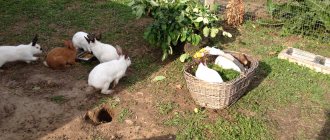
Requirements for feeders
Before purchasing devices, you need to take into account their indicators, which will help organize a rational feeding process:
- the correct volume of the feeder (should accommodate the daily portion of feed);
- ergonomics (convenient to pour food, easy to remove for cleaning and disinfection);
- safety for animals (high-quality material of construction, absence of sharp corners, notches);
- impossibility of getting animals, garbage, feces inside.
You can use different designs at the same time, matching them to the products.
Dimensions and drawings
The sizes of cages and feeders are selected taking into account the characteristics of rabbits. That is, you need to take into account the size and norm of food consumption of a particular breed. Also, when selecting sizes, you need to decide on the number of animals that will have access to the feeder.
Expert opinion
Zarechny Maxim Valerievich
Agronomist with 12 years of experience. Our best country expert.
Ask a Question
Before starting work, it is recommended to draw a diagram of the future device. This will simplify the manufacture of the product and help avoid mistakes.
Main types of feeders
- Bunker models. A practical container that is suitable for dry granulate and grain. In essence, this is an automatic feeder in which food is supplied automatically as it is eaten. The animals have unhindered access to the dishes, making it convenient to eat from them.
There is no need to check that the tank is full, because its volume is designed to last for a long time. The designs are ergonomic - easy to fill and clean. You can buy it or make it yourself using galvanized steel using special drawings. - Nursery devices. A manger or hay barn for rabbits is a popular design that is made from wood or metal. Used for hay or grass - prevents their scattering. Senniks can be placed both inside the rabbitry and from the outside. It is not advisable to attach the sennik to the cage door so that the baby rabbits cannot get in and be injured.
- In the form of cups. Such dishes are suitable for feeding juicy and dry foods. Stores offer ceramic or plastic cup designs. Due to the fact that rabbits often turn them over, they are not practical enough in practice. Bowls can be easily made independently from scrap materials (tin cans, plastic bottles, concrete pours).
- Grooved. Chutes are used for all types of products. Animals have unimpeded access to such reservoirs, especially during collective breeding. Minus - they easily turn over, feces, bedding, and dirt can get into them.
- Models for root crops. Cup containers are best suited for feeding succulent feed, but trough options can also be used.
- Universal devices. This group includes bowls, gutters, and self-made models. The advantage of this variation is the ability to feed different types of feed at the same time.
- Other models. There are different types of industrial feeding containers that differ in appearance, quality, and cost.
Step-by-step production
We invite you to familiarize yourself with step-by-step instructions for constructing the most popular types of feeders.
Cup
Any container with smooth edges will do for this. The main thing is to secure the feeder well in the cage, otherwise the animals will constantly knock it over.
You can take any container as a container for food - a bowl, a jar, a basin, but in such containers the food quickly becomes dirty and often scatters throughout the cage.
Experienced rabbit breeders offer several simple methods of attachment:
- hang on the cage wall using wire or hooks;
- screw it to the floor (which is not very practical, as it complicates the cleaning process).
Bunker
The simplest version of a bunker feeder is a product made from wooden sheets covered with tin.
To make such a container you need:
- Following the drawings, make markings on sheets of iron and plywood, cut all metal and wooden parts (bottom, walls, load-bearing cross member) along the contour.
- Tin parts are bent by hand.
- Wooden parts are fastened to sheets of metal.
- Then all the parts are knocked together.
Drawing of one of the cutting options indicating the dimensions of all parts
The creation process can be organized much easier if you do without the use of plywood. To do this, it is advised to prepare a test layout from paper, fold it and check that there are no gaps or protruding parts. Then the drawing of a bunker feeder for rabbits is transferred to a galvanized metal sheet, no more than 0.4-0.7 mm thick, all the parts are cut out and fastened together using rivets.
If you have all the necessary consumables, making such a design will take no more than 2 hours.
The following video presents the simplest and fastest option for manufacturing a bunker-type device:
From a canister
An old, well-washed canister will serve as a convenient container for grain and granulated feed. In addition to the canister itself, you will need a knife, a block, screws, wire, plywood and tin.
Procedure:
- mark and cut out places on the canister for two holes (for pouring food and delivering it to the rabbits);
- saw off a block slightly longer than the bottom opening, insert it into the workpiece and secure it with self-tapping screws - you will get a feed stop;
- make a rectangular partition from a sheet of plywood to form a grain bin;
- cut out the side holders for attaching the partition from the block, secure them at an angle using screws to the base of the product;
- make cuts in the upper opening of the canister, insert a piece of plywood into them, pull it to the side walls using self-tapping screws;
- cut a strip of tin, bend it and screw it to a wooden stopper so that rabbits don’t gnaw it;
- hang the finished product on the cage using wire directly on the mesh.
In the photo there is a feeder for rabbits: a convenient and practical container for grain, created from an ordinary plastic canister
According to the Maklyakov method
Another popular type of bunker-type structure, which is made of galvanized iron (or plywood) using the following technology:
- Markings are made on a sheet of metal in accordance with the drawing, side and internal walls, a lintel and a supporting strip are cut out.
- After this, the necessary bends, holes for connections are made, as well as several holes in the floor so that small debris and dust fall down.
- All parts are fastened with rivets.
Rabbit farm equipped with bunker feeders of the Maklyak system
This type of feeder is in demand among rabbit breeders not only because it is one of the most affordable options, but also due to its high practicality - if there are two bunkers, it is possible to fill several types of feed at once.
Grooved
This feeder is designed for simultaneous feeding of animals, suitable for any type of feed - green, coarse and concentrated, and can also be used as a drinking bowl. It is made from 50 cm in length (1 m is considered optimal) from metal, wood or other suitable materials.
When starting work, you must first decide on the material for the structure, study the diagrams and drawings. For example, to create a wooden product, 6 boards are taken - 2 for the longitudinal walls, 4 for the ends.
The simplest and most practical option for making a groove feeder yourself is to use plastic pipes (It is important to carefully align the edges of the cuts so that the animals do not get hurt.)
The easiest way to produce a grooved structure with your own hands is to take a piece of plastic or metal pipe with a diameter of 100-150 mm. It needs to be cut lengthwise and the sides closed to prevent feed from spilling out.
It is also easy to build a bunker-type structure from a pipe
Zolotukhin systems
Trough feeders made according to Zolotukhin’s drawings are very popular among rabbit breeders. Their advantage is that the structure is inserted directly into the door and is often equipped with rotating mechanisms. This is very convenient, as it saves space in the cage, and there is no need to open the door every time to add food or clean the container.
The procedure is as follows:
- cut out two wooden sides;
- make marks on a metal sheet;
- bend the sheet metal along the marked lines;
- fasten the side parts to the metal blank with self-tapping screws.
Zolotukhin’s drawings: a – trough feeder made of wooden boards; b – trough drinker; c – nursery (sennik)
Nursery
There are many options for creating hay barns. Let's consider the simplest of them, for the manufacture of which you will need wooden boards, a sheet of iron, a drill, a saw, nails and screws.
- The sides are made from boards, which should expand at the top and smoothly taper towards the bottom.
- The main part of the hay bar is cut out of galvanized sheet, and its edges are bent.
- Wooden and metal parts are fastened together using self-tapping screws.
- To hang the finished product, galvanized iron strips about 10 cm long should be attached to it.
The dimensions of the hay barn are selected individually, taking into account the parameters of the cage and the needs of its inhabitants.
Nursery feeder made at home from wooden beams and coarse mesh
Another original idea for creating a hay box from scrap materials is a plastic box with holes cut in the bottom and one of the sides
Materials and tools for making feeders yourself
Making a device with your own hands is not difficult. You just need to stock up on materials for manufacturing and tools with which it will be convenient to make such structures. Before work, you will need diagrams of future products with dimensions.
| Materials | Tools |
| Wooden boards, plywood sheets Flat slate sheets PVC pipes (plastic) Sheet of metal (preferably stainless steel) Roll of wire Metal mesh of different sizes Plastic canister Plastic bottle | File Self-tapping screws (nails) Pliers Wire cutters Hammer Screwdriver Drill Tape measure Pencil Scissors Stationery knife Rivets Pliers File |
What are feeders made of?
The material for the feeder is usually:
- tin;
- steel sheets;
- flat slate;
- wood or plywood;
- plastic.
Tin and steel sheets are preferred for the following reasons:
- a metal feeder is too tough for rabbits;
- easy to clean;
- durable;
- The edges of a tin structure can be folded inward to prevent rabbits from scooping out food.
Tin can be worked with simple tools, while steel sheets require a welding machine. True, the blanks can also be fastened with rivets. Animals gnaw plastic and wood with pleasure, so it is advisable to make feeders from such materials only if the most vulnerable areas are covered with tin.
Without this, a feeder made of thin plywood will fall into disrepair in just a month. To prevent rabbits from encroaching on the feeder and other elements not intended for teeth training, branches are thrown to them as “gnaws”.
It is convenient to use ready-made products to create a feeder. Most often, steel and plastic pipes are used: part of the wall is cut out, creating a trough feeder.
Rabbit breeders also actively use jars and canisters. Nursery feeders are often made of metal mesh. The cell size is 25x50 mm: pets can easily get hay through it.
According to some breeders, a mesh with a mesh size of 25x25 mm is also suitable, but a check is required: you should make sure with your own eyes that the rabbits freely extract hay, including when the amount is small. Also, hay fields are made in the form of a lattice made of steel rod.
Craftsmen adapt various products in the form of lattice for mangers. For example, they screw a cut-off bicycle rack to the wall.
Other options for homemade feeders
If you wish, you can make feeders for rabbits from leftover building materials: plastic pipes, profiles, plywood or even a plastic bottle.
The simplest and most primitive design is created from a bottle. The work is carried out without drawings, and the set of tools is minimal. The level of complexity of work in the manufacture of structures from pipes, profiles and plywood is slightly higher. The last two types of structures are made on the basis of drawings.
From pipes
You can make a grooved feeder for rabbits from a plastic pipe:
- A jigsaw is used to cut a piece of plastic pipe whose diameter is 11 cm or more. A piece 30 cm long is enough.
- The pipe needs to be cut in half lengthwise. Before this, the places of the cuts are marked with a marker - these are 2 parallel lines, the distance between which is 13 cm. The lines are brought to the middle of the pipe section, leaving a jumper 2 cm long. Then the lines continue to the end of the section.
- Using a hacksaw or jigsaw, cut the pipe along the first lines to the jumper. Then the same fragment is cut off from the other edge. It turns out a gutter with a jumper in the middle, which keeps the pipe from straightening.
- The cut pieces are heated using a hair dryer so that they straighten. Using a jigsaw, plugs are cut out of them to cover the ends.
- The side parts are glued to the gutter and a small indentation is made from the edges. You need to leave room to drill holes for hanging the feeder on the wall or door of the cage.
All edges of the structure should be checked for nicks that could injure rabbits. If there are any, they are sanded with sandpaper or a file.
From a building profile
You can make a rabbit feeder with your own hands from a profile according to the following scheme:
You need to prepare a 10x4 cm profile sheet, rivets, a ruler, a pencil, metal scissors, a riveter, a drill.
Plan for creating a feeder from a profile:
- To get the details, you should transfer the drawing to paper or directly to the profile.
- Then the fragments are carefully cut out.
- In the area where the trough will be located, holes are drilled using a drill.
- You need to bend the workpiece along the marked lines.
- The parts are connected with rivets, and holes are pre-drilled.
- Hooks are screwed to the part of the feeder that will be facing the rabbit. They will hang the structure on a cage.
Sharp edges on the structure must be smoothed.
From a plastic bottle
The feeder is made from a 1.5–2 liter bottle. Using a sharp knife, cut a rectangular opening (20x10 cm) on the side. Rabbit food will be placed here. You should not remove the cap from the bottle, otherwise the food will spill out.
The finished feeder is hung on the wall. To fix the device, use wire or screws.
The second option for creating an analogue of a bunker feeder from two bottles (5 l):
- An opening is cut into the first bottle through which the rabbits will get food.
- The second hole is made from the other end of the container. Its circumference should correspond to the diameter of the neck of the second bottle.
- The second container is inserted into the first and food is poured on top.
From plywood
The rabbit feeder, which was made of plywood, is not durable. After all, rabbits’ teeth are constantly growing, they need to be ground down, so they chew through structural parts. To prevent this from happening, you should line those areas of the feeder that are accessible to rabbits with sheet metal or perforated corners. This will extend the life of the devices and also avoid injury to the animals.
Rabbit feeders must meet basic requirements - functionality, safety, ease of use and reliability. In this regard, bunker-type structures benefit. Although, when keeping a large number of rabbits, it is recommended to stock up on all types of products. To reduce costs, you need to learn how to create them yourself.
Materials
Taking into account the preferences of rodents, materials must be environmentally friendly and durable. Typically, wooden walls are lined with galvanized or tin sheets.
For the hay barn you will also need netting and beams.
Less often, rabbit breeders choose plastic.
Hay feeder
With your own hands you can make a structure similar to a manger, which will be filled with hay and grass. a grid or mesh is installed on the side from which the animals will take food .
Required materials and tools:
- grille from an old refrigerator or MDF;
- hammer and screwdriver or screwdriver;
- pliers;
- hacksaw;
- pencil;
- roulette;
- nails or screws;
- metal scissors;
- sheet of tin;
- sheets of plywood.
DIY production:
- The hay feeder or hay box must match the size of the doors. Therefore, you need to make markings on the plywood according to the size of the doors.
- Using a hacksaw, two side walls are cut out and grooves are cut out.
- The side parts are connected to each other by a block, which is attached to them on top with self-tapping screws.
- The front part of the structure is cut out of tin and attached to the sides.
- Rabbits will get grass and hay from the back part, for which the grid is used. It needs to be adjusted to size and installed near the grooves.
- After the hay box is ready, it can be attached to the walls of the cage.
Zolotukhin's feeder
Convenient universal design that can be filled with your favorite type of food. Such equipment is easy to maintain and can be easily made by hand.
The feeder will be attached to the door on the outside of the cage, which makes it easy to clean and fill with food. Such equipment can be made of galvanized iron or boards and mesh.
Required materials and tools:
- sheet of tin;
- boards 30 mm thick;
- pencil;
- roulette;
- metal scissors;
- pliers;
- hacksaw;
- hammer;
- metal mesh or grate;
- nails.
Manufacturing instructions:
- Two walls should be cut out of the board and a recess should be made in them, to which a partition in the form of a mesh dispenser will be attached. Through this mesh the rabbits will get food, which they will not be able to spill.
- A piece is cut out of a sheet of tin according to the dimensions of the door and needs to be bent in half.
- A board is prepared for the front wall, which, together with the sidewalls, is attached to the sheet metal.
- A mesh is installed in the prepared grooves of the side wooden parts.
- The structure is attached to the cage. To do this, you need to install it in the door slot and drive one nail into the side elements.
The result is a feeder that can be rotated, which is very convenient when adding food and cleaning the structure.
Types of drinking bowls for rabbits and the material from which they can be made
Drinkers can be:
- open;
- vacuum;
- nipple;
- float
All drinkers, except nipple ones, are homemade. You can also make a nipple drinker entirely yourself or buy a tip for it:
- Open drinkers can be grooved or simply containers with water.
- You can make a float bowl yourself using the principle of a toilet tank, but the access of water to such a drinking bowl must be constant and under sufficient pressure.
- Vacuum are based on a school physics course. The rabbit's cage contains only a small part of the water container. The drinking bowl itself with a water container is located outside. The designs can be very varied, but most often it is a fairly deep bowl and a PET bottle with water.
- With a nipple drinker, no water containers are required. The rabbit licks water from the ball. In this case, water appears only when you touch the ball with your tongue or nose.
Comparative characteristics of drinkers:
| Drinker type | Advantages | Flaws |
| Open | No | Easily tips over and gets dirty |
| Float | Automatic water level replenishment | Easily soiled; easy to break; constant water pressure required |
| Vacuum | Availability of fresh, relatively clean water | Small containers that require frequent addition of water; the open part located in the cage becomes dirty, making the water undrinkable |
| Nipple | Always fresh, clean water; there is no container that can be contaminated with excrement and food residues; you can attach the nipple part to a PET bottle; water from one large container can flow into several cells at once. | Not always easy to install |
The material for the drinking bowl can be:
- metal;
- plastic;
- rubber;
- ceramics.
Wood is not used for drinking bowls. Heated drinking bowls are completely absent. Therefore there are only three options:
- Provide rabbits with access to open ice in winter. Not suitable for many pets, they may catch a cold;
- constantly add hot water;
- At your own peril and risk, make electric heating yourself.
A very well-made drinking bowl that prevents the rabbit from contaminating the water with excrement. It is convenient to add water with this drinker design
Important tips and tricks
If you decide not to buy feeders, but to make them yourself, then you should take these tips into account:
- all equipment and utensils for rabbit breeding must be practical, easy to care for, and hygienic;
- if the feeder is not made of pure metal or tin, prevent gnawing on its elements;
- minimize feed contamination;
- the feeder must contain the daily amount of food, otherwise the rabbits will climb into it and shit there (with the exception of bunker feeders);
- the feeder should be comfortable for pets;
- The attachment of the feeder must be strong to prevent it from overturning or falling.
What types of feeders are there for rabbits?
Each container is suitable for a specific type of food. The farmer must decide on the diet of his pets and, accordingly, choose the necessary design. It is recommended to have a supply of other species so as not to be caught off guard by the change of season, the birth of females, strengthening the diet when diseases occur, and adding variety to it. In addition to dividing into types, rabbit feeders are divided according to the type of fastening into fixed ones, firmly mounted on the walls of the cage, as well as movable ones that can be moved inside.
Main types
To choose a suitable model, you need to know the main types of containers used for animal feeding. The most commonly used are bunkers. They have a number of advantages over others: ease of use, providing comfort to animals. Thanks to the presence of a small hole, food comes in small portions automatically under the influence of its gravity. The most practical material is tin. Several copies can be attached along the walls.
The universal type includes grooved containers. Several individuals can be accommodated near them at once. For hay, which is a necessary component of the daily diet, nursery models, also called hay barns, are used. If you want to save money, you can use plastic bottles.
Drawings of feeders for rabbits
Do-it-yourself rabbit feeders require preliminary preparation when making. First of all, you need to make a drawing. Subsequently, these dimensions will be transferred to the material used. Let's look at the drawings using the example of a bunker structure.
Bunker design drawing
Front wall
Back and side walls
Trough and limiting part
A correctly executed drawing is the key to success. Having cut out blanks from paper, their dimensions should be accurately transferred to the metal.
How to make a feeder with your own hands, taking into account its features?
Considering the ineradicable habit of the inhabitants of the cage to gnaw everything that comes their way, it is advisable to use metal and cover the corners of wooden parts with it. This will extend the life of the structure. The narrow access will prevent small animals from getting inside. To prevent the animals from scooping out food and littering the cage, you need to make a small threshold, for example, by soldering rods with a diameter of 5 mm or more.
It is advisable to make combined feeders for rabbits with your own hands, consisting of two compartments. The upper one is a regular compartment, and the lower one is a manger where hay is placed. This saves a lot of space. The optimal height from the floor is 7-10 cm. Access from the outside should be provided so as not to open the cage doors every time, causing mild stress in timid animals.
