What are “warm beds”?
The productivity of early growing vegetables, especially pumpkins and nightshades, has always been associated with a lack of heat. The normal development of green mass directly depends on the amount of sunlight falling on the soil surface. Therefore, you have to resort to various kinds of tricks:
- Light a fire in the area in order to protect the beds from returning “creeping” frosts;
- Cover with film or use expensive geotextiles;
- Set up a heating base under the soil in the garden bed.
Of all the options, the warm bed method turns out to be the most convenient and effective. Of course, provided that all recommendations are followed and the components for the heating mixture are carefully selected.
For your information! The essence of the method is that the soil with planted seeds is heated due to the activity of soil bacteria during the decomposition of manure, organic matter or any other substances that can serve as a chemical source of heat.
There is no need to build greenhouses, greenhouses, or heat and ventilate beds under cover. In northern latitudes, many summer residents make warm beds with their own hands in a greenhouse; this is both a good feed for seedlings and at the same time insurance against unexpected frosts.
Types of warm beds
In the literature and recommendations of experts, one can find a division into two main schemes:
- With full or partial penetration into the ground;
- Beds arranged in a wooden or plastic casing brought to the surface of the soil.
Depending on the composition of the heating mass, it can be used as a basis for making warm beds in a greenhouse with your own hands in the spring, or you can make the structure more “long-lasting”, designed for 3-4 years of use.
In each specific case, a different amount of heat is released, so warm beds are divided according to the quality of the organic mixture:
- The highest quality is obtained when using cow and horse manure;
- A little lower in level are considered “warmers” with sawdust and plant matter treated with nitro fertilizers or bird droppings;
- The simplest option is compostable plant waste, covered with soil in a ditch; you can use everything you can find on the site.
In the latter case, warm beds are made with your own hands in the fall; they are easy to set up and are used in areas located on the slopes of hilly areas. In addition to improving the soil structure, they help solve the problem of topsoil loss during the rainy season. One of the options for arranging warm beds in the fall is shown in the video:
What can be planted in warm beds
The above division based on the contents of the heating layer is not used by chance. It depends on him which crops can be planted in the first year of using a warm bed. In order not to make mistakes with planting, you need to control two conditions - nitrogen content and the temperature of the heating layer.
In warm beds with manure, the ammonia or nitrogen content is low, soil heating is moderately high, so on this basis you can grow tomato and eggplant seedlings, both in a greenhouse and in the open ground under a film.
For “warmers” with a purely plant base, you can also plant any early crops - radishes, carrots. If you cover the soil with black film to “disperse” warm beds in spring cold conditions, you can even sow pumpkin and nightshade crops. The only drawback is poor organic nutrition and not too high soil temperature.
For warm nitrate beds, in the first year it is recommended to sow root crops that do not accumulate an excess of nitrates - beets, onions, carrots. After a year, you can sow any crops.
What can you put in a warm bed?
In addition to the heating component - manure, nitrate mixture or compostable plant residues, the following must be added to the composition of the warm bed:
- Sawdust, cut small branches and twigs, waste from pruning trees and shrubs. Any cellulose, even dry plant stems, will go into a warm bed. Thanks to woody organic matter, moisture is retained under the soil layer;
- Damaged and rotten fruits are vegetables left on the beds for disposal. Anything will do - apples, potatoes, leftover peels and plant rhizomes, preferably in crushed form.
- A small amount of clean soil with a good fertility index, preferably without roots and weed seeds.
Soil is added as a source of microorganisms, which will generate heat during the reproduction and processing of plant mass.
Manure can be placed on top of the plant matter.
Important! If you are unlucky with the soil on the site and the soil is depleted, you can use dry powder preparations containing a ready-made culture of microorganisms.
You will get the best warm beds you can imagine. Bacteria not only process organic matter, releasing much-needed heat, they also change the structure of the soil for the better, so summer residents often use the contents of such a bed as soil for growing seedlings on racks at home.
You can even organize a mini-farm on your site to grow soil bacteria; the demand for them is growing from year to year, but there is one difficulty. Proper maintenance of elite warm beds will require fairly high qualifications, and in addition, in the initial stages it will be necessary to feed the microflora with potato and bean decoctions, regularly apply nitrogen fertilizers and protect bacteria from pathogenic putrefactive organisms.
Warm bed of manure
It is known that cow, or better yet, horse manure is considered the best material for fertilizing soil, but only in the form processed by soil bacteria. Fresh material should “burn out” for at least a year in the open air or in a hole, so it can be used to make excellent warm beds.
The manure will be heated for at least one and a half months
At the bottom of the ditch, a drainage cushion is made from wood chips and finely chopped branches, then a layer of manure and grass is laid, and a layer of soil is poured on top. Due to its high energy value, manure can warm beds even in an unheated winter greenhouse.
For your information! The use of manure attracts mole crickets in large quantities, so the walls, top and bottom layers of soil in a warm bed will need to be covered with plastic mesh.
Warm straw bed
In many respects, a straw heating “pillow” turns out to be even better than a classic “sandwich” made from branches, old stems, grass and leaves. Straw allows air to pass through well, which is necessary for the development of soil bacteria.
Straw is one of the best materials
To make warm beds, straw is mixed with freshly cut grass, placed in piles 40-50 cm high. Next, watered with ammonia water or a solution of nitrate and covered with a thin layer of good soil. All this must be done at an air temperature of at least 10°C. After a couple of weeks of regular wetting with water, the mixture warms up and can be placed in the prepared ditch. Fresh plant mass is added under the warm bed and covered with soil. The beginning of the silage fermentation process can be recognized by its characteristic sour smell. A warm bed will effectively warm the soil and plants for at least another 40-50 days.
Warm bed of chicken manure
Unlike manure, chicken material contains many organic nitrogen compounds. Fresh droppings, coming into contact with moisture, begin to “ferment”, releasing toxic gases and enormous amounts of heat.
When arranging warm beds, chicken fertilizer is mixed with wood waste, straw or dry plant stems at a ratio of 1:20, placed at the bottom of the ditch, sprinkled with balled soil of any quality and spilled with a small amount of water. The bacteria necessary for processing organic matter are contained in the manure itself. The layer thickness can be up to 20 cm.
For your information! When vegetation is processed, a large amount of ammonia is released, so a warm bed using chicken “fuel” is also a good way to fight mole crickets, mice and other pests.
Warm bed with sawdust
Any wood processing waste is considered an excellent material for arranging a ground “warmer”. Wood itself is difficult to process by soil bacteria; this requires the sawdust to undergo thermal or chemical treatment.
The easiest way is to treat the sawdust with an aqueous solution of saltpeter, mix it with the contents of the compost pit and leave it in the air for at least a day. Next, wet soil is added to the sawdust mass and placed in a pile or ditch at least 20 cm deep. To enhance the work of compost bacteria, warm beds can be covered with black film.
Do you need warm beds in a greenhouse?
Using the heat from decaying plant matter is considered the safest way to heat plants. For example, you can make warm beds with cow dung. In this case, from the end of winter until the onset of stable warmth, the greenhouse is provided with heated beds. And starting from the end of May, humus can be used as fertilizer for more heat-loving crops.
Even more heat is generated when chicken manure mixed with sawdust and straw is used in warm beds. If you allocate the entire usable area in the greenhouse for warm beds, then when the air temperature outside is not lower than -10°C, the temperature inside the room on the ground will be within +7 - +12°C.
Advantages and disadvantages
The use of heat generated by microorganisms is beneficial for two reasons:
- The process of heating beds does not require any equipment or regulation, except for periodic watering of a ditch, pile or box with a mixture;
- To provide a warm atmosphere around plants, wood waste and green mass residues are used, the cost of which is significantly less than alternative energy sources.
The process of heat release is concentrated at the planting site; there is no unproductive energy loss, as in the case of heating with external energy sources. It can always be stopped or increased, depending on the ambient temperature.
Among the disadvantages, one can note only the hidden release of gases containing ammonia, which in itself is a factor of discomfort. In addition, good knowledge of the selection of the composition of the medium is required, otherwise the soil can easily become infected with pathogenic microorganisms and rot.
Filling the compost bed
The main feature of a warm bed is the organic filling, which, when decomposed, provides not only warmth, but also useful substances necessary for rapid growth and a bountiful harvest.
The process of filling a compost bed
Filling the beds may vary depending on the capabilities and organic materials available on hand, but the basic principles are the same for any type of warm beds:
- The lowest layer is drainage from large debris in the form of tree branches, various unnecessary boards, stumps, and thick tops. Sand is often poured at the very bottom, cardboard, newspapers, magazines, books, rags, and metal debris are placed.
- The second layer is less coarse organic matter, consisting of sawdust, chips, weeds, peelings, peels, etc.
- The third layer is tops, leaves, grass, compost, rotted manure (if any). Often chalk, lime, and ash are added to the same layer, depending on the acidity of the soil.
- Fertile garden soil is poured on top of the bed. You can make the following mixture: sand, peat, humus, garden soil, some sawdust and mineral fertilizers (the latter is not necessary).
Detailed diagram of a compost bed
- Each layer needs to be thoroughly watered with warm water so that the bed settles and rots faster.
Return to contents
When is it better to make warm beds: in autumn or spring?
Both options are actively used by summer residents. If the climatic zone is characterized by a protracted late spring with repeated return frosts, then perhaps the best option would be to arrange spring-summer warm beds.
The film helps enhance the warm-up
If the climate is hot enough, summer ends in mid-September and later, then you can afford to build warm beds in the fall, so that the final cleaning of the site occurs between the end of November and the beginning of December. This will allow you to grow a full harvest of the most heat-loving crops, such as beets, carrots, onions, and even try to take a second harvest of radishes and cucumbers.
How to make a warm bed in the fall
The technology for arranging heated beds is reminiscent of forming a compost heap or pit. First of all, it is necessary to dig a trench with a width and depth of at least 30 cm. Chopped dry brushwood and trimmed branches left after cleaning the garden are placed at the bottom. Then it is necessary to pour a sufficiently thick layer of grass, laying it with maximum density, the layer thickness is at least 15 cm.
Next, you need to load dead wood, usually cut grass, plant stems, cobs and trunks of corn and tomatoes, and branches of bushes. The stems are chopped with a shovel or a hatchet to the state of chips, mixed with a small amount of soil, mixed with an equal amount of chicken droppings and loaded into a trench. A layer of soil at least 20 cm thick is laid on top. 15-20 days before planting the seeds, all this is spilled with water at the rate of 50-70 liters of water for each meter of warm bed. Heat begins to be released within a couple of days, so warm beds are put into operation at an air temperature no higher than +5°C.
How to make a warm bed in spring
To make the spring version of heated beds, they mainly use sawdust, old last year's leaves, chopped twigs and tree branches. It is ideal if it is possible to use full-fledged organic matter, for example, waste from last year’s harvest, apples, potatoes, beets, everything that was not used and left for preparing a compost pit.
In spring you have to use all available organic matter
The material is loaded into the trench according to the same principle, but instead of chicken droppings it is better to use ammonium nitrate. The fertilizer is pre-diluted in warm water and moistened with chopped organic matter at the rate of 1 liter per meter of warm bed.
The disadvantage of this scheme is the heavy, extended launch of a warm bed for several reasons:
- Soil temperature and microorganisms begin to actively process organic matter at temperatures below 7°C. Therefore, after covering the filling with soil, a black film must be pulled over it, with the help of which the heating of the soil can be improved several times;
- Lack of nutrient medium. In order for the bacteria to grow to colony size, initial complementary feeding is necessary, so potato broth or cow manure diluted in water must be added to the warm bed.
In addition, a sufficient amount of nitrogen and moisture is important for warm beds, so periodically the soil under the film should be shed with warm water with the addition of 10-20 g of nitrate per liter of liquid.
Important! A warm spring bed laid on potato peelings, grass and old fruits can produce heat within 3-4 days after laying. Therefore, you should not hesitate to plant seeds.
An original version of arranging warm beds in the spring with your own hands is shown in the video:
Spring problem
The risky farming zone did not get its name because of the low temperatures. Their annual averages are low, and seasonal differences are not extreme. The features of this climate zone are different:
The territory of the north and north-west of Russia is influenced by both Atlantic and continental air masses.
- Unlike the east coast of the continent, the influence of the ocean and the continent is not tied to the season.
- The same season in different years differs in terms of temperature, humidity and precipitation.
For example, winter may end early, in March, or it may end late. It is possible that snow will fall in April or May in the middle of warm days. Frosts may be absent altogether, and sometimes last until mid-June. Because of this, farming in colder continental zones is more predictable and productive.
If we talk about large fields, then overcoming this disadvantage of the risky farming zone is impossible. Agricultural enterprises are limited to those areas of activity where risks are minimized: growing feed and potatoes, livestock farming, flax farming. But for gardeners and vegetable gardeners, who are of the last interest in profit, the way out is to install warm beds.
How to make warm beds with your own hands
The efficiency of soil heating can be increased not only by special microflora, but also by skillful selection of the design of the bed itself.
The following must be taken into account:
- During the fermentation process of the organic base of warm beds, a large amount of water vapor and volatile products are released. An unpleasant smell appears, so it is better to arrange the beds away from the house;
- As the plant's organic material is consumed, the bed will sag. The top layer of soil will fail, so periodically the warm soil will need to be replenished and additionally watered.
In addition, a place will need to be allocated next to the ditch to remove the mass processed by bacteria and replace it with fresh one. Everything that is taken out of the burnt mass can be used as soil in a greenhouse or for feeding tomatoes and eggplants.
Dimensions of a warm bed
The dimensions of the bed are chosen to be no more than 40 cm wide and 25-30 cm deep, depending on the climatic conditions and the arrangement of the warm bed. The length of the trench is limited only by the size of the site.
The walls and bottom need to be sealed
The limitation on the width and depth of the trench is due to the fact that air oxygen penetrates the soil no more than 20 cm for light sandy soils and 10-15 cm for podzolic and loamy upper layers.
Site selection and preparation
The best place for arranging a “hot water bottle” is considered to be the sunny or warmest side of the site. Sometimes you can find recommendations of the opposite kind, for example, to make a trench or place a box in the shade of trees or in the spaces between plantings of shrubs. For some reason, it is believed that this scheme allows you to protect a warm bed from moisture loss and premature drying.
It is correct to place the trench in the warmest place of the site; the more solar heat, the more active the microflora is, and ultimately the better the organic matter is processed. A lack of moisture will always be felt, so the surface will have to be periodically filled with water and covered with film or geotextile.
Do-it-yourself warm raised beds
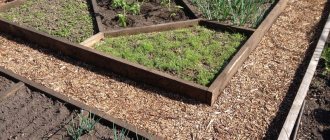
The most stable results can be obtained by using so-called raised beds. Essentially, it is a box without a bottom, assembled from boards, plastic or any other material that is resistant to the corrosive effects of ammonia.
Raised beds are easy to maintain
You don’t have to make a box, but simply drive the posts into the ground and hang the sides on them. The walls must be strong enough to withstand soil pressure from inside the structure, not get wet, and be easily removed from the racks if necessary.
A high warm bed is more effective, since the amount of oxygen penetrating into the thickness of organic matter is much greater, which means the rate of oxidation and heat release is higher. The only significant drawback is the fact that the internal space of warm beds is often used by rodents for their nests. Therefore, it is best to make walls from slate or reinforce them with wicker mesh. When assembling a warm bed with your own hands, you first need to put a layer of gravel and sand.
Such protection will stop any pest; in addition, gravel improves drainage and oxygen penetration into the thickness of the organic mass. There is more work, but the warm beds you assemble with your own hands, photo, turn out neat and durable. On average, such a design can last at least ten years.
Holster's bed (hilly)
One of the problems encountered during the construction of warm beds is severe subsidence of the soil as the organic mass burns out. You can combat this phenomenon using the Holster system.
In fact, this is also a warm bed, but without a housing. The organic matter is laid out in a path on dense soil and covered with a thick layer of soil. In order to improve the processability of organic matter, the top layer is laid out from turf cut from virgin soil. True, the layers have to be laid with the grass facing down.
How to build combined warm beds
Proper growing of vegetables always requires a large amount of moisture. In the case of arranging warm beds, water will be required 2-3 times more. Therefore, a combined scheme was invented in which the main part of the organic mass, compost, bacteria and plant nutrition are located above the ground level. All this is fixed using sheets of slate or corrugated metal, dug into the trench at 30-35 cm.
In the lower part, a fairly large volume of wood waste, branches, and everything that can be found from solid wood is placed in combined rows. The thickness of this layer can reach 25 cm. Wood actively absorbs excess moisture, retains it and releases it in small portions to replenish the overlying layers. The wood layer also helps to get rid of excess water after rain on the site.
Excess moisture often leads to the destruction of the contents, leaching out nutrients and, most importantly, nitrogen, which is essential for feeding bacteria.
How to properly make sunken warm beds
For a small area, the easiest and fastest way is to make warm beds in a trench. Since this is the most popular option, it is worth considering in more detail the step-by-step process of making a warm bed with your own hands.
First of all, using a polypropylene cord, the dimensions of the future ditch are cut out and dug to a depth of at least 30 cm. The walls are trimmed and reinforced with pegs and boards, and the excavated soil is removed outside the site.
The soil for backfilling will have to be taken from virgin soil
The temporary fence made of boards and stakes can then be removed; they are needed at the first stage in order to form a collar. As the plant mass burns and is processed, the soil backfill will settle and the height of the pile will decrease, but for now, at first, the boards will hold the embankment within the bed.
The next stage is filling the trench with plant matter, compost and virgin soil. All this is moistened, spilled with a solution of nitrate or any other fertilizer and carefully compacted in order to make the filling as dense as possible.
The last stage is the most difficult physically, since it is necessary to place at least two or three cubes of virgin soil into the trench, having first freed it from weeds and grass roots.
Arranging warm beds in a greenhouse
The principle diagram and method of laying plant mass, soil and wood waste are practically no different from other options for the “heating cake”. Only the design of the warm beds themselves differs. If in an open area soil with plant matter is placed in boxes or trenches, then in a greenhouse the system looks like the “opposite”.
The entire area inside the greenhouse is set aside for filling with soil and plant matter. Before loading begins, the site is filled with a layer of crushed stone and sand, this will simplify drainage and improve the filling of the soil base with air oxygen.
Before loading the material, two boxes of boards and plywood are assembled in the central part; they will serve as a kind of paths so that you can walk inside the greenhouse and process and care for plants without any problems.
Warm beds in a greenhouse
The technology of heating the soil under plants using the decomposition of organic matter is ideal for use in greenhouses and even in small boxes covered with geotextiles or film.
Growing seedlings in greenhouses helps relieve the greenhouse load
The only problem that one has to face when arranging greenhouses is related to the need for regular ventilation and removal of evaporation from the beds. You have to make lifting housings or remove part of the film during daylight hours. In greenhouse designs, the boxes are usually made detachable, so that with the arrival of summer the soil can be replaced, treated with a disinfectant, and with the onset of autumn, organic matter can be added and the filling can be used before frost begins.
How to make warm beds from plastic bottles
A huge number of plastic containers forced summer residents to look for uses for them in their garden or vegetable plot. Usually, fencing or walls of structures are made from plastic bottles.
Bottles are a good heat insulator
It would be more rational to use a plastic bottle as a protective material placed at the bottom of a trench or wooden box.
This solution allows for effective thermal insulation of the plant layer from the rather cold soil base. The smartest ones fill the bottles with water and punch several holes in the plastic walls, so the bottles turn into a kind of accumulator of water and fertilizers. Excess moisture during watering drains inside the container, and as the plant dries, water vapor passes to the root system of the plants.
Step-by-step instructions for making a bed
The difference in the step-by-step instructions for equipping the two types of different devices lies in the depth of digging the trench. A cucumber bed can be made a meter high. But to ensure the stability of such a box, a trench at least 60 cm deep is needed.
This is necessary so that the edges of the building rising above the ground are not exposed to natural conditions.
Installation
Step-by-step instructions on how to make a warm bed for cucumbers and other crops are as follows:
- A trench is dug approximately 60 cm deep, the width and length of which depend on the available space and the number of proposed structures on the site. A rectangular shape is considered optimal, although it can be made even from a barrel that is no longer suitable for use on the farm. With special adjustment for individual crops, some holes may be deeper (for root crops), and some shallower (if the bed is for annuals or strawberries).
- Digging is carried out according to a pre-designed scheme, which takes into account the possibility of an unhindered approach to the box with cucumbers (for this there must be passages or paths between them). It is necessary to calculate the general layout of the site, taking into account the passages and sizes of equipped spaces for the growth of vegetables.
- A polymer mesh (or a cross structure of this type from scrap materials) is installed at the bottom of the trench to prevent the possibility of damage to the crop by rodents. This is not a prerequisite for construction, but for experienced gardeners who have dealt with pests, such a decision suggests itself.
- Building material is installed on the sides of the future warm box. These can be strips of corrugated sheets, ordinary construction slate or wooden boards. Even building polymer sand tiles and decorative strips made of wood-polymer composite are suitable (an excellent option for flower beds near a country mansion).
- The installed edges are covered with soaked soil and compacted thoroughly, after which you can begin filling the beds according to the method that is preferred. If it is for cucumbers in the spring, craftsmen install a special frame of bent pipes over it. This is necessary so that polyethylene or a special film can be stretched over it, creating something like a greenhouse.
Scheme for installing the box and filling the beds
Wooden boards must be treated with an antiseptic before installation.
Features of use
The plant layer of warm beds provides enough energy and nutrients for seeds to germinate and develop regardless of air temperature. But at the same time, fermenting and rotting plant matter, even with the addition of ammonia fertilizers, becomes an ideal environment for the development of pathogenic microorganisms and infection.
To get rid of pathogens, a large amount of fertilizer, manure or chicken droppings is always added to the beds. At the first spills of soil, organic nitrogenous salts begin to react violently with the release of ammonia, the temperature inside the bed reaches more than 100 ° C, which contributes to good sterilization of the plant mass, removal of pathogens and rot.
Excess nitrogen is easily regulated by radishes
Thermal generator
In the conditions of summer cottages, a greenhouse with year-round heating is a rare occurrence. Most often, owners come to their dacha in the spring, and many do not even spend the night there. Heating in this case is difficult, so the heat source must be looked for elsewhere. And it is proposed to use composting as a method.
Exothermic reaction
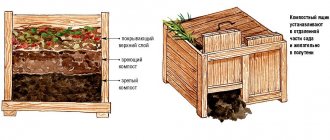
Compost production is an exothermic process, meaning it produces heat.
It happens for a long time, and sometimes very intensely. It is known that chicken manure added to the soil can even burn the plant if the dosage is overdone. In winter, the composting process slows down, and in summer, on the contrary, it resumes. The big advantage of compost is the fact that nutrients from it are absorbed better than from manure, and weed seeds die when properly composted. The idea of self-heating beds is based on these two properties of compost, and they are nothing more than a compost heap with a fence, where something has also been planted.
The main problem in developing this technology was timing. Within a year, organic matter has time to rot completely, and this process had to be slowed down. But here, too, a solution was found: it turns out that the speed of the process depends on the correct placement of the layers.
Location and design choice
One of the important parameters that must be taken into account when constructing a bed is the groundwater level. Its height above ground level depends on this - there are high and low beds. The first ones are located entirely above ground level, and the second ones are dug into it. The water level at the site is important for two reasons:
- composting always takes place in the presence of moisture;
- the bed should not be immersed in water - in this case freezing in winter will be guaranteed.
To create a high bed, it is enough to remove the layer of turf and enclose the area with a box of boards, having previously disinfected them. But you will have to dig a hole under the low one. However, the low one also has its advantages - it lasts longer and requires less frequent watering.
There are also a combined version of a bed and a mound. The latter allows you to increase the number of landings, because the area of the ball segment is always larger than the size of the circle underneath it.
Necessary materials
The principle of installation is from large to small. This means that the lower layers should consist of large woody materials, and the upper layers should be made of soil. All organic residues and waste that may be on the site will be used. The main thing is to sort them. So, for work you will definitely need:
- remains of trunks and stumps;
- branches;
- tops and straw;
- leaves;
- paper, cardboard and other household waste;
- turf.
In addition, it will be necessary to prepare manure or compost. The decomposition of manure will stimulate the processing of the lower layers of the cake. For other materials, it is worth purchasing sand or crushed stone, as well as metal reinforcing mesh - this is the first thing you need to put in a warm bed with your own hands. The mesh will prevent mice and moles from populating the garden bed. Finally, we must not forget about the quality of materials. Thus, rot and fungal infections should be excluded, and potato and tomato tops should not be used as tops: the solanine they contain prevents the decomposition process.
Advice from professionals
In order for warm beds to be truly comfortable and effective, it is necessary to constantly monitor the nitrogen content in the soil. This has to be done without special instruments and sensors, as they say, by eye. When first laying warm beds, it is necessary to increase the content of nitrate or use bird droppings in order to increase the amount of nitrogen to double the norm.
Microorganisms that actively process plant matter strongly absorb nitrogen from the soil. Therefore, when it comes to planting seedlings and seeds, the level of nitrogen in the soil is only slightly higher than normal, which has a beneficial effect on the development of plants.
Where and when is it better to make beds?
It is better to install warm structures in open areas of land that receive a large amount of sunlight. It is advisable that the surface of the ridges be illuminated for at least 5-6 hours a day. They should be placed from the east to the west.
Warm beds are best made in early spring, when the soil warms up to a temperature of about +10 degrees. We must wait until the soil thaws and dries completely. This bed is good for planting seeds, seedlings and early crops. When used correctly, warm buildings allow harvesting twice a year.
You can make ridges at the end of summer or early autumn. At this time, a lot of plant waste accumulates in the garden plot. During the winter period, the covered organic raw materials will completely rot, and the bed will be ready for use.
Features of a sunken bed
We recommend reading our other articles
- Milking machine for goats
- Horse Vladimir heavy truck
- Vyuga cabbage variety
- Description of the cucumber variety Adam F1
A sunken bed is usually located just below ground level on the site. To make it, a hole of the required size is dug. The shape can be any, but the most convenient is square or rectangular. The sides are immediately marked. In a sunken bed you cannot do without sides, otherwise the earth will crumble. For the sides you can use slate, special plastic sides, wooden boards, etc.
If the soil is clayey, then a drainage layer of several centimeters must be laid on the bottom. And if the ground is peaty or sandy and the moisture drains quickly, a layer of sawdust, natural fabric or something similar is placed at the bottom to retain the water.
Features of a sunken bed
First, wooden logs and then small branches are placed at the very bottom. After this, you can fill in a layer of organic matter. Now everything is compacted a little, watered and covered with fertile soil on top. The thickness of the final layer should be at least 15 cm. If the crops that will be planted here have a deep root system, then the layer is made much larger.
