Author: Natalya Category: Garden plants Published: January 29, 2017Republished: February 27, 2019Last edits: January 6, 2021
- How to stratify cedar seeds
In nature, seeds that have fallen from plants overwinter in the soil, and by spring their hard shell becomes softer and cracks under the influence of frost and moisture. Low temperatures and high humidity provoke the growth of the embryo, and it breaks through the shell in search of food and light. In gardening, there is an agrotechnical technique that imitates the necessary weather conditions and thereby accelerates seed germination. This technique is called stratification.
Seed stratification: what is seed stratification, why is it needed, and how to do it
To begin with, go for a walk in the fall in the park, forest, or, for some, in your own garden plot. You see, many plants have fruits, and therefore seeds. At the same time, some of them are already lying on the ground. The weather is still warm, temperatures are above zero, it rains regularly... One word - autumn. It would seem that the seeds that fell on the ground should germinate, the conditions are suitable. But that was not the case; they will remain there until spring. And only then will some of them (those that end up in the soil layer) sprout.
This is how nature takes care of plant reproduction in our harsh climate with frosty winters. After all, if the seedlings begin to sprout in the fall, they will inevitably freeze and die. Therefore, inside them there are substances specially developed over many years of evolution that prevent them from germinating ahead of time.
Seed stratification.
The thick shell is also a kind of protection. And only over the long winter months, being in moisture and cold, do the seeds get rid of these substances, the shell loses strength, and in the spring the seed germinates.
Strictly speaking, this is natural stratification. It is worth understanding that such treatment with cold and moisture is needed, as a rule, for plant seeds from temperate latitudes with frosty winters. Tropical crops do not have such protection against early shoots. Yes, they don’t need it, it’s warm there even in winter - enjoy your health!
Seed stratification at home is a process that imitates natural stratification. And for it to be successful, you need to adhere to the following rules.
What is the meaning of seed stratification (literally, interlayering)?
In creating the conditions in which they are in nature from late autumn to early spring. In fact, this is their artificial imitation, which promotes better germination of each seed.
How is it really happening? In the natural environment, it falls on the ground and over time becomes covered with some kind of layer (leaves, dust, snow crust). Gradually, along with moisture, it absorbs useful substances, gets wet and, under favorable external factors (primarily acceptable temperature), awakens. This is a somewhat simplified “model”, but it gives a general idea of the processes taking place. Consequently, the described cycle must be organized, but only at home. And it’s not at all difficult to do if you know how.
Why is seed stratification needed?
The process of transition of seeds from dormancy to active life under the influence of external influences on the seed is called stratification. In fact, stratification is the preparation of the embryo for development. To undergo seed stratification, certain conditions are necessary: favorable temperature and humidity of the environment. They cause softening of the hard shells, their cracking, and sliming. Under the influence of moisture, the seeds swell, and the physiological process of converting complex high-molecular organic substances into simpler ones available to the embryo for nutrition begins.
Without undergoing stratification, the seeds will not germinate, especially with a sharp change in temperature and humidity conditions in the middle and northern regions. In areas where climatic conditions remain virtually unchanged, seeds do not require a dormant period and can reproduce year-round.
The duration of stratification of most plants ranges from 1-6 months, but there are perennial crops for which this period increases to 2 years (Table 1). Most flower crops, especially when sowing in spring, also need stratification; a list of some of them is given in the table. 2.
The main goal of stratification is to reduce the period of dormancy in artificially created conditions and awaken the embryo to growth and development, that is, to obtain friendly shoots by a given date.
Why is stratification needed?
The main task of stratification is to create the necessary conditions for the awakening of seeds. Most often, cold stratification is used, simulating winter temperature changes. Seeds, falling into warm soil after a cold atmosphere, begin to actively grow, as if spring had arrived. Seeds are divided into 3 types:
- Does not require stratification;
- Requiring warm or combined stratification;
- Requiring cold stratification.
The first group includes seeds of plants whose homeland is located in the south. These plants do not know cold winters and do not require cold preparation. This group also includes plants whose physiological dormancy passes quickly while the seeds are being prepared for planting. The second group includes plants growing in places where winter is not pronounced. Their seeds are first kept warm and then cooled, simulating the change of seasons. The third group of plants, living in conditions of pronounced summer and winter, needs stratification in order to awaken dormant seeds.
Timing of cold stratification of perennial crops
| Culture | Duration of stratification, days |
| Apricot | 80-100, 120-150 |
| Quince | 70-90 |
| Cherry plum | 120-180, 130-150 |
| Barberry, honeysuckle, | 75-90 |
| Hawthorn, viburnum | 210-240 |
| Common cherry, chokeberry | 150-180 |
| Felt cherry | 100-120 |
| Walnut | 50-80 |
| Pear | 75-100 |
| Strawberries | 20-30 |
| Cotoneaster, rosehip | 75-90 |
| Schisandra chinensis | 90-120 |
| Mahonia, grapes, prince | 120-140 |
| Almond | 50-70, 120-140 |
| Peach | 100-120 |
| Plum, sloe, rowan | 120-180, 150-180 |
| Bird cherry, lilac, aconite, columbine, hosta, anemone | 30-50 |
Features of seed stratification of a particular plant
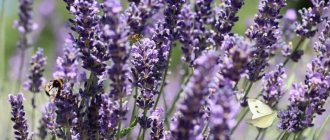
Before sowing certain seeds, you should take care to obtain reliable information. Do they need stratification for them to emerge? And if necessary, what kind and for what duration? These terms and requirements are different for different cultures. For example, the seeds of a tulip tree (lyriodendron) will take a year and a half (!) to germinate, simulating winter-summer-winter cycles, and lavender seeds will take only one month of low temperature. I advise you to be sure to read the recommendations for a specific plant.
Helpful advice! Stratify ordinary plants in open ground, exotic plants in the basement or refrigerator
Seeds of plants common to your area (you can stock up on large quantities of seeds) can be safely sown in open ground before winter, of course, having previously prepared the beds and marked the sowing locations with special markers or simply by sticking plastic spoons or knives.
If there are few seeds and they are from rare plants, then stratification should be done more purposefully. Sow in containers or cassettes and place in conditions that simulate natural ones (refrigerator or basement with temperatures close to zero). Above +4 is bad, but slight freezing is acceptable.
Small or exotic seeds should be sown in containers or cassettes and placed in conditions that imitate natural ones.
Features of stratification of various plant species
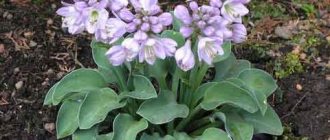
Stratification of rhododendron seeds
Each crop has its own growing characteristics, and they may differ slightly in different climatic zones. However, each individual plant species has its own special stratification method.
It exactly replicates the necessary conditions of temperature and humidity, which in nature lead to accelerated seed germination. Next, the features of stratification will be considered for various plants.
Pome crops
Apple seeds
Pome crops Stratification of seeds of apple, pear, quince and other similar plants is carried out in a substrate consisting of washed river sand. Its quantity should be three times the volume of seeds. The mixture of sand and seeds is placed in a container that is not covered with a lid and placed in a refrigerator, basement or cellar at a temperature of +3-4°C for 3 months.
Gardeners often practice substrate-free stratification - the seeds are placed in a linen bag and dipped in water poured into a plate. Its duration is about 3 days.
The water is changed daily. Then the seeds need to be dried and placed in bags on napkins, as described earlier. The timing of stratification and temperature are similar to the conditions using the substrate.
Strawberries and wild strawberries
Growing remontant strawberries
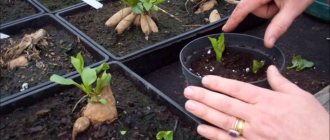
Strawberries and wild strawberries A layer of soil is placed in a container, on top of which a layer of snow 2 cm thick is laid. The seeds of the crop are placed directly on the snow. Carefully place them at a distance of 1-2 cm from each other. This is convenient to do with a toothpick. They are not covered with anything on top.
Next, the container is placed in the refrigerator for 36-48 hours. After the snow melts, the seeds will enter the soil to the required depth. Keep them in this state for about a week, after which place the container on a lighted windowsill. To create a greenhouse effect, cover it with plastic wrap. Friendly shoots appear in about a week.
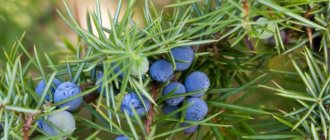
Coniferous plants
Growing blue spruce from seeds
Coniferous plants In this case, peat is used as a substrate. It is pre-disinfected in potassium permanganate, then squeezed out and placed in a 2-3 cm layer on the bottom of a plastic container.
The seeds are placed on top of the substrate, covering them with another 2 cm of peat. The container is closed with a lid and sent to the refrigerator for 2-3 months (thuja, spruce, pine) or for longer periods for juniper and yew. You can sow the seeds immediately after cracks appear in the hard shell.
Grape
Growing grapes from seeds
Grapes Seeds are mixed with an equal volume of sand, placed in a plastic container and sent to the refrigerator for 2-4 weeks. The grape stratification temperature is 2-3°C.
After completing the “cold” stage, the container with the seeds is transferred to a warm place with a temperature of at least +25°C for 5-6 days. The sand should be watered daily.
Lavender
Stratification of lavender seeds
Lavender Small lavender seeds are laid out on cotton pads and covered with the same pads. After moistening, the discs are packaged in plastic bags and sent to the refrigerator at a temperature of no more than +5°C.
The duration of lavender stratification is about 2 months.
Clematis
Clematis from seeds
Clematis This culture is distinguished by two-stage stratification, and the duration of each of them can be quite significant. They all start with cold stratification. Since the seeds are quite large, they undergo stratification in the substrate. Peat or sand is used as such; sometimes a mixture of them is used in a 1 to 1 ratio.
Clematis has a wide variety of varieties, so each variety has its own stratification period:
- Clematis stinging – from 2 to 6 months
- Manchurian – from 2 to 5 months.
- paniculate – from 2 to 8 months.
- Tunguska – from 3 weeks to 3 months.
- purple – from 2.5 to 8 months.
At the same time, the algorithm for placing seeds for all varieties is approximately the same. Substrate, after disinfection with an antiseptic (for example, potassium permanganate).
Then it is moistened and the seeds are placed at a depth of no more than 1.5 cm. Optimal temperature is +1-2°C, humidity - from 65 to 70%
Warm stratification is carried out on a gauze substrate at a temperature of no more than +20°C. Its duration for different varieties of clematis can take up to 30 days. You should monitor the temperature at all times and regularly moisten the gauze. Sowing should be done immediately after the seeds are hatched.
Propagation of clematis by seeds
Despite such a long stratification, the germination rate of clematis seeds is about 70%. And although this is a fairly high figure, it is still recommended to take seeds with some reserve in quantity.
Dolphinum
Delphinium from seeds
Dolphinum This crop may also require stratification, but its duration is relatively short - from 1 to 2 weeks. A feature of delphinum stratification is that the seeds must be in contact with water and air at the same time, that is, the use of two layers of gauze or napkin is undesirable.
Usually, the seeds are placed on top of a moistened substrate, and the top is not covered with anything. In this form, the container with the seeds is placed in a dark room with a temperature of +5-6°C. The condition of the seeds is regularly monitored and water is added as needed.
In some cases, the seeds are laid out on a long strip of fabric, which is rolled into rolls. The edges of the rolls are folded inward. Then the rolls are placed end-to-end in a container with water.
Gentian
We sow gentian. Stratification
Gentian Gentian seeds are sown in a pot with vermiculite or sphagnum or placed in bags with a napkin. They are kept at room temperature for two weeks, periodically moistening. Then the bag or pot is transferred to a refrigerator at a temperature of +1-2°C.
The seeds are kept in the refrigerator for about 2 months, after which they are again transferred to room conditions. They will sprout in about 2-3 weeks. If stratification is successful, the gentian will bloom the next year.
Lumbago
Flower lumbago: growing from seeds
Lumbago stratification takes about 2 months and is carried out in a dry substrate. Typically, peat is used in quantities at least three times greater than the volume of seeds.
You need to make holes in the lid of the container. The stratification temperature should be within +2-5°C.
Peonies
Propagation of peonies by seeds
Peonies These beautiful flowers require two-stage stratification. The first stage consists of keeping the seeds in the soil at room temperature for two weeks. They should be watered with warm water every 2-3 days.
Then the peony seeds, without removing them from the soil, are placed in the refrigerator for up to 2 months. Moreover, the temperature should be slightly higher than the “classic” one - from +5 to +10°C. Next, the container with soil and seeds is removed from the refrigerator and placed in the light. Young peonies germinate in about 1 week. They are planted in open ground at the end of April.
Thematic video: What is stratification. How to do stratification correctly
How to prepare a substrate for stratification
Stratification should be carried out in sterile soil mixtures or substrates. Mold and other fungal diseases, like pests, can completely ruin your months of efforts. In principle, any options are suitable, but it is more convenient to stratify small seeds in a mixture of peat and sand, perhaps with the addition of garden soil (be sure to disinfect all the components that you take from nature), and large seeds - in sphagnum, peat, or a mixture of peat and sand.
Also, ready-made purchased soil for plants is suitable for home stratification; as a rule, it does not require any additional processing. Sometimes those gardeners who stratify many seeds at once, to save space in the refrigerator, do not sow the seeds, but put them in plastic bags with damp vermiculite, moss or even moistened paper napkins, and after the due date, sow them in cassettes or containers .
True, this method is good for large seeds, which are easy to find in such substrates. And remember that saving is saving, but the volume of substrate should be 3 times larger than seeds.
Main methods of stratification
For the cold stratification method, prepare seeds and a suitable substrate. Disinfect the seeds with a fungicide. Use sand, peat or a mixture of these substances as a substrate. The soil is not suitable for this task; it may contain fungal spores. Wet the substrate at the rate of 1 part substrate and 4 parts water. Squeeze out excess liquid. Mix 1 part of seeds with 3-4 parts of wet substrate and place the mixture in a plastic container. Choose container sizes with reserve, taking into account the further growth of seedlings in them. Cover the container with a lid or film to avoid moisture evaporation and place in a warm place for 2-3 days. During this time, the seeds will swell. Then move the container to a cool place. Use a basement, cellar or refrigerator, any place where the air temperature does not rise above 5 degrees.
Once a week, open the seeds, ventilate and shake the container to saturate the substrate with oxygen. If necessary, moisten the substrate and remove rotten seeds. Remove the sprouted seeds with tweezers and plant them in the soil. If at the end of the stratification period several seeds remain ungerminated, soak them in a growth activator. With the warm stratification method, place the seeds on a damp cloth and leave them in a warm place for 2-3 days. This time is enough for most crops to germinate. But there are also exceptions. For example, lemongrass berries will have to be kept in sand at an elevated temperature of 28 degrees for a whole month for sprouts to appear.
Seed stratification: soil and air humidity
Before planting the seeds in the substrate, it is better to soak them in water for a couple of days, this will speed up the process of activating the chemical processes inside. And then throughout the entire period it is necessary to maintain high soil and air humidity. Therefore, it is necessary to place containers with seeds in a plastic bag. Or use purchased mini greenhouses for seedlings. If they dry out, the seeds should be sprayed with water from a spray bottle. It is better to use soft, filtered water, or even better - melted snow.
Crops that require cold exposure
Stratification is needed for seeds of fruit and vegetable crops, perennial flowers, which are grown in mid-latitudes. This group also includes ornamental trees and shrubs, conifers, and herbs. For flower crops, the timing of stratification depends on the species:
- 1 month stratify the seeds of lavender, aquilegia, aconite, primrose, gentian, soft mantle;
- The procedure lasts 1 week for delphinium, bluebells;
- The seeds of peonies, clematis, hellebore, and chaenomeles are cooled for 3 months.
Seed stratification and constant monitoring
Check the seeds placed for stratification regularly, once every 2 weeks. That is why a refrigerator or basement is convenient for these purposes. Open the plastic bags, open the mini-greenhouses and inspect the seeds for mold. If it appears, wash the large seeds and treat the sown ones with a fungicide (hydrogen peroxide diluted with water is suitable).
Check the seeds placed for stratification regularly, once every 2 weeks.
Stratification in apartment conditions
First you need to empty the lower sections of the refrigerator, where containers with seeds will be placed for storage in the future. We plant each variety in a separate pot with well-moistened peat in layers: soil - seeds - soil - seeds - soil. We pack the pot itself in a plastic bag with holes and put everything in the refrigerator. If the seeds are small, then they do not need to be mixed with peat. We place the seeds on damp gauze folded in several layers, tie knots on different sides so that nothing spills during storage and place them in convenient containers, then place them in the refrigerator. Water the contents with water as the gauze dries. For convenience, attach tags to each type of seed. In apartment conditions, scheduled inspections are carried out once every 20 days.
If you will be planting in small quantities in spring, the seeds are placed in paper bags, placed side by side, close to each other, watered with water as it evaporates and stored in the refrigerator at a temperature of no more than +6°C.
Seed stratification: when to sow hatched seeds
When you see that the seeds have sprouted, immediately sow them in the soil substrate and place them in a warm place. If a large sprout has already grown from the seed, this must be done very carefully so as not to break it. If you break it, the future plant will die. When the first shoots appear, the containers must be placed on a well-lit windowsill and additionally illuminated with special phyto-lamps (in winter the days are too short).
As you can see, there is nothing complicated or scary about home seed stratification. All you need is attentiveness, accuracy and patience.
Which crops require seed stratification?
Vegetable, berry, and fruit plants are also stratified. Many ornamental crops require seed stratification.
Garden
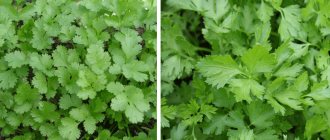
Stratification is necessary for root vegetables of the Umbelliferae family - carrots, root parsley, celery and parsnips - from a month to a month and a half.
Onion and leek seeds must be stratified for about a month and a half.
Strawberries and wild strawberries may not sprout without stratification. Specific recommendations for individual varieties are on the manufacturer’s packaging.
Garden
Almost all stone fruits - plums, peaches, cherries, cherries - require a long period of cool wintering, at least 4-5 months.
For apple and pear trees, 90 days in damp cold is enough.
Rosehip, grapes, almonds, bird cherry, elderberry, rowan, lemongrass - from three months to six months.
Hawthorn is stratified for up to eight months.
Decorative
All conifers grown from seed require cold rest before the growing season begins. For example, cedar needs at least 3 months of wintering.
Several days to several weeks of cooling are necessary for many flower crops, including
- violets,
- verbena,
- delphinium,
- Lavatera,
- hellebore,
- different varieties of phlox,
- many bells,
- alyssums,
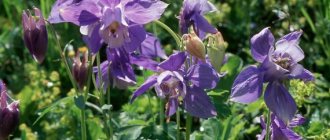
- aquilegia,
- cyclamens,
- aconite,
- clematis,
- daisy,
- Snapdragon,
- mignonette and many others.
It is almost impossible to wait for rosemary and lavender to sprout without stratification.
Seed stratification at home
After harvesting, if it is necessary to propagate the crop, gardeners leave some of the seeds for sowing. No matter how good the weather was, immediate sowing of the seeds would not produce seedlings. This happens because the seed embryo must necessarily go through a period of rest. The length of the dormant period is determined by the physiology of the seed and the growing season of the plant (begins in spring and ends in autumn). If the seeds of all types of crops germinate immediately in the fall, the plants would die from weather conditions incompatible with the life of a young seedling.
Seed stratification at home.
The seed contains special chemicals that block the development mechanism. These substances are called growth blockers or growth inhibitors. Gradually, their quantity in the seed decreases and, instead of inhibitors, other chemicals called growth stimulants begin to affect the physiological processes in the seed. They awaken the embryo from dormancy (hibernation) and, including the development mechanism, ensure germination, growth and development of the plant.
Concept and principles of stratification
If it is necessary to propagate a plant at home by seed, all conditions of natural growth must be observed.
Otherwise, you won’t be able to get a healthy culture. What is seed stratification and how to carry it out? The main factors necessary for seed germination are:
- a certain temperature regime;
- sufficient amount of moisture;
- oxygen access.
If you place the prepared seeds of fruit, vegetable or flower crops in ideal conditions, the protective crust will begin to soften and the grain will be saturated with the ingredients necessary for growth.
So, seed stratification is a process that occurs under the influence of optimal temperature and humidity, the result of which is the natural awakening of the seed and its transition from the resting phase to the growth phase.
Which seeds require stratification? Seeds that germinate poorly or slowly under natural conditions are subject to additional processing before planting.
These include seeds:
- fruit trees (apple, pear, rowan, etc.);
- berry bushes (rose hips, honeysuckle);
- forest trees (cedar, maple, ash);
- coniferous plants (fir, spruce)
- perennial flowers (clematis, peony, lavender);
- some vegetable crops (peppers, eggplants, tomatoes, carrots).
How much to stratify seeds? The timing of pre-sowing treatment of plants can vary from 1 – 2 days to 6 – 8 months. You can find out the period for stratification of a particular crop type on the seed package or in specialized reference books.
Types of seed stratification
In practice, several types of stratification are used:
- cold;
- warm;
- combined;
- stepped.
The need, duration and type of stratification are usually indicated on the seed packet or in reference books. Dry seeds, cleared of organic residues, are placed for stratification. Otherwise, they may rot in a humid environment (apple trees, pears).
Cold stratification of seeds. For perennial seed crops, in conditions of a clear division into cold and warm periods, ending the growing season in the fall, cold stratification is usually used. Cultures of temperate regions need this type of stratification. Seeds are placed in conditions with air temperatures from 0 to +4 ºС and humidity 65-75%.
The duration of stratification under these conditions can be 1-6 months. It is used for pome, stone fruit, some vegetables, flowers and other crops. If the plants do not go through the cooling stage, they may not sprout in the spring. That is, stratification imitates pre-winter sowing for some crops, when the embryo is provided with conditions for rest and subsequent awakening to growth and development.
Some seeds that require temporary exposure to low temperatures can germinate without stratification. But in this case, the seedlings will be sparse and not friendly (sea buckthorn, honeysuckle, strawberries).
Thermal stratification of seeds. Thermal stratification differs from cold stratification by the short duration of its passage. Typically, vegetable crops undergo thermal stratification. Dry seeds can remain in suspended animation for a long time. But an increase in temperature to +18..+22 ºС and humidity not lower than 70% awaken life processes. For example: tomatoes, peppers, cucumbers, eggplants just need to be soaked in warm water, left in a warm place, and after a day or two the seeds will sprout, that is, germ sprouts will appear.
Seeds of ornamental plants, packaged for storage and stratification.
Combined seed stratification. Combined stratification is applied to slow-germinating seeds and seeds of some crops in areas where imitation of the change of seasons is necessary to increase germination. Usually these are the seeds of perennials with thick, dense peels (hawthorn, viburnum, snowberry, yew, apricot, plum).
Hawthorn and viburnum seeds require long-term (7-8 months) stratification. To soften the dense shell and awaken the embryo, the seeds are first kept for 4 months at a temperature of +20..+25 ºС in a container with high humidity, and then for 5-6 months in a cellar or cool place at a temperature of 0..+5 ºС. For yew and some types of maple, a thermal stratification period of 1.0-1.5 months is sufficient, and then the seeds are placed on cold stratification.
Stepwise stratification of seeds. This is the most complex type of multi-stage seed stratification. It consists of several cycles with low and high temperatures. Thus, the seeds of some types of peonies and actinidia are kept several times alternately at high and low temperatures.
Primrose, aquilegia, and aconite are frozen many times. Before sowing, their seeds are kept in water at room temperature +18 ºС during the day for 5-7 days, and placed in the freezer of the refrigerator at night. In this case, seed germination is high and consistent.
Combined, or stage-by-stage, stratification
Staged stratification involves using first warm and then cold stratification, or vice versa. Combined stratification is needed for the seeds of those plants that take too long to germinate.
Gentian sprouts appear slowly, so it is necessary to speed up the process of the appearance of the first shoots using combined stratification. To do this, pour small gentian seeds into a soaked fine-grained hydrogel and place the bag of seeds in a warm place with a temperature of about 20°C.
After 2-3 weeks, the seeds must be placed in the refrigerator and kept for another month at a temperature of 3-4°C. After this, they need to be removed from the hydrogel and sown in a previously prepared container with warm clay, well-fertilized soil. In about 1-2 weeks, the first shoots should appear.
Primrose seeds need to be stratified first at low temperatures and then at high temperatures. Pour the seeds onto a damp cotton pad, place in a small bag and refrigerate for 1-2 weeks. Make sure that the cotton pad does not dry out. After a couple of weeks, you need to remove the seeds and put them in a warm place next to the battery, but not on it.
List of some plants whose seeds require stratification
Fighter , or Aconite (Aconitum). Some species: Altai wrestler; The wrestler is tall; Bearded wrestler; Antidote fighter; Cowl wrestler. Two-stage stratification is required:
- +20..+25 °С from 2 weeks to 3 months
- 0..+5 °С – 1-6 months
Anemone , or Anemone. Some species: Blue anemone; Oak anemone, or; White anemone; Altai anemone. Two-stage stratification is required:
- +18..+20 °С - 2-3 months
- +2..+5 °С - 3-4 months
Cornflower (Centaurea). Some species: Blue cornflower, or Field cornflower; Fisher's cornflower. Stratification is required at a temperature of +1..+5 °C - 1-2 months. Sowing can be done in open ground (April-May).
Carnation (Dianthus). Some species: Sandy carnation; Dianthus grass; The carnation is lush. Stratification is required at a temperature of +1..+5 °C - 1-2 months. Sowing can be done in open ground (April-May).
Jeffersonia . Some species: Jeffersonia dubious, Jeffersonia bifolia. Two-stage stratification is required:
- +8..+10 °С – 6 months
- 10/30 °C * – 1 month
Note! *Here and further in the list. X/Y°C means that the seeds should be kept at X°C for 18 hours and at Y for 6 hours. This is a daily storage mode, that is, every day the seeds must be kept at X °C. and at Y °C.
Seeds quickly lose their viability. Sowing is carried out after harvest in mid-summer
Delphinium , or Larkspur, or Spur (Delphinium). Stratification in sand is required at a temperature of +5..+6 °C from 2 weeks to 1 month. The optimal temperature for seed germination is +10..+15 °C
Bluebell (Campanula). Stratification in sand is required at a temperature of +1..+5 °C. Sowing in spring, germination at +10..+15 °C
Clematis , or Clematis. Some species: Clematis Drummond, Clematis pungent, Clematis whorled, Clematis ligusticofolia. Two-stage stratification is required:
- Stratification in sand or peat at 0..+5 °C - 2-3 months
- Germination 20/30 °C * - 1-2 months
Seed germination is uneven.
Black cohosh , or black cohosh (Actaea cimicifuga). Two-stage stratification is required:
- 20 °C - 2-3 months
- 4 °C - 2-3 months
Germinate at 12 °C.
Peonies (Paeonia). A two-stage stratification is required.
Peony evasive , or Peony extraordinary, or Peony Maryin-root (Paeonia anomala).
- 18/30 °C * – 1 month
- +5..+7 °С - 3.5 months
Peony (Paeonia lactiflora).
- 18/30 °C * - 1.5 months
- +5..+7 °С - 2-3 months.
Peony (Paeonia tenuifolia).
- 12/30 °C * – 4 months
- 5 °C - 1.5 months
Phlox . Some species: Phlox charming, Phlox Douglas, Phlox subulate. Stratification in sand at +1..+5 °C is required - 2-4 months. The optimal temperature for seed germination is +5..+12 °C.
Liverwort , or coppice (Hepatica). A two-stage stratification is required.
- +18..+20 °С – 1 month
- 12 °C - 3.5 months
Seeds with a developed embryo germinate only at 12 °C.
Note! The above list is being supplemented and corrected. We are waiting for your comments and additions.
Cold stratification
Cold stratification is needed for those seeds whose embryos need to ripen. With this stratification, the seeds are first soaked and then placed in a cold place for a while, thereby simulating natural temperature changes.
Most tree and shrub crops require cold stratification. Thus, mountain pine seeds need to be stratified for a month in damp sand at a temperature of 5°C. The sand must be moistened all the time so that the seeds do not dry out.
Blue spruce seeds need to be stratified for 2-3 months in the refrigerator at a temperature no higher than 4-5°C. You can also place the seeds in pre-sifted and calcined wet sand, or you can use a special coconut substrate. It is sold at any gardening store.
Coconut fiber is an excellent antiseptic and antibacterial agent, in addition, it provides the necessary aeration. Bacteria, mold or rot will definitely not appear in such a substrate, and the seeds will always have enough moisture and air. The ratio of seeds to substrate is 1:3. To prepare coconut substrate, simply pour 0.5-1 liters of water into the compressed disc of coconut soil. Then you need to wait 15 minutes until the coconut fiber straightens and increases in volume, mix well and, if necessary, squeeze it out a little.
Lavender seeds also need cold stratification. They are usually kept at 5°C for about 35-40 days. Pour lavender seeds onto a damp cotton or linen cloth, spreading evenly over the surface, and cover with a second piece of cloth.
Make sure that the cloth does not dry out, but do not allow it to “swim” in the water, otherwise the seeds will rot or become moldy. Clematis seeds also need to be stratified. If they are large enough - 5x10 or 6x12 mm in diameter, they must be placed in a soil mixture consisting of sand, peat and ordinary soil in equal proportions and refrigerated for 2-3 months.
Medium-sized seeds - from 3-5 to 5-6 mm in diameter - need to be stratified under the same conditions, but not more than a month.
Small seeds can not be stratified at all, but only soaked for a day before sowing. However, if the manufacturer recommends stratification for small seeds, then it must be carried out.
To do this, pour the seeds onto a damp paper napkin or cotton pad, put them in a ziplock bag and put them in the refrigerator for 1-2 weeks.
If you store containers with seeds in a basement or cellar, be sure to cover them with glass or mesh to prevent rodents from spoiling the seeds.
Cold stratification accelerates seed germination and has a beneficial effect on the development of seedlings.
Methods of stratification at home
Stratification in cabbage stalks. An ideal way for cold stratification at home. Separate the stalks of late cabbage from the heads. We chop off the roots. Remove the core from the resulting stalk. Fill the resulting container with seed material. Close tightly and secure with tape the lid from the remnants of the stalk. We bury the “pot” with seeds (like our grandfathers with gold coins) in the ground vertically in a hole the depth of a spade bayonet.
Cover the top with soil. We install a numbered marker, and in the diary under its number we write down information about the seeds, indicating the type and variety of the crop, the time of planting and the end of stratification. In the spring, when the top layer of soil is heated to the temperature required for the crop, we dig up a stalk with seeds and sow it into the prepared bed.
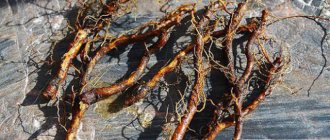
Stratification of maple seeds.
Additional stratification methods
Additional stratification methods are used as the only or complementary for some plant species
- The combined stratification method is used for plants that require a long time to germinate seeds. For example, primrose seeds are first subjected to cold processing for 2-3 weeks, then transferred to a warm place, controlling the temperature above 20 degrees and keeping the cloth constantly damp.
- Washing as a method of stratification is used for seeds that were already prepared last year but not planted. Soak the seeds in water for several days; once the seeds have sprouted, you can plant. Another washing option is to place the seeds in a canvas bag and leave it under running warm water for 10 hours. Then remove the seeds and place them on damp gauze until sprouts appear.
Related article: Apple tree: planting and care, photo, pruning, grafting, description of varieties
- Bubbling is an interesting way of stratification. To do this you will need an aquarium compressor. The essence of the procedure is to soak the seeds in a container of water and pass air bubbles through it. Maintain the water temperature at least 20 degrees. The bubbles wash away the protective substance that prevents the seeds from germinating. This method speeds up germination by an average of 1 week.
- Freezing is a method of stratification in which seeds are soaked in water and then frozen in it. After defrosting, freeze again. The cycle is repeated 6-7 times.
Stratification is a useful procedure for obtaining early and vigorous shoots of crops grown in the garden.
Dry seed stratification at home
- Seeds placed for stratification are pre-disinfected. You can soak it for 0.5 hours in a 0.5% solution of potassium permanganate. Then rinse in several waters at room temperature. Dry, place in plastic bags, provide with a detailed label indicating the type, variety and date of laying for stratification. Place the bags on the top shelf of the refrigerator or in a room with a temperature of 0 - +3..+4 ºС before sowing into the ground.
- Disinfected, dried seeds in linen or plastic bags are placed in a plastic container, the lid is tightly closed and secured with tape. The prepared package is buried in the snow before it begins to melt. With the onset of warmth, they are moved to the basement or to the bottom shelf of the refrigerator until sowing.
Processing options
In the methods described above, two processing options are used - wet and dry. Each of them has its own varieties and rules of application.
Dry
Dry seed can be stratified in two ways. The first involves performing the procedure in this order:
- the seeds are kept for 30 minutes in a 0.5% solution of potassium permanganate;
- washed under running water, dried;
- pour into a plastic bag;
- Place in the refrigerator for at least 1 month (until sowing).
The second option is more original. It is carried out in the fall according to the following scheme:
- remove the core from the head of late cabbage;
- seed is poured inside, filling the cavity not to the brim;
- cut off the bottom of the removed stalk, close the hole and secure it with tape;
- bury the cabbage head in the ground on a bayonet, positioning it vertically, and set a mark.
Related article:
Seeds from which everything grows on its own: 7 rules when choosing high-quality planting material
Dig up cabbage immediately before sowing. They take out the planting material and immediately sow it.
Wet stratification of seeds at home
- Sanding . We prepare containers with a substrate, which can be coarse washed river sand, rotted sawdust, peat, moss. It is very important that the seeds are thoroughly washed from organic residues, disinfected and dried. Fill the containers 2/3 with wet substrate. We lay out the prepared seeds and cover them with substrate on top. Along with moistening, the substrate must be treated against fungal infection with one of the biofungicides: trichodermin, phytosporin, alirin-B and others. Processing methods are usually indicated on the packaging. Cover the containers with a lid and place them in a plastic bag to maintain moisture. The packaged containers are placed on the bottom shelf of the refrigerator. The temperature should be within +3..+4 ºС. With this storage method, at the end of the stratification period, the packages are transferred to conditions with reduced temperatures to +1 ºС. In addition, the containers are periodically inspected, monitoring the condition of the seeds and, if necessary, the substrate is moistened.
- Stratification in fabric rolls . On strips of natural fabric 10-12 cm wide and 30-35 cm long, lay out a thin layer of moss or cotton wool. Carefully place the seeds. We bend the long sides of the fabric strip that will cover the seeds on top and roll it into a roll. We bandage it and put it in water to absorb moisture. Gently squeeze out excess water. Wrap the roll in a plastic bag and place it on the bottom shelf of the refrigerator. We provide each roll with a label or number, and a detailed description in the garden diary (see above). During stratification, we systematically check the rolls for moisture. We control the condition of the seeds. If a fungal infection is detected, we wash the seeds, disinfect them, dry them and repeat the entire process of laying them out for stratification on new pieces of material.
Pre-winter sowing. Some crops are sown and planted in the fall (pre-winter sowing) in the soil, where they undergo stratification under natural conditions (winter garlic, greens, certain varieties of lettuce).
In addition to those described, there are other ways to carry out seed stratification.
Note! Stratification will save you from spring suffering associated with low seedlings or their absence at all.
Examples of combined techniques
With this method, the seeds are warmed at the first stage of testing, cooled at the second stage, and vice versa. This option is suitable for crops that have to wait a long time for germination.
Gentian
Gentian seeds are kept in a waterproof bag with wet hydrogel. At the initial stage, a warm microclimate is created (18-19 degrees C), 13-21 days. At the second stage, the packages are cooled to 3-4 degrees per month.
After this, the seeds are removed from the hydrogel and sown on a warm, sunny day in a dacha, clay plot. Shoots will appear in 9-15 days.
Primrose
Primrose seeds are treated differently. At the beginning they are cooled, at the end they are warmed. Place inside layers of damp gauze. Place in a waterproof bag and keep in the cold for 10-14 days. Lightly moisturize periodically. Then leave in a warm room until germination.
Sow strawberry seeds in the snow
Stratification of strawberry seeds is carried out in an original way:
- drainage holes are made in the closing box;
- pour soil (peat, sand, vermiculite) onto the bottom and compact it a little;
- the ground is covered with snow - up to two centimeters;
- dry strawberry seeds are placed on the snow;
- the container is placed in the refrigerator;
- the snow melts for several hours, immediately after that the box is closed with a lid;
- Every day the lid should be opened slightly and the seedlings should be ventilated;
- after 7-10 days, the container is transferred from the cold to a warm (+25) place with good lighting for a week.
Tomatoes
Heat-loving tomatoes are not chilled before planting.
- Prepare a clean, flat plate.
- Cover the bottom with sterile strips of gauze or chintz (2-3 layers).
- Lay out a layer of seeds (previously disinfected).
- Spread another layer of fabric on top and sprinkle warm water (+45) on top. The napkins must be damp. But the moisture should not stand in a puddle.
- Place in a warm place, with a temperature not lower than +23, for 2-3 days.
When the sprouted roots reach a length of 4 mm, the seedlings are transferred to the ground.
Verbena
The seeds of this plant remain valid for no more than 2 years. Verbena germinates more amicably after stratification. To do this, a small piece of gauze is moistened, wrung out, and placed on a flat saucer. Seeds are sprinkled on top. The saucer is covered with cling film or a plastic bag and placed in the refrigerator for 4 days.
Delphinium
Stratification of delphinium seeds is carried out as follows.
- Shreds measuring 10*40 cm are cut from calico fabric.
- Seeds are poured evenly, in the form of a path, onto the central part of the fabric strip.
- We bend the fabric on both sides towards the center. Starting from the short side, roll the flaps into rolls. The seeds from such a cocoon do not spill out and are distributed evenly.
- The rolls are secured with a rigid wire or rubber band, attaching a tag with markings.
- For rolls, use a box with a little water poured into the bottom so that the fabric is moistened, but does not displace all the air. For seed germination, moisture and a free flow of oxygen are necessary. To retain moisture, sphagnum moss is laid between the rolls.
- The box is taken out into the cold: a balcony, a vegetable store, an open terrace of a country house. The seed material can withstand temperature limits of +3...+6 degrees for about seven days.
- Thanks to these manipulations, delphinium increases germination rate by up to 80%.
The seeds should just swell. To prevent the roots from growing earlier than necessary, the seedlings are transferred to an even colder place. The roots are thin and break easily. As soon as they appear, they should be planted in the ground, in a separate pot.
Cheremsha
Rich in vitamins and mineral salts, “bear onions” are listed in the Red Book. Collecting it in the forest is prohibited. But wild garlic grows well in the garden if the seeds are stratified correctly.
To do this, the seeds are laid out evenly between two layers of damp cotton wool or a napkin. The dishes with wet wipes are placed in the refrigerator for 2 months. Temperature range – 3-4 degrees Celsius.
To increase germination, sometimes seeds are pre-treated with Baikal 1 solution.
What is seed scarification, why is it needed, and how to do it
It just so happens that in our climate (with winter frosts), nature itself has provided various protective mechanisms so that plants germinate from seeds during the warm spring period, which is favorable for their life. The hard seed coat is one of the natural barriers that regulates the time of seed germination. Artificial scarification of seeds is a way to remove this barrier at the request of the gardener.
Scarification is a way to speed up seed germination.
Note! The seeds of some plants do not have a dormant state and can germinate immediately after the fruit ripens, that is, in the fall. And this is unacceptable from the point of view of nature, because there is a frosty winter ahead, and the seedlings will inevitably die. That’s why she provided some of them with a thick, durable and, most importantly, waterproof shell.
Such seeds lie in the ground or on the surface of the soil all winter, experiencing the effects of cold and moisture.
Gradually, the shell begins to “give weakness” and collapses in some place (usually along the seam). Moisture begins to flow to the seed and its germination process begins. This usually coincides with the onset of warm days in spring. There are, however, some seeds for which one winter is not enough, and it may take more time to destroy the hard or, as they say, “stony” shell (hawthorn, for example).
But it’s okay, we can help such “slow-witted people” and speed up this process. Violation of the integrity of the hard shell of seeds is called artificial scarification.
What's difficult? - the question arises. He took a hammer, hit the seed so that it cracked, and planted it. In principle, this is possible, only there are more accurate and correct methods that give a higher percentage of seedlings, and not a large percentage of porridge from kernels and shells.
Scarification is a violation of the integrity of the seed coat.
What is a scheduled inspection
Stratification is a process that lasts throughout the winter period. Every 10 days, seeds must be checked for rotting and those that have died must be removed. During a routine check, monitor the humidity; if there is a lack of it, sand or peat is watered from above with water at room temperature (100 grams of water per 1 sq. m. of seeds). You need to monitor the storage process until the first sprouts appear. Before direct sowing, a control check of the seeds is carried out, their careful screening: swollen sprouts that have hatched well should be planted separately from sandy loam, and those that are smaller than average in size are best planted in the ground along with sand and peat, where they underwent stratification.
Basic methods of artificial scarification of seeds
A sharp change in low and high temperatures. We all know that when temperatures change, materials experience compression and expansion. If such a process is done abruptly and repeated several times, then the integrity of the shell can be damaged, which is what we need.
In practice it looks like this. The seeds are placed in a bag made of loose fabric (gauze, bandage) and dipped in boiling water for a few seconds (no more than 30), then immediately into a container filled with a mixture of water and ice. Having done such cycles 3-5 times, the seeds are examined. If damage to the shell is noticeable on some of them, they are put aside, and the diving procedure is continued with the remaining ones. The main thing here is to be careful and not overdo it. If the shell has already opened and you put the seed in boiling water, it may die.
Exposure to chemicals. It is known that the seeds of many plants are eaten by animals and birds, but even if they are in their digestive tract, they are not digested due to their hard shell and end up back into nature. But at the same time they were exposed to digestive juices, or simply acids. Even short-term exposure to them can break the hermetic shell. How to do this in practice?
Pour 3% hydrochloric or sulfuric acid into a glass container (bowl, wide glass). (Be careful and wear rubber gloves, or better yet, safety glasses). The seeds are carefully immersed in acid and kept for no more than 12 hours (as in the stomach of animals).
Then the seeds are also carefully removed and washed thoroughly in running water to remove all remaining acid. This method is good, but it requires skills in handling chemicals and accuracy, which means it is not suitable for everyone. But the following method of artificial scarification of seeds is quite accessible to everyone.
Mechanical destruction of the shell. No, this is not about a hammer, as you might think, although in skillful hands, it can also become the same scarifier. Everything needs to be done carefully, too, and it is not necessary (not even advisable) to make a hole in the shell. It is only necessary to thin it, making the penetration of water into the seed possible and rapid.
In practice, there are several options, and they depend on the size of the seeds themselves. Large seeds can be rubbed on a file, sandpaper or even a nail file, scratched with an awl or needle, or scraped a little with a sharp knife or scalpel. In the industrial production of plants and seeds, special machines are used - seed scarifiers.
But what about the small ones? You can’t hold them in your fingers to work on sandpaper. But you can try to rub it a little in the sand, pouring it into a tight bag or jar. The seeds with sand in the bag are simply crushed on the table, and when poured into a jar, they are shaken.
To scarify, large seeds can be rubbed on a file, sandpaper or even a nail file.
Types of stratification
Currently, the following types of stratification exist.
Depending on the method of seed preparation:
- cold stratification (seed treatment at low temperatures);
- warm or hot stratification (preparing seeds under elevated temperature conditions);
- combined processing (use of cold and warm methods in a certain order);
- stepwise preparation of seeds for germination (using treatment with low and high temperatures several times);
Depending on the timing:
- autumn (carried out when it is necessary to prepare seeds for a long time, for example, fruit and coniferous trees);
- winter (used when it is necessary to use a combined preparation method for plants such as iris, clematis, lavender, as well as before planting indoor flowers of various types);
- spring (used for vegetable crops and unpretentious flowers, for example, when propagating primrose, aquilegia or delphinium).
Important nuances of artificial scarification
Whatever method of seed scarification you choose, there are some nuances common to absolutely all methods:
- There is no need to completely destroy the shell, just damage it, and then the water will find its way to the seed, and together they will finish their job.
- Purchased seeds, as a rule, have undergone the necessary scarification procedure and this is indicated on the packaging.
- If you collected the seeds yourself, then before exposing the seeds to any influence, study - is this necessary, will it help speed up their germination? Do these seeds need simple scarification or will it not help, but do they also need a long process of stratification (treatment with cold and humidity)?
These are the methods people have come up with to speed up the process of seed germination. Everyone is in a hurry to get somewhere... Everyone wants to outwit Nature... Although Nature itself suggested these methods.
What is stratification
All those who like to grow various plants are familiar with the situation when a seed planted in the ground lies for months and does not sprout. To understand the reason for this lack of germination, you need to pay attention to plants in the wild. This is especially true for plants from regions with pronounced seasonality. After the seeds or fruits ripen, the cold season begins.
During this period, a period of dormancy begins for plants and their seeds. It continues throughout autumn, winter and part of spring. All this time, the seeds, which are at rest, are exposed to low temperatures for 6 - 7 months. Most often, the seeds of many perennial crops ripen in the summer and weather conditions allow them to germinate immediately. However, with such germination, the plants will die with the onset of cold weather. Therefore, the seeds are in a state of sleep. This is how nature protected the plants from premature germination and further death of the seedlings.
After the end of winter, and as the weather warms up and the earth warms up, the seeds awaken and begin to grow. Sometimes seeds are in such a deep state of dormancy that in order to germinate they need to survive two winters, and only after that do they acquire the ability to emerge from the dormant state and produce vigorous shoots. In addition, the shell of many seeds is so hard that the seedling cannot break through it, and under the influence of cold and water it softens, microcracks appear on it, this makes the shell softer and more pliable.
Also, under the natural influence of low temperature, the chemical composition of the tissues surrounding the embryo changes, and the amount of substances - inhibitors that retard growth - decreases, the content of growth stimulants increases, and this also gives impetus to development. When cultivating plants, it is not always possible to wait 12 months, after which one can hope for seedlings to appear, so there is a need to shorten the dormant period of seeds.
This can be done using artificial imitation of weather conditions. The process of creating conditions close to natural, with keeping seeds at low and sometimes at elevated temperatures, is usually called seed stratification. The purpose of this process is to speed up the emergence of seeds from the dormant state and provoke their germination. Seeds that have undergone stratification, as a rule, produce more friendly and healthy seedlings.
If you refuse this technique, seeds that were stored at normal room temperature may either not sprout at all or sprout in extremely small quantities. And although the general principle of stratification is placing seed material in low temperature conditions, there are several varieties of this agricultural technique.