Life cycle of a plant in September, October and November
Reference. For this plant, autumn is a transitional period. Despite the fact that at this time orchids are preparing for winter, some of them still bloom.
In September, the sun is no longer as hot as in summer, so the flowers that were placed on the balcony or in the garden during this period should be returned home. After this, the plants must be carefully inspected for pests , otherwise one flower may later infect the others.
Also, starting from this month, the amount of fertilizer applied is gradually reduced. The temperature at night is also reduced from 14 to 24 degrees, depending on the variety. In this way, the orchid is prepared for winter.
In October, some species of this plant prepare for the flowering period, while others “fall asleep” for the winter, partially shedding their foliage. There is no need to worry about such changes - you should simply examine the orchid and, if no other signs of disease are found, then leave the flower to overwinter.
In November, these flowers least of all need feeding and watering. There are exceptions, such as phalaenopsis - care for this species is the same as at other times of the year, because they do not have a rest period. But in any case, it is necessary to take into account the heating systems that are turned on at this time - now the orchids need more intensive watering.
Due to the short daylight hours, you should also additionally install special lamps for orchids so that they do not suffer from a lack of light.
In what cases is a transplant necessary?
In some situations, the benefits of replanting outweigh the possible harm to the plant. If the phalaenopsis needs urgent help, you need to place it in a new pot, regardless of the risks.
Disease or infection by ticks
If a plant is affected by a disease, human intervention cannot be avoided. You need to do this:
- Remove the orchid from the contaminated soil.
- Treat the root system with the necessary preparations.
- Pour boiling water over the pot twice to disinfect it.
- Pour new soil into the container and plant the phalaenopsis.
Container tightness
When the root system grows, it completely fills the pot with soil. If the roots come to the surface, you need to purchase a larger pot and replant the plant. It is advisable to plan a transplant in the spring, when daylight hours lengthen.
Poor quality substrate
Important! After some time, the soil in which the phalaenopsis is planted may deteriorate - it may turn sour from excessive watering or become infertile, giving up all the nutrients to the flower.
In this case, you will have to completely replace the soil.
Over-watering and root rotting
If the watering regime is violated, the soil does not have time to dry out and turns sour. If greenish mold appears on the surface of the substrate, you cannot leave the flower in it. During transplantation, it is necessary to study the condition of the orchid's root system and remove rotten parts.
Leaves turn yellow and dry
Leaf blades may wilt due to lack of soil or deficiency of nutrients. You can add soil on top if there is room, or buy a larger pot, transfer the phalaenopsis into it and add soil to the sides.
The volume of foliage significantly exceeds the size of the pot
The rapid growth of green mass indicates that the orchid is being properly cared for.
But if the container in which the phalaenopsis is planted is very large, an active increase in the volume of the root system and leaves can occur to the detriment of flowering. The situation will be corrected by transferring the flower to a smaller pot.
Is it possible to transplant at this time of year?
The optimal time to transplant a flower is during its dormant period. It usually falls in September-October in autumn and April in spring.
In autumn, the orchid becomes “sleepy” and for a more comfortable winter it will need fresh substrate. In spring, on the contrary, it will be a good help, because the plant takes substances useful for itself from it.
Important! Sometimes replanting an orchid during the flowering period has a beneficial effect on the plant. This condition is strictly individual for each flower.
At what time of year and period is it better to transplant an orchid into a pot at home, you can find out here, and in this article we talked about whether it is possible to replant a plant if it has sprung.
Transplant methods
Representatives of orchids can grow in substrate or without soil. Which option to choose is determined by their type and growing conditions that can be provided.
Important! The soilless method is only suitable for epiphytic orchids that receive minerals and moisture from the air.
In the substrate
A container with drainage and soil is the most common and simplest option. Air humidity for this method is not as critical as with soilless cultivation, which greatly simplifies care.
The substrate can either be purchased or prepared independently from natural materials.
Advice! If the old soil was not infested with parasites, it is good to throw a few pinches of it into the new one. This way the orchid quickly adapts to unfamiliar conditions.
Without soil
This option should be used in greenhouses, florariums, greenhouses - where high humidity can be maintained. For soilless planting, natural durable materials are used - pieces of pine or oak bark, grapevine.
Pine bark is the most affordable option, which you can not buy, but find in a forest or park. The found bark should be washed and treated with boiling water to get rid of possible pathogens.
Which method should I choose?
- Along with the common method of transplanting an orchid into another pot, there is another one - planting on a block. In this case, the roots are tied to the block using a thin fishing line. To prevent them from drying out less, moss is used to cover the roots and also cover the block itself.
- The second method is closer to the natural conditions in which orchids grow in the wild. Just for the plant to feel comfortable, it is necessary to provide it with the usual tropical humidity. Therefore, if it was a good decision to move the flower to the block, then it will need to be kept in greenhouses with high humidity.
- It is also necessary to highlight the transshipment method. In this case, the orchid is transplanted into a new pot with old soil, adding fresh soil only around the edges. This method is the least traumatic for the plant and is suitable if you only need to increase the volume of the pot without refreshing the substrate.
- For apartments, the usual replanting or transferring into a pot is more suitable, which will protect the orchid roots from drying out. The flowerpot itself prevents the rapid drying out of the root system, making it gradual, but keeping the flower on a block does not provide such protection - the roots dry out very quickly at normal humidity in the apartment.
How can you grow a flower?
Orchids can be grown not only in classic flower pots. These plants can also be planted in rather original planting containers.
In a pot
Traditionally, all beginners plant phalaenopsis in ordinary flower pots.
- Choose transparent containers with holes in the bottom and sides. If you couldn't find a transparent pot with ready-made drainage holes, you can make them yourself using a burner or soldering iron (but not a knife or scissors).
- All orchids need holes because they require constant air exchange and removal of excess moisture. In addition, these conditions provide additional protection against the development of fungi and bacterial infections.
- Moisture-loving varieties of orchids can easily get by with drainage holes in the lower third of the planting container.
- It would be good if the planting container had small legs. This slight rise will provide an additional layer of air.
- The size of the pot should correspond to the size of the root system. The pot should not be too big, but containers that are too small will not work either.
In a driftwood
For many, it is a discovery that epiphytes (to which orchids belong) can be grown in driftwood and woody elements. Since in the wild, phalaenopsis often grows from tree roots or attaches to other types of flora, growing a home orchid in natural or decorative driftwood can be a completely reasonable decision:
- Attach the orchid to natural or decorative driftwood, and secure the roots to a special stand attached to the driftwood.
- Wrap the rhizome with sphagnum, separate it and secure it. Sphagnum moss will need moisture from time to time, so provide it.
- Before fixing the orchid on a snag, it is given 10-14 days to adapt to the new substrate in a shaded place. Only after this is the plant fixed in its main place for further residence.
- Once every 14 days, the flower along with the stand must be detached from the driftwood and immersed in warm water for 9-10 minutes. If necessary, fertilize the water with fertilizers in a small concentration.
- After a warm “shower”, allow excess moisture to drain from the plant, and then return it to its original place.
In capsules
This planting option is only suitable for already cut flowers. It helps keep them fresh for a longer period. Typically, such orchids are sold in stores in ready-made capsules. The installation looks like an orchid flower immersed in a special solution.
See also: Favorable days for planting honeysuckle in the fall in 2020 according to the lunar calendar
It is better, of course, after transportation to move the phalaenopsis into clean water, after carefully removing the flower from the store capsule.
On the block
It is believed that planting on a block is closest to natural methods of growing orchids. In tropical forests, phalaenopsis clings to the bark of trees and develops on it.
This planting method is more suitable for growing phalaenopsis in greenhouses or the tropics. There it is much easier to maintain the high level of humidity that orchids need.
In apartments or private houses, it is most often not possible to create a high degree of humidity, so the plants begin to get sick and require daily spraying (and in hot weather, repeated daily spraying).
Planting a plant on a block is quite simple:
- A piece of cork oak, Amur velvet or pine bark is selected (but this is an extreme case).
- Phalaenopsis is attached to this piece using special brackets. Attach carefully so as not to damage the plant.
- As soon as the flower takes root and grows its roots into the bark, you can remove the garter. Under no circumstances should you pin sphagnum moss under an orchid rosette - this will lead to stagnation of liquid and rotting of the roots.
- Place moss only in those areas where the roots are located or in the direction of their growth.
Selection of pot and soil
In order for the flower to grow well after transplantation, you need to choose the right substrate and pot.
There are now many different pots that can be suitable for orchids, but any of them must meet certain requirements that ensure:
- Outflow of moisture so that the roots do not rot.
- Air circulation inside the pot.
- Safely remove rhizomes that sometimes extend beyond the pot.
- Optimal temperature conditions.
An orchid does not require large flowerpots, the main thing is that they are made to suit the needs of this flower. To do this, the pot must have holes for drainage, the height of the container must be equal to the width of the neck, and the volume must be suitable for the root system (it must fit freely in it). Also, the pot should be transparent, because the roots of the orchid are actively involved in photosynthesis.
Recommendation. It is better to avoid glass pots because glass can injure the plant.
The soil must also meet the needs, so it is better to purchase it in flower shops. If you want to make it yourself, then you need to familiarize yourself with the composition:
- Pine bark.
- Sphagnum moss.
- Fern root.
- Charcoal.
- Broken nut shell.
- Expanded clay.
Substrate from the store must be disinfected (boiled) and sifted.
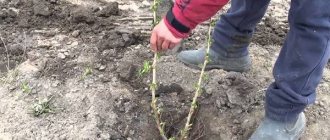
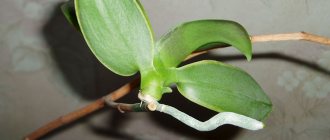
Transplanting baby orchids
Reproduction of the flower occurs by separating the children from the stem. When their roots reach 3-5 cm, the shoots can be separated from the main plant at the point of their connection with the stem. If children grow on a peduncle, you need to cut it off along with a small part of it. The cut areas are treated with charcoal or activated carbon powder.
The optimal substrate for children is with a fine fraction. Pine bark or coconut fibers about 1 cm in size are suitable. A mixture of bark and coconut shells can be used.
Children are planted in the same way as mature flowers. But a glass or small pot is used as a container.
Step-by-step instructions for doing it at home
When all this is prepared, you can proceed to replanting. It is important not to rush anywhere and do everything carefully so as not to harm the plant.
Removal from pot
You should first knead the pot so that you can easily remove the flower. If the contents have completely dried out (this happens if you start an orchid), then you need to lower the pot into warm water for an hour. After this, getting the plant will not be difficult.
You can also cut the pot if the roots have grown excessively to the walls. This should be done carefully so as not to damage them.
Flushing
After removing the root ball, you need to straighten it with your hands. This will remove lumps of substrate. Next, you can rinse the intertwined roots under warm water to remove any remaining soil.
Trimming roots and leaves
After the plant is cleaned, dead root elements should be removed. This is done with sharp scissors or a knife. Only bad roots need to be removed - hollow, limp, rotten. The same must be done with dying leaves. The cut areas are treated with charcoal.
Important! If pests are found on the roots, the orchid must be left for an hour in a bucket of water - the parasites will quickly die.
We talked in detail about how to trim the roots of an orchid when replanting and avoid damage to the flower here.
Preparing the container
A transparent pot with holes for ventilation is filled one quarter with substrate. The bottom is paved with drainage material (pebbles, expanded clay). This is necessary to ensure that the roots of the flower are not damaged by excess moisture.
Read more about how to choose a pot for replanting an orchid at home in our article.
Placement in a new “home”
Before placing the plant in a new container, you need to dry it. To do this, you just need to leave the orchid at room temperature without soil and water for two hours.
After this, you should carefully place the flower in a new pot. Next, gradually add the substrate, distributing it with a thin stick so that there is no free space between the roots. To make the soil more dense, you should knock on the walls of the pot.
Under no circumstances should you press or try to push more substrate into the pot. This can easily damage the orchid roots.
If some rhizomes are too long and do not fit into the pot, then it is better to leave them outside. Thus, the orchid will use them to collect additional moisture from the air.
First watering
After transplantation, the orchid needs rest , so it is not recommended to water it in the first five days. This break is also due to the fact that the plant needs time to heal the wounds from the cuts that were obtained when removing outdated material. Instead of watering, you should spray the leaves so that the flower does not begin to dry out.
Reference. Fertilizers need to be applied only 3-4 weeks after transplantation.
How different types of plants are planted
Since there are several varieties of orchids intended for growing at home, they should also be planted differently.
Phalaenopsis and Vanda
When planting these types of orchids, follow these rules:
- Pay special attention to the planting container. Since these plants belong to epiphytes, they need to be grown in transparent containers. The best option here would be a plastic flower pot.
- Since these flowers grow in width, they should be provided with a wide planting container. Phalaenopsis must have enough space for the root system and air exchange.
- Be sure to make drainage holes before planting. Each should be about 8mm in diameter. Drainage holes must be made both at the bottom of the pot and on the side walls. This will help ensure normal ventilation for the root system of the flower.
- Moisten the soil evenly. If the top layer of soil has dried out and the roots are still waterlogged, the risk of root rot increases. Waterlogged soil is also a fertile environment for the development of fungi and infections.
- Before filling the container with soil, place a drainage layer on the bottom. Pebbles or crushed stone can be used as drainage. In the central part of the planting container, foam is used as drainage (this helps to avoid waterlogging of the roots). The soil mixture is poured on top of the polystyrene foam (choose medium-sized foam blocks).
- Fill the pot so that there are empty spaces between the pieces of soil. This provides orchids with normal breathability.
- When planting, plant the plant so that its roots are completely immersed in the soil mixture, and the base is slightly raised above the surface of the substrate.
See also: Planting rhubarb in 2021: favorable days according to the lunar calendar
Moisture-loving
These include:
- miltonia;
- Masdevallia;
- oncidium;
- bulbophyllum.
They all love moisture (this is their source of vitality), but do not tolerate its stagnation (such a paradox), so you need to plant such varieties with extreme care:
- Stagnation of liquid in the soil can only be avoided by providing the plant with an adequate drainage system. This means that approximately half of the planting container should be filled with large pieces of soil. In the center of this entire structure is drainage foam.
- The layer of soil mixture should not be too thick. It is enough to fill it to 10 cm (for some species, 3 cm is enough).
- The orchid is placed in the ground so that the base is completely covered.
- A thin layer of moss is laid out along the edges of the planting container.
Sympodial
These species require a slightly different approach when planting compared to the previous ones. One of the representatives of this species group is Cattleya. Their root system grows horizontally, so it is important to immediately provide the plant with a sufficient amount of space in the planting container:
- It is best to choose a container in the form of a bowl or basket for planting.
- Place a layer of drainage on the bottom of the container.
- The soil used is a mixture of pine bark, pine cones and cork material.
- The plant is planted at the edge of the container so that its side shoots form and develop correctly.
Possible problems and difficulties
During the transplant process, due to inexperience, you can make a mistake that will greatly undermine the health of the orchid. Here are the most common ones:
- Wrong choice of pot.
- Poor quality substrate or incorrectly prepared.
- Unclear adherence to transplant instructions.
- Replanting during flowering is not particularly necessary.
A problem may arise if you replant an orchid after purchase without removing the sphagnum - in this case, the roots rot and die.
If everything is done correctly, then there will be no negative consequences for the flower.
Is it possible to replant a plant during flowering?
Reference. Beginning gardeners are usually afraid to move flowering orchids to a new pot. But experts say that to replant such a plant, you just need to try to minimize damage to the root system and shorten the flower stalks by 2 cm in length.
It is important to understand that flowering is a huge burden for any representative of the flora. Transplantation itself can put an orchid into a state of stress, and when all the energy and nutrients are spent on the formation of a bud, this becomes a critical moment for the plant.
Aftercare
After transplantation, the plant needs special care: partial shade and no watering. In such conditions, the orchid should spend 3-4 days, during which it adapts to the new pot. At this time, it is necessary to closely monitor her condition.
If the plant does not grow for a long time after transplantation, then the air humidity should be increased, bringing the conditions closer to natural for it. This is done simply - the pot along with the flower is placed in a plastic bag. The air is humidified using a sprayer, but without water droplets falling on the plant itself. During the spraying process, ventilation also occurs. Keep the orchid in this state until it begins to grow.
By fulfilling all the conditions for replanting, you can avoid many problems that often lead to the death of the plant. Therefore, it is very important to be careful and attentive - the more careful the transplantation process is, the less stress the orchid will receive.
Plant care
After transplanting an orchid, it is important to properly care for it, following the following recommendations::
- Move the pot to the shade and protect the flower as much as possible from direct sunlight (8-10 days).
- The temperature in the room where the orchid is located should not exceed 20 degrees.
- The first moistening should be carried out 5 days after transplantation. Before watering, the water must be boiled. Then immerse the orchid pot in water for 30 minutes. The next moisturizing should be carried out no earlier than after 2 weeks. The leaves can also be irrigated with warm purified water.
- After 30 days, you can fertilize using mineral and organic compounds that contain potassium, magnesium, and nitrogen. Next time, use the fertilizer after 20 days.
- After transplantation, the orchid may become sick.
The growth of the plant’s root system is also inhibited. Experienced gardeners recommend not replanting the plant too often. It is enough to do this once every 2-3 years.
Orchid transplantation is a complex and responsible process . If all the work was done correctly and efficiently, then the orchid will receive minimal stress. In addition, it will even be able to bloom in just a few weeks and delight others with its beauty and healthy appearance.
If you find an error, please select a piece of text and press Ctrl+Enter.
Replanting an orchid after purchase. Signs of need
As a rule, an orchid goes on sale in the flowering phase.
It is transported in a transparent plastic pot, in which it can grow for more than one year without replanting.
It is better to place the transport pot in a decorative orchid pot, translucent or matte. It will fit perfectly into the interior of your home.
Attention! Transplanting a phalaenopsis at the wrong time or during flowering is very stressful for it, can harm the plant and even lead to death. It is important to follow the rules when replanting an orchid.
In some cases, an orchid needs care and replanting after purchase, or adjustment of the substrate:
- The orchid is wobbly and does not stand on its own. The reasons for this may be different: One-sided development of leaves and the exit of the leaf blade outside the pot;
- Strong deviation of the peduncle, causing the pot to turn over;
- Insufficient amount of substrate in the flowerpot.
The orchid wobbles and does not stand on its own - it needs a transplant.
To correct these small defects, you can replant after purchase, or you can use other methods:
- The plant can be placed in a heavy glass pot,
- Strengthen the support for the peduncle,
- Or add soil.
So, replanting a phalaenopsis orchid after purchase: how and when you can:
- The pot was damaged during transportation. In this case, the phalaenopsis can be replanted, but it is better to place the plastic pot in a beautiful orchid pot;
- The orchid was purchased at a sale and was not properly cared for. Rotten roots will be visible through the transparent flowerpot of the phalaenopsis - the first sign of waterlogging. In this case, the plant must be transplanted into a new substrate;
- The soil is of poor quality. The soil in which orchids are usually sold often consists of peat with various additives. It vaguely resembles a standard orchid substrate.
This happens because in industrial cultivation an automatic system is used, which takes into account a number of parameters (pot size, humidity and ambient temperature).
They satisfy the needs of the plant at any time of the year.
During indoor cultivation, excessive moisture content of the substrate creates problems.
This indoor flower needs immediate replanting:
- After purchasing a plant in a pot filled with sphagnum moss, the moss is immediately removed, regardless of whether there will be a transplant or not. The vacated volume is filled with a substrate suitable for phalaenopsis;
- If pieces of bark are mixed with peat, the plant must be replanted. Peat is a very moisture-intensive substrate, which can ultimately lead to waterlogging of the roots.
The roots in the peat substrate are waterlogged and rot.
Timely and correct replanting of an orchid will allow you to preserve the plant, which will delight you for many years.
When to replant
Houseplants should be replanted in accordance with the natural cycle. With the arrival of spring, their dormant period ends. Orchids gradually enter a phase of active growth - the growing season. This process makes it possible to painlessly relocate indoor flowers, without fear of losing or delaying luxurious flowering.
How to transplant gloxinia - step-by-step instructions at home
The need for phalaenopsis and arboretum orchids to replace soil averages once every 2–3 years. The period depends on the quality of the soil mixture. The substrate, which consists mainly of moss, is depleted faster. In this case, the orchid is replanted after 1.5–2 years. The bark contains significantly more nutrients, so the shelf life of such soil can be extended to 3 years.
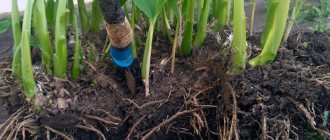
The signal for a change of “place of residence” is provided by aerial roots that seek support, rising above the container. The roots of an orchid huddled in a cramped container do not receive the required amount of nutrients.
Note! Such a plant looks depressed: the leaves become flabby and dark spots appear on them. Such a plant is unlikely to bloom.
Transplantation in winter
As daylight hours shorten, metabolic processes in any plants gradually slow down. The flower enters the resting phase. It is not advisable to disturb the plant during this period. It should be replanted between November and March only in emergency cases.
The color of the roots of a healthy orchid is light green. If the color has changed, turned gray or brown, or some of the roots have noticeably dried out, this means that the plant needs to have its roots examined and possibly treated.
There are often cases when pests of indoor plants settle in a pot or spores of a fungal disease develop. Treating only the above-ground part of the plant with medicine is not enough. To get rid of pests, you need to do this:
- The flower is removed from the planting container.
- Inspect the roots, cut off the rotten, diseased and dried roots.
- The plant is treated with a fungicide or insecticide, depending on the lesion.
- The sections are disinfected (phytosporin, foundationol), the sections are powdered with crushed charcoal.
- The flower pot is disinfected and the drainage is changed if necessary.
- The soil for planting is replaced with a new one.
Dendrobium orchid
Replanting after purchase
For the first time, a flower is replanted after purchase. Transport containers for plants are too compact and are designed for short-term storage. Roots in containers quickly displace soil and grow through drainage holes.
For adult large plants, disposable containers are dangerous due to their instability. They can easily turn over, break the peduncle or damage the rosette with leaves.
Note! If you buy an orchid, you should also purchase a container that fits the size of the root system. Transplantation, if possible, is carried out in the spring or in the first half of summer.
Transplanting a blooming orchid
You should not replant a blooming beauty without good reason. At the moment of flowering, all the plant’s energy goes into feeding the flowers, so careless injury to the root system can result in a long-term illness and even death of the flower.
Replanting a flowering plant is justified only in the following cases:
- disease damage (phyllosticosis, leaf deformation);
- spread of pests (mites, thrips, scale insects, nematodes, bedbugs)
- Root rotting due to stagnation of moisture.
In case of emergency transfer:
- Peduncles are shortened by 2–3 cm.
- To reduce the risk of damaging the roots, the plant and pot are soaked in warm water for half an hour. You can use a bucket or a tall basin; the water should cover the container with the roots by 2/3 of its height.
- If the roots fill the plastic pot, carefully break it and remove it, being careful not to damage the roots.
- The roots are inspected, pruned if necessary, and the sections are disinfected.
- If the reason for the transplant is a disease or pests, the rhizome can be kept in a bath with a solution of the necessary drug, and the leaves and peduncles can be treated with a spray bottle.
The plant must be planted in clean soil, having previously treated the planting container.
Sanitary pruning