Seed propagation is the most difficult and requires certain skills. It is used when they want to develop a new variety. Collected and sown seeds rarely reproduce the properties of the mother plant. Therefore, before growing gladioli from seeds, you need to think a hundred times whether you need it. In addition, as a rule, hybrid varieties (and they are now mostly grown) do not set seeds. But if the idea has arisen to get your own variety, then, first of all, it is necessary to artificially pollinate the gladiolus. This work requires skill and is quite delicate, one might even say jewelry-like.
This procedure is carried out for different purposes:
- if you want to get a plant with early flowering;
- get offspring with flowers of unusual colors or shapes.
Getting ready for landing
You can grow the future beauty and pride of your garden in 3 ways:
- Seedlings on the windowsill
- Planting in open ground
- By seeds or dividing the bulb
Seedling
Sufficient lighting at all times is necessary. If there are already seedlings of other crops on the windowsills, then the children may not have enough light, and then the sprout will be weak and pathetic.
The second difficulty is that it is not advisable to grow gladiolus for seedlings in common boxes. When transplanting into the ground, you will have to separate the roots, and this, in turn, will weaken the plant, and it will take longer to take root and get sick.
https://youtube.com/watch?v=Bb9XIz7jjv0
Planting in open ground
This option is best suited for the propagation and development of garden fence!
Adult bulbs and young overwintered bulbs are planted when the soil warms up to +10* and the threat of frost has passed. Approximately from mid-April to mid-May. To plant the bulbs, you need to prepare them!
10-15 days before instillation, it is recommended to clear them of scales. For what?
- This will speed up shoot germination by about 7-10 days.
- Will allow you to cull bulbous babies that did not survive the winter.
- Freed from the shell, the tubers will be able to absorb nutrients in full.
- If pests are hidden under the crust, then we won’t give them a chance to get into the planting beds!
The selected bulbs should be given a daily bath in a solution of potassium permanganate: 2 g per 10 liters. warm water.
By the time of planting, the children should have 2-3 root tubercles - the key to a healthy and powerful plant. The more such tubercles, the better.
When planting in open ground, we will treat our bulbs again. This time - karbofos.
It would be a good idea to shed the earthen grooves with an aqueous solution of chicken droppings.
Children should be planted in soil that has been properly prepared since autumn according to the following scheme:
- the distance between the tubers is at least 7 cm;
- planting depth – 3-5 cm (large ones can be planted deeper – up to 7 cm);
- the distance between rows is at least 20 cm.
After planting, the soil is mulched with 2-3 cm of humus.
All that remains is to cover the plantings with non-woven material or greenhouse film to obtain friendly shoots and to protect them from suddenly returning frosts.
The first feeding is 30 days after the first leaves appear.
Seeds or bulb division
Over time, the mother bulbs of gladioli grow, become large, flat and “lazy” - they produce fewer children and drive out weak flowers. Some gardeners recommend cutting such an onion, smearing it with green or cinnamon, and planting the rejuvenated “madame” again in the spring. But such an experiment could end in complete fiasco. It’s better to collect tubers from it and plant them.
But if you wish, sow the seeds in February in soil made from leaf humus + 30% coarse sand (preferably river sand). Soak the seeds for 3-4 hours in Kornevin or sodium humate. It is necessary to sow in such a container that it can be buried in the garden bed along with the seedlings - the roots must not be damaged under any circumstances. Feed more often and expect corms to appear in the fall.
You will be able to find out what you did in 2 years.
https://youtube.com/watch?v=CmVXRhtbjEU
Preparing the bulb for seedlings
To prepare the bulbs for spring planting, you need to carefully inspect them. For planting in a flower bed, it is advisable to use only healthy and undamaged specimens. You need to check the planting material especially carefully for the presence of rot and plaque. Such bulbs will lead to the development of diseases.
If it’s a pity to throw away damaged tubers, they can be made healthier. To do this, it is recommended to remove the affected areas with a sharp knife and then place them in a light pink solution of potassium permanganate. The sections are treated with Fundazol or brilliant green and sprinkled with ash.
There is no need to rush to plant such material, as it can hardly withstand the effects of low temperatures. Treated bulbs should not be planted in a flowerbed, but in a separate bed.
It is also recommended to plant children separately from other plants. This improves their development and does not create competition with strong adult crops for lighting, moisture and nutrients from the soil.
After selecting healthy bulbs, they need to be prepared for planting. This is done in several stages:
- Calibration Healthy bulbs of each variety are sorted by size. The planting pattern and depth depend on this.
- Cleansing from covering husks. This procedure is performed as carefully as possible. In some situations, bulbs begin to sprout even in the refrigerator, so it is very important not to injure the sprouts.
- Disinfection. To do this, the bulbs are placed in a light pink solution of potassium permanganate for 20-30 minutes. They must be placed in different containers. It is not recommended to mix different varieties at this stage.
- Soaking in boric acid. This step requires a solution with a concentration of 0.2%. The planting material needs to be soaked for 48 hours. This contributes to his recovery. Thanks to the procedure, it is possible to obtain tall stems and large flowers.
- Germination. The bulbs are placed in boxes with a mixture of humus, turf soil, peat and sand. These components should be taken in equal parts. To speed up the germination process, superphosphate, wood ash, and bone meal are added. Before the sprouts appear, the boxes are moved to a room with a temperature of +18 degrees.
Experts who breed gladioli have different opinions regarding their preparation for planting in the spring. Some gardeners claim that germination helps to weed out non-viable material and achieve earlier flowering.
Other gardeners believe that it is quite difficult to replant a sprouted plant without damaging the thin roots. Therefore, it is recommended to germinate the bulbs by laying them out in one layer on a table or other flat surface. The temperature should be +17-18 degrees.
At the same time, by the time of planting, the height of the arrows should be 3-5 cm. It is important that the root tubercles are swollen, and the roots themselves are still absent. It is not recommended to moisten the tubers, use growth stimulants or spray them with water.
Choosing the optimal planting method can only be done experimentally. The first method allows you to get earlier and more friendly flowering. It is best used when there are a large number of bulbs. The second method helps reduce bulb culling. However, in this case, a lot depends on the grower.
Description of gladioli seeds
Gladiolus fruits have the appearance of a membranous box. Its upper part is slightly cracked. Inside the box there will always be winged type seeds. On average, their number reaches 250 pieces. The seed material of the gladiolus flower does not have physiological dormancy. Therefore, they can be planted immediately after collection. As a result, after a few weeks they will begin to germinate.
Important! It is necessary to store gladioli seeds in a room where there is a fairly high level of humidity. In a dry environment, seed material may lose the ability to germinate
Most gardeners, even experienced ones, cannot answer the question of what gladioli seeds might look like. Every person knows the description of a flower bulb, but certain difficulties arise with the appearance of the seed material.
The main characteristics of seeds include:
- shape - flat;
- Brown color;
- size - about 2 mm.
Planting
When planting gladioli, the depth of the bulbs is important. If you plan to plant large bulbs on light soils, then a depth of eight centimeters will be sufficient. If buds are planted - five centimeters. In addition, you should do this a week earlier. On loams, planting should be done a couple of centimeters higher. After completing the work, you need to sprinkle the planting areas with peat.
Deepening of planting material provokes late flowering. The bulbs grow very large with a small number of buds. The bulbs can also become infected with various diseases.
Subtleties of plant care
As already mentioned, gladioli are delicate plants that require some care.
Diseases
Gladioli have many different types of diseases:
- Fusarium. A common fungal disease that causes plant death. It can occur during storage of the bulbs if they are heavily infected. If the disease is poorly developed, it may not appear outwardly, but seedlings may not appear. When the disease appears late, yellow stripes appear on the leaves of gladioli and they quickly dry out.
- Heart rot. A common fungal disease. When it is infected, brown spots appear on the leaves and they quickly disappear. Wet stains form on the flowers. Heart rot spreads during harvesting in wet weather. It can also be provoked by storage in very humid areas.
- Less common are diseases such as sclerotinia, hard rot, bacterial scab, and yellow scab.
Pests
Gladioli are an attractive treat for some pests. These include spider mites and thrips.
In order to get rid of spider mites, plants are sprayed with compounds containing sulfur and phosphorus. Measures to prevent thrips infection include treating the bulbs with karbofos. They are placed in a solution of karbofos (0.4%) for half an hour, dried and stored in the refrigerator. The same is done before disembarkation.
Watering
Soil moisture is also very important, as for most plants, including nemesia flowers, described in the article https://2gazon.ru/ozelenenie/cvety/nemeziya-iz-semyan.html. Watering must be done regularly
This promotes good development of the root system and proper formation of inflorescences.
Flower propagation methods
Seeds
Seed propagation is used only for breeding purposes to develop a new variety. Seeds are collected from evenly colored varieties, preferably red. Flowers should grow close to each other.
In early February, they are sown in boxes and placed in a greenhouse. Over time, bulbs up to one and a half centimeters in size grow from the seeds. You can also grow roses in a greenhouse - more about this in the article.
Plants obtained in this way do not retain varietal characteristics. Therefore, such cultivation of gladioli is not of interest to gardeners.
Bulbs
Flower bulbs for planting
Propagation by corms
Gladioli are propagated mainly by bulbs and buds. High-quality flowering of this plant is possible for five years. Then you need to replace them.
If you do this using an onion, you need to divide it into parts. Each of them should contain several buds. The cut areas should be treated with charcoal powder. The resulting material for seedlings needs to be dried and planting can be done.
Important! With this method, you can get up to four full-fledged plants from one bulb, and then the same number from each of them.
This method is especially suitable for those varieties that produce few buds (babies).
Reproduction by tubers
Propagation by buds is a simple and effective method of propagating gladioli. From them, plants are obtained that completely repeat all the varietal characteristics of the parent. On average, up to thirty buds appear on each bulb per season. Of these, the largest ones are chosen (10 - 20 millimeters).
They will develop quickly and bloom a year earlier than the smaller ones.
Seedling
You can propagate gladioli from seedlings, just like roses from a bouquet, the cultivation of which we described from cuttings here https://2gazon.ru/ozelenenie/cvety/rozy/vyrashhivanie-r/iz-cherenkov.html. And although this method is quite labor-intensive, it allows you to quickly breed very valuable plant varieties.
To do this, you need to cut a cutting of about fifteen centimeters, place it in water for roots to appear. Then plant it in a prepared box with sand. A full-fledged bulb develops from a rooted cutting.
How to grow gladioli from seeds
Growing gladioli from collected seeds
Gladioli seeds from autumn must be saved until February or March. Usually during this time they are planted in boxes or special containers.
IMPORTANT! For flower seedlings, it is necessary to provide good lighting (additional illumination with fluorescent lamps). If this is not possible, then it is better to sow gladioli later, in the middle or end of March.
It is advisable to carefully peel the seeds from the impeller (shell), then soak in humate (you can also use heteroauxin, root) for several hours. Heteroauxin is a “magic” drug that stimulates the growth of a healthy and strong root system of gladioli. Proportions:
- heteroauxin: 0.6 grams of the drug is diluted in a liter of water, the seeds are soaked for 6 hours;
- Kornevin: 1 gram diluted in a liter of water.
Prepare containers for seedlings and soil in advance. The best soil mixture will be mixed turf soil, humus and river sand. Some gardeners use ready-made soils, such as Violet, Torfolin, but it is also necessary to add washed and calcined river sand to them (2/3 soil and 1/3 sand).
After soaking, the seeds must be germinated until a sprout appears, after which they are sown in pots or boxes.
Further care is simple:
- soil moisture;
- careful loosening of the soil in the boxes.
In May or early June, when stable warm temperatures set in, the boxes with plants are taken out into the air. At first, the time the gladioli spend on the street is short, then the duration is increased. At first, they can be slightly covered from bright sunlight. It is also advisable to cover the plants at night, especially if it is cool at the beginning of summer.
Then they act based on the situation. Some gardeners leave gladioli in boxes or pots all summer, providing normal care. Others prefer to transplant plants into the ground, especially if there are free ridges on the site for this. Some gladioli can produce an ear in the first summer, but usually plants grown from seeds do not bloom in the first season. Gladiolus directs all its forces to the formation of bulbs. When sowing in February, by autumn you can get strong and healthy baby onions, which will need to be planted in the ground next year.
Gladioli seeds planting and care
Small bulbs are dug out from gladioli planted with seeds in the fall, carefully separating them from the stem. The timing of harvesting baby bulbs depends on the climate and weather conditions; this is usually done in September.
The collected children are treated in a solution of potassium permanganate, then dried and placed for the winter. You can store the babies in boxes or drawers, ensuring a temperature of about +4…+8ºC.
ON A NOTE! Seed material should be regularly inspected, removing damaged bulbs. If the babies are wet, they need to be dried.
In the spring, in April, the baby is taken out of storage, the scales are sorted out and removed from them. They are then soaked in any growth stimulant and then planted in prepared beds.
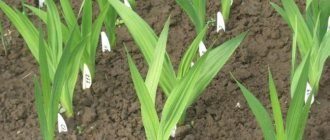
Gladioli are planted in May (in the northern regions - in early June), when the threat of recurrent cold snaps has passed. The children are small in size, so it is most convenient to plant them in furrows sprinkled with river sand. In such soil they get sick less and produce strong and high-quality plants.
The grooves are made up to 5 cm deep, they are spilled with a solution of potassium permanganate, sprinkled with sand and then gladioli bulbs are planted.
IMPORTANT! The distance between the children is 15 cm. The top of the onions is again sprinkled with sand and gently irrigated with water
The top of the onion is again sprinkled with sand and gently irrigated with water.
Subsequent care boils down to regular watering and loosening. After about a month, you can water the plants with a solution of boric acid. This drug helps strengthen gladioli and form high-quality bulbs.
If everything is done correctly, then in the second year the baby produces a peduncle. To obtain a full-fledged bulb in the fall, you should break off the arrow so that all the plant’s forces are directed to the growth and nutrition of the tuber. You can fully enjoy the flowering of gladioli grown from seeds in the second or third year. And who knows, you might be able to grow a completely unique hybrid of this royal flower that will delight you and those around you.
Selection of soil and location for gladioli
In shaded areas the culture does not develop well.
She has problems with flowering. Therefore, when choosing a place for planting, you should choose sunny places. This will ensure high-quality flowering and prevent the development of diseases. The causative agents of many pathologies develop well in wetlands. An illuminated place cannot be found in every area. Therefore, it is necessary to take into account that shading plants on the eastern side will delay flowering by 15-20 days. If the shadow is in the south, gladioli may not bloom at all.
With the constant presence of groundwater on the surface, plants experience oxygen deficiency. In such conditions, the beds are made higher. However, this method is not suitable for regions with hot weather.
To ensure that moisture from irrigation is consumed exclusively by gladioli, they are planted no closer than 3-5 meters to trees and other plantings. It is advisable that the flowerbed be protected from western and northern winds. Shrubs will help do this.
If an unsuccessful site for seedlings is chosen, gladioli will not bloom and form high-quality bulbs. As a result, next year it will not be possible to get full-fledged flowers, since there will be no high-quality planting material.
The choice and preparation of the soil is of no small importance. Gladioli love black soil. They can also be planted in loamy or sandy soil. Sandy, peaty and clay soils need improvement. It is recommended to add sand to peat, and peat to sandy soil. Clay soil is mixed with sand and peat.
Gladioli are suitable for soil that is characterized by a slightly acidic reaction. The pH level should be 5.5-6.5. Therefore, before planting bulbs, it is worth carrying out a soil study.
To do this, you need to take a glass of soil in 4-5 places on the site and submit it to the laboratory. It is recommended to do this analysis in the spring. Based on its results, it will be possible to determine the acidity of the soil and the amount of nutrients. If there is high acidity, chalk or quicklime should be added to the soil. Take 100-200 g of substance per 1 square meter.
The soil under the gladioli is dug up to the depth of the roots. This is done at 45-50 cm. All weeds are removed at the same time. If possible, legumes should be grown in this area the previous year before planting flowers. This helps improve the soil structure and protects against wireworms, which pose a great danger to gladioli.
In the fall, fertilizers with phosphorus and potassium are added to the soil. The amount of fertilizing is determined taking into account the results of soil testing and the selected crop nutrition system. Beginning flower growers can use nitrophoska. 30 g of the drug is used per 1 square meter. Chernozem does not require additional fertilization.
Zinnia - growing from seeds is accessible to everyone
The main method of propagation for an annual plant such as zinnia is growing from seeds. The process itself, as a rule, does not cause any particular difficulties, but one very important point should be taken into account - young seedlings cannot tolerate even slight frosts. Therefore, only in the southern regions of the country can you sow directly into the ground in April and not use covering materials.
But lovers of such a wonderful flower as zinnia have mastered growing it from seeds even in fairly cold regions. For this, greenhouses and modern covering materials are used, which give very good results. You can grow seedlings in boxes or pots in the house or on the balcony. Thus, it is possible to achieve longer flowering.
For a flower such as zinnia, seeds can be obtained mainly in the southern regions. But proper care and hot summers make it possible to achieve this result in the middle zone of our country. They mature approximately 60 days after flowering begins. The best qualities are obtained from the seeds obtained from the apical basket located on the central shoot.
Zinnia seeds remain viable for 2-3 years. If the seeds are not very fresh, then it is better to soak them in order to plant only hatched specimens. You can plant in boxes, but to avoid picking, this should not be done very densely. Some gardeners prefer to plant in peat pots, which is quite convenient. Seeds need to be planted to a depth of 1 cm. In about a week, if the ambient temperature is not lower than 22 degrees, seedlings will appear.
When the last cold weather has passed, you can plant zinnia in a permanent place. These flowers love light and well-fertilized soil. But this plant does not tolerate stagnant water. It is advisable that the area where the zinnia will grow be protected from the wind. Depending on the variety, seedlings are planted at a distance of 25 to 40 cm. Then care consists of watering, without which the plant most likely will not die, but the flowers will be much smaller. 2-3 additional feedings are also desirable, which will allow you to get larger and more beautiful flowers.
In order to decorate the garden with such a magnificent flower as zinnia, growing from seeds is not something difficult. A beginner can do all this work, but you can achieve success in an even simpler way. Only in this case flowering will occur a little later. Seeds are planted immediately in a permanent place in early June, when the danger of returning cold weather has disappeared. But this method has its drawback - the flowering period will be much shorter, because the flowers are very heat-loving and will lose their beauty during the first autumn frosts.
However, connoisseurs of such an original flower as zinnia, growing from seeds even at late planting dates were able to turn them into an original way to decorate greenhouses or a house, and then, if the weather is good again, put them outside again. Many regions of our country are characterized by rather unstable weather, especially in spring and autumn. In the middle zone, recurrent frosts and even snow occur even in early June, but April and May can be very warm. In autumn in this region, frosts, although short-lived, occur at the very beginning of September, and then the weather is usually warm for a long time. Therefore, many people grow zinnias in pots, containers, etc. This plant feels very good in such containers, and if there is a threat of cold weather, they can easily be brought into a greenhouse or even a house, thereby prolonging their beautiful flowering.
fb.ru
Sowing and cultivation
Seeds are sown in boxes in February, in a room or in a heated greenhouse, provided that additional lighting is provided. If it is not possible to provide additional light, then sowing is done later. Before sowing the seeds, it is advisable to soak them for 2-3 hours in sodium hummate or heteroauxin; the solution is diluted according to the instructions.
Soil for seedlings is prepared from turf soil, leaf humus and sand. Gladioli seeds are too small, so they are not planted in the soil. It is enough that they are distributed over the surface of the moistened substrate.
Having sowed gladioli seeds, they are grown under the same conditions as for other crops. When warm weather sets in, the boxes with seedlings are taken out to an existing greenhouse or nursery, where they are left open for the day, shading them from the sun's rays for the first time. Cover at night from possible return frosts. Seedlings are grown in boxes until autumn or transplanted into open ground if the seedlings in the boxes are dense.
Before the onset of cold weather, small bulbs are dug up and stored for winter storage. They must be stored in gauze bags in a cool place. It's better to hang them somewhere so they can be ventilated. Or you can store it in boxes, but in a layer no more than 4-5 cm high.
If all growing conditions have been met, the resulting hybrid plants can bloom the following year.
Summer gardeners are accustomed to propagating luxurious gladioli with bulbs, but there are other methods of propagation, for example, by seeds. At first it may seem labor-intensive, but those who have already received seeds and grown flowers from them say that there is nothing complicated.
When growing gladioli from seeds, it is important to remember that in most cases the varietal characteristics of the parent plant cannot be preserved. New inflorescences can have the most unexpected colors and shapes; it is no coincidence that the seed method is used in breeding work.
But the florist has the opportunity to independently grow some special flower and get a gladiolus with an original color.
Zinnia care, cultivation, watering, planting at home
From mid-summer to late autumn, my eye is pleased with the bright spectrum of colors; zinnia blooms. I use low-growing varieties of zinnia (up to 30cm) to decorate borders, and medium-sized (40-60cm) are full-fledged residents of my flower beds. I propagate zinnia with seeds, which I sow for seedlings in March in boxes. I plant the seedlings in a permanent place in…
yunost
There is not an indifferent gardener who will not plant at least one type of zinnia in his flower beds. With its beauty, this plant will captivate anyone, even someone far from floriculture. I always grow several types of zinnias on my plot: tall, medium-sized and short. Various colors of zinnias allow you to combine them almost...
masko4
Diseases and pests
The most common diseases of gladioli include:
- fusarium . Depressed red spots appear on the seeds. Treatment of seed material consists of treatment, or rather soaking, with Tiazone (30 mg per 4 liters of water);
gray rot . Symptoms are based on the appearance of a white coating on the seed. To treat the disease, use baking soda (50 g per 10 liters of water). The seed must be treated with the solution before planting;
scab . The seed becomes covered with yellow spots, which become brown over time. The fight against the disease consists of treating the seed with a solution of Fundazol (30 g per 5 liters of water). They need to spray the soil before planting.
During the cultivation of gladioli, flowers can be affected by various pests, including thrips, wireworms and root mites . Treatment consists of using highly effective insecticides. “Karbofos” (75 g per 10 liters of water) is used against thrips. They need to spray the plants.
Bordeaux mixture is used against wireworms (40 g per 5 liters of water). Treatment is carried out 3 times, with an interval of a month. To combat root mites, you should use the Oxychoma solution (50 g per 10 liters of water). This solution needs to be watered every 2 weeks.
Prevention of diseases and pests consists of several stages:
- Clean planting material before storing.
- Remove all dead plants from the area before winter.
- Spray the soil with copper sulfate (10 g per 10 liters of water) before each planting.
So, now you know how to properly grow gladioli at home. If you follow the basic rules for planting and care, the flowers will be able to grow beautiful and monochromatic.
How to work with seeds?
Over time, gladioli bulbs lose their properties:
- become flat;
- give fewer children for reproduction;
- They throw out weak peduncles in small quantities.
In this case, some gardeners resort to propagating gladioli by seeds. This technique is considered risky, costly and unjustified, but still takes place. When growing bulbs from seeds, all varietal properties of the mother plant are often lost, and cross-pollination that occurs during the flowering period has a strong effect. The result of such processes is unpredictable.
In gladioli, after pollination, seed pods are formed, in which the seeds then ripen. In terms of external characteristics, they resemble small flat plates, the size of which is 2 mm. After ripening, the seeds become brown in color. Under the shell, a barely noticeable embryo of the future gladiolus can be seen. Up to 200 seeds are formed in each seed capsule. After ripening and harvesting, they are successfully stored indoors, but the storage area should not be allowed to be too dry. In this case, germination greatly deteriorates.
In March-February, the collected seed material is planted in containers or boxes. During this period, flowers need to be provided with a sufficient level of lighting using fluorescent lamps. If this is not possible, sowing dates should be postponed to the end of March.
Before sowing, the seeds are soaked in a growth stimulator for several hours. Containers and soil mixture are prepared in advance. The ideal option would be to mix in equal proportions:
- turf soil;
- humus;
- river sand.
Flower growers also use a ready-made purchased mixture, but in this case calcined sand should be added to it. Gladioli seeds are germinated and then sown in boxes or pots. Subsequently, they will only need regular moistening and careful loosening of the soil.
With the onset of warm weather, boxes with young shoots of gladioli gradually begin to be taken outside and hardened. Initially, they are left in the fresh air for a couple of hours, and then this time is gradually increased. To prevent the sprouts from getting sunburned, they are covered from direct rays.
After the threat of night frosts has passed, you can plant gladioli in open ground. Although some florists leave them in boxes all summer, while implementing standard care procedures. As a rule, in the first year of life, a flower grown from a seed does not bloom. All his strength goes into the formation and development of a strong and healthy bulb.
In the fall, gladioli planted from seeds are dug up, small bulbs are separated from the stem and prepared for storage. The timing of harvesting flowers depends on climatic conditions, but most often this is done in September. The next year, the collected bulbs are planted in furrows on the plot. They may well already bloom, although professionals recommend cutting off the peduncle so that the plant has enough strength to further form the bulb. Caring for gladioli grown from seeds is no different from that carried out when growing them from bulbs or children.
Professionals usually prefer to grow gladioli from seeds. For amateur gardeners, this planting process may be too time-consuming and labor-intensive. If you understand how to properly propagate gladioli by seeds, you can not only grow plants every year, but also develop new hybrid varieties of these beautiful, majestic flowers.
Before growing gladioli from children or seeds, you should study as much available information on this issue as possible. Not only books will help, but also the lived experience of professional gardeners. The information collected will be especially useful if you want to create a new variety yourself. After collecting seeds for gladioli, planting should be successful. When selecting planting material, it is necessary to take into account that hybrid varieties in most cases do not acquire seeds.
When the desire to get your own personal variety is great, growing gladioli from seeds can become extremely interesting, despite the labor intensity and scrupulousness. The first step is independent artificial pollination of gladiolus flowers. This is a complex process for which you need to allocate enough time. It is not worth producing it hastily, without understanding it, as you can ruin the mother plants. Typically, pollination is carried out with the aim of producing a new early flowering plant or flowers of unusual shapes and colors.
Reproduction of gladioli by children (tuber buds)
The most reliable, but at the same time simplest way to propagate a flower you like is to collect tubers from it. Garden gladioli of any variety produce them in sufficient quantities after the end of the flowering period.
What it is?
Corms form the basis of bulbous plant species; it is from them that the growth and development of the future flower begins. Depending on the variety, a different number of children are formed on the mother bulb.
Sometimes you have to resort to stimulating this process by cutting off the peduncle just before the end of flowering.
Propagation of gladioli by tuber buds allows you to quickly propagate your favorite variety, as well as rejuvenate your own plantings.
Basics of care
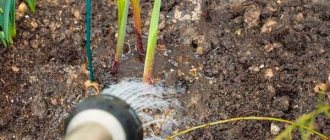
When growing crops, you should pay attention to the following points. Watering
It is important to regularly moisten the flower bed. The recommended moistening depth is 30-35 cm, it is at this level that the roots are mainly located
Surface watering should be avoided, as such a procedure can provoke active development of weeds and damage to root tuber tissue. Watering is carried out in a volume of 1-1.5 buckets per 1m2. It is best to water the plant along the furrows or between rows
Watering
It is important to regularly moisten the flower bed. The recommended moistening depth is 30-35 cm, it is at this level that the roots are mainly located
Surface watering should be avoided, as such a procedure can provoke active development of weeds and damage to root tuber tissue. Watering is carried out in a volume of 1-1.5 buckets per 1m2. It is best to water the plant along the furrows or between the rows.
Loosening
After each watering, it is important to loosen the soil; this manipulation will prevent the formation of crust and will maintain good ventilation, which is very important for the roots, and uniform distribution of moisture in the soil. After loosening, the crop should be lightly covered with soil and furrows should be laid for irrigation.
The plant also needs loosening after precipitation, and on average the procedure is carried out once every 10 days.
Mulching. This process protects plants from bad weather, retains moisture for as long as possible, and reduces the frequency of loosening. Experienced gardeners recommend using a mixture of humus, peat, compost, pine needles, grass or straw as mulch. Mulching is carried out when seedlings grow to a level of 10 cm.
Weeding. With regular loosening and mulching, this representative of the flora only needs weeding 3-4 times during the summer. The procedure is carried out as a preventive measure against weeds. Try to prevent the development of weeds under the flowers, remove young shoots in a timely manner, since the presented crop does not tolerate competition, which is inevitable when adjacent to weeds. Timely removal of weeds will prevent the risk of pests and diseases.
Feeding. This plant accumulates nutrients in the bulb from the beginning of flowering until the end of the growing season. During the growing season, at the beginning of the development of flower shoots, it is recommended to fertilize the crop with a mixture containing phosphorus and potassium. Phosphorus promotes abundant and lush flowering, and potassium is needed for the rapid formation of a large tuber
It is very important to avoid nitrogen-containing compounds when feeding, which inhibit flowering and blunt the development of tubers.
Preparing gladioli for planting is presented in the following video.
Soil preparation
The land plot that is planned to be planted with gladioli should be prepared. If these are light sub-sandy soils, then silt from the pond and clay should be added to them. Heavy clay soils are covered with coarse river sand.
Planting the bulbs should be done in soil that has good structure. She must:
- disintegrate into small lumps (0.8-1.5 cm);
- excellent moisture retention;
- be neither loose nor dense;
- can be filled with air and moisture without any problems.
Soil preparation begins in autumn. The area is dug deep: about two bayonets. Immediately apply the following fertilizers (per 1 m²):
- humus – 7-10 kg;
- superphosphate – 60-70 g;
- potassium salt – 25-30 g;
- bone meal – 75-100 g;
- stove ash – 50-100 g.
In the fall, the cutting of beds is also carried out. In the spring, loosen the soil again (by 15-20 cm) and add the following per 1 m²:
- 40 g ammonium nitrate;
- 50 g ammonium sulfate;
- 20 g urea.
It is prohibited to use fertilizers containing chlorine, which negatively affects the growth of gladioli.
How to propagate?
The seed propagation method is quite risky, labor-intensive and expensive, but some brave gardeners who are ready to experiment still prefer this method. The main problem when growing is that the varietal characteristics of the mother plant are often lost, and the result is unpredictable. This method is usually carried out by breeders when writing scientific papers or to develop new varieties. Sowing in open ground is possible if the following conditions are met.
The seed is planted in February in a greenhouse. Here, young seedlings will be able to gain strength for transplanting into open ground.
Before sowing, the seeds should be kept in a weak solution of sodium humate or heteroauxin for 2.5-3 hours.
A favorable substrate for seeds is a mixture of humus and sand in proportions 2:1.
Sowing is done shallowly; the planting site is sprinkled with light soil on top.
Moisturizing the sowing site is carried out simultaneously with fertilizer, and solutions based on mineral preparations are used.
Planting can be done not only in a greenhouse, but also in boxes or indoors, however, high-quality lighting should be provided. If it is not possible to install lighting fixtures, then the seeds should be planted later than February. Further care is not particularly different from growing other crops.
With the arrival of warmth, the boxes with seedlings are placed in a greenhouse, where they are left open for the whole day, creating shade at first in bright sunlight. If frost is likely, it is recommended to cover the plants at night. So, seedlings are grown in boxes or in a greenhouse until autumn, after which they are transplanted to a summer cottage.
Before the cold weather arrives, miniature bulbs should be dug up and stored.
They are usually stored in gauze bags in a cool room. For good ventilation, it is recommended to hang the bags or put them in a box, folding them in a layer of maximum 4-5 cm. If the gardener followed all the rules for propagating by seeds, then the resulting hybrid plants can bloom the very next year.
Dividing the bulb
More experienced florists and summer residents risk propagating gladioli by dividing the bulb. This will require certain skills and a supply of theoretical knowledge, otherwise the experiment will be unsuccessful.
Features of the method
By dividing the mother gladiolus bulb into several parts, you can obtain not only a larger amount of planting material, but also stimulate the formation of children. For manipulations, material from the second or third year of life is selected without signs of any diseases or pest damage.
How to do it correctly?
Before you start cutting the onion, prepare your tools and equipment. The knife is well sharpened and fired over a fire. The head section is made vertically. The number of parts obtained depends on the size of the original onion.
On each piece there should be not only part of the bottom for the formation of new roots, but also living buds.
The cutting areas must be disinfected and treated. Wood ash and brilliant green are used for such purposes. After this, the onion pieces are left to dry for some time, and then planted in the prepared nutrient soil. In the fall, ready-made, formed corms are dug up. Already next year they will produce a large number of children, which will later be used for reproduction and renewal of planting material. It is necessary to care for divisions planted in open ground in the same way as for an adult plant.
It is advisable to plant the bulb segments upside down. Ground shoots with this method develop more slowly, flowering often does not occur, but the formation of children is stimulated.
Read also: How to preserve garlic in flour for the winter
How to get gladioli seeds
Gladioli seeds are formed in seed pods and only after the pollination process has taken place. In nature, the process of independent pollination of these flowers is difficult, since there is a difference in the timing of pollen maturation in the stamens of flowers of male plants and the opening of the pistil in female flowers.
Insects and also the wind can “help”, although in these cases there is no need to talk about the purity of pollination. Bees and gusts of wind carry pollen to different gladioli flowers, without particularly thinking about selection work. Therefore, to obtain seeds, you will have to carry out pollination, and then wait for the seed pod to ripen.
What do gladioli seeds look like?
Many people, and even experienced gardeners, may be confused by the question of what gladioli seeds look like. Indeed, everyone knows about the bulbs of these flowers and their children, but the seeds are a problem. Outwardly, they look like small flat brown plates, no more than 2 mm in size. Upon careful examination of the plates, you can see the plant embryo inside, under the shell.
The number of seeds in a seed capsule reaches 180-200 copies. After collection, they are preserved quite well in room conditions.
ON A NOTE! Gladioli seeds should not be stored in a very dry place, as they may lose their viability if they dry out.
Favorable days for planting gladioli according to the lunar calendar in 2021
In order for the bulbous flowers on the site to develop normally and delight with abundant flowering, it is recommended to plant gladioli in open ground in the spring of 2021 according to the lunar calendar. The best time for planting vegetation outside occurs only during certain phases of the moon - this is due to changes in gravity and general pressure at different positions of the satellite. To determine planting days for gladiolus bulbs, periods for feeding and other manipulations according to the lunar calendar, you can use the data given in the table.
| Manipulation | March | April | May |
| Preparation of planting material | 3, 4, 5, 6, 11, 13, 17, 18, 22 | 3, 4, 5, 6, 7, 8, 10, 14, 23, 24, 25, 26, 27, 28, 29, 30 | 2, 3, 4, 5, 6, 7, 11, 12, 15, 16, 23, 24, 25, 26, 30, 31 |
| Planting bulbous plants and flowers | 2, 3, 4, 5, 6, 11, 12, 13, 14, 17, 18, 22, 23, 27, 28 | 1, 2, 6, 7, 8, 9, 10, 12, 13, 18, 19, 24, 28, 29 | 5, 6, 7, 10, 11, 12, 15, 16, 20, 25, 26, 30, 31 |
| Vegetation cuttings | 1, 2, 3, 4, 5, 6, 9, 11, 12, 13, 14, 17, 18, 22, 23, 27, 28 | 1, 2, 6, 7, 8, 9, 10, 12, 13, 14, 18, 19, 24, 25, 28, 29 | 2, 3, 5, 6, 7, 10, 11, 12, 15, 16, 20, 23, 24, 25, 26, 30, 31 |
| Loosening the soil and weeding | 1, 2, 7, 8, 9, 11-16, 19, 20, 21, 22, 23, 24, 25, 26, 29, 30, 31 | 3, 4, 5, 6, 9, 10, 11, 12, 13, 14, 16, 17, 18, 19, 20, 21, 22, 23, 30 | 1, 4, 8, 9, 10, 11, 12, 13, 14, 17, 18, 19, 20, 21, 22, 23, 24, 28, 29, 30, 31 |
| Days of watering and preventive treatment against pests | 1, 2, 3, 4, 5, 6, 9, 10, 11, 12, 13, 14, 17, 18, 22, 23, 24, 25, 26, 27, 28, 29, 30, 31 | 1, 2, 3, 4, 5, 6, 7, 8, 9, 10, 11, 12, 13, 14, 18, 19, 23, 24, 25, 26, 27, 28, 29, 30 | 2, 3, 4, 5, 6, 7, 8, 9, 10, 11, 12, 15, 16, 17, 20, 21, 22, 23, 24, 25, 26, 27, 28, 29, 30, 31 |
| Disease and pest control | 1, 2, 7, 8, 9, 11, 12, 13, 14, 15, 16, 19, 20, 21, 22, 23, 24, 25, 26, 29, 30, 31 | 3, 4, 5, 6, 9, 10, 11, 12, 13, 14, 16, 17, 18, 19, 20, 21, 22, 23, 30 | 1, 4, 8, 9, 10, 11, 12, 13, 14, 17, 18, 19, 20, 21, 22, 23, 24, 28, 29, 30, 31 |
| Application of mineral fertilizers | 1, 2, 3, 4, 5, 6, 7, 8, 9, 25, 26, 27, 28, 29, 30, 31 | 1, 2, 5, 6, 7, 23, 24, 25, 26, 27, 28, 29, 30 | 2, 3, 4, 5, 6, 23, 24, 25, 26, 27, 28, 29, 30, 31 |
| Application of organic fertilizers | 10, 11, 12, 13, 14, 15, 16, 17, 18, 19, 20, 21, 23 | 8, 9, 10, 11, 12, 13, 14, 15, 16, 17, 18, 19, 20, 21, 22 | 7, 8, 9, 10, 11, 12, 13, 14, 15, 16, 17, 18, 19, 20, 21 |