It doesn’t change from year to year - this is the conclusion that summer residents draw in the event of a bad harvest. A rather unpretentious crop, it is not every year that we are pleased with the harvest. Diseases, pests, bad weather, soil conditions - individually and all together these factors determine the yield of a potato bed.
To this list it is necessary to add the subjective components of an unsuccessful potato season: incorrect choice of variety, insufficient preparation (or complete absence) of tubers, erroneous determination of the timing of planting potatoes.
A comprehensive solution to the problem of potato yield has long existed and has been successfully used on an industrial scale. This is a Dutch technology for growing potatoes.
The essence of the Dutch method
Among the owners of small summer cottages, there is an opinion that growing potatoes “Dutch style” is only possible with the use of special equipment; it is not applicable in small beds. This is an erroneous point of view: Dutch technology only regulates the implementation of preparatory processes and compliance with planting deadlines exactly.
It does not matter in what way the ridges are formed: with a special potato planter or an ordinary hoe. All operations on a potato bed are aimed at improving the aeration of the soil layer and the bushes themselves through free planting. Each hundred square meters of vegetable garden can produce up to 500 kg of high-quality tubers.
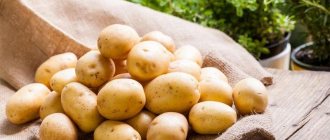
- Only high-quality potatoes are used as planting material.
- For planting, material not lower than the second reproduction is selected.
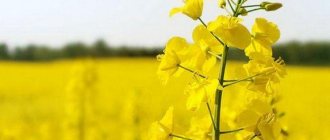
- It is imperative to follow the rules of crop rotation. Potatoes are planted in one place only after 3-4 years, preferably after winter grain or legume green manure.
- High potato yields are impossible without the application of complex fertilizers.
- Timely prevention of damage to the site by pests, diseases and weeds is carried out according to a schedule with special chemicals.
- Compliance with the timing of autumn and spring tillage and adherence to technology are especially important aspects of increasing the yield of the bed.
Even farmers do not always follow the rules exactly: they skimp on quality seed and thicken the plantings. Small vegetable gardens of summer residents do not allow for crop rotation. Hence the skepticism about the possibilities of the Dutch method of growing potatoes.
Harvesting
When growing tubers using the Dutch method, the crop is dug up in two stages. The first is intended for harvesting seed potatoes. The collection period is in July or early August. The second stage is the harvesting of food material. It is scheduled for the end of August or beginning of September.
14 days before the appointed time, the tops are cut from the bushes. Reception allows the tubers to accumulate more nutritional components, improves the taste of potatoes, and increases shelf life. In addition, pests living on the tops leave the area and do not damage the underground part of the plant. The skin on the tubers becomes denser, which saves the potatoes from mechanical damage. Farms use preparations to desiccate (dehydrate) tops. At a summer cottage, the above-ground part is simply mowed down.
The excavated material is washed with a hose and dried in the sun until the moisture evaporates. Then the harvested crop is moved under the canopy.
For storage, prepare a room with good ventilation and containers with holes. Leave at least 10 cm between boxes.
The Dutch way of growing potatoes - pros and cons
An inquisitive summer resident, as soon as he learns about the yield of 400-500 kg per 1 hundred square meters in the North-West region, begins to try on the Dutch method of growing potatoes and weighs all the positive and negative sides:
- For a potato bed, you can use an area with heavy soils and close groundwater, which is unsuitable for farming from the point of view of gardening practice.
- Possibility of using small-scale mechanization to care for potato beds. In the absence of technology, even a simple hoe can easily go through and correct the shape of the ridges.
- Due to the use of high-quality planting material, soil aeration and free planting, potato bushes are practically free from fungal diseases.
- You can harvest tubers without using shovels or forks: simply by moving the ridge with your hand.
- The average yield of 400 kg per 1 hectare is a killer argument in favor of the Dutch method.
This impressive result of the Dutch method is explained simply: potatoes grow in ideal conditions, in light, well-warmed soil with a constant flow of oxygen through the side surfaces of the ridge and a supply of nutrients in the growth zone.
The method also has a drawback - in the southern regions without artificial irrigation, the Dutch technology is not applicable. The soil in the ridges dries out quickly. The costs of the irrigation system and the water itself increase the cost of potatoes.
Care
The Dutch method includes watering, trimming mounds, and treating against diseases and pests.
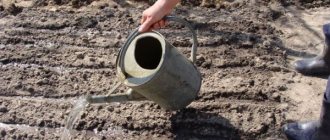
Watering is carried out three times during the summer:
- when buds begin to appear on the bushes;
- closer to the end of flowering;
- two weeks after flowering.
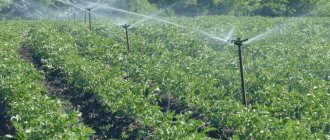
In hot summers without precipitation, the amount of watering can be increased. To prevent the soil on the mounds from being washed away during watering, sprinkling is used using a nozzle with small holes.
A good method is drip irrigation, but this method is justified only in a region where summers are hot, there is almost no precipitation and potato plantations are small. The drip system is laid on the tops of the ridges after the second hilling.
If after heavy rain the ridges have crumbled a little, then they need to be corrected. When they fall off, the tubers become exposed, they turn green in the sun and dry out. Shedding occurs only on soils that contain some sand.
Important!
The Dutch method is not suitable for sandy soils due to the likelihood of frequent crumbling of ridges.
Care involves treating plantings from pests and diseases. If it is noticed that such problems arise from year to year, then you should not wait for the first signs to appear. Prevention should be carried out. To do this, you can use biological agents belonging to hazard class 4. If the disease begins to appear or the first pest is noticed, chemical pesticides are used to prevent severe damage to the potato bushes.
What varieties are best grown using the Dutch method?
Highly productive potato varieties are exported from Holland to 70 countries around the world; purchasing planting material is not so difficult or expensive. The purchase will justify itself: the average yield of such potatoes is 400 kg per 1 sq.m.
Dutch varieties
| Variety | Characteristics of the variety |
| Impala | Early ripening (50 days) variety of universal geography - Middle zone, Siberia, southern regions (2 harvests). |
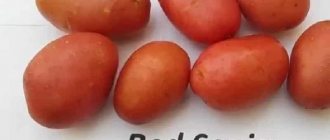
| Red Scarlett | Early variety with red tubers (white pulp does not darken during heat treatment) |
| Prior | An early variety with high resistance to nematodes, late blight and viral diseases |
| Cleopatra | An unpretentious early variety that is not afraid of the most depleted soils. |
| Mona Lisa | Mid-early variety, produces 2 kg of tubers per bush. |
| Asterix | A mid-late variety whose tubers are well stored until spring |
Domestic varieties
| Variety | Characteristics of the variety |
| Nevsky | Mid-early variety with high immunity and productivity |
| Zhukovsky early | An early ripening variety with a yield of up to 600 kg per 1 sq.m. Resistant to all fungal and viral diseases. Very tasty. |
| Peter's mystery | Pink tubers with creamy flesh are stored until spring. In the conditions of the North-West, the average yield is up to 300 kg per hundred square meters. |
| Zdabytak | A late variety from Belarus, resistant to all diseases, contains a lot of starch. |
You should not skimp on planting material - maximum second reproduction after seed propagation. The investment will pay off not only with an increase in yield; varietal plants practically do not get sick, are less damaged by pests, and have high immunity.
Seed material
The first and main advantage of growing potatoes the Dutch way is the excellent quality of planting material.
Firstly, only varietal potatoes are used for sowing, and not mis-graded potatoes, which are often planted in Russian dacha farms. Varietal purity must be at least 100%.
Secondly, the reproduction of tubers for planting must be at least second; most often the elite and super-elite are used. At the same time, germination and germination should also remain at 100%.
Thirdly, tubers must be planted in a germinated state. Their size is strictly aligned and is 50-60 mm. In this case, the seedlings should be from 2 to 5 mm long, in this case, when using automated planting, they will not break off.
Comment! One of the features of the Dutch method is that the tubers are treated with special chemicals against aphids before planting.
Aphids are the main carrier of viruses, so as a result, the crop is completely protected from viral influence.
The most popular Dutch varieties
Currently, along with the use of technology, some varieties of potatoes from Holland are popular in Russia. They are distinguished, first of all, by their high yield, so it is worth taking a closer look at them.
- Agria is an ideal variety for growing in the middle zone. In addition to high yield (about 500 c/ha) and large tubers, it is responsive to watering and does not like high temperatures.
- Condor is one of the most common commercial Dutch varieties at the moment, as it allows you to get up to 500 c/ha with good resistance to drought and various diseases.
- Eba - in addition to decent yield indicators (300-400 c/ha), it also has a wonderful taste, as well as resistance to pests and drought. The variety is resistant to mechanical damage and transports well.
- Romano is an early potato variety, the ripening period is only 90-110 days. Without special care, using only regular watering, you can harvest up to 400 c/ha.
- Ariel - this variety is not used for industrial cultivation, apparently due to its low yield (200-300 kg). But it will grow even without watering in the middle zone, and will delight you with its taste and aroma.
An interesting fact is that after numerous variety tests, about 30 varieties of Dutch potatoes were registered in Russia for cultivation. But despite the use of these productive Dutch varieties, the yield from their industrial use has not increased much. After all, our Russian potato varieties also have very good yield potential. This suggests that it is not just a matter of using unique and high-quality varieties. There are other subtleties thanks to which the Dutch get their exorbitant harvests.
Optimal conditions
The technology was developed and tested in Holland, which most closely corresponds to the North-West region in terms of climatic conditions and soil moisture. All operations on the site are aimed at creating optimal growth conditions for potatoes: from planting to harvesting.
- The area for potatoes should have a flat surface without a slope: uneven distribution of moisture will affect the yield.
- Compliance with the rules of crop rotation on the site, which increases the natural fertility of the soil and is an excellent prevention of fungal diseases and rot, the causative agents of which live in the soil layer.
- Improving the soil through sowing green manure as predecessors of potatoes.
- Loose soil saturated with oxygen accelerates the emergence of seedlings and the development of the bush in the future.
- The fertility of the site is not of fundamental importance - when planting potatoes, fertilizers are placed at the base of the ridge. The root system of the bush practically does not penetrate below this level.
- The shape of the ridge ensures rapid heating of the soil due to the topography of the bed. The temperature inside the ridge is, on average, 2-3°C higher than the temperature of the soil layer below the base.
- In conditions of excess water, excess moisture quickly leaves the ridge, which has a beneficial effect on the growing season of potatoes.
Soil preparation
The Dutch method of growing potatoes requires special soil preparation. The land is cultivated using machinery and fertilizers are applied in large quantities. It is necessary to strictly follow the rules of agricultural technology when using this method.
The Dutch method is usually used on large areas. Therefore, special requirements are imposed on the area for potatoes:
- potatoes are planted on a flat surface without slopes;
- lowlands are not used due to the high probability of moisture stagnation;
- the area should be open and well lit;
- on the north side there should be protection from gusty winds;
- choose an area with fertile, loose soil.
May be interesting Potato “Robin”: a variety with unpretentious cultivation How to prune a plum in summer if all the branches stretch upward Irbitsky potato variety: description and characteristics, reviews
In one place, potatoes are replanted only after 3 years, according to the rules of crop rotation. The ideal predecessors for this crop are grain crops and green manure plants. They cleanse the soil of pests inherent in nightshade crops and well loosen the soil with their roots.
Soil preparation begins in the fall. To do this, dig the soil deeply, turning the layer over, but without breaking the lumps. The method is called “fall plowing”. As a result of its use, pests and weed seeds are destroyed, and the soil is saturated with moisture.
With the onset of spring, the soil is dug up to a depth of 15 cm, while applying fertilizers. For every hundred square meters of land add 200 kg of manure or humus. Additionally, 200 g of potassium sulfate and 500 g of superphosphate are distributed over the same area.
How to prepare tubers for planting
Dutch agricultural technology involves the use of only healthy planting material: tubers of at least 2nd reproduction, the so-called “elite” and “super-elite”. These root crops have not yet become infected with fungal spores and viruses.
Small tubers 50-70 g (the size of a chicken egg) from a trusted supplier have 100% germination; saving in this case is inappropriate.
A mandatory stage of Dutch agricultural technology is the germination of seed tubers. The appearance of sprouts confirms 100% seed germination. For manual planting, the length of the seedlings is insignificant; seeds with sprouts over 5 mm cannot be planted by machine without damage.
Dutch agronomists pay great attention to treating planting tubers against aphids with special means. Aphids feed on plant juices and spread viruses. This treatment protects the plantings from dangerous potato diseases.
How to grow potatoes “Dutch style”: site preparation
Dutch technology in our interpretation is often far from original, many aspects are not taken into account.
The surface of the site should ideally be strictly horizontal without slope, which ensures uniform distribution of water.
The soil should be loose, plowed or milled before planting: autumn plowing to a depth of 22-27 cm (preferably with turning over the layer) and spring treatment with a milling cutter or cultivator with soil development at 12-14 cm.
Spring loosening of the soil with a milling cutter accelerates the ripening of potatoes by 7-10 days. Repeated machine cultivation of the land, combined with the application of large doses of fertilizers and strict adherence to all technologies, are the main points in preparing a plot of land for potatoes.
| Tillage | Fertilizers | |
| Autumn | Deep plowing, 22-27 cm |
|
| Spring | Milling, 12-14 cm | Urea - 5 kg per hundred square meters |
If there is no equipment in the dacha garden in the spring, use an ordinary shovel or fork (the distance between the teeth is 2-3 cm, the thickness of the teeth is 0.5 cm). Such working with a pitchfork preserves the capillary structure of the soil without turning the layer over. Through these capillaries the mother tuber will feed on soil moisture.
Seed selection
The Dutch method requires attention at any stage of cultivation. But the choice of planting material is a special point. The yield and presentation of potatoes directly depends on the quality of the seeds.
The most suitable varieties are those specially bred by Dutch breeders with increased resistance to diseases, pest damage, and stable germination. The main thing is that they fully comply with the requirements of growing technology. Therefore, they purchase tubers for planting only in specialized stores or representative offices of the manufacturer, where there are certificates confirming the quality of the seeds. Before purchasing a variety, you should familiarize yourself with the characteristics of the species in order to choose the one most suitable for the conditions of the region.
For planting, tubers of the “super elite” or “elite” category are selected with an optimal weight of no more than 70 g and a size of 5-6 cm. One variety of potato is planted on the plot - this is also required by the growing technology. The condition is associated with a temporary difference in potato types in terms of germination. The variety in the planting area is replaced once every 5 years.
Tubers are prepared without signs of spoilage, damage or rot. Seeds are selected as uniform in shape and size as possible. Before planting, potato tubers are germinated. If planting material is planted by mechanization, then the length of the sprouts is allowed up to 0.5 cm, by hand - 1 cm.
Tuber planting scheme
According to the potato planting scheme using Dutch technology, per 1 sq. m of bed there should be no more than 30 potato stems: 400-500 tubers are planted per 1 hectare (100 sq. m.).
The rows for planting tubers are placed in the north-south direction; the lighting of all bushes will be uniform during daylight hours. The row spacing is marked at least 65-80 cm - this is the minimum area that provides adequate nutrition to the plantings. There is no point in deepening planting material the size of an egg; a furrow 4 cm deep is sufficient.
To grow potatoes using the Dutch method, 2 methods of laying out beds for planting tubers are used.
- In rows with the same distance between them, approximately 70 cm.
- In paired rows (ribbons) with a distance between rows of 25-30 cm and a wide row spacing of 120 cm.
Planting in paired rows is justified when using drip irrigation: the system is laid inside the tape.
Features of cultivation
The traditional method of harvesting includes placing potatoes in a deep hole, regular weeding, treating with fungicides, and getting rid of parasites. This method requires effort and energy, and the result in the form of tubers the size of a walnut brings disappointment and losses.
A field planted using Dutch technology is distinguished by the presence of high “ridges” - mounds of earth that form pronounced furrows. The gaps between them reach 80 cm. At first glance, it may seem that the space is being used irrationally, but the harvest of potatoes from 1 m2 of land will be 1.5 times higher than from an area densely planted with nightshade bushes. This is explained by the landing characteristics:
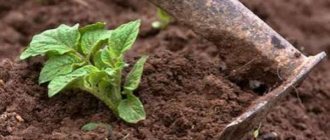
- Placing tubers close to the ground surface. When planting, root crops are buried at a depth of up to 15 cm at the height of the furrows. The steep walls of the V-shaped “waves” are well illuminated by the sun’s rays and warm up evenly. Potatoes germinate faster, allowing for an early harvest.
- Formation of high furrows. Thanks to alternating depressions, during heavy rainfall, water flows down into the furrows. Excess moisture does not have a negative effect on the sprouts: the tuber does not rot, the roots do not rot.
- Loose soil, formed into furrows, allows air to pass through well. This promotes the rapid development of the plant's root system.
- Hilling up the beds is carried out only twice.
Related article:
How to achieve high potato yields
The Dutch method is good for growing early and mid-early varieties that need warmth and moderate amounts of moisture.
The disadvantages of the ridge planting method include:
- difficulties in preparing the soil for planting;
- preference for using labor mechanization means;
- Damage to tubers when planted at insufficient depth.
The Dutch method of growing potatoes is not always effective, and to achieve the desired result, you should carefully read the step-by-step instructions for planting and caring for seedlings.
How to choose the right planting date
The most important rule is not to prepare the soil in advance, at most the day before.
You can navigate by folk signs - the blossoming of birch leaves. The main criterion is the state of humidity, when, when digging, the soil itself falls away from the shovel.
The simplest and most reliable method
To check the readiness of the soil for planting Dutch potatoes, you need to take a handful of soil, squeeze it into a lump with your palm and lightly throw it on the ground. If the lump crumbles when it hits the ground, the soil is ripe.
Compliance with planting dates when the soil is ready promotes rapid rooting of tubers and accelerated growth of the leaf apparatus of the potato bush.
Variety selection
Now let's say a few words about choosing suitable potatoes for planting using Dutch technology. Of course, it is better to give preference to varieties that are least prone to various diseases. And in order to not be hindered by the weather, which is beyond our control, several species of different ripening periods should be planted. The Mona Lisa variety has excellent resistance to viral diseases; in addition, if all measures are taken to fertilize the soil with nitrogen fertilizers, a harvest of more than 2 kg is guaranteed.
Also worth noting are the early varieties Yarla, Cleopatra and Prior. The first one is also not picky about the quality of the soil, so it can be grown in almost any area. After planting Cleopatra, make sure that it is not affected by scab; this species is not resistant to this disease. The middle late ones include Eba and Frisia. Both varieties are distinguished by excellent immunity to viral diseases. But farmers who prefer the Asterix variety can boast of an excellent harvest with a long shelf life.
The process of planting potatoes using Dutch technology step by step
The technique is based on long-familiar techniques. The Dutch combined everything into one clear scheme and connected it with automated planting of tubers.
In relation to the conditions of a summer cottage, the sequence of operations is as follows:
- After cultivating the top layer of soil, rows are marked: direction - “north-south”, distance - 70-80 cm.
- A shallow furrow (4 cm) is made along the stretched string.
- Lay out the sprouted tubers at intervals of 30 cm.
- Level the surface of the bed.
- 2 weeks after emergence, a ridge 25 cm high is formed: the cross section is an isosceles trapezoid, the upper base is 15-20 cm, the lower base is 45-55 cm.
- Simultaneously with the formation of the ridge profile, all weeds are removed.
The Dutch method - features of caring for a potato bed
Classic Dutch technology suggests using a milling cultivator to remove weeds in large areas, which leaves behind trapezoid-shaped ridges of the required height of 25 cm. This treatment combines 3 processes:
- weed removal;
- loosening;
- ridge formation.
After forming the profile, Dutch technology does not require a mandatory series of treatments of plants with various preparations:
- Application of herbicides to kill weeds.
- Treatment with reagents for the prevention of late blight - 5-6 treatments per season. The first treatment is carried out only when signs of the disease appear.
- During the growing season, at least 3 waterings are carried out: 1 before flowering; 2 a week after the flowers fade; 3 in another 20 days.
- Insecticide treatment includes spraying against aphids (a virus carrier) and the Colorado potato beetle.
Russian farmers take a simpler approach in the fight against viruses - they remove diseased plants.
To grow potatoes using the Dutch method, it is necessary to carry out high-quality soil preparation before planting tubers; fertilizing is not provided.
Instructions
Mid-early potato varieties are suitable for planting, but simply purchasing high-quality tubers is not enough to achieve the desired result. You need to choose the “right” site and carry out measures to prepare it.
Site preparation
Planting using the ridge method should be planned in the fall. It is easier to prepare by following the instructions:
- Inspect the area. An area located in a low area will not be suitable. Constant rainwater runoff makes the soil waterlogged. Lumps do not allow oxygen to pass through well; deterioration of aeration blocks the oxidation of mineral and organic components of the soil. In such soil, plants develop poorly. Often, when the growth of seedlings slows down, inexperienced gardeners begin to fertilize the soil, not realizing that this is only worsening the situation. It is necessary not to oversaturate the soil, but to restore aeration. Loose soil gives plants the necessary nutrition without impeding growth.
- Select an area for planting potatoes where cereals or legumes previously grew. The beans will saturate the soil with nitrogen. Cereals will also enrich the soil with nitrogen and potassium, eradicate weeds and loosen the deep layers of the earth.
- Cultivate the land. You can dig up the area in the fall, enriching the soil with mineral and organic fertilizers. Use manure or compost for organic matter. Up to 4 kg of organic matter is consumed per 1 m2 of land. Compost must be added every 3 years. Effective inorganic fertilizer - superphosphate (40-50g per 1m2), potassium chloride (up to 20 g per 1m2).
Related article:
7 best potato varieties
In spring, it is necessary to plow the ground to a depth of 20-25 cm. Urea (0.5 kg per 10 m2) can be used as a nitrogen fertilizer.
You should not plant potatoes in an area where nightshades were previously grown. Plants can die from pests and diseases.
Choosing a potato variety for planting using the Dutch method
The Netherlands is one of the top 10 world leaders in the export of vegetable products, so the Dutch way of growing vegetables can be trusted. However, it is not necessary to purchase potato varieties developed by Dutch breeders for planting; it is enough to know the nuances of choosing root crops:
- Tuber size. Root crops with a diameter of at least 5 cm are suitable for planting.
- Number of eyes - there must be at least 5.
- Grade. Seed potatoes are used for planting. If there are tubers left from the last harvest, and the quality of the potatoes meets expectations, you can use them. After 3 years, it is advisable to completely renew the seed material.
Related article:
9 Tips for Growing Potatoes
- Size of sprouts. Long sprouts grow when potatoes are stored indoors without access to light; They are brittle and crack when planted. Spoilage of sprouts reduces yield by 25%, so you should place the root crops in the sun, wait until the sprouts reach 0.5-2 cm in length, and start planting. If necessary, the growth of sprouts can be stopped by lowering the storage temperature of the vegetable or blocking access to ultraviolet radiation. If there is more than 1 month left before planting, the sprouts can be broken off, and by the right time they will grow again.
- Diseases. Before planting, tubers are checked for the presence of late blight, scab and other plant diseases.
There may not be enough seed potatoes. Then you can cut the tubers 3 days before planting and place them cut side up in a well-lit, warm room. Potatoes should have sprouts. To separate the root crop, use a knife made of stainless material, periodically dipping it into a weak solution of potassium permanganate. The cut is treated with a solution of barley malt and succinic acid.
Related article:
How to plant potatoes
Suitable varieties for planting:
- Romano is a pink potato that is used for cultivation in the Far Eastern, Central, and Volga-Vyatka regions. The heat-loving variety is planted in soil heated to 15-20C°. Romano ripens within 2.5 months. The variety tolerates long periods of lack of watering and is unpretentious to soil composition. Weight of root vegetables - 70-90 g.
- Mona Lisa is a yellow variety, disease resistant, suitable for cultivation in the Central region. Mona Lisa does not tolerate frost, and before sowing the tubers should be stored at a temperature no higher than +4C. Root crops reach a weight of 75 -155 g.
- Yarla - light yellow tubers of an early ripening potato variety produce high yields in the Central and Lower Volga regions. Depending on the composition of the soil, the tubers reach 80-300 g.
Related article:
What potato varieties are best suited for the Urals
- Prior is a yellow variety that belongs to the early variety. Grown mainly in the Central and North Caucasus region. The tubers are smooth, with small small eyes. The size of root vegetables is 80-150 g.
- Sante is a mid-early, high-yielding potato variety. Yellow tubers are distinguished by their regular shape and abundance of eyes. Potato weight - 100-150 g. Sante It has a low starch content.
- Impala is a variety popular in the Central and Southern regions of the Russian Federation. Early yellowish tubers can be consumed 1.5-2 months after planting, and full maturity occurs after 2-2.5 months. Potato weight is 120-160 g. Impala produces 2 harvests.
Planting potatoes
There is no need to rush into planting, otherwise morning frosts will destroy the first shoots. You can determine the timeliness of sowing in 2 ways:
- Measure the soil temperature. If the warming of the earth at a depth of 10 cm has reached 8-10C°, you can plant potatoes using the Dutch method.
- Test the strength of a lump of earth. Form a ball and throw it on the ground. If the soil has crumbled, it means it is sufficiently warmed up, moderately moistened and ready for further processing.
Related article:
Ways to preserve potatoes until spring
When forming furrows, it is necessary to leave a distance of at least 70-80 cm between them. This will allow each bush to receive maximum moisture, sunlight and air. The tops will grow tall and spreading, with a powerful root system and large tubers.
The hills (ridges) of the soil should not have an acute angled top, since the powerful roots of the potatoes will rush to the sides and look out. The best option is a trapezoidal ridge section.
Planting and care process:
- Form furrows.
- Plant potatoes (4-5 tubers per 1m2), wait for the first shoots to appear.
- Hill up the potatoes, completely covering the sprouts with soil. When hilling, it is necessary to take soil from the furrow, raising the height of the ridge. During the hilling process, weeds are destroyed.
- Check the bushes for flowering. The first watering should be done before the flowers appear. When the bushes are covered with flowers, water the potatoes again, and after the flowers wither, carry out a third watering. To moisten the soil, you need to use a spray hose for drip irrigation.
- Treat bushes against pest beetles (Colorado beetle, wireworm). The most common ways to get rid of parasites are spraying with solutions of mustard powder, wood ash, and celandine infusion. Effective chemicals against beetles - Karado, Beetle-eater. To prevent potato bushes from being spoiled by Colorado beetles, you can plant fragrant tobacco bushes between the furrows. Such a neighborhood will not harm the potatoes, and the owner of the land will protect the crop from insects.
- A month after the first hilling, start weeding and raising the ridge. Form a height of “waves” of 30-35 cm, increasing the space between the ridges. After this, there is no need to carry out weeding and hilling. And herbicides (Centurion, Lazurit, Titus and others) will help in further control of weeds.
Related article:
Early maturing potato varieties
Harvesting
The collection process will please you with its simplicity. Pre-mowing the tops will make the work easier. The procedure is carried out 2 weeks before digging up the tubers. In the sun, the remains of the tops will harden, become dry and light, and the tubers will ripen. The skin of ripened potatoes is denser, and the root crop itself becomes suitable for transportation and long-term storage. After the specified period, you can start digging manually (with a shovel) or using a plow. The potatoes are easier to remove from the formed ridges. To dig up the crop, you do not have to dig deep holes, since the potatoes are located close to the surface.
The Dutch method of growing potatoes produces excellent yields. Under favorable conditions, you can collect about 80 tons from 1 hectare of land. The absolute record is 120 tons from 1 hectare. Impressive results confirm the effectiveness of the method when carefully selecting seed potatoes and following cultivation recommendations.