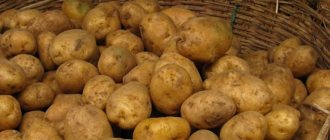
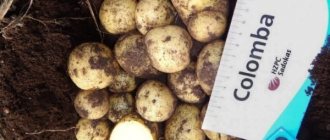
Potato varieties for seed propagation
After flowering, all potato bushes are covered with berries, from which the seeds are collected.
Certain varieties produce a larger number of fruits, and their seeds have increased germination:
- Farmer. Potatoes with thin light skin, the flesh does not disintegrate during cooking. The harvest is harvested 65 days after planting. Each bush bears fruit with 10–15 potatoes weighing about 100 g. Resistant to viral diseases.
Farmer - Assol. Oval tubers with smooth light skin. The pulp is dense, light yellow. New potatoes are dug up in mid-July, and the entire crop is harvested in August. The variety is resistant to diseases and sudden temperature changes. The weight of each tuber is from 100 g and above. More than 3 kg of crop is harvested from the bush.
- Empress. Small bushes with large elongated tubers. The pulp is yellowish, the taste is high. The weight of vegetables is from 60 to 140 g; 3.3 kg of potatoes are usually harvested from a bush. The first harvest is dug in July, harvesting is completed at the end of August. The plant is resistant to fungal diseases and is practically not affected by nematodes.
- Triumph. Small oval tubers. It is characterized by increased productivity: each bush bears fruit of at least 30 potatoes. The creamy flesh is good - great for soups and baking. The culture has increased immunity to viral and fungal diseases.
- Ilona. Full ripening occurs in August. New potatoes begin to be dug up in July. The tubers are large, elongated, beige in color. The pulp is crumbly white. High yield, resistance to diseases and pests, good germination in various climatic conditions.
- Velina. Oval tubers of medium size, pale yellow color, dense foliage. Potatoes sprout quickly and are harvested in August. Vegetables are suitable for preparing various dishes. Each bush produces 500–700 g of tubers. There is immunity to fungi and viruses.
- Revenge. Large oval-shaped tubers weighing 120 g. One bush produces up to 3 kg of yield. Smooth yellow peel, creamy flesh that does not darken during heat treatment. Resistant not only to common diseases, but also to pests.
- Lada. Produces round tubers that keep well all winter. The peel is reddish, the pulp is starchy light yellow. One tuber weighs up to 150 g. The variety has increased resistance to common diseases.
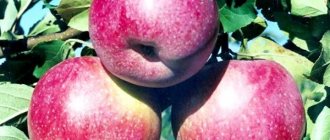
- Beauty. Mid-season high-yielding variety. Large red tubers weigh up to 300 g each. The yellow flesh does not crumble when cooked. The plant is resistant to fungal diseases and temperature changes.
Beauty
- Virgo. Large elongated tubers weighing up to 200 g, light red peel. The pulp is yellow, boiled. There is immunity to infections and pests.
Benefits of seed planting
Growing a crop from seeds has a number of advantages over classical propagation by tubers:
- there are no diseases that occur in tubers;
- buying seeds is cheaper than buying potatoes for planting;
- the yield is 10–20% higher than that obtained from tubers;
- The shelf life of planting material is more than 5 years, it does not require much space;
- grown potatoes are more resistant to late blight and other diseases.
Potatoes grown from seeds are small in size in the first year, but are used for planting the following season.
How to get healthy planting material
We are all accustomed to planting potatoes with seed tubers selected from last year's harvest. But the tubers accumulate diseases every year and it happens that we harvest only a little more potatoes than the planted amount.
In this case, you need to renew the potato seeds . At the lowest cost, you can get healthy seed material by growing tubers from botanical seeds. Only now you will have to part with the variety, because with seed propagation, seedlings will grow that are different not only from the original variety, but also different from each other. But you can breed your own variety if you're lucky)))
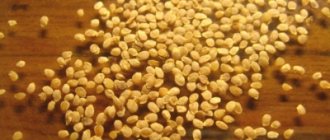
When to collect seeds
To obtain a large number of healthy seeds, berries are collected from the strongest bushes that have not been sick throughout the season.
Reference! To prevent loss of berries, the top of the bush is wrapped with vegetable netting. This will prevent falling and make collection easier.
The seeds are found in the berries left after the potato blooms. To prevent the fruits from falling off, they are harvested unripe in mid-July. For early ripening varieties, the harvest time begins in June. Their color at this time should be light green.
How to collect potato seeds from bulbs
The collected berries are carefully laid out in one layer or hung in a gauze bag in a bright and warm place. Leave for several weeks until fully ripe and softened.
Further actions:
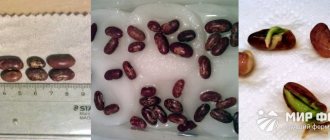
- Ripe berries are turned into porridge by crushing them. Add a small amount of water to the mixture. Leave in a warm place for 2-3 days for fermentation (bubbles and a sharp characteristic smell should appear).
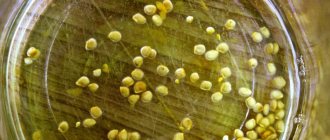
- The fermented pulp is poured with a large amount of water. Seeds that are suitable for planting will sink to the bottom. All defective material will rise to the surface.
- Remove empty seeds from the surface.
- To separate the seed material from the water, filter the entire mass through cheesecloth or a fine sieve.
Planting material is also extracted in a simpler way: the fruits, cut in half, are ground on a sheet of paper and allowed to dry. After the pulp evaporates, only the seeds remain on the leaf. The disadvantage of this method is the lack of fermentation, which destroys the dense seed coat, which prevents the rapid germination of plants.
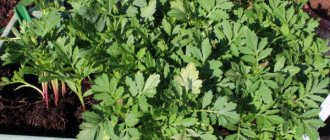
Seedling care
In order to grow a good harvest, you need to properly care for potato seedlings.
Additional lighting
Like other plants, potato seedlings need light. In winter and spring there is not enough of it, since the duration of daylight hours is too short. In these cases, additional illumination is used.
To do this, it will be enough to illuminate the seedlings from above and from the side with lamps with reflectors. You can also use reflectors and place them between the seedlings and the room. Mirrors, foil and foil insulation are suitable as reflectors.
Watering
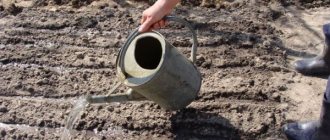
Watering is carried out regularly, but carefully. It is necessary to irrigate only through a spray bottle. When watering from a watering can or in some other way, it is difficult to control the amount of water poured, and sand and seeds are washed out of the soil.
Top dressing
After picking the seedlings, they can be fed with urea or ammonium nitrate, this will accelerate the growth of leaf mass. After 25-30 days, fertilization with a complex preparation of your choice is allowed:
- "Kemira Lux";
- "Agricola";
- "Baikal EM-1";
- "Uniflor Growth".
Picking
When the seedlings acquire 2 true leaves, they are picked. This procedure is carried out very carefully, since the stems of potato seedlings are very tender. You need to remove the sprout using a spoon; you cannot pull out the plants. When transplanting seedlings into a separate container, they are buried to the level of the cotyledon leaves.
When and how to replant in open ground
The seedlings are transplanted when they have at least 4 leaves. To do this, dig holes 10 cm deep in the beds. Add 300 g of humus to each. Also pour half a liter of water into each well. After the soil gets wet and becomes similar in consistency to thick sour cream, the seedlings are buried in it. The lump of earth from the container where the seedlings were is not removed.
Good to know!
Potato sprouts are covered almost before foliage begins to grow. The hole is covered with dry soil and compacted a little.
Growing potatoes from seeds in open ground
This method is used less often, since it is not possible to get a large harvest in one season. The agricultural technology of sowing is simple and clear.
Site selection and soil preparation
The place should be sunny and windless. It is best if the following crops previously grew in the chosen place: pumpkin, corn, legumes, beets, carrots or cruciferous vegetables.
First of all, fertilizers are added to the soil; this can be humus or nitrophoska. You can also sow the plot 5-6 weeks before planting potatoes with green manure. Before these plants bloom, the area is dug up.
Sowing seeds
Immediately before sowing the seeds, the beds are watered. When it is absorbed, sow the potato seeds, making shallow furrows at a distance of 65 cm from each other. Sow, leaving a distance of about 5 cm between the seeds, so that in the future it will be possible to remove weak shoots.
The top of the bed can be mulched. To do this, use dry grass or other materials.
Further care for potatoes
Care after sowing is also important. The main thing in it:
- moderate watering;
- easy loosening after watering;
- weeding;
- nitrogen-containing fertilizers;
- treatment against insects, in particular against the Colorado potato beetle.
Storage and preparation for planting
Packaged seeds are stored in dry rooms at a temperature of +12...+18°C.
Advice! Store the material in a place inaccessible to rodents, as they will use some of the seeds for food and spoil some.
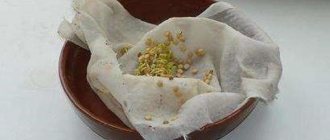
Before planting, it is better to prepare the seeds to awaken and harden them:
- To awaken, they are filled with warm water and left for 48 hours in a warm room.
- Remove from water and dry naturally to a powdery state.
- To harden, wrap it in a damp cloth and leave it for 14 days. The fabric is regularly moistened, kept indoors during the day, and put in the refrigerator at night.
The appearance of sprouts is a sign that it is time to plant the seeds in the ground.
Specifics of growing seedlings from seeds
Growing full-fledged tubers from potato seeds is not an easy task. During the cultivation process there is a risk of encountering certain difficulties. But by following the instructions and being aware of possible problems, they can be easily circumvented.
Growing methods
Before sowing, the seeds are soaked; for this, the seeds are placed in a humid environment. They are placed in a damp cloth or thick paper, but not filled with water. Then they are sent to a dark place for 3-5 days, periodically moisturizing them.
It is also useful to harden the seeds before sowing. To do this, they are transferred to the refrigerator overnight, where the air temperature should be from -1 to +2 °C. Before planting, it is allowed to treat the material with growth stimulants, for example the drug "Epin". This treatment will increase seed germination.
Next, the seeds are sown. At home, potatoes are grown from seeds in several ways.
Seedling box
Boxes no more than 10 cm deep are filled with a fertile mixture. To prepare it you will need 1 part soil to 4 parts peat with fertilizers. It can also be purchased in specialized stores. If you use regular soil, germination will be significantly lower. In the boxes, grooves are made 0.5 cm deep. The distance between the grooves should be 10 cm. Sow seeds in them, the distance between them is at least 5 cm.
See also
Description and characteristics of the Skazka potato variety, planting and care rules
Read
Sprinkle everything on top with sand and press it down lightly; the layer should be about 0.5 cm. Cover the box with polyethylene or a sheet of glass and send it to a warm, bright place, for example, on a windowsill. The first shoots should appear within 10-14 days.
"Snail"
In order to create an unusual pot for potato seeds called “snail”, you need to prepare the following materials:
- a transparent vessel with low sides;
- backing for laminate 10 cm wide, 1-1.5 m long;
- tweezers;
- 2 rubber bands;
- plastic bag;
- priming.
In order to make a “snail”, you need to spread the substrate on the table and put the seeds on it, and then the soil. Its thickness should be 1-1.5 cm. Next, the substrate is carefully rolled into a “roll” and inserted into the prepared vessel. You should first pour some sawdust into it. They will help retain moisture, and if overwatered, they will take unnecessary water onto themselves.
Secure the structure with rubber bands and cover the top of the “roll” with a plastic bag. The finished “snail” is sent to a dark, warm place. As soon as the first shoots become visible, move the unusual pot to a sunny place and remove the cellophane.
Peat cups
Before planting in a peat cup, the seeds are germinated; this is done in the same way as for the previous planting options, only the wet material with the seeds is placed in a container with a lid, and the seeds are kept there until germination. The container is opened from time to time for ventilation.
Sprouted seeds are planted in a peat pot one at a time. The soil used is earth, peat and sand. The planted sprouts are watered and covered with film. After 14-18 days, the sprouts will be ready for picking.
Plastic cups
In this case, the planting process is completely repeated, as in the case of peat cups. But it is necessary to make small drainage holes in the plastic for air access.
Peat tablet
Potatoes can also be grown in a peat tablet. Before planting, the seeds are soaked for 5 days, as in the first growing options. Next, you need to prepare the tablet itself, because they are sold in dried form. There is a small depression on one side of the tablet; with this part you need to place the tablet up and pour a little water into the hole. And when it is absorbed, a little more.
After the tablet gets wet, you need to place the seed on it and lightly press it into the peat. Then place the tablet in a bag and close it. In the future, it is necessary to open the package several times a day and spray the tablet from a spray bottle. You also need to leave it for 30 minutes to air.