Farmers who invest effort and money in preparing garlic in the fall receive an early and rich harvest. The advantages of winter garlic (planted in the fall) are disease resistance, high yield, and long-term storage.
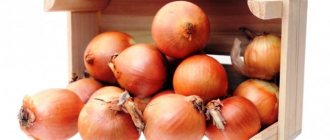
What distinguishes winter garlic from spring garlic is the uniform arrangement of small cloves around the stem in the head. They have an even number - 6-10 pieces, a thicker shell, a pronounced burning taste and are great for food and pickles.
We will reveal the secrets of a bountiful harvest and tell you how to treat garlic before planting for the winter.
Preparing the land for autumn planting of garlic
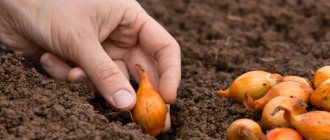
The first stage is choosing a site for planting and preparing the soil in the fall. Planting activities begin in early September. When choosing a place for a bed of garlic, make sure that it is well lit and not in a draft.
So that when the snow melts, water does not accumulate in the garden bed and the garlic does not rot, we place the plantings on a hill. Notice where the snow falls first on your site, where the highest place is, and try to plant there.
If potatoes, carrots, turnips, onions or radishes previously grew in the selected bed, this place is not suitable for planting garlic, because they have the same pests. It is better if these are beds after tomatoes, zucchini, legumes, and cucumbers.
The soil should be loose and light , so first dig up the bed to the depth of a shovel and fertilize it. If we don’t have enough time, we buy ready-made fertilizers, but they are easy to prepare yourself. For example, let's feed with the following mixture: 45 g of classic mineral fertilizer - nitrophoska and 45 g of superphosphate, 250 g of dolomite flour, add this to a bucket of humus and fertilize the bed for the crop (calculated per square meter).
Advice. Sprinkle wood ash between the rows of garlic to repel pests. The distance between rows is 25 cm.
Be sure to determine the acidity of the soil. If nettles, coltsfoot, and clover grow, these are signs of soil with normal acidity. We noticed plantain or ivy - high acidity. Garlic bears fruit well in soil with normal acidity, so if the levels are elevated, treat the soil with chalk or dolomite flour.
Garlic is planted to a depth of 12 cm, then covered with peat or sawdust, or, in extreme cases, dry leaves or pine needles.
The third stage is soil disinfection. This can be done in several ways:
- 5 g of manganese per 10 liters of water;
- 40 g of copper sulfate per 10 liters of water;
- 1 g manganese, 1 g boric acid, 1 g copper sulfate per 1 liter of water.
After this, pour in tinctures of calendula and yarrow, cover with film and remove it only before planting.
Soil preparation
It is imperative to disinfect the soil before planting garlic for the winter. If you plant even properly prepared planting material in contaminated soil, you may not expect a good and healthy harvest. The soil must be free from pests and disinfected from fungal infections. Gardeners do not recommend planting garlic in the same area for two years in a row. A bed that has recently been fertilized with manure is not suitable. There is a scientific explanation for this:
- during the growth process, the above-ground part will be better formed rather than the bulb;
- formed heads in such an area are loose and are poorly stored;
- Such a crop has a high risk of infection with fungal diseases.
It is best to plant garlic in beds where cucumbers and tomatoes, pumpkin or cabbage have recently been grown. The area must be well lit. It is better that it is in the east or west direction. You should not plant garlic in lowlands, as moisture will accumulate there and the crop may rot.
Soil preparation should be done in the fall. This process includes several stages:
- the soil should be dug up and weeds should be carefully removed;
- during the digging process, add compost; if the soil is acidic, add ash;
- water the fertilized area with a fungicidal solution. It is better to use a ready-made soil disinfectant. It is added according to the instructions. The drug protects the soil from possible infections, improves the quality of the crop, and helps increase its quantity.
Selection and preparation of seed material
What kind of seeds you plant is also important. You can select and prepare the soil perfectly, and the planting material will be pumped up. Then don’t expect a harvest.
We pay attention to the following subtleties:
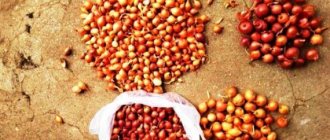
- We choose planting material that is large and dry, without damage, in a word, healthy. Please note that the cloves should have scales;
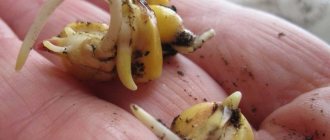
- When separating the cloves, be careful not to damage the bottom part. The end of the clove should be dry and uniformly gray in color.
Processing garlic before planting
Before planting, processing of planting material is required. Garlic, despite the fact that it itself perfectly removes various viruses and bacteria, is very susceptible to various diseases. These are, for example, neck or bacterial rot, downy mildew or downy mildew, garlic rust or garlic fusarium.
Look at the photo to see what the diseases look like.
We get rid of potential pathogens before planting by properly processing the planting material.
For example, garlic bacteriosis affects plants not only during growth, but also during storage. Bacterial rot manifests itself as brown sores on the cloves or transparency of the clove. Garlic is susceptible to disease if it is not ripe or is poorly dried before storage, or perhaps stored in a damp place. With this disease, it is not enough to process only the garlic; you also need to cultivate the soil.
Why is processing needed?
Despite the fact that garlic is often used in folk medicine because of its bactericidal properties, the plant itself is susceptible to infectious diseases. Vegetables that are planted before winter remain for a long time in conditions favorable for the development of diseases. Pathogens often live in the soil. Most of them tolerate cold well. Infections spread quickly, and it is difficult to save the affected elements. Often the only way out is to dig up the plantings and then disinfect the soil.
Also, pest larvae (for example, onion flies, nematodes) may remain in the bottom of the garlic. Insects destroy garlic and spread infections, which significantly aggravates the situation. That is why it is so important not to neglect the processing of planting material. This will help prevent mosaic, penicillium, rot and other problems. Otherwise, even the most modern and stable hybrids may suffer.
How to process garlic
Let's take a closer look at what and how garlic is processed.
Brine
Solution: 2 tablespoons of salt per 1 liter of water.
Soaking time: half an hour.
Copper sulfate
Solution: 10 g of vitriol in 1 liter of water.
Soaking time: 3-4 hours.
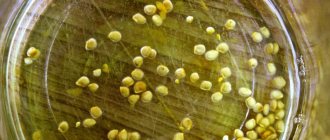
Potassium permangantsovka
Solution: a couple of manganese crystals per 5 liters of water.
Soaking time: overnight or 3-4 hours.
Ash liquor
Making lye is quite simple. We take ash from burning pine and birch firewood, corn and sunflower stalks, rye straw and buckwheat straw. It is forbidden to use ignition products , as well as to burn plastic, cellophane and garbage in the same fire. The ash must be clean.
Solution: sift the ash and fill it with water after rain, melted water or simply boiled water. Proportions: for 0.5 kg of ash we use 3 liters of water.
Then there are two ways:
- Leave for 3-5 days, shaking regularly, then remove everything that floats on top and pour into plastic bottles.
- Leave for 20-30 minutes, then heat, almost bringing to a boil (but do not boil!). Let it cool completely, remove all excess from above and bottle the remaining cloudy liquid.
Store for about six months. It cannot be used in concentrated form. Dilute with water in a ratio of 1:2.
We use it instead of saline solution to disinfect garlic before planting. Dilute the lye and soak the garlic in it for 1-2 hours.
Fungicide "Maxim"
The fungicide is not toxic to humans; it is the only product of its class approved for use in gardens and summer cottages. It is odorless and mixes easily with water. A red pigment is added to the suspension, which allows you to control the application process.
It is valid for 48 days after application, so you can treat it at any convenient time.
It is also used to treat planting crops. Please note that the disinfectant cannot be used on sprouted or already infected seeds that have cracks. It doesn't cure, it prevents disease.
"Maxim" is prepared in glass or plastic containers. The shelf life of the solution is one day after preparation.
Solution: 2 ml of the drug is mixed with 1 liter of water.
This is enough for 1 kg of garlic. The drug protects garlic from such forms of rot as bottom rot, black rot, gray rot and penicillium rot.
Fitosporin
Phytosporin is sold in powder, liquid and paste form. It is better to buy it in the form of a paste - it is both more convenient and economical to dilute. The powder is poorly soluble and cannot be stored; the liquid form is weaker in effect.
Solution: take a packet of paste (200 g) and dilute it in 400 ml of water. This is the so-called mother liquor. You can store it for a long time. When there are leftovers before winter, you can dilute them with water and water the compost pit or soil near trees and shrubs.
To soak garlic, you need 0.2 g of mother liquor and 250 g of water. Soak for 0.5-1 hour.
If phytosporin is in powder form, then take ½ teaspoon and dilute it in 1 liter of water and soak for 15 minutes.
"Fundazol"
“Fundazol” is a therapeutic and prophylactic drug, so the love of summer residents for it is completely justified. However, it is dangerous for humans, so it must be used in strict accordance with the instructions. Available in the form of a white powder with an odor.
Solution: 0.5 liters of water per 10 g of powder.
Soaking time: for a day.
Tar
Birch tar is the most natural and safe remedy for humans and all living things. It is used to get rid of rot and onion flies.
Solution: add 1 teaspoon of tar to 1 liter of water.
Soaking time: literally half an hour before planting.
Can be repeated after garlic sprouts. Water not the seedlings themselves, but between the rows. The irrigation solution is prepared from 10 liters of water, 1 tbsp. l. tar and 30 g of soap. After two weeks, repeat the treatment.
Disembarkation dates and rules
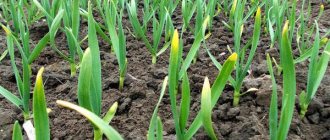
Before winter, garlic begins to be planted 2-3 weeks before frost, so that before the frost its root system is already developing, but there are no shoots yet.
You can navigate by temperature: when the average is +10...+12 °C, planting begins.
Approximately in the middle zone this is the end of September - beginning of October. The further south you go, the later they start, and vice versa.
Key points to pay attention to when planting:
- bed width – 1 m;
- the distance between planted garlic cloves is at least 10 cm;
- distance between rows – 20 cm;
- garlic planting depth in autumn – from 8 to 12 cm;
- the cloves are planted bottom down;
- after planting, the ground is covered with peat, leaves, spruce branches, etc.
Useful tips
Some advice from experienced summer residents:
- when buying garlic for planting, you may buy the wrong variety, so it is better to take planting material from friends on recommendation or develop your own over time;
- do not plant garlic without scales; if they peel off on their own, such a clove is more susceptible to rotting;
- do not plant garlic immediately after digging and preparing the bed for planting - let the soil settle a little and the fertilizers take root;
- pay attention to the time of planting: do not plant too early so that the garlic does not have time to sprout, because when cold weather sets in, the planted garlic will die;
- in the spring, during the formation of the garlic head, remove the arrows so that they do not take all the strength.
How to prepare garlic for planting in the fall
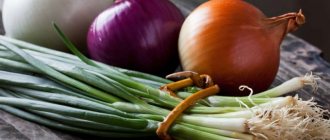
Winter garlic is suitable for autumn planting. Spring crops are not used during this period. Experienced gardeners name the characteristic differences between the two types:
- Only winter crops have an old arrow;
- the arrangement of cloves in several tiers is typical for a spring crop. The winter variety often has only one layer; in rare cases, the second layer may contain a pair of small cloves;
- The winter root vegetable differs in the color of its skin - it is purple.
If you plant a spring variety in winter, it will freeze and there will be no expected shoots in the spring. The preparation of winter varieties has a clear algorithm and is carried out in the established sequence.
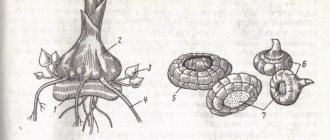
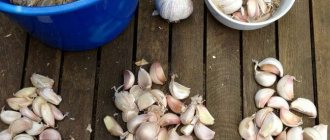
Head selection
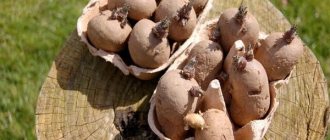
Not all planting material is suitable for winter planting. When selecting, gardeners carefully examine each head, evaluating them according to several indicators:
- head size. The new crop will inherit the parameters of the mother plant, so small heads are not selected for planting;
- weight of cloves. Ideally, the mass of the cloves should be approximately the same. Thanks to this, you can expect that all the teeth of the future harvest will be even;
- appearance. The planting material should not show signs of disease or have a loose texture. The disease may be visible on one tooth, but this already indicates that the entire head is affected;
- The thickness of the peel is assessed. In a healthy plant, it fits tightly to the edible part.
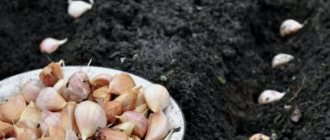
Selection and preparation of cloves
Individual cloves are selected for planting. It is better that they are the same size and shape. Separating the head is not always quick. Soaking it in water for a couple of minutes helps make the task easier. This helps soften the top skin. When dividing, you need to be careful not to injure the covering of the planting material.
Additionally, each clove should be inspected during the process. This will eliminate the risk of contracting the disease in the future. It is necessary to inspect the bottom. If there are no signs of roots on it, then such planting material will not germinate in the spring. When preparing a solution for soaking, you should add a couple of potassium manganese crystals to water at a temperature of 20-25 degrees. The water should be light pink. You can keep the heads in the solution for up to 30 minutes, no longer.
Do I need to peel winter garlic before planting in the garden?
Experienced gardeners strongly advise against cleaning planting material. The peel present on the cloves is a natural protection against pests and diseases. It should not be removed. If you ignore this point and clean the cloves, you can further injure the root base. As a result, the planting material will be spoiled, and in the spring you should not wait for seedlings in the garden.