Which onions are suitable for planting before winter
For winter planting of crops, the following varieties are chosen:
- having high frost resistance;
- resistant to arrow formation;
- capable of growing in short daylight conditions;
- having immunity to diseases.
When choosing onions for winter planting, take into account the recommendations for zoning of each variety. Heat-loving varieties are not suitable for cultivation in northern regions.
Advice. It is better to use sets that were grown from seeds in the same area. Such planting material will not require a period of adaptation to climatic conditions.
The importance of pre-sowing treatment of onions
Every gardener knows: carrying out pre-sowing activities is the key to harvesting a decent harvest from your plot. It is first important to determine the expected planting date and onion variety.
If you are confident in the quality of the planting material, then the processing process can be skipped. And if there is even one doubt about the place of growth or storage conditions of onion sets, then the “seed soaking” procedure is mandatory.
Almost every gardener grows onions on his plot.
Correctly performed preliminary work with seed material will protect you from unpleasant surprises in the future.
If onions are not disinfected, then they can introduce all sorts of pests and contaminate the soil, which can lead to complete loss of the crop.
Compliance with all the rules of preliminary preparation will contribute to:
- significant growth of onions;
- disinfection of the soil around the plant;
- strengthening the immune system;
- increasing stability in adverse weather conditions;
- and will also prevent rotting.
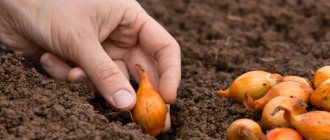
Preparing onions for planting in the fall
Only healthy bulbs are selected. The set must be dry, clean and undamaged. Soft, sprouted, rotten specimens are discarded.
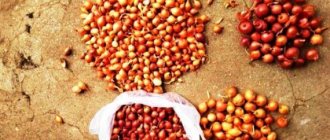
Sorting
The crumbling dry husks of the selected planting material are removed and the dried tops are shortened.
Next, the bulbs are calibrated. For planting, select heads whose size does not exceed 1.5 cm. From such a set a high-quality turnip will grow.
Heads with a diameter of 2-3 cm are planted to obtain green feathers in early spring.
The larger the planting material, the more powerful the greens will be and the greater the likelihood that such onions will form arrows with seeds.
How to properly prepare the soil and how to treat the beds
Autumn preparation is a prerequisite for obtaining a good result in the spring. Digging should be combined with the application of the necessary fertilizers. The acidity of the soil should have a neutral pH value.
Advice . For fertilizer in the spring it is better to use potassium sulfate, for the autumn period - potassium chloride.
A mandatory requirement is that the soil should be as light as possible. To do this, peat is added to the substrate.
Remember . Do not mix manure and ash.
Before planting, the soil must be treated against a variety of insects and all kinds of infections.
For onions, the soil should be as light as possible
The composition may vary:
- Salt solution. Add 60 grams of salt to 10 liters of warm water. The beds are watered with this product at least 24 hours before planting.
- In 3 liters of hot water for 3 days you need to infuse a glass of tobacco dust. This solution is used to spill the soil before planting onion seedlings.
- By adding 40 ml of ammonia to a whole bucket of water, you get a very effective remedy for all kinds of pests. This product is used for the growth of green mass in onion sets.
The described compositions can be used not only for watering, but also for spraying.
Important . Any water procedures are carried out in the evening, in dry weather.
Do I need to soak winter onions before planting in the fall?
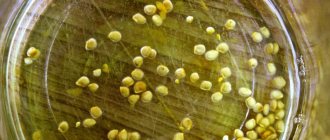
To obtain a high-quality onion harvest in a timely manner, gardeners practice soaking. Soaking onions before planting in the fall is necessary to disinfect the heads from infections and fungal infections.
Attention! Prolonged exposure to solutions leads to oversaturation of the bulbs with moisture; in cold soil, this provokes freezing of the heads.
Soaking does not last long and is carried out on the day the seeds are planted in open ground.
Features of cultivation
A bountiful harvest on your own plot is the merit of an attentive farmer. Beginners often encounter the fact that young plants are destroyed by pests and diseases, and sometimes plants do not fully reveal their potential. Do I need to soak onions before planting?
The light-loving crop has certain requirements for growth. Lack of sunlight negatively affects the general condition and can provoke the activation of fungi. Improper watering regime also contributes to the fact that the bulb loses the protective properties of the immune system. Excess moisture or regular thirst during the formation of roots and green mass will affect the yield.
Fungal diseases and infections are the scourge of vegetables. Without pre-treatment, seeds are subject to aggressive attack from diseases. Additionally, insects will happily feast on juicy bulbs.
Ignoring the rules of crop rotation will also negatively affect the overall health of the plants. Experienced farmers do not recommend planting the crop for several years in a row in one place, or after carrots, garlic or cucumbers. The best predecessors are considered:
- green manure (rapeseed, clover, lupine, mustard);
- legumes;
- tomatoes;
- cabbage.
The plant does not like acidic soils, so the soil must first be alkalized. The beds for the bulbs are prepared in the fall. Carefully dig up the ground, choosing plant debris. Organic fertilizers are added in the winter, and mineral fertilizing is applied in the spring. If the vegetables in the area were sick, then it is better to etch the area with copper sulfate.
All of the above factors can negatively affect productivity. To reduce financial and physical costs, farmers use a less troublesome method - soaking onions before sowing. Spring work will not take as much time as removing the consequences of errors.
Why soak onions before planting?
Soaking is carried out for the purpose of preventing diseases, destroying pest larvae between the layers of the skin of the heads, preventing bolting, increasing the percentage of germination, improving the quality and quantity of the crop.
For good growth
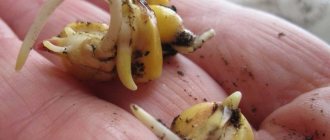
To obtain vigorous shoots in early spring, the seed is prepared in the fall. Heat treatment of seedlings is needed in order to “wake up” the vital processes of the planting material, for better development of the root system before the onset of frost. A good effect is achieved by immersing the seeds for 8-9 hours in a container of water, in which the temperature is maintained at +40°C.
You can also use a quick awakening by alternating immersion in hot and cold water. First, the seedlings are kept for 10-15 minutes at a temperature of +45...+50°C, then immersed in cold water for 10 minutes.
As a preventive measure against diseases and pests
Since the seedlings planted in the fall will experience oversaturation with moisture during the autumn rains and heavy snowfalls, the bulbs may be susceptible to fungal infections.
To prevent fungal diseases and the appearance of insect pests, with the onset of spring, planting material is disinfected. This will help get rid of pathogenic bacteria and insect larvae located between the scales of the bulbs.
To protect against shooting
The formation of an arrow on which seeds appear after flowering is an undesirable process. Flowering arrows take away the nutrients necessary for the formation and growth of onion heads.
To prevent bolting, onions are heated in hot water before winter planting. To do this, use slow heating or dip for 30 seconds in hot water heated to +60°C.
Preparations for soaking onions
In addition to folk recipes, ready-made formulations are also used for soaking onions before planting. For treatment, you can buy the following stimulants:
- "Maksim"
. Sold in liquid form in ampoules. The active ingredient is fludioxonil. Used to prevent mold, root rot and many other problems. - "Epin Extra"
. A biostimulating drug that helps increase plant immunity, accelerate ripening and at the same time significantly increase yield. Soaking onions before planting will help solve many problems in the future. - "Energen"
. Growth stimulator with a wide range of actions. The composition contains the following main substances: humic and fulvic acid. Additional substances include: sulfur and silicic acid. - "Gumat +7"
. Highly effective preparation in the form of fertilizer. The main effect is to stimulate the active growth of all types of plants. In addition to nutritious humus, it contains a large number of different nutrients, which will bring a lot of benefits when soaking onions before planting. - "Biostim"
. Organomineral fertilizer based on amino acids of plant origin. The composition is completely natural. This is a long-used tool that is not inferior to new developments. - "Zircon"
. An immunomodulator that helps not only restore protective functions, but also stimulates the rapid development and growth of onions. The chemical composition is rich in many useful substances and minerals. In addition, there are various acids present.
Such preparation of onions for planting in the spring will help improve germination, grow roots faster and, in addition, strengthen resistance to adverse conditions. The drug is dissolved in water, strictly following the instructions on the packaging. The water should be heated to +40ºС. The onion is placed in the composition for a maximum of 15 minutes. Drying is mandatory before planting.
What and how to soak correctly
For soaking seedlings before winter planting, there are various compositions prepared from biological products and folk remedies. We'll tell you how to soak onions and what proportions of solutions to use.
In a solution of salt and water
The cheapest and most accessible method is treatment with a solution of table salt. The saline solution inhibits the growth of pathogenic bacteria, prevents the appearance of onion nematodes, mites, and thrips.
To prepare a saline solution, use 10 g of table salt and 1 liter of water heated to +45°C. The seedlings are placed in the solution and kept in it for 15-20 minutes.
Warm saline solution has a dual effect: it disinfects and prevents the formation of shoots.
Soaking in a solution of potassium permanganate
Potassium permanganate solution has many properties:
- has an antiseptic effect;
- protects the seedlings from wintering insect pests;
- prevents fungal diseases;
- accelerates the rooting of seedlings.
To prepare a solution, 1 g of the substance is dissolved in 1 liter of warm water. The planting material is kept in this solution for 30-40 minutes.
Attention! Treatment in a solution of potassium permanganate is carried out before planting the sets. Treated onions are not washed with water or dried.
In a solution of copper sulfate
Copper sulfate is used as a pesticide to treat bulbs against parasites and pathogenic fungi overwintering in the soil. A solution of copper sulfate has disinfectant and antiseptic properties and is used to prevent various rots of onions.
To prepare a solution, 25-30 g of the drug are diluted in 10 liters of warm water. The seedlings are immersed in the solution for 2.5-3 hours, dried and planted in the beds.
In soda solution
The most popular method is treatment with soda solution. Soda has antiseptic properties. This procedure allows you to prevent damage to stem and root rot, downy mildew, and bacteriosis. To soak the seeds, prepare a solution of 25 g of soda and 5 liters of water, heat it to 45°C and keep the seeds in it for 20-30 minutes.
With tar
One of the effective folk remedies for soaking seedlings before planting is a solution of birch tar. It has an antiseptic effect, prevents the appearance of pathogenic microbes, putrefactive bacteria, onion flies and other crop pests, does not cause addiction to them and provides long-term protection.
Important! Before processing in the solution, the bulbs are heated at a temperature of +35…+37°C.
To prepare the solution 1 tbsp. l. birch tar is diluted in 1 liter of warm water. The onions, previously cleared of old husks, are placed in the solution for 2.5-3 hours, stirring occasionally so that each head is evenly soaked.
In hot water for heat treatment
To be sure of the purity of the planting material, to protect the sets from nematodes, insect larvae and putrefactive bacteria, it is necessary to warm up the onion sets before planting in the fall. To do this, the bulbs are immersed for 10-15 seconds in water heated to 80°C. During this time, the bacteria, eggs and larvae of pests located between the onion scales will die, and the onion itself will not have time to warm up much.
Soaking the seeds in hot water increases the germination percentage. Heat treatment in hot water will prevent the bulbs from sprouting before frost.
Preparations for disinfecting onions
To disinfect the bulbs, use the drug “Fitosporin”.
Reference. "Fitosporin" is a microbiological preparation of systemic action aimed at destroying fungal and bacterial infections. Live bacteria in its composition, during their life activity, inhibit and block the reproduction and growth of pathogenic bacteria and pathogenic fungi.
Soaking in a solution of “Fitosporin” helps prevent the development of bacteriosis, downy mildew, and various types of rot.
The drug in the form of a powder or paste is pre-soaked for 2 hours in water to awaken living bacteria.
Attention! To prepare the solution, it is not allowed to use chlorinated tap water - it will lead to the death of living bacteria.
The powder is dissolved in water in a proportion of 10 g per 0.5 l of water. To prepare a solution from the paste, first prepare a concentrate: 100 g of paste is diluted in 0.2 liters of water. Then 30 ml of concentrate is mixed with 200 ml of water.
Liquid “Fitosporin” is diluted at the rate of 5 drops per 100 ml of water. The seedlings are soaked in the prepared solution for 2 hours before planting.
The solution with soaked bulbs is kept in a dark place. When exposed to sunlight, living bacteria die.
Procedure for processing with potassium permanganate
After soaking in a saline solution, you need to begin processing the planting material using potassium permanganate. Depending on the condition of the seeds or sets, you can use a solution of varying degrees of concentration, which will determine the soaking time. We will consider the acceptable options separately.
Method No. 1
Involves the use of a solution of medium “power”. The rules of this method are:
- The concentration of the active substance is 1%. Therefore, you need to prepare a dark purple manganese solution. To do this, you will need to dilute 10 g of potassium permanganate in 1 liter of water.
- If it is not possible to accurately weigh the powder using a scale, you can assume that 1 tsp. without top holds 6 g of potassium permanganate.
- Dissolve a measured amount of powder in warm water.
- The soaking time for bulbs or seeds in the solution is 40-50 minutes.
This treatment will help if the planting material has fungal infections or is infected with mold.
After such dressing, the onion should be immediately rinsed with warm water and dried for planting or left under film for 6-8 hours so that it releases roots. When planting, you need to act as carefully as possible so as not to damage the formed roots, otherwise you can significantly slow down the survival rate of the bulbs.
Method No. 2
This technology requires compliance with the following rules:
- use a weaker solution - 35-40 g of potassium permanganate per 10 liters of water;
- increase the soaking time to 2-3 hours;
- before immersing in water, first place onion seedlings in a stocking so that later they can be easily removed from the solution;
- After soaking, rinse and dry the planting material.
In terms of the impact on seeds or onion sets, the second method is more gentle, so there is less risk of harming it. However, experienced gardeners prefer to expose onions to more aggressive influences in order to destroy all microbes and viruses on its surface.
Method No. 3
The most aggressive technology, which involves the following rules:
- increase the concentration of the active substance as much as possible - up to 20-25 g per 1 liter of warm water (you should get a solution of a dark beetroot shade);
- reduce the soaking time to a minimum - up to 15-20 minutes.
After soaking, the bulbs may darken. In any case, they need to be washed and dried well.
Such treatment can only be used if there is suspicion of onion infection with onion fly larvae, powdery mildew spores or other dangerous diseases. This solution is very strong, so it effectively disinfects onions. The disadvantage is that it can also damage the seed material and reduce its germination rate.
Landing Features
Planting of crops before winter is carried out immediately after a stable drop in air temperature to +5°C has been established. It is impossible to delay the planting time, since the seedlings will not have time to take root before the onset of frost. Seeds planted earlier than recommended may germinate before winter.
DO THIS WHEN PLANTING ONIONS FOR A BIG HARVEST!!!
Soil preparation
To grow the crop, choose areas with fertile, well-drained soil. Loamy, neutral soils are best suited. The site should be well lit by the sun and not be in a lowland, where there will be constant stagnation of moisture.
The area is cleared of plant residues and 10 days after planting, it is dug up deeply with the addition of humus (5 l/m²) and superphosphate (30 g/m²).
Technology for planting winter onions
Dry weather is chosen for planting onions. Furrows with a depth of 2.5-3 cm are made on the site. A distance of 25-28 cm is left between the beds. When growing seedlings for green mass, the bulbs are placed at a distance of 5-6 cm.
If it is necessary to grow a turnip, the distance is increased to 8-10 cm. The heads are placed vertically in grooves, sprinkled with soil, tamping down a little.
Attention! When planting crops before winter, the beds are not watered.
Care
Onions planted in autumn do not require watering, since the soil will not dry out during the rainy season. The beds are covered with a layer of mulch. During the winter, the onion plantings will remain dormant. Caring for the crop is necessary with the onset of spring. In early spring, the mulch is removed so that the beds begin to warm up from the sun.
When the top layer of soil dries out, watering is carried out. After them, the soil is loosened to improve root aeration. Simultaneously with loosening, weeds are removed, taking nutrients from the soil. Thin out onion seedlings as necessary.
The first fertilizing with wood ash is carried out after removing the mulch from the beds. During active growth of green mass, fertilizing with a solution of chicken manure is used. During the period of turnip formation, urea (20 g/m²) and superphosphate (30 g/m²) are added to the soil. The third fertilizing is carried out by adding potassium nitrate (20 g/m²) to the soil.
Watering is carried out once a week. When dry weather sets in, the crop is watered every 3 days.
Onions planting and care in open ground
As we know, onions cannot be planted in the same place where the onion bed was also located last year. In this case, the likelihood of disease increases greatly, and such plantings should be avoided.
Choose a place where tomatoes, carrots, potatoes, legumes, cucumbers, zucchini, pumpkin, and cabbage were previously planted. The soil after them retains its nutritional value, and the onion needs this to grow a good turnip. Onions and carrots have good neighborly relations; they repel each other’s pests, so you can plant them side by side.
He also prefers the soil to be light, loose and nutritious. Loves bright places, with good drainage, without stagnant moisture.
It is better to prepare the future onion bed in advance in the fall, loosen the soil well and add humus and compost. In the spring, one to two weeks before planting, we loosen the soil and sprinkle it with organic humic fertilizers. Gumi Kuznetsova will do.
Planting an onion on a turnip (on the head)
We prepare grooves approximately 8-10 cm deep. The distance between them is at least 15 cm.
We spill them with Fitosporin solution for disinfection. You can use both powder (1 tsp per 10 liters of water) and paste (1 tbsp diluted paste per 10 liters of water).
We plant our seedlings in the spilled grooves at a distance of 10 cm from each other. We sit him on what is called “shoulder-deep”, i.e. not only to cover the roots, but much deeper. This is necessary so that the bulb has good contact with the soil and does not dangle, because It won't be long before she has roots.
Sprinkle wood ash on top as fertilizer and disinfection. And fill the grooves with earth.
Planting onions on greens (on a feather)
When we don’t have a goal to grow turnips, but we only want greenery, then to save space we suggest you use the bridge planting method.
This is when the bulbs are planted one to one very tightly and not very deep. In this case, planting in open ground is not necessary; you can use a container with soil. Or select a small place in the garden bed.
Mixed fit on the pen and head at the same time
When we don’t have a lot of space, but we want to grow good onions and eat greens, then this method will come in handy. We make the furrows as usual, but we plant the seedlings in them in a checkerboard pattern and quite often.
With such a goal that some of these seedlings will grow into turnips, and some can be pulled out as they grow into greens and consumed fresh.
Otherwise, the actions are the same as for classic planting on a turnip (see above).
Onion care
When we have organized a good garden bed, in a well-lit place, with nutritious, loose soil, all we have to do is weed it in time so that weeds do not interfere with the growth of the crop. We water after planting once a week.
Onions also need frequent loosening of the soil (between rows and between plantings, especially after rain, so that the soil does not turn into crust) and fertilizing.
At the end of May it is necessary to feed it with nitrogen-containing fertilizers, in mid-June it already requires potassium fertilizers and ammonium nitrate. For those who prefer to do without chemicals, green fertilizers made from weeds and nettles, vermicompost and ash are suitable.
Fertilizing with ammonia is also effective: 2 tbsp. dissolve a liter of ammonia in 10 liters of water; you need to water it on wet soil, not dry soil. Therefore, we pre-moisten the beds. Ammonia will drive away pests and nourish your plantings with the necessary nitrogen.
We do this feeding in triads with an interval of 10 days. And you will forget about the yellowing of the onion feather, and the onion fly will not even stick its nose into your beds.
That's it, dear friends, there is nothing complicated in growing onions, you will definitely succeed.
Tips and tricks for soaking onions before planting
Experienced gardeners recommend:
- To reduce the period of growth of the root system, the seed material is soaked for 20-30 minutes in solutions of root formation stimulants “Zircon” and “Kornevin”.
- After soaking in disinfecting solutions, the seedlings are dried. Placed in soil, wet planting material will begin to rot.
- To ensure that the disinfectant composition penetrates well through all the scales, a small incision is made on the top of the neck of the onion.
- To disinfect the bulbs, before planting, they are kept for 2-3 hours in a solution of wood ash.
Salt treatment procedure
Before planting in the ground, selected and heated seed must first be treated with salt - sea salt or regular table salt. This is done in several stages:
- Moisturizing planting material . During the storage season, onions lose a lot of moisture, so it is worth moistening them initially - placing them in plain water for 2 hours. Thanks to this technique, disinfection will be more effective.
- Preparation of saline solution . Dilute salt in warm clean water at the rate of 1 tbsp. l. for 1 liter of water.
- Soaking . Immerse the planting material in a saline solution for 2-3 hours.
- Flushing . After soaking, rinse the bulbs or seeds thoroughly with several changes of water.
If the onions were not treated with a saline solution, then this composition can be sprayed on the onion beds:
- Dissolve 300 g of salt in a bucket of water.
- Pour the prepared mixture over the onions.
- Wash off the salt from the feathers of the plants by spraying them with clean water.
This watering can be done once a season. If you do this more often, you will be able to fight the onion fly more effectively, but the soil will become too saline. As a result, the plant will lag behind in development or stop growing altogether. The salt itself will be difficult to wash out of the soil and will remain in it for a long time.
Planting onions
Onions are planted in May in warm, moist soil. For planting, prepare a bed in a well-lit and ventilated place. The crop requires soil with a high content of organic matter. A bed after zucchini, pumpkin and cucumbers is well suited. Onions are not planted after the onions and garlic themselves. Before planting, the soil is loosened well, a furrow is marked and it is poured from the spout of a watering can without a sprayer.
It is convenient to plant onions in a furrow in a checkerboard pattern, so during the season it will be possible to select a product from the ridge for greens, because it is not recommended to pick feathers separately from a common bed. If the green part is cut off, a good bulb will not form. An unprotected bulbous cut can cause fungal infection.
Planting process
Why process onions before sowing?
To get the best results from growing a crop, you need good seed material and know how to disinfect onion sets before planting. The set must be dense, clean, and without damage. Dry, sprouted or with signs of rotting specimens are not suitable for planting.
Processing onions before planting
To grow bulbs, take small sets, up to 3 cm in diameter. Empty, damaged bulbs should be thrown away, and sprouted or large ones can be used to plant separately on greens. Before starting various treatments against pests and diseases, the seedlings are sorted and heated.
Why are treatments needed:
- increase germination;
- increase the quality and size of the crop;
- reduce the formation of flower shoots;
- protect against pests and diseases.
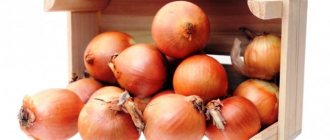
Onions are often stored incorrectly, especially in warehouses at low temperatures. For sevka, the required storage mode is at a temperature of +18°C. Well-dried seedlings do not germinate before planting time. Purchased seed should not be planted immediately after purchase. Seeds stored at low temperatures will go away when planted and will not form a large bulb. Therefore, purchased planting material should be dried and heated for several weeks at home. To do this, the seedlings are kept for 14-20 days at a temperature of +20°C.
You can warm it up by laying out the seeds near radiators and other heating devices. Before planting, for 8-10 hours, the seed is heated at an elevated temperature of +30...+40°C, without overexposing or exceeding the temperature. A warmed onion shows better survival rate and will shoot less. The method also helps against infection with neck rot and powdery mildew. Sometimes, to prevent onion arrows from forming, soaking in a soda solution is used. But soda is less effective than pre-sowing heating.
Note. There is also a quick way to warm up the seeds if the time for long-term warming is missed for some reason. The seed is soaked in water at a temperature of +45...+50 °C - this is hot water that can be tolerated by the hand. Soaking time is 10-15 minutes, then immediately immerse the set in cold water for the same time.
For rapid germination, it is important to remove dry husks from the seeds. Unhulled scales release substances into the soil that inhibit the germination of the head. All dry husks are removed before the first juicy scales appear. You should carefully strip the onions so as not to damage the roots.
Dry onion tops are trimmed to speed up the exit of the feather. But due to inexperience, you can confuse the parts of the onion and cut off the root or cut out the neck too much. Therefore, you can wait a while with this technique; with subsequent soaking, the dry neck will soften on its own, and pruning will not be required.
What are the pros and cons of the procedure?
There is still ongoing debate among gardeners about whether it is necessary to soak onion seeds or not. Of course, this is everyone's business, and before making a decision, you need to familiarize yourself with the pros and cons of soaking onions.
Pros:
- Abundant growth of both greenery and turnips.
- Disinfection.
- Prevention of rotting.
- Protecting the soil from pathogenic bacteria that can be carried along with the seeds.
Minuses:
- Before soaking, you need to cut the onion, and if the seeds are too small, this will be a rather labor-intensive task.
- Improper preparation for soaking and violation of temperature conditions.
- Seeds can deteriorate due to improper pruning or non-compliance with the proportions of the solution (read how to prune onions correctly here).