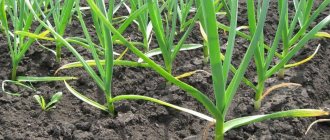
Why process garlic before planting?
No matter how well you prepare the bed for the autumn planting of garlic, spores of pathogenic fungi and pathogenic bacteria can still remain in the soil. They attack the plant.
As a result, the garlic rots and does not survive until spring.
ON A NOTE. We also must not forget about the hereditary diseases that garlic cloves inherit from the mother’s bulb.
How to peel garlic before planting. Proper processing of garlic heads for planting
It is necessary to plant exactly the seed that was grown and collected in the gardener’s country.
Thus, the fruit will already be fully adapted to weather conditions and soil. If you take foreign varieties for planting, it may happen that the plant simply does not sprout and dies, since the new growing conditions are not for it. For planting, good quality cloves of the spring (for planting in spring) or winter (for planting in winter) species are selected. The teeth should have a dense structure and no defects. Garlic just before planting
There are several types of preparation for planting. To get the most out of your efforts, you need to understand how to prepare seed. By following these simple rules, the crop will be protected from parasites and will be able to grow faster. Consider these types:
- If only seeds are available, then they too should be treated with cold before planting. The only difference is the aging time - you can keep the seeds in the refrigerator for 30 days. This procedure will allow the garlic to sprout faster and form larger heads once the garlic has sprouted. Moreover, this way the vegetable will not be afraid of the cold of winter and will not die.
- Some gardeners prefer to prepare and treat garlic with special antiparasitic agents before planting. After this procedure, the garlic must be dried.
Before planting a plant in the ground, it must be hardened at a temperature not exceeding +5 degrees Celsius. A shelf in the refrigerator will do. It is necessary to place the heads in the cold 2 months before you plan to plant the garlic cloves. After maintaining the temperature, the head is divided into individual cloves. This procedure should be carried out very carefully so as not to damage the integrity of the tooth.
Does garlic require pre-soaking before planting?
Experienced gardeners recommend soaking the plant.
However, ordinary tap water will not work in any case. To do this, you need to make a special solution that will protect the teeth from parasites during growth. After soaking, garlic grows much faster, and the fruits are large and fleshy. It is generally customary to soak garlic in a saline solution. Ticks and other harmful insects do not tolerate table salt solution. To create such a solution you need to take 30 grams of salt and three liters of water. Soak the garlic in this solution for no more than 24 hours.
There is another effective and useful solution - a solution of potassium permanganate. The resulting solution should have a light pink tint. Soak the garlic for no more than fifteen minutes.
The disinfecting solution looks like this: dilute copper sulfate (1 teaspoon) in water (1 liter). Keep for no more than thirty minutes.
The next method is to make a solution from ash (wood ash). Half a kilogram of ash is poured with water at room temperature. The ash must first be sifted well. After infusing the solution for twenty minutes, place it on the stove and bring to a boil. Then you need to decant it and dilute it with water (half a liter of solution per liter of water). Soak the garlic for 48 hours.
How to properly process planting material before planting before winter
There is nothing difficult about processing garlic before planting.
First you need to select suitable planting material. Take medium-sized cloves from proven varieties. Make sure they have no damage or signs of rot.
Next, prepare a liquid mixture of water and fungicide. This may be a remedy diluted according to a folk recipe. Or a purchased drug. This is a matter of taste and personal preference.
Garlic cloves are placed in the liquid for the required amount of time. Then the planting material is dried and planted on the prepared plot of the garden.
Preparing garlic for planting. How to prepare garlic cloves for planting
One of the most important points in properly planting garlic in a personal plot is preparing the plants for this. This is what we will talk about in our publication.
If you have not yet subscribed to our channel, then do it right now by clicking on the “Subscribe” button!!!
Preparing garlic before planting
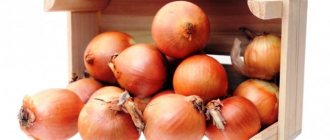
Before planting garlic in the fall on your personal plot, you should pay great attention to the selection of planting material in order to then get a very good harvest for the next year.
After the previous garlic harvest was harvested in July, the bulbs were stored. And now it is necessary to select the largest ones for planting. The larger the onion, the more cloves it contains, which means the greater the garlic harvest. But you especially need to look at the bottom of the bulbs. It must be intact and without visible damage.
Garlic bulbs are also called heads. So, before planting, we separate the heads into cloves and carefully inspect them. If we notice those damaged by diseases or pests, then we immediately discard them. We leave only healthy cloves.
Even if the onion had at least one damaged clove, the rest must be disinfected. To do this, some gardeners use copper sulfate (1 tsp per 10 liters of water). Although a solution of potassium permanganate is also quite suitable. We dip the cloves in it for a few minutes, and they are completely ready for planting.
When choosing heads of garlic for planting, there is one small trick that few people know about. If the bulb contains only 3-4 large cloves, then such garlic should not be planted. It is already degenerating and is not suitable for planting. But if the bulb has more cloves, then it is quite suitable for planting in open ground in the fall.
And one more general rule - do not peel the garlic cloves before planting. They cannot be planted naked. In this case, the cloves are more susceptible to various diseases, which can lead to a large loss of the future harvest.
This is how you can quite simply prepare garlic for planting in your garden. In our next publications, read about the timing of planting garlic in 2021.
How to treat the soil before planting garlic
An important point is soil disinfection. This is necessary in order to destroy pathogenic microorganisms remaining in the soil before the onset of winter.
The soil is treated while preparing the bed for planting garlic. That is, somewhere in 20-30 days.
There are several effective ways to treat garlic cloves.
The most accessible solution is potassium permanganate. 5 grams are diluted in 10 liters of water and watered evenly over the area.
The most effective solution is copper sulfate. A bucket of water requires 40 grams of product.
You can also use tinctures of various plants (for example, calendula), but you need to understand that they are much less effective.
Feeding
Watering garlic can be successfully combined with fertilizing. Let's talk about how to feed winter garlic for its best growth. In general, fertilizing is best done in three stages as the plants develop.
As soon as the garlic has 3-4 true leaves, water it with a urea solution from a watering can or by sprinkling. Solution concentration – 1 tbsp. l. fertilizers per 10 liters of water. This volume is enough for the entire garden bed, since the consumption is 2-3 liters per 1 m2.
Before feeding winter garlic a second time, wait two weeks after the first application. To prepare a nutrient solution, nitroammophoska or nitrophoska and the drug “Agricola” or “Fertility” are diluted in ten liters of water. Consumption is 4-5 liters per 1 m2.
The third feeding is aimed at “supporting” the plant during the formation of the bulb, and it occurs in the second half of June. Crushed superphosphate (2 tbsp) is diluted in ten liters of water. The solution consumption is 4-5 liters per 1 m2.
Treatment with folk remedies
Planting material can be treated using folk remedies that have fungicidal properties.
Salt solution
This is the easiest way to process garlic before winter. Dissolve 2 tablespoons of salt in a liter of water and soak the teeth for half an hour.
After drying, the garlic is ready for planting in the garden.
Pale solution of potassium permanganate
You need to prepare a weak pale pink solution. And be sure to make sure there are no undissolved crystals. It must be processed within 10 minutes.
Tar solution
Not the most popular remedy among summer residents. Mainly due to the fact that not everyone can buy tar. However, such a liquid preparation effectively prevents garlic from rotting.
For every liter of water, take a teaspoon of tar. Mix thoroughly until smooth and soak the garlic for half an hour.
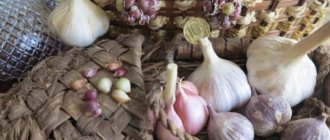
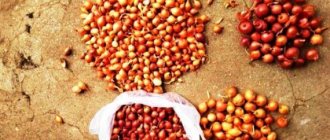
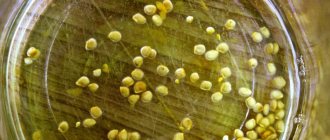
Selection and preparation of planting material
For winter planting, a winter crop variety is used. Before planting for the winter, garlic should be carefully selected and inspected according to several parameters:
- Estimate the size of the bulb . Small heads are not selected for planting, since the crop will completely inherit the original size from the mother. Feel free to set aside the large, dense heads.
- Weight of teeth . Gardeners try to plant cloves of the same size because they want to achieve the same germination rate and yield. In addition, this affects the overall approximate size of the heads. If there is no obvious need to grow identical fruits, then this point can be excluded.
- Appearance . The parent fetus should not have any significant diseases; the texture of the teeth should be dense and hard. If a lesion is found on one clove, then the entire head is considered infected.
- Skin density . In a healthy fetus, the skin always fits tightly to the fetal body, it is not bursting and strong.
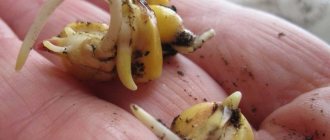
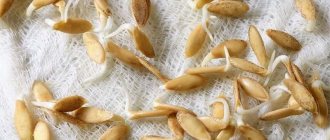
To make it easier to separate the cloves and disassemble the head, you can soak the head for a few minutes in warm water. This will help soften the outer skin of the crop. When disassembling the onion, be careful not to damage the skin of the cloves themselves.
After disassembling the head, you need to inspect each clove individually. It should not be damaged, stained or infected. Also pay attention to the bottom, it should have signs of young roots. If the bottom is broken or roots are not formed, then the clove will not germinate.
When the cloves have been selected, you need to soak them in a solution of potassium permanganate. To do this you will need:
- warm water 20-25 degrees,
- manganese - several dry crystals.
The solution will turn out to be light pink. Seed material should be placed in the solution for no more than 30 minutes.
Treatment of garlic with preparations before winter
Preparations produced by the chemical industry have a much greater fungicidal effect due to the concentration of active substances.
But you need to be careful and observe the soaking time for the teeth so that they do not get a chemical burn.
Below are the most effective fungicides for treating garlic before winter.
Copper sulfate
It is considered the most effective fungicide for treating planting material. For 1 liter of water you need 5 grams of the drug. Soaking time – 10 minutes.
Maxim summer resident
A special agent for treating planting material. Soaking time – 30 minutes. The working solution is prepared in the proportion of 2 ml of the drug per 1 liter of water.
Fitosporin
One of the most effective and at the same time safe means for treating garlic before planting before winter.
The liquid is prepared according to the instructions. You need to treat your teeth for half an hour.
Fundazol
Before planting, the teeth can be treated with foundation. Per liter of water you need 20 grams of powder.
Remember to dry the teeth before planting and never peel them.
Winter garlic: planting dates
As mentioned above, winter garlic is planted in garden beds in the fall. Arrowing varieties, the most common, form, in addition to the underground bulb, an inflorescence, on which bulbs then develop.
Before you learn how to treat garlic before planting, you should find out when it should be planted. Let us immediately note that there is no specific date. Planting dates depend on climatic conditions. Keep in mind that this needs to be done approximately 1-1.5 months before the cold snap. During this time, the teeth should take root and develop a good root system that will penetrate 10-12 cm deep, but not “release” the leaves. In regions with a cold climate, the planting period begins on September 20, in more southern regions - from October 14. If you plant garlic earlier, it will germinate; if it is planted later, it will freeze.
How long to soak garlic cloves in solution before planting
The same amount of time for soaking the cloves before planting them in the garden. The average for folk remedies is 12 hours, for purchased fungicides – 30 minutes. But there are exceptions here too. For example, teeth are soaked in a solution of copper sulfate for no more than 10 minutes. In a solution of table salt - 20 minutes, in a solution of Fitosporin - 2 hours.
Therefore, if you use purchased fungicides for treatment before winter, be sure to read the instructions on the package. It indicates the period for soaking the seed before planting.
Is it necessary to soak garlic in potassium permanganate?
While there is still time, I propose to discuss the need for pre-planting treatment of selected garlic cloves. Is this procedure mandatory and, if so, how should it be performed correctly?
We tried both ways. Last year we decided to save time and effort and didn’t bother with soaking the garlic cloves. The result is that this year we collected almost one small change.
Of course, the weather also played a role - hot May and the first half of June and dank, rainy July. I know that many people dug up the crop ahead of schedule this time, having noticed rotting on the control specimens.
Common mistakes
- The cloves are peeled. Husk is a natural protection against fungi and pests. Don't delete it.
- Too concentrated a fungicide mixture is used. Dilute the drug strictly according to the instructions, otherwise you will “burn” the planting material.
- The garlic is soaked too long. The same goes for soaking times. Leaving the cloves in liquid for a long time will cause chemical burns.
- Garlic is not dried before planting. Teeth must be blotted with a towel and dried.
Disinfecting the beds before planting
Planting material must be processed before planting.
This will avoid diseases and pests. There are several options for disinfecting garlic; each gardener chooses his own method. Copper sulfate can be purchased at any specialty store. Table salt is available in every home, so you can start processing the garlic before planting.
To do this, we inspect the garlic cloves and select only healthy, undamaged ones for planting. Place the cloves in a cloth bag and soak in a saline solution for 2-3 minutes. We dilute the saline solution in a ratio of 3 tbsp. salt per 5 liters of water.
Immediately after this, dip the garlic into the copper sulfate solution. To do this, dilute 1 tbsp in 10 liters of water. l. drug. Soak the garlic in the solution for 2 minutes. After which we immediately plant the garlic in a previously prepared bed.
Potassium permanganate.
To process garlic, prepare a light pink solution of potassium permanganate. Place winter garlic in the solution for 2 minutes. It is more convenient to carry out the procedure by placing the garlic cloves in a cloth bag. After processing, plant the garlic on a fertilized bed.
It is very good to treat garlic against pests in a solution of a broad-spectrum insecticide. Karbofos copes with this task effectively.
Wood ash.
Wood ash is not only an excellent fertilizer, but also a useful solution. To ensure that garlic grows actively, we treat it with wood ash diluted in water in a ratio of 300 g of ash to 10 liters of water. I most often use this solution for spring garlic, not winter garlic.
If the garlic has been well processed and planted on fertilized soil, then in the spring, as soon as the snow melts, the garlic will actively begin to grow. As soon as the snow melts, I recommend loosening the soil so that there is access to oxygen, and the sprouts will quickly break through the earthen crust.
Potassium permanganate is used most often. Kills harmful microflora, inhibits most fungi, saturates the skin with potassium, which will later be used as fertilizer.
Not dangerous to humans, but it is best to work with rubber or latex gloves. At high concentrations, traces may remain on the skin.
In reality much less. The authors constantly rewrite the same recommendations, without thinking that they are followed by real people, who then do not reap the real harvest.
Experienced gardeners do things differently.
To plant garlic, use a marker. This device is the width of the bed (50...80 cm). It has pegs located at a certain distance. To plant garlic, it is recommended to sow in rows at a distance between rows of 18...25 cm, and a gap of 7 cm and above is maintained in the row.
Several interesting designs of markers have been invented and used. They are easy to use.
The designs of the devices are easy to replicate. If desired, every vegetable grower can make them.
Having prepared the holes in the beds, all that remains is to disinfect them. The easiest way would be to pour 150...200 ml of boiling water into each. But this method will only temporarily prevent the appearance of pests and diseases. More effective solutions are needed.
To water the holes, use a three percent solution of copper sulfate (30 g of crystals are dissolved in 1 liter of water or 300 g in 10 liters). 50...70 ml is poured into each seat.
Some vegetable growers place small pieces of toilet paper at the bottom of the hole to prolong the effect of the disinfecting solution. The fungicide will be stored in such a battery. Even a planted clove will be protected by the drug for a long time.
To avoid losses in the spring, you need to protect the garlic in the fall.
Experts recommend treating garlic bulbs and cloves with special preparations before planting, which will provide good protection against pests and diseases. After such treatments, the germination rate of planting material is almost one hundred percent.
However, you need to know which preparations are best used for winter and which for spring garlic:
- Solutions of salt and copper sulfate can protect against various diseases. They can be used to treat both spring and winter varieties.
- A solution of potassium permanganate disinfects planting material, which may contain bacteria and fungal spores. Potassium permanganate also promotes root formation. Used to treat teeth both in autumn and spring.
- Ash infusion is intended to saturate seeds (onions) with microelements. After treatment with ash infusion, shoots appear faster, so it is used only for planting in spring.
- Fitosorin-M is a drug of natural origin, which contains spores of soil bacteria. With its help, the safety of teeth is increased, which, after treatment with Fitosporin, will be protected from fungal and bacterial diseases. You can soak winter and spring garlic in the solution of the drug.
- Maxim is a drug whose effect can be compared to antibiotics. Suitable for spring and autumn plantings.
About
Answers to frequently asked questions
Is it necessary to treat garlic before planting before winter?
Not at all if you have high-quality planting material and the soil on the site is not contaminated.
What is better, store-bought fungicides or folk remedies?
Of course, industrial drugs are more effective, but folk recipes will also help solve the problem.
What to soak garlic cloves in?
In a regular bowl, the main thing is that the liquid completely covers the planting material.
Do I need to water the soil with fungicide?
Also optional. This is only necessary if your plants have been affected by fungi. If such a problem has never happened, then you can do without processing.
Soaking in a solution of wood ash
Quite often you can come across the question of whether it is worth soaking garlic before planting. The answer depends on which variety you choose. If we are talking about winter garlic, then it is better not to do this. The main purpose of soaking is to help the teeth hatch faster. Therefore, it is relevant in the case of spring garlic. It is recommended to keep it in the refrigerator for a month beforehand.
Soaking in ash is perhaps the oldest and most inexpensive method. Ash is formed in sufficient quantities in the bathhouse. You just have to collect it during the winter. To prepare the solution, pour two glasses of wood ash with two liters of hot water. It is necessary to wait until the finely dispersed mixture separates into layers. By this time, the solution should have cooled; drain the light part into a separate container. It is in this that you should soak the garlic cloves for one hour.
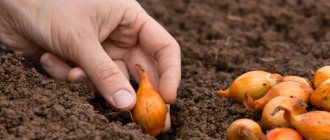
Landing
Of course, you need to take into account weather conditions, which can make adjustments to the gardener’s calendar. Thus, early planting of garlic in the soil can result in the appearance of green shoots that will freeze in winter and kill the entire crop. And late planting will not leave time for the garlic to form roots, which is also guaranteed to destroy the plant.
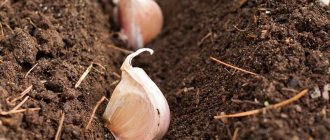
The cloves should not be planted into the soil by pressing. This action can damage the planting material. Ideally, you need to dig small holes or a solid trench 5-6 cm deep and cover the bottom with compost or humus. After such preparation, carefully arrange the garlic cloves and cover them with a layer of earth. The distance between the arranged rows should be 20 cm and 15 cm between the garlic.
After completing the planting process in the fall, the soil must be protected from severe frosts. To do this, prepare mulch from fallen leaves, dry grass or straw residues, which cover the garlic crops. With the arrival of spring, this layer is removed to speed up the drying of the earth.
Necessity of processing
Processing of planting material, especially before winter, is due to the need to protect it from various pathogenic bacteria, which are the main cause of rotting of vegetable crops. Especially in the Middle Zone, a disease such as garlic rot is widespread. Therefore, processing garlic before autumn planting is a necessary procedure.
But there is a danger of spoiling the material if you take the wrong concentration of the disinfectant solution or leave the cloves in it. That is why knowledge of correct step-by-step processing is so important.
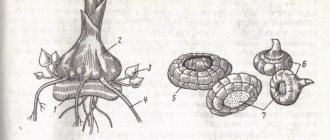
This culture reproduces vegetatively (while the issue of planting bulbs is not being considered, another article will be written about this). All positive and negative properties will be transferred to the new plant, which after the formation of the root system begins.
If the mother plant has any diseases, they will appear most clearly in the spring. Next year, hereditary characteristics will be fully revealed.
Pre-planting treatment is aimed at maximizing the elimination of fungal spores. Prevention from diseases is a prerequisite for a high harvest with good quality.
The All-Russian Plant Institute (VIR) conducted research on the effect of hereditary diseases on the quality of winter garlic. Based on numerous experiments conducted over several decades, interesting data have been obtained. They must be taken into account during preparation for planting.
| Winter garlic variety | Period of research, years | Disease of the parent material (signs are present on one clove, the rest are healthy) | Manifestation of the disease in inheriting plants, % |
| Elenovsky | 1983…1996 | Aspergillosis (black mold) | 100 |
| Penicillosis (green mold) | 100 | ||
| Fusarium (bottom rot) | 85 | ||
| White rot | 88 | ||
| Cervical rot | 79 | ||
| Downy mildew (downy mildew) | 76 | ||
| Bacteriosis | 78 | ||
| Rust | 67 | ||
| Garlic nematode | 58 | ||
| Gulliver | 1976…2001 | Aspergillosis (black mold) | 98 |
| Penicillosis (green mold) | 100 | ||
| Fusarium (bottom rot) | 84 | ||
| White rot | 90 | ||
| Cervical rot | 81 | ||
| Downy mildew (downy mildew) | 68 | ||
| Bacteriosis | 74 | ||
| Rust | 59 | ||
| Garlic nematode | 62 | ||
| Lyubasha | 1988…2005 | Aspergillosis (black mold) | 97 |
| Penicillosis (green mold) | 99 | ||
| Fusarium (bottom rot) | 86 | ||
| White rot | 94 | ||
| Cervical rot | 79 | ||
| Downy mildew (downy mildew) | 65 | ||
| Bacteriosis | 76 | ||
| Rust | 55 | ||
| Garlic nematode | 66 |
It’s easier to prevent disease from entering the garden beds than to eliminate it long and hard and then worry that all your efforts are in vain.
Care Tips
The plant tolerates frosts well down to -25°C, but if the indicators drop even lower, then mulching is a mandatory measure for preserving the crop. When figuring out how to properly plant garlic and care for it, it is worth noting that along with the formation of leaves, an arrow is also formed, and when it grows to 20 cm, it is necessary to break it off if the seeds are not needed. Another secret is that in order for the garlic heads to ripen faster, the earth is raked away from them, leaving 1/3 open.
Since weather conditions differ in different areas, it is better to focus on the following rule: it is important to plant winter garlic 35-45 days before the onset of constant cold weather. This time is enough for the plant to take root and develop a good root system. The main thing is that leaves do not begin to form.
After the first loosening in the spring, watering is carried out, but only if there is no natural precipitation. During the period from May to June, regular watering is a prerequisite for care. 20 days before harvest it stops completely. There are tips on how to properly water garlic planted before winter in the spring:
- When the weather is moderate, irrigation is carried out once every 8-10 days and 10-12 liters should be spent per 1 m2.
- When it’s hot in spring, the volume of liquid is the same, but watering is carried out three times every 2 weeks.
- When there is a lot of rain, watering should be reduced so as not to destroy the plants.
Without applying fertilizers, it is most likely impossible to get a good harvest, and this is done in several stages:
- The information regarding planting winter garlic and caring for it states that the first feeding is carried out when the plant already has 3-4 leaves. You need to mix 1 tbsp. spoon of urea and complex mineral fertilizer in 10 liters of water. 2-3 liters should be consumed per 1 m2.
- After 2-3 weeks, the next feeding is carried out, for which 2 tbsp is taken per 10 liters. spoons of nitrophoska or nitroammophoska. Consumption is 1 liter more than in the previous version.
- The last feeding is carried out in the second half of June, so 2 tbsp is taken per 10 liters. spoons of crushed superphosphate. Again, consumption is 1 liter more
After planting, it is important to properly care for your garlic. To do this, it is better to follow the recommendations of experienced gardeners:
- Water the garlic carefully. Moisture is necessary for the crop during periods of active growth, as well as during severe drought. Watering is done once every 4-6 days. After rains, watering should not be resumed for at least a week - the soil should dry thoroughly. Otherwise the head will begin to rot.
- It is better to combine watering with the application of fertilizers. The first feeding is done when 4 leaves appear: one large spoon of urea per bucket of water. The second - after 14 days (per bucket - 2 large spoons of potassium salt and Superphosphate), the third - after another 2 weeks (ash solution).
- In May, garlic is spilled with an ash-salt solution (a glass of ash and half a glass of table salt per bucket of water). This is an additional measure of disinfection and protection against diseases and pests.
- When an onion fly appears, the garlic is dusted with a mixture of ash and carrot seeds ground into powder. This pest does not like this mixture at all.
- If garlic begins to turn yellow early, it lacks moisture or oxygen. The crop is watered or loosened.
- A good harvest is not possible if the heads are planted tightly. The optimal distance between the teeth is 10-12 cm.
- On highly acidified soils, deacidification will be required throughout the entire growing season of this crop. It is enough to periodically spill the beds with an ash solution or sprinkle them with dry ash before watering.
- To prevent garlic from being crushed, its arrows must be broken off in a timely manner.
Tags: soak, potassium permanganate, before, planting, garlic
About the author: admin4ik
« Previous entry
Important point!
A head of garlic that has all the large constituent cloves should not be used as planting material, as this is the main sign of degeneration. If you have more cloves of garlic than the required amount, then this gives you the right to plant only the largest, high-quality specimens. And in case of shortage, all the cloves are calibrated into the largest, medium-sized and small ones, and then planted. This technique will allow you to get beautiful, even shoots and, accordingly, a harvest.
The elements of the garlic head should not have a protective shell and bottom, an even grayish tint. They must be dry, since moisture will give impetus to the growth of shoots, and this cannot be allowed. Garlic should form strong roots before spring, but under no circumstances should it sprout.
Finally, a few more words
In order for garlic to survive all the delights of wintering in the ground, you need to properly prepare the soil and the planting material itself. If you only do one of these steps, there is no guarantee that you will see tender green garlic entrances in the spring. Each stage of preparation is very important, because only careful preparation of the plants and soil will be the key to success and you will be able to harvest a luxurious harvest that will be stored without problems. Don’t be lazy, and then the harvest you harvest will certainly bring joy, and you can call yourself a gardener with a capital G.
See also:
Tags: autumn planting soil garlic
Soil preparation
Nail fungus will go away quickly! Generously lubricate it with new ointment with kukui extract... Read more »
The selected area is fertilized with compost or humus. Then you need to dig up the soil and prepare the area for sowing garlic. Such a plot should not be more than 1 m, and the height should not exceed 0.3 m.
If it is impossible to adhere to crop rotation, the soil is prepared in the fall more carefully: it must be treated with a solution of copper sulfate, which you can easily prepare yourself. Add 5 full tablespoons of copper sulfate to a bucket of hot water and stir everything thoroughly. The resulting solution is used to treat the selected area at the rate of 5 liters of product per 1 square meter. m of soil.
Before planting garlic, it is recommended to fertilize the soil with urea at the rate of 0.5 tablespoons per square of soil.
If you want to get a harvest free from chemical additives, then it is better to use green manures, and a more understandable name is green fertilizers. They increase the access of moisture and light to the soil through their roots, and fast-growing shoots, after being buried in the ground, turn into organic fertilizers.
In the last ten days of August, the selected plot of land is sown with peas, barley, mustard or beans. When the seedlings are about 30 cm, they need to be mowed and buried. The time for the green mass to turn into fertilizer will be completed before the onset of the cold period and the garlic can be planted in thoroughly fertilized soil.
Remember!
The ideal period for planting garlic in the fall lasts only a month, from mid-September to mid-October.
What solution should I use?
Various options are suitable as a solution. Choose the one that suits you:
Melt-in-your-mouth salmon with peach glaze (recipe)
Anti-crisis pizza with a thick layer of dough: will always help out in difficult times
Step-by-step recipe for making strawberry cheesecake with cookies and delicate cream
- Potassium permanganate solution. Prepare a strong composition of potassium permanganate. Use plastic containers for this. Dip the planting material into it, fill it with liquid and leave overnight. There is no need to do any rinsing in the morning. Remove the cloves from the solution and immediately plant them in the ground.
- Ready-made drugs. Many experienced summer residents recommend using products such as “Maxim” or “Maxim Summer Resident”. They have proven themselves to be the best in fighting infections and preventing the development of rot and mold. Carry out soaking in accordance with the instructions. These drugs are based on an analogue of a natural antibiotic produced by bacteria, so it is not capable of harming the beneficial microflora of the soil. But it is also worth considering that it is still assigned hazard class 3, therefore, you need to work with it using protective equipment.
- Solution "Fitosporin-M". This product has an antifungal effect. You need to soak the planting material in it for 1-2 hours. The drug prevents the development of fungal and bacterial diseases, but at the same time it contains mineral supplements. The latter contribute to the rapid emergence of seedlings, so it is not recommended to plant tines treated with this composition too early.