Why are onions treated before planting?
Onions are an unpretentious garden plant that is grown everywhere in our country. It is difficult to imagine Russian, or any other cuisine without this vegetable. Therefore, you can find onions in every garden - be it a city dweller’s summer cottage or a rural resident’s estate. However, despite the apparent ease of cultivation, there are certain subtleties that should not be neglected.
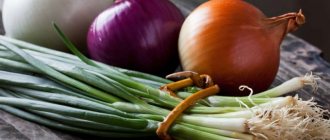
Onion lovers grow various varieties of this crop
To get good feathers in the summer and healthy, beautiful bulbs by autumn, the seed must be properly prepared for planting. Seed selection, treatment against pests and diseases, soaking to stimulate growth are the main preventive measures that guarantee a good harvest. There are different ways to treat seeds. Through trial and error, each gardener selects the appropriate option for himself.
To soak or not - that is the question
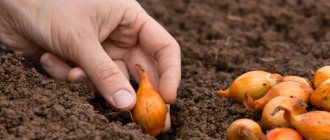
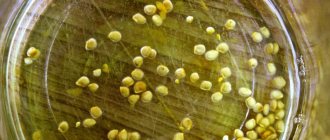
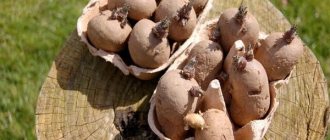
As a rule, to obtain onions, they are grown from sets (small onions with a diameter of 1 to 3 cm). Even experienced gardeners wonder whether it is necessary to soak onion sets before planting. In fact, the soaking process has several goals: friendly shoots, disinfection from pests and rapid development of the root system.
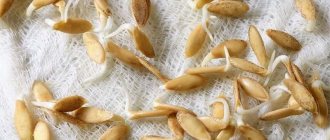
The fibrous root system of onions is poorly developed, and if you hold the bulbs in water for just half an hour before planting, you can see how the thin roots have already begun to move out. To do this, it is not at all necessary to add growth-accelerating fertilizers to the water; it is enough to just add water at room temperature.
Seed preparation
Preparing the bulbs for planting is the first and very important stage in growing a crop. It doesn’t matter whether you bought planting material at the market, in a store, or use your own seeds - proper processing of the bulbs will largely determine the future harvest.
Seed preparation consists of:
- sorting;
- warming up;
- soaking in a stimulating solution;
- disinfection.
Sorting and warming
Before proceeding directly to preparation, the onions are sorted, removing all rotten, damaged or simply suspicious specimens. Dry tops must be carefully cut off without damaging the green tips that have grown up. This operation promotes friendly shoots and will slightly speed up germination. Along the way, you need to pick off all the dry scales, which are easily separated.
Bulbs planted with onion peels do not develop well. The fact is that scales not only hinder growth, but also release harmful substances into the soil, and this negatively affects the development of the plant.
The remaining healthy bulbs are sorted by size and laid out to dry. The seeds are dried for a week in a dry, warm place, at a temperature of about +25 o C. It is this temperature and dry air that will rid the onion of the nematode, which does not like heat. The maximum temperature at which this pest can exist is +22 o C.
Growing onions for feathers or turnips depends on the size of the bulbs, so first the seeds are sorted
Surprisingly, the largest bulbs grow from small seeds, so farmers who grow onions for sale keep all the change for themselves. Large bulbs will delight the gardener with early growth and seeds for the future harvest.
Warming up with Fitosporin
3 days before planting the bulb, you need to soak it for a day in warm water (temperature +32…+35 o C). This measure will improve the heating of the seeds and help remove excess scales. Fitosporin added to water will serve as a good disinfectant for planting material and eliminate the need for pickling in a solution of potassium permanganate. 20 g of powder dissolved in 1 liter of water will cope with many fungal and bacterial diseases. After soaking, you should try to peel the bulbs down to the white shirt and place them in a plastic bag. In 2 days at room temperature, roots and green tips will appear - after which the onions can be planted.
The biological preparation Fitosporin is used for disinfection of planting material and for soil treatment
Warming up with growth stimulants
Warming up in warm water can be combined with growth stimulation. To do this, add Epin or Zircon to the water at the rate of 40 drops per 1 liter of water. These drugs accelerate growth and root formation, and also increase plant immunity to diseases and adverse weather conditions, but for these drugs to be effective, it is necessary to acidify the water. You can add a grain of citric acid or, as the instructions advise, 1 g per 5 liters of water.
Disinfection
It is important to remember that growth stimulants do not have disinfecting properties, so the bulbs must be disinfected before planting in the ground. The spores of pathogenic fungi are so small that they cannot be seen without a microscope, so even if the bulbs seem completely clean and healthy, you should not refuse this procedure.
There are various ways to disinfect planting material, but not all of them are as effective as they are said to be.
Potassium permanganate
The most popular remedy among gardeners is potassium permanganate. Before planting, the bulbs are soaked in a dark solution of potassium permanganate, and for spring planting the procedure lasts 2 hours, and for autumn planting - 5 minutes. This is explained by the fact that in the fall you need to plant the bulbs without letting them wake up, otherwise they will freeze in the winter.
Potassium permanganate is a universal disinfectant
Copper sulfate
Copper sulfate is perhaps the second most popular remedy for all ailments. 1 tsp. powder is dissolved in 1 liter of water. The temperature of the liquid should be approximately +45 o C. Soak the bulbs in the same way as in a solution of potassium permanganate - taking into account the time of year.
Before planting, onions can be soaked in a solution of copper sulfate.
Using soda, salt and ammonia
Instead of potassium permanganate, many gardeners use a baking soda solution. To do this, before planting the bulbs, dilute soda (1 tsp per 10 l) in warm water (+40...+45 o C) and soak the seeds for 10–15 minutes.
Soda solution is also used to treat onions before planting.
Soda is also used as a spray when powdery mildew or other diseases appear on seedlings, but this product does not bring the desired effect.
You can often find advice about soaking the bulbs in a salt solution, but this is a controversial opinion. Many experts believe that this measure is useless at the stage of preparing onions for planting. However, watering seedlings at the root with a salt solution (200 g per 10 liters of water) is an excellent means of preventing onion flies. The same applies to a solution of ammonia. Watering the plants (5 tablespoons per bucket of water) will rid the seedlings of many insect pests, and at the same time reduce the acidity of the soil and enrich it with nitrogen.
Birch tar solution
Many gardeners use a solution of birch tar to treat bulbs. A controversial method, whose adherents claim that tar serves as an excellent preventative against many pests and diseases, moreover, it is a natural remedy that does not harm the soil and the crop itself.
Adherents of organic farming when processing planting material prefer birch tar
Peeled and dried onions are kept in any stimulant, and then placed in a tar solution for 2–4 hours. It’s easy to prepare - dissolve 1 tbsp in 1 liter of water. l. tar. The temperature of the liquid should be about +20 o C. To prevent the bulbs from floating, they are covered with a plate.
Red pepper and liquid soap
Often the bulbs are soaked in a solution of red pepper and soap. Seedlings treated in this way will be protected from many diseases and soil insect pests. To prepare a solution, dilute 3 g of red pepper powder and 1 tsp in 1 liter of water. green or any other liquid soap.
How to prepare a bow so that it does not go into the arrow
Preparing onions for planting includes several stages, each of which is very important:
- Sorting and checking the quality of bulbs;
- Drying;
- Warming up;
- Soaking and disinfection;
- Rinsing and ventilation after disinfection.
Since planting this vegetable crop is a serious and responsible matter for gardeners, we should consider each stage of preparation in more detail.
At the very beginning, 3 weeks before planting, it is advisable to evaluate the quality of the material prepared for this. To do this, you need to carefully sort it out, inspect it, and remove diseased, dried and rotten onions.
Sorting and checking the quality of bulbs
Then you should sort the bulbs by size. This is done in order to plant large heads first, because they germinate more slowly and are more used for cutting green feathers and growing for seeds. Medium-sized bulbs are planted in the second place, and small ones - in the very last place. It is known that the smaller the bulbs, the faster they germinate and produce a better harvest in good soil.
More on Tele4n.Net:
Planting cucumber seeds for seedlings in the spring of 2021: what must be taken into account, how to plant correctly, conditions for the development of seedlings
Drying
At the next stage, the sorted onions must be thoroughly dried in a warm room, protected from drafts and moisture. This is usually done in attics.
At home, you can place onions on the top of your kitchen cabinets, or on the top shelves of your closet.
Warming up
Then, in order to avoid early formation of arrows, the dried bulbs must be warmed well, scattered near the battery. On warm spring days, onions can be warmed up under the warm rays of the sun.
It is recommended to warm the onions for the first 15 days at a temperature not lower than plus 20 degrees, and then warm the onions for 8-10 hours at a temperature reaching 40 degrees. During the last heating, it is important to monitor the time, do not overheat or overheat the onion.
Soak
This is followed by the procedure of soaking and hardening the future harvest. To do this, the onions are soaked in water at a temperature of plus forty to plus fifty degrees for 15 minutes, and then soaked in cool water for the same amount of time. After which you can place the onion in a solution of mineral fertilizer for 5-6 hours.
Treatment against pests and diseases
But the most important purpose of the process of soaking onion sets before planting is, of course, its disinfection, the destruction of pests and the prevention of diseases during crop growth.
You can disinfect onions in this way:
- soak for 2-3 hours in a weak salt solution prepared at the rate of 2 tablespoons per 2 liters of water;
- soak for about two hours in a dark solution of potassium permanganate.
After each soaking, the bulbs should be rinsed in clean water.
The old, proven and effective method is also very suitable for disinfection - soaking in a solution of copper sulfate, prepared at the rate of 30 grams per 10 liters of water. The bulbs should be kept in this solution for about two hours and then washed with water.
Soaking onion sets in a saline solution has a detrimental effect on pests such as onion flies, thrips and mites. And a solution of potassium permanganate perfectly destroys fungal spores, thereby preventing fungal infection of the bulbs.
Instead of potassium permanganate, other chemicals available in garden stores (copper chloride, etc.) are also widely used to disinfect bulbs.
Often, to stimulate root growth, bulbs are soaked in various growth stimulating solutions. Solutions of humate and zircon are more common here.
At the end of the soaking and disinfection stage, the onions must be washed, dried and ventilated. Only after this can you begin planting it.
Onions are usually planted in the soil after waiting until the ground warms up to plus 15 degrees. But it is also not recommended to delay planting onions.
Preparing soil and beds
When preparing a bed for sowing onions, you need to take into account its predecessors. Crop rotation is especially important for this crop, so bulbs should not be planted in the same place where they grew before. The bad predecessors of onions are:
The seedlings grow well after:
The beds for planting onions are prepared in the fall. Add rotted manure at the rate of 1 bucket per 1 m2 and dig it well. Considering onions’ dislike for acidic soils, it is advisable to add wood ash or dolomite flour to the soil. This measure will not only deoxidize the soil, but also enrich it with many useful microelements. Mineral fertilizers are not applied during digging, since onions are very sensitive to high concentrations of salts. It is better to use them as top dressing during the growing season.
For disinfection, the filled and dug up bed is spilled with a solution of Fitosporin (5 g of powder per 10 liters of water). This procedure can be repeated in the spring, before planting.
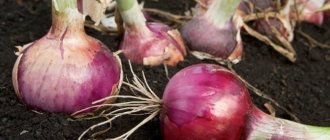
Seeds processed and planted according to all the rules will delight you with healthy feathers and large bulbs
My method of preparing onion sets for planting is simple but effective. 2 weeks before the intended planting, I sort the bulbs, clean them of excess husks, cut off the dry ends and lay them out to dry. We live in a private house and use a water heating boiler. It is always warm, the temperature on the surface is maintained at about +40 o C - an ideal place for warming up the bulbs. After 2 weeks, I soak the seeds in Fitosporin-M solution. Unlike regular Fitosporin in powder form, this drug has the consistency of a dark brown paste. But what is important is that it is enriched with humic acids, nitrogen, potassium and phosphorus (it is always written on the packaging what additives are included in the preparation). Therefore, by soaking the bulbs in a solution of Fitosporin-M, I simultaneously disinfect the seed and stimulate further growth. The beneficial bacteria contained in the preparation kill pathogens of bacterial and fungal diseases, and humic additives and microelements not only have a stimulating effect, but also increase plant immunity. I plant the bulbs soaked for 24 hours in prepared beds. The onion turns out excellent - it doesn’t get sick and doesn’t turn yellow ahead of time. Fitosporin-M is economical - to prepare a working solution, 200 g of paste is diluted in 400 ml of water. There is a very important nuance here - chlorinated tap water will kill all beneficial microorganisms, so it cannot be used. To soak the bulbs, I dilute 1 tbsp. l. working solution in 1 liter of water from an artesian well.
Despite its simplicity, growing onions cannot be neglected. By spending very little time and effort preparing seeds for planting, you can prevent the appearance of diseases and pests in the future, and therefore reduce the effort when growing a crop. Pre-sowing seed treatment is easy and not burdensome; even a beginner can handle it.
Selection of planting material, preparation
It must be remembered that conscientious and painstaking adherence to all the rules for preparing onion sets for planting will ensure their abundant and rapid growth, and as a result will delight gardeners with a rich and high-quality harvest!
Processing and soaking onions before planting
First of all, when preparing the seedlings for planting, you need to carefully sort them out. Arm yourself with several sorting containers.
It is necessary to discard all damaged and small specimens, leaving medium-sized bulbs for planting on the head. Large onions, small ones, and even sprouted ones are suitable for greens. But we throw away the empty, wrinkled, missing ones.
Next, carefully cut off the dry tail on the top of each head with scissors. This simple operation will help them germinate faster and better. Well, you need to be afraid that an infection will get into the cut, because the seedlings will be treated for diseases before planting.
Should I soak onions before planting? And what is the best way to do this? Let's figure it out.
Of course, we are interested in our seedlings growing large and at the same time being protected from diseases and parasites. Therefore, a simple scheme is usually used: first, the planting material is soaked in growth stimulants, and a little later, immediately before planting, it is treated with protective agents.
To nourish the onion so that it grows large, it is recommended to dilute complex fertilizer in water (40-45 degrees) and soak the onion there overnight. When the seed is saturated with nutrients, you can begin its protective treatment and planting.
Most popular recipes:
- Soaking onions in potassium permanganate. Make a strong dark pink solution of potassium permanganate and soak the onions in it for 2-3 hours. After this, they will need to be washed under running water so that the concentrated potassium permanganate does not damage future young roots. Potassium permanganate prevents fungal and bacterial diseases.
- Soaking onions in saline solution. 1 tbsp. Dilute l salt in one liter of water, immerse the onions in it for 2-3 hours. Salt also prevents rotting and disease.
- Soaking in copper sulfate. 1 tsp copper sulfate per 10 liters of water, for 10-15 minutes. Copper sulfate disinfects seedlings and protects them from diseases.
These are time-tested ways to prepare onions. But time does not stand still, and we want to share with you new interesting recipes that will help comprehensively protect your plantings. One of these recipes is a combined treatment with salt, potassium permanganate and ash together in one solution. See below for how to do it:
Treating onions before planting with salt, potassium permanganate and ash
For a three-liter jar of warm (60 degrees) water, take 2 tbsp. l with a slide of salt dark pink solution of potassium permanganate 2 tbsp. l wood ash. Soak for 2 hours.
Treating onions before planting against pests with birch tar
The most nasty pest of onions is, of course, the onion fly. Luckily for us, she cannot stand the smell of birch tar. And if you want to protect your crops, then it would also be a good idea to soak the onions in the solution: 1 tbsp. l. tar in a liter of water for 10-15 minutes.
The same solution can be used to additionally water the plantings during the growing season.
Why is seed processing necessary?
Although onions are quite unpretentious to grow, it is necessary to carefully prepare the sets for planting in the spring. The quality of planting material is difficult to determine by eye, especially if the bulbs are small. Therefore, before planting onions, the planting material is prepared, including soaking.
Pre-sowing prevention will help separate good seeding from bad and improve the quality of the crop:
- Accelerate the ripening of heads and the emergence of greenery. Keeping the bulbs in water, even for a short time, stimulates the germination of roots - this significantly increases the rate of germination of onion feathers. In addition, saturating the seeds with water helps to increase productivity.
- Prevent shooting. Onions that are soaked in hot water are subject to temperature stress, which leads to the production of substances that block the formation of buds and the bolting of onions.
- Disinfect the bulbs. Soaking in solutions disinfects the seedlings, destroys pest larvae and prevents rotting and disease. If bulbous crops are planted annually in one place, there is a high probability that the crops will become infected with bulbous flies or bacterial diseases, in which case soaking is necessary.
More on Tele4n.Net:
Planting raspberries: how to plant correctly? Distance between bushes
Why is it necessary to treat onions with potassium permanganate?
While experienced landowners reap an excellent harvest, novice gardeners are faced with the problem of onions bolting and cannot grow strong heads. Why is this happening? Perhaps the secret lies in the correct preparation of planting material? And this is true, because not everyone knows that treating onions with potassium permanganate before planting helps protect the crop from death. Do you want to start getting a great harvest by saying a hard “no” to fungal diseases? Then quickly read the review, because it reveals secrets known only to selected farming masters.
Treating onions with potassium permanganate before planting
Why is pre-treatment necessary?
By purchasing seed materials, such as onion sets, in the spring, you can actually save yourself from the preparatory stage, to which farmers devote quite a lot of time. This is seed germination. Of course, this approach saves the gardener time and effort, but does not guarantee the purity and sterility of the future product.
Sometimes it happens that a person purchases planting material, sends it into the soil, takes care of it and hopes for a good harvest, but bad luck - the result is depressing:
- small onions;
- soft heads with noticeable signs of rotting;
- low yield rate due to product loss.
Why is this happening? If you carefully read the sequence of actions performed by a person, you can understand that he simply skipped the stage of disinfecting purchased products. Is it really that important? Of course, the features of the product are not known for certain, as are the methods of obtaining it and storage methods.
It is beneficial for the seller to have time to sell the prepared material, and the more, the better. It is possible to argue with this statement, but it is useless. Yes, there are exceptions - people who think about the future and want to acquire a good client base, but there are few such implementers (about 10%).
It turns out that any product purchased in a store or on the market must be subjected to additional processing (salt, potassium permanganate). This approach allows you to remove not only surface contaminants (dust, special reagents that preserve the excellent appearance of leaves, etc.), but also harmful microorganisms inhabiting the seedling.
Why potassium permanganate?
Currently, there are a lot of compositions and mixtures for disinfecting planting material, not all of them are useful for humans. For example, a well-known brand adds chlorides to its products, and this is a time bomb that, when it enters the human body, accumulates in it, causing incurable harm. To protect yourself from the harmful effects of strong reagents and at the same time get a good result, you should soak the onions in potassium permanganate.
Potassium permanganate. or potassium permanganate, is an antiseptic used by humans for a long time. For example, during the Great Patriotic War, orderlies treated damaged skin of wounded soldiers with permanganate salt dissolved in water; a little later, people began to gargle with a weak solution and even take it orally in case of severe poisoning. Consequently, over the years the drug has established itself as a good antiseptic (antimicrobial agent with a high oxidizing effect) and has been used in various fields.
The benefits and harms of potassium permanganate for plants
Since experienced gardeners claim that “treating onions with a weak solution of potassium permanganate before planting is a key step on the path to a quality product,” this means that this statement needs to be substantiated.
Benefits of potassium permanganate for plants:
- Protection of seeds from wintering pests, thanks to the identified antiseptic effect (if they are soaked in a specially prepared solution).
- Potassium permanganate is a kind of unique foliar fertilizer. The thing is that fertilizing with manganese allows you to supply plants with minerals that are so necessary for full growth and development.
- Infection of fungi and their spores (antifungal properties of potassium permanganate). Thanks to the correct treatment, you can save not only onions, but also strawberries from gray rot, and tomatoes from late blight.
However, there is no need to rush to water all the beds with a solution of potassium permanganate, because this is a chemical compound that can harm the human body (cause burns of mucous membranes and skin, provoke diseases of the skeletal system), reduce soil productivity, etc.
Important: potassium permanganate can be used to irrigate soils that have alkaline or neutral acidity. If you neglect this advice, you can reduce fertility and lose the harvest (of course, an acidic environment is beneficial for some plant varieties, but not for all).
Useful tips
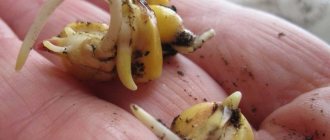
Those who have to soak the sevok for the first time quite often leave it wet and put it in a warm place for about another 10 hours. To do this in the simplest way, the seed is simply wrapped in a film bag or placed in a bucket, which is tightly closed with a lid. Thanks to such simple manipulations, you can easily sort the onions. As a result, small roots form on its bottoms. If they have sprouted along the entire circumference of the bulb, then this plant is optimally suited for sprouting on turnips, and if the roots do not fully germinate, such a bulb is most likely useful for planting on greens.
The yield of onions can be significantly increased not only by soaking them in various solutions and using fertilizers. So, for example, you can plant other crops nearby. Carrots or garlic can effectively repel pests such as onion flies, which will affect the yield in the most positive way.
Planting seedlings always requires at least minimal preliminary preparation of the beds. It is good to plant onions where crops such as tomatoes, pumpkins or peas previously grew. At the same time, planting onions where carrots or garlic previously grew would be a bad idea, since the harvest will not be the most abundant.
Among gardeners, opinions regarding watering onions after planting vary significantly. Some people believe that planted onions should be watered as abundantly as possible so that the water almost completely covers the seedlings. Other gardeners are convinced that there is no need to water the seedlings at all, and that abundant moisture harms the normal growth and development of the crop.
Experienced gardeners can easily determine when to water onions. Those who have little experience can adhere to a number of simple rules.
- You can water the beds with water immediately before planting, and then there is no need to water the onions after planting.
- If there was no watering, then the best solution would be to water the seedlings immediately after planting. It is necessary to water in such a way that water does not fall on the bulbs.
The need to water onions in the second half of summer is determined by several main factors. If the plant has a sufficiently developed root system, then the need for watering will arise only due to dry weather.
To learn how to soak onions before planting, watch the video below.
Tags: soak, before, planting About the author: admin4ik
How to prepare seedlings for planting
So, you purchased the seeds in the store and prepared the soil for planting material to be immersed in it. What's next? Of course, preliminary preparation of the material before planting, which includes:
- Careful inspection of seedlings (all dry places should be treated, damaged seedlings should be removed from the main mass).
- Cleaning the tops of dry seeds (this will improve germination).
- Drying the seedlings (in the spring you need to spread them out on a flat surface at a temperature of 20-25°C).
- Soaking the prepared material in a bucket of water and salt dissolved in it for 3 hours. To prepare such a composition, it is enough to take 1 liter. clean water and add 1 tsp to it. salt.
- Disinfection (soak onions in potassium permanganate before planting). This is why you need a saturated solution of potassium permanganate (purple). It is important to do this procedure immediately before planting (in spring) so as not to lose the antiseptic and antifungal characteristics.
- Final drying of the seeds, necessary to prevent rotting of the product. Next, planting work begins.
It is important to observe the dosage of the components when preparing a saturated solution of potassium permanganate in which you plan to soak the seed product. If you neglect this point, you can destroy not only harmful parasites, but also the seeds themselves. How to properly prepare an effective disinfectant composition and not make soaking hell for planting material?
How to properly soak onion sets in potassium permanganate before planting?
Natalya Begisheva
make a pink solution and pour onions into it for several minutes. hours. Dilute potassium permanganate in any stronger jar or bottle, shake it, and add it to the water for onions until it turns pink
Olga
And after soaking, before planting, it is good to cut off the top of the bulb.
Tatyana Savchenko SIBERIA
Soaking for 20-30 minutes in a pink solution of potassium permanganate at room temperature is enough. And the tops can be cut off BEFORE soaking.
Elena Ivanova
We do this: cut off the tops of the onions and soak them for 2 hours in a warm solution of potassium permanganate. The onion always turns out good!
Alya Dichko
Even better if you wait 30 minutes. in a pink infusion of potassium permanganate, and then 30 min. in a Salt Solution (100 grams per 5 liters) - there will be no onion flies and there is no need to water it with salt in the summer. Do not wash the bulbs before planting.
Svetlana Burova
I agree with Salya, keep it in salt solution
LYUDMILA FILATOVA
I cut off the top of the bulbs first, and then soak them in a pink solution of manganese for 30 minutes, after which I plant them, but so that the cut top is not covered.
Svetik
And I haven’t cut or soaked onions for several years now. I buy imported Stuttgarten and Redbaron sets. And when they soak, they say it goes in the direction more often. It seems like I always have a good harvest of onions. And before, I also soaked it in potassium permanganate, for what purpose I don’t remember, and then dried it... There was a lot of hassle - it couldn’t have been better.
Galina Kaysina
I never cut or soak onions before planting, and after planting I cover each bulb with a handful of ash and add it again when the feather grows 5 centimeters, no onion fly harms me, I only bury the bulb halfway.
Methods for processing onions in manganese
There are several options for treating onions with potassium permanganate before planting (they differ in the concentration of the working composition and the time for which the seed must be soaked):
- Concentrated 1% solution (10 g of powder per 1 liter of warm water), in which you need to soak the material for 45 minutes. Here it is important to place the sets in a warm liquid. “No fungi and harmful microorganisms” is the motto of this method. It sounds loud and provocative, but do not forget that if the composition destroys all living things, then why can’t it damage the seeds themselves?
- Weak composition (3 g of powder per 1 liter of water), soak for about 2 hours. This method differs from the first in the low concentration of the working component, therefore, less force of action, which means that the harmful effect on the seeds themselves is reduced. It turns out that this treatment of onions with potassium permanganate before planting is an ideal option, although gardeners claim that not all bacteria die with it.
- A highly concentrated composition (25 g of powder per 1 liter of warm water), in which you can soak the seeds for only 15-20 minutes. This disinfection option is used only when there is a suspicion that the bulb is infected with powdery mildew spores. The thing is that the composition is very strong, therefore, it can destroy the planting material itself.
Important: if the onion feathers are damaged, you cannot soak and water the sets with reagents; therefore, you will just have to spray them. To do this, a weak composition is prepared (3 g of potassium permanganate per 10 liters of water) and the feathers are thoroughly processed (necessarily 3 times a week).
There is no need to rush to choose the latest method of processing onions in potassium permanganate; it is better to weigh all the pros and cons and make an informed decision. The best option is to soak for 2 hours.
Preparation of a super solution for processing onions: three in one
Pour warm water into a three-liter jar and add 2 tbsp. spoons of salt. Stir the contents of the container well with a spoon until dissolved. This will protect the bulbs from pests, especially wireworms.
Then you need to pour a dark pink solution of potassium permanganate into the jar, previously diluted in a separate container. Due to potassium permanganate, onion sets are disinfected from infection.
Here you need to add 2 tbsp to the jar. spoons of ash, which will serve as an additional source of nutrition for the bulbs and a disinfectant.
All ingredients in the jar must be mixed.
Pour the onion sets with this mixture and keep in it for 2 hours. Then drain the liquid and rinse the bulbs in running water. Now the onions are ready for planting.
Planting onions
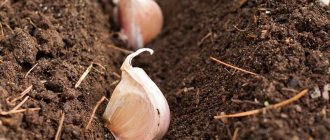
Onions are planted in May in warm, moist soil. For planting, prepare a bed in a well-lit and ventilated place. The crop requires soil with a high content of organic matter. A bed after zucchini, pumpkin and cucumbers is well suited. Onions are not planted after the onions and garlic themselves. Before planting, the soil is loosened well, a furrow is marked and it is poured from the spout of a watering can without a sprayer.
It is convenient to plant onions in a furrow in a checkerboard pattern, so during the season it will be possible to select a product from the ridge for greens, because it is not recommended to pick feathers separately from a common bed. If the green part is cut off, a good bulb will not form. An unprotected bulbous cut can cause fungal infection.
Planting veska onions - how to grow a rich “green” harvest?
When is the best time to plant onions on greens?
According to most gardeners, the best time to plant onions is when the weather is consistently warm. And all because the soil must warm up thoroughly. If you carry out work earlier, when the soil temperature is below +12-14 °C, this will lead to the fact that the onions will ripen into feathers (only greens will grow), and the bulbs will not develop. As a rule, the optimal time for planting onion sets is the end of April.
But remember also that you should not be late in planting this crop. If the soil temperature is too high, the bulbs will ripen slowly and may not have time to form for normal storage. To choose the right time, you can study the lunar landing calendar for 2021. According to him, the favorable time for planting onions is after April 25. If you prefer summer planting, you should choose either June 15 or July 13.
If you are going to plant seedlings in the fall, you should choose mid-October, when the ground is not yet completely frozen. The favorable period for carrying out work is October 10, but no later than the 15th. True, to prevent onions from freezing in winter, it is necessary to cover the beds with an additional layer of snow when the temperature drops below -12 °C. And in early spring, before clearing the beds, be sure to scatter the snow in different directions to avoid water stagnation in the garden.
Processing planting material - making onions more resistant
Having decided to plant onions on your site, the first step you must take is to prepare the seed. If you purchased onion sets, you need to dry them. Seed grown on your own site should be heated at a temperature of about +40 °C. At the same time, heating is a rather lengthy process, which consists of two stages: we warm the onions for 21 days at a temperature of +20 °C, and keep the onions for about 12 hours at a temperature of +35 °C.
After this, you need to soak the seeds in a growth stimulator (for example, in Epin or Silka). If you do not have the opportunity to carry out stage-by-stage preparation of the seed, processing the onions before planting will be as follows:
- soaking the onion in water heated to a temperature of +50 °C for 15 minutes;
- immersing the seed in cold water for 10 minutes (this process is called hardening);
- treatment of seedlings in a solution of complex fertilizer for 5 hours.
Another mandatory procedure before planting is disinfection of the sets. For treatment, you can use a weak solution of potassium permanganate or copper sulfate (to prepare the mixture, mix 40 g of the product in a bucket of water).
There is also one fairly effective “grandmother’s” method:
- dry the sets for a week at a temperature of about +25 °C;
- the next step is soaking the planting material in a saline solution (2 tablespoons of salt per 2 liters of water) for three hours;
- rinse the onions;
- immerse the seed in a concentrated solution of potassium permanganate for 2–3 hours;
- rinse again;
- dry the onions.
This completes the preparation of onion sets for greens.
Proper soil preparation for planting
Before preparing the soil for planting, you need to choose a suitable place for arranging the bed. It is important to remember that this crop is light-loving, so the place where the onions will grow should be open and well-lit. In addition, this crop is moisture-loving, but cannot withstand excessive amounts of water. That is why try to choose beds where groundwater does not flow.
Soil preparation begins in autumn. Onions love loose and nutritious soil, so you need to: dig the beds to a depth of 20 cm; add peat manure compost. An important nuance is that you need to fertilize the soil only at the soil preparation stage. But you should not add organic fertilizers to the soil, since this will lead to the rapid growth of weeds; in addition, the green part of the onion will quickly grow, and the root system will not keep up with it. As a result, you will not be able to grow onions suitable for storage.
Before planting the seeds, you should not add chicken manure or humus to the soil. Soil preparation also includes checking the soil acidity level. If the soil is acidic, before planting the seeds you should liming using one of the following ingredients: dolomite flour, lime, chalk, wood ash. Do not forget about one important point - you should not apply lime and manure to the garden bed at the same time, since as a result of such measures the level of nitrogen in the fertilizer decreases. But it is permissible to reduce the acidity of the soil using other means that we described above.
In spring, soil preparation consists of loosening the soil and adding mineral additives. Before planting onions (about a week in advance), water the bed with the following solution: a tablespoon of copper sulfate per 10 liters of water.
Planting onion sets - instructions for beginners
Before planting, be sure to sort the bulbs, since depending on the size of the planting material, the distance between the sets in the beds is determined. The onion planting pattern should be as follows:
- bulbs up to 1 cm in size are placed on the bed at a distance of approximately 5 cm;
- bulbs up to 1.5 cm - at a distance of 8 cm;
- larger seed - at a minimum distance of 10 cm.
If we talk about beds, they should be at a distance of at least 25 cm. Planting depth is about 4 cm. After immersing the seedlings in the soil, the soil around the bulbs must be pressed tightly, and the planting material itself should be covered with a layer of mulch of about 3 cm. As a mulching material you can use straw, sawdust, peat or small pebbles. There is one “grandmother’s secret”: make a hole in the garden bed for planting onions, water it, and add a little sand to the bottom. According to gardeners, onions in such beds will grow much faster.
Onions, like other vegetables, have desirable and undesirable “predecessor crops”. Desirables include cucumbers, cabbage, potatoes, as well as vegetables, when planted they add a large amount of “organic matter” to the soil. Undesirable predecessors include carrots and garlic - onions can only be planted in the beds where these crops grew after 3 years.
How should crops be cared for on the site?
Caring for onions will not cause you any trouble. The main thing is timely weeding, loosening and watering of the plant. Let's take a closer look at each of the events:
- Loosening. Carry out work correctly before the first shoots appear. The frequency of the event is once every 14 days, which will avoid the formation of an earthen crust in the garden bed.
- Watering. Immediately after planting the onion sets, you need to water them once a week. There are about 7 liters of water per square meter of soil. Since July, the amount of watering has been reduced.
- Feeding. Onions are one of the crops that practically do not need feeding, but there are several points. So, for the first time you can apply fertilizer a couple of weeks after planting. Apply a manure solution of 500 g of manure to 5 liters of water into the bed. You can also feed onions with a solution of bird droppings - dissolve 500 g of bird droppings in 7 liters of water. As a top dressing, you can use dry mineral fertilizers (in the form of granules), which are simply sprinkled on the soil before watering.
Those gardeners who think that caring for onions should not include removing weeds are deeply mistaken. The area where you plan to grow the crop should be free of weeds. Otherwise, it will be quite difficult for you to get rid of them without damaging the onion when the greens begin to grow. In addition to weeding, care should include the use of chemicals to treat the bed with the plant. It is best to use Roundup, which effectively fights weeds and is at the same time safe for the plantings themselves.
Diseases and pests have a negative impact on both the greens and the bulbs. That is why crop care must include measures to combat them. The most harmful insect is onion flour, which appears already in May with the first shoots. To protect onions from the invasion of this pest, be sure to treat the crops with insecticides. It is best to use products such as Zolon and Volaton.
Downy mildew is one of the most dangerous diseases for onions. This is an analogue of late blight, which affects tomatoes and other vegetables in the garden. With this disease, the greens begin to darken and dry out, and the bulbs will be unsuitable for storage. The main way to combat the disease is spraying with products such as Ridomil Gold and Acrobat.
nasotke.ru
Why process onions before sowing?
To get the best results from growing a crop, you need good seed material and know how to disinfect onion sets before planting. The set must be dense, clean, and without damage. Dry, sprouted or with signs of rotting specimens are not suitable for planting.
To grow bulbs, take small sets, up to 3 cm in diameter. Empty, damaged bulbs should be thrown away, and sprouted or large ones can be used to plant separately on greens. Before starting various treatments against pests and diseases, the seedlings are sorted and heated.
Why are treatments needed:
- increase germination;
- increase the quality and size of the crop;
- reduce the formation of flower shoots;
- protect against pests and diseases.
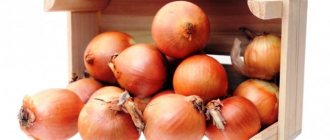
Onions are often stored incorrectly, especially in warehouses at low temperatures. For sevka, the required storage mode is at a temperature of +18°C. Well-dried seedlings do not germinate before planting time. Purchased seed should not be planted immediately after purchase. Seeds stored at low temperatures will go away when planted and will not form a large bulb. Therefore, purchased planting material should be dried and heated for several weeks at home. To do this, the seedlings are kept for 14-20 days at a temperature of +20°C.
You can warm it up by laying out the seeds near radiators and other heating devices. Before planting, for 8-10 hours, the seed is heated at an elevated temperature of +30...+40°C, without overexposing or exceeding the temperature. A warmed onion shows better survival rate and will shoot less. The method also helps against infection with neck rot and powdery mildew. Sometimes, to prevent onion arrows from forming, soaking in a soda solution is used. But soda is less effective than pre-sowing heating.
Note. There is also a quick way to warm up the seeds if the time for long-term warming is missed for some reason. The seed is soaked in water at a temperature of +45...+50 °C - this is hot water that can be tolerated by the hand. Soaking time is 10-15 minutes, then immediately immerse the set in cold water for the same time.
For rapid germination, it is important to remove dry husks from the seeds. Unhulled scales release substances into the soil that inhibit the germination of the head. All dry husks are removed before the first juicy scales appear. You should carefully strip the onions so as not to damage the roots.
Dry onion tops are trimmed to speed up the exit of the feather. But due to inexperience, you can confuse the parts of the onion and cut off the root or cut out the neck too much. Therefore, you can wait a while with this technique; with subsequent soaking, the dry neck will soften on its own, and pruning will not be required.
The main problems when growing onions
Some gardeners consider it normal to plant seedlings dryly, without any preparation. But this can only be done with completely healthy planting material that has been properly stored. Otherwise, the summer resident risks getting the following problems:
- fungal and bacterial diseases;
- damage to plantings by pests;
- shooting a bow.
Proper preparation of the seedlings before planting will help you avoid most of them.
First of all, the sets are carefully examined, sorted by size and bulbs with spots and traces of disease, soft and sprouted are rejected.
Secondly, the tips of the integumentary scales should be trimmed without affecting the growth point. Trimming will allow the bulbs to germinate faster, but this procedure is best done after soaking, when the upper scales are wet and it will be easier to clean.
How to prevent shooting
The appearance of arrows in onion beds is a consequence of improper storage of planting material during the winter. To ensure that the planted seedlings do not go to waste, it is necessary to observe the temperature, humidity and their ratios in the room during storage. If the conditions are not met, the bow begins to throw arrows.
If the sets were purchased in a store, it is recommended to warm them up before planting. They do this in two ways:
- Warming up at a temperature of about 30°C for a week. The seeds are poured onto a wooden tray in a layer of at least 2-3 cm and placed on the battery;
- Immediately before planting, the onions are poured with very hot water (60–65°C), soaked for 2 minutes, the water is drained and the procedure is repeated in cold water.
Warming up reduces the ability of the seeds to shoot arrows. Single specimens shoot even after warming up. Then the arrows are broken out as soon as they become noticeable.
Prevention of fungal diseases
To disinfect, planting material is soaked in disinfectant solutions. For this use:
- Salt. Stir a tablespoon of salt into 1 liter of warm water. Immerse the onion sets for 2-3 hours, then rinse them several times in clean water.
- Potassium permanganate. In a strong solution (3 g or half a teaspoon / 3 liters of water), the seeds are soaked for 2–2.5 hours, then thoroughly washed with clean water.
- Baking soda. 1 teaspoon is dissolved in 1 liter of warm water and the set is left for 2 hours.
- Fitosporin. The drug is diluted according to the instructions and the seeds are soaked in it for the prescribed time. After treatment with Fitosporin, the onions are not washed.
- Copper sulfate. 50 g of the drug is diluted in a small amount of hot water, then poured into a 10 liter bucket. The bulbs are disinfected for half an hour, then washed and dried.
More on Tele4n.Net:
Planting cucumbers in open ground with seeds in 2021
There is no need to use all the products at once. Folk remedies and the biological product Fitosporin are good only for prevention. Copper sulfate is considered more effective and is used in cases where in past years onion plantings suffered greatly from fungal diseases.
However, keep in mind that for prevention you need to carry out a set of measures, including following the rules of crop rotation and cultivating the soil to remove fungal spores.
Processing of sevka in biostimulants
Such procedures are not necessary, but will help to obtain strong plants with high immunity, and, as a result, a good harvest. To stimulate growth, the seeds are soaked in the following preparations:
- Epin-Extra. The biostimulator improves plant immunity, increases productivity and accelerates the formation of root crops. The drug must be used according to the instructions. Complex mineral fertilizer has similar properties. 1 tablespoon of fertilizer is diluted in a bucket of water and the seeds are soaked for a day.
- Ash. A half-liter jar of sifted wood ash is dissolved in a bucket of water, infused and the planting material is soaked in this solution for 2-3 hours. Ash is considered an excellent antiseptic and contains a lot of essential microelements.
Diseases and pests under favorable conditions can destroy a significant part of the crop. In addition, pathogens persist in the soil and on plant debris.
This will make it difficult to grow vegetables in future seasons. To prevent the development of diseases, it is necessary to prepare the onions selected for planting. These simple measures will help you get a high yield of healthy bulbs without the use of chemicals to treat plant diseases.
Onion fly: how to fight it?
Before planting, the seedlings need to be soaked to ensure a healthy harvest. Thus, onions are treated against onion flies before planting. Traditionally, for disinfection, it is recommended to soak onion sets for a couple of hours before planting in a saturated solution of potassium permanganate, saline solution or Fitosporin. But this doesn’t help much against the hero of our article.
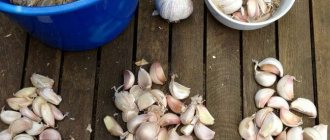
Experienced gardeners recommend doing this: the prepared (cut) seedlings are placed in a warm mixture of water and tar (1 spoon per liter) and kept for 2-3 hours. Since tar mixes very poorly with water, floating on the surface in spots, the sowing in the container is stirred from time to time. It's better to cook onions outside - the smell is still amazing. The resulting bulbs will not arouse the appetite of pests, and the plantings will be safe.
How to get rid of onion fly
Let us remind you when it is most effective to combat this pest: for the first time - at the end of April (when dandelion, lilac, cherry bloom), for the second time - at the end of July.
Onion fly: how to fight with folk remedies
Joint plantings
And again we take advantage of the onion fly’s sensitivity to certain odors. If you plant savory, carrots, celery, tomatoes, and chamomile near the onions, there is a high probability that this insect will fly past your garden bed.
Ammonia for onion flies
We have already written about the wonderful properties of ammonia, also known as ammonia. This substance contains nitrogenous compounds that are easily digestible by plants, so ammonia is recommended to be used for onion plants and as a fertilizer for yellowed tips and a “tired” appearance. That is, we kill two birds with one stone! Concentration – 10-20 grams per bucket of water, about a glass per plant. Watering is best done on damp soil.
Previously, gardeners clearly knew how to treat onion flies - with saline solution
We thoroughly watered the soil in the garden bed, then watered the plants with saline solution, and watered them again with clean water. After two weeks, the treatment against onion flies was repeated with a stronger solution, and after another three weeks - with an even stronger one (one, one and a half, two glasses of salt are added to ten liters of water, respectively). This is a really effective method, but do you want to put that much salt into your soil? You decide.
Sprinkling the beds with dusty and odorous substances is also good against onion flies: ash, tobacco dust, tabazol (a mixture of tobacco dust and sunflower ash), ground pepper, naphthalene, ground wormwood (can be mixed, or in its pure form). After sprinkling, it is recommended to loosen the soil.
Infusions of strong-smelling herbs
This can be an infusion of dandelion, tobacco, tomato tops, wild rosemary, mint, fir, valerian, conifers.
If you want to fight the onion fly without adding anything to the garden bed, you can install pegs around the planting and stretch a long cloth soaked in kerosene over them.
Video: Protecting onions from onion flies and diseases in one product. How to prepare onion sets for planting
Onion fly: how to fight with drugs
Since this insect can be eradicated quite well (if you don’t miss it) with folk remedies, you don’t have to resort to chemicals in households. This is an option for farms and people growing vegetables for sale. However, such drugs exist:
- “Mukhoed”, “Medvetoks”, “Zemlin” - the soil is cultivated when planting seedlings
- “Sochva Zh”, “Aktara” - spraying onions
Fighting onion flies, a couple more tips:
- observe crop rotation: onions should be planted in the same place with an interval of at least three years;
- dig up the soil after harvesting to a depth of at least 20 cm. This will bring the larvae to the surface, they will not have time to pupate and die;
- safe proximity between onion beds is at least 400 meters. That is, if your land is clean and there are no larvae in it, this does not mean that the neighbor’s onion fly will not fly in and “throw” eggs at you. Therefore – prevention and prevention again!
This is what it is, an onion fly. The fight against such a widespread enemy must be proactive, because in a very short period the larvae can destroy the crop and make it unsuitable for storage. And since the choice of effective folk remedies is quite wide, the main thing here is not to be lazy and not to forget.
Have a good harvest!
The result of treatment with salt and potassium permanganate
After soaking in a saline solution and then treating the onions in potassium permanganate before planting, the seed is completely ready for transfer to open ground. Salt becomes a preventive measure against pests that cause damage to the crop: onion fly, onion thrips and onion mite. Potassium permanganate prevents fungal diseases.
There is a method for watering onions planted in beds with salt to prevent the appearance of onion flies. For this purpose, in addition to salt, ammonia is used. A solution is prepared with the following ratio of elements: 1 glass of salt, 10 ml of ammonia, 10 liters of water. The beds should be watered with this mixture in the evening and between the rows, and not along the leaves or under the bulbs. After the procedure, water the bed with water for better penetration of substances. The pest disappears. It is important to use such substances sparingly when growing plants. The use of large amounts of ammonia, like salt, is harmful to the crop.
Interesting. To prevent the appearance of onion flies, it is recommended to plant carrots, marigolds, and calendula in the rows or next to the crop.
Components such as salt and potassium permanganate must be used in combination, because individually they only affect one unfavorable factor: pests or diseases.
Soak the onion in a salt and manganese solution
Almost every day, lovers of growing various herbal crops come up with more and more new ways to protect themselves from unexpected expenses, and how to protect the crops they grow from various fungal diseases. But the most effective and efficient method is considered to be soaking the onion in a saline or manganese solution.
To soak onions in saline solution you need:
- Pour three cups of salt into a 10-liter bucket of water.
- Move the solution, place all the planting material and leave for two days for a more effective result.
- Before planting, water the area with saline solution. This will help prevent onion flies from appearing over time.
A fairly simple procedure that will help disinfect onions from nematodes. It’s even easier with potassium permanganate. This method of soaking is the most popular, because it requires a minimum of time and available materials. The temperature of the water does not matter; potassium permanganate is simply added until the composition receives a slightly concentrated color. After which the onion heads are placed in the solution for 20 minutes.
Treating onions with phytosporin before planting
Treatment with phytosporin has the same effect as disinfection with potassium permanganate. Fitosporin is an organic microbiological preparation that is effectively used to treat planting material against fungal and bacterial diseases. Available in powder, paste and liquid form. The drug spreads throughout the plant’s vascular system and begins to have a positive effect on crops from the moment of treatment. It is based on a spore culture - a bacterium, which, by producing its metabolic products, suppresses the reproduction of pathogens. When treated with sevka, the drug has a detrimental effect on the development of diseases such as bacteriosis, peronosporosis or downy mildew, and various types of rot.
Phytosporin should be used in cloudy weather. The active bacterium of the drug dies when exposed to sunlight. It is important not to combine phytosporin with solutions that have an alkaline reaction. Fitosporin, which is available in the form of a paste, contains humic acids; if used, no additional use of growth stimulants is required.
The paste and powder are pre-soaked for 2 hours in water, the required proportion of which is indicated in the instructions. It is ineffective to simply sprinkle phytosporin. To activate bacteria, preliminary preparation in water is required, otherwise the drug will be useless. To dilute forms of phytosporin, chlorinated tap water should not be used. Such water is harmful to living bacteria. You can use melt, rain or boiled water.
Important! Planting of sets is carried out immediately after treatment with the drug, without subsequent rinsing.
Fitosporin paste is prepared in two steps. First, prepare a concentrated solution at the rate of: 100 g of paste per 200 ml of water or any other amount, but maintaining a 1:2 ratio. The concentrated solution can be stored. Before use, it is diluted at the rate of: 3 tbsp. l for 1 glass of water. The prepared solution is sprayed onto the seedlings before planting.
The powder is suitable for soaking and spraying planting material. Prepared at the rate of: 10 g of powder per 500 ml of water. Seeds should be soaked for 2 hours before planting.
Fitosporin only prevents the spread of certain diseases, but the drug does not help against harmful insects, such as treating onions with salt.
You can water the onions on the ridge with phytosporin. The drug is safe for humans, and the feather can be eaten on the day of treatment. Treatment is carried out no more than once a month; spraying should be done at intervals of 2 weeks.
Bulbs can be treated with a disinfectant before storing.
Pros and cons of soaking sevka
Among summer residents, the debate continues over the effectiveness of preparing onions for planting by soaking. Everyone must make a decision for themselves, and can be based on the advantages and disadvantages of this procedure.
According to an analysis of many years of experience of gardeners, the following advantages of the procedure are noted:
- activation of the growth process of greenery and turnips;
- disinfection;
- prevention of rotting;
- protecting the soil from pathogenic bacteria that can be transferred with planting seeds.
Processing onions activates the growth of greens and turnips
The disadvantages of soaking relate to improper preparation or violation of the temperature regime . Planting material can deteriorate due to improper cutting or failure to maintain proportions when making the solution. Therefore, before using one of the options, you should study the instructions.