With the arrival of autumn, there is less work in the garden than in summer or spring, so you can start planting garlic. In autumn, it is customary to plant winter garlic so that the vegetable sprouts and bears a harvest; this must be done correctly. Advice from experienced gardeners will tell you at what depth to plant garlic before winter and other features of growing the crop.
About boarding time
When planting in the fall, it is possible to pick fresh greenfinches from the garden in the spring. Boarding times vary by region, so there is no specific date. There is only one factor to focus on – the ambient temperature. When the temperature is close to zero, but there is no snow yet, you can plant the vegetable in the ground.
In more severe climatic zones, it is customary to plant garlic before winter in September so that the plant has time to form roots. In the middle zone, crops can be planted in the ground from October to November. Do not rush into the planting date, as the plant will begin to germinate early and then die from the cold.
Attention! Garlic needs to be planted before the snow falls.
When and how to plant garlic in the fall - the nuances of planting winter garlic
To grow a good head of garlic, the cloves are planted in the fall. Planting time is directly related to what kind of planting material you have and at what depth you will plant it. Planting dates are quite flexible, but you need to have time to do everything 40 days before the onset of stable frosts. If you plant everything on time, it will have time to grow its root system up to 12 cm, which will allow it to successfully overwinter and enter the spring. A garlic crop planted on time will not have time to release its greens and will calmly wait for the spring days.
In the middle zone, the favorable time for landing begins at the end of September and lasts until mid-October
How to store garlic for the winter in an apartment? In a special publication on our portal, we will tell you in detail about how to store garlic. You will learn how to store young garlic so that it does not dry out, how to properly prepare freshly harvested garlic for storage, and what can happen if storage conditions are violated.
Preparing the bed
The plant takes root well in soil where eggplants, cucumbers, peppers, zucchini, and pumpkins were previously grown. It is not recommended to plant garlic in the soil after potatoes, radishes, and carrots. Choose a suitable place for the plants. It should be:
- dry, without stagnant zones;
- well lit.
In about 1.5-2 months, in the summer, you need to lay fertile soil in the garden bed. To create it you will need:
- rotted horse manure – 10 kg;
- nitrophoska - tbsp;
- superphosphate – 10 g;
- a glass of dolomite flour.
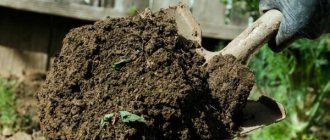
After applying the listed fertilizers to the ground, the soil must be dug up and then leveled with a rake. Next, the soil for planting garlic for the winter is treated with a solution of copper sulfate (40 g of powder per bucket of water). Water the ground at the rate of 1 liter of solution per 1 square meter. Copper sulfate will suppress the formation of pathogenic microflora, so the plants will be absolutely healthy.
How to make beds
Preparing the soil, planting material, as well as setting up a garden bed for garlic in the fall are important factors affecting the harvest of winter garlic. We can say that fertile soil is 50% of success, and that garlic will delight you with a harvest. Site preparation should begin three weeks before the intended planting. The ground should be carefully dug up, this will help remove weed roots and enrich the soil with oxygen. The soil for garlic after digging must settle naturally, otherwise it will settle along with the planted garlic and it will rise, which threatens its death. The bed is made high, at least 25 centimeters.
Fertilizers are applied at the first digging stage. Compost is used, sometimes humus, but not fresh manure. After applying the fertilizer, the bed is dug up again, you can walk over it with a rake to evenly distribute the nutrients.
How to prepare garlic for fall planting
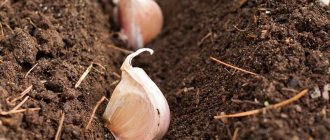
Garlic can be planted in two ways: cloves or bulbs (small bulbs). If you plant cloves, germination will be fast and there will be a lot of harvest. Planting with bulbs allows you to get large bulbs. First, the cloves need to be sorted by size. For planting, take only large teeth; they grow well. Damaged cloves are immediately removed to the side.
Selected planting material must be disinfected in a weak solution of potassium permanganate or in a solution of copper sulfate. Soak the teeth for 20-30 minutes in the solution, then remove and dry. Now the cloves are ready for planting.
On a note! Ash lye is well suited for soaking. For 2 liters of water you need to take 2 cups of ash and leave the mixture for 30 minutes.
Planting garlic bulbs in the fall
You can also propagate garlic in the fall using arrows, inside of which the seeds, called bulbs, ripen. The main disadvantage of this method is the long growing period. However, there are a number of advantages:
- phytodiseases are not transmitted through the top seedlings;
- all features of the variety are preserved;
- a dense, high-quality harvest is obtained;
- There is enough planting material to cover several beds.
To harvest high-quality bulbs, it is necessary to leave only powerful, healthy shoots - the underground bulb will develop poorly in weak plants. When the material is ripe, it is frozen, and before planting it must be disinfected in salt, ash, manganese solution or Fitosporin. You can read more about preparing seedlings in a separate article.
Young garlic in the garden
The first harvest of such garlic will produce single cloves - undivided heads, like an onion, small in size. The next year, such seedlings are germinated again and already 2-3 harvests are produced by the young generation of fragrant, high-quality garlic. This method of planting is used for rejuvenation and propagation of the variety, often even for commercial purposes.
Growing garlic is a simple and comfortable process that usually does not cause difficulties for gardeners on the first try. The main thing is to pay close attention to the preparation of the material and soil, and also to be sensitive to the moment of planting. Every gardener should try to get his own harvest, because native vegetables are always nicer and nicer.
At what depth to plant
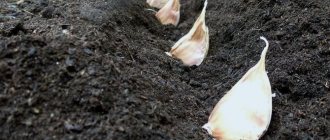
Before planting, you can moisten the soil a little, then it will be easy to work with. Rows are laid out in the garden bed; they should be no closer to each other than 25 cm. The planting depth depends on the planting material: cloves are planted to a depth of 10-15 cm, and bulblets - 3-5 cm.
Planting to a depth of 10-15 cm
You need to make a deep furrow in the garden bed. The depth is determined by eye, but it should not be less than 20 cm. If the cloves are too deep, they will take a long time to germinate. A 3 cm layer of river sand is placed at the depth of the groove. The cloves are planted at a distance of 10-15 cm from each other. Cover the cloves with a layer of soil and level the ridge with a rake.
Garlic can be planted to a depth of 10-15 cm in the Leningrad region, in the Moscow region. In these regions, the ground does not freeze much during the winter. For Siberia and the Urals, it is enough to make a groove 8-9 cm deep. At a greater depth, the garlic may not sprout.
Planting to a depth of 3-5 cm
When planting garlic bulbs, grooves are made in the ground with a depth of no more than 5 cm. The bulbs are inserted in increments of no more than 10 cm. After planting, the seed is buried in soil, and then the soil is slightly moistened with plain water. Cover the bed with a heap of autumn leaves and leave it for the winter.
Predecessor crops: after which plants is garlic planted?
Crop rotation is an important rule for obtaining a high yield on the site. Therefore, it is undesirable to sow the soil with the same crop for more than 2 years in a row.
Planting garlic will go well after growing:
- cucumbers;
- pumpkins;
- squash;
- zucchini;
- melons;
- bell pepper;
- eggplant.
All of the above crops are annual. They quickly develop and grow, saturating the soil with nitrogen, which garlic needs in due time for full formation.
There are vegetables after which it is not advisable to plant garlic in the fall. They deplete the soil, taking away the entire range of useful substances from it. These include:
- carrot;
- beet;
- potato;
- turnip;
- potato;
- radish.
On a note! Even a solution of humate (with potassium or sodium) added after harvesting such crops will not help to compensate for the loss of useful elements in the soil. Consequently, the garlic yield will be extremely low if grown in such low-nutrient soil.
Other planting methods
Experienced gardeners use simpler methods of planting garlic before winter. They are easy to use, so you can try them too.
- "lazy" way. Garlic is planted at any depth, regardless of the region. The main requirement is that the distance between the rows should be 20-25 cm. You should not plant the cloves too often, the space recedes by eye. After planting, the rows are covered with soil, the soil is not compacted;
- "economical" way. It is suitable for those who do not have extra space on their site. Plants are planted in double order. First, make a furrow 10 cm deep. Cloves are planted in it and sprinkled with a little earth (about half). Then they plant garlic cloves in a second layer and cover the ridge with soil.
Regardless of the chosen method, in the spring the crop will begin to grow actively, and soon it can be picked for salads. The harvest will be guaranteed.
Attention! For planting, you need to choose a dry, cloudy day. It is advisable that it rained the day before.
Which variety do you prefer?
A variety is selected for autumn planting of garlic, taking into account the climatic characteristics of the region. Preference is given to winter varieties. It has a high yield when planted in open ground. If you plant garlic in the spring, you may end up with a head with 1-2 cloves.
Zoned varieties for middle latitudes of Russia:
- Lyubasha;
- Union;
- Podmoskovny;
- Gribovsky Yubileiny;
- Novosibirsk;
- Winter Komsomolets;
- Notch.
When choosing planting material, pay attention to whether the vegetable shoots arrows during the growth process or grows without them. The bolting species are large lobules located around an axial ring. The head has 4-12 teeth. If there are 14-25 teeth in the head and they are arranged in a spiral, then such garlic will most likely not release its feathers.
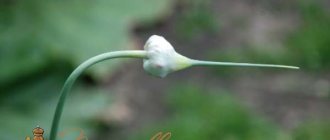
Shooting varieties are not afraid of frost, and they contain essential oils. At the tips of the arrows you can see an inflorescence with seeds (bulbs); they are often used for planting. These garlic feathers are aromatic and have an interesting taste, which is why chefs often add them to various dishes.
Important!
Trim the arrows in time. This ensures high crop yields. Non-shooting varieties are better in this regard. There is no need to follow them, since there are no arrows.
In areas located in the latitudes of the Russian Federation, it is better to choose domestic varieties. Foreigners are more whimsical and require special care and are afraid of the cold. It is difficult for them to adapt, and in the Moscow region, 2/3 of such planting material perishes.
Is it necessary to cover
For the Moscow region, Leningrad region, after planting a garlic bed, you need to lay a layer of mulch. This could be dry leaves, straw, sawdust. Mulch will help retain heat until cold weather and retain moisture in the ground. Just before frost, the mulch layer can be renewed.
In more northern regions, where winter lasts a long time, after planting, in addition to mulch, the bed is covered with plastic film or a piece of roofing felt. If the crop is not covered for the winter, there is a high probability that the garlic will freeze.
Preparation of planting material
There are requirements not only for the soil in which they are sown, but also for the planting material itself. They are very simple:
- Only healthy cloves are used, without damage.
- Before planting a vegetable, make sure that it has been stored correctly (in a dry room that has been properly ventilated). A summer veranda or canopy is a good choice.
- The seedlings were taken from the agroclimatic zone where they plan to plant them.
- For planting, take the largest ones, because they will grow larger.
Garlic is the most unpretentious plant in the garden. But it is better for him to work a little and get a bountiful harvest as a reward. This will become possible provided that the bed is fertilized, loosened, regularly weeded and irrigated.
Be sure to weed immediately when the first shoots appear. The vegetable is most vulnerable at this time: weeds deprive it of moisture and minerals. Then you can periodically loosen without starting any more weeding. This is necessary, since this crop grows better on loose soil.
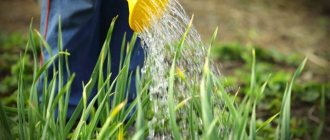
Garlic should be watered all the time, not counting the last month before harvest. To do this, carefully use a watering can or hose with a shower head. As necessary, ensure that the soil does not dry out or become waterlogged.
Advice!
As they grow, occasionally sprinkle the rows with fertilizer - large heads will appear.
The best varieties of winter garlic
Winter garlic differs from others in that it has a stem in the center of the head. The cloves are arranged in a circle, in one row. The most popular varieties of winter garlic are:
- Lyubasha. The plant can grow up to 1 m, is frost-resistant, and is also resistant to dry periods;
- Dobrynya. Produces large heads, the taste of the cloves is pleasant, not too spicy;
- Sofievsky. It is highly frost-resistant and suitable for growing in Siberia. Bulb weight - 100 g;
- Alcor. It has a slightly pinkish color on the bulb and stores well;
- Dubkovsky. The variety is high-yielding, the heads are of medium size. Weight rarely exceeds 50 g.
You can plant several varieties of garlic in one bed. However, you need to take into account the peculiarities of growth: large varieties require more space for planting than medium and small ones.
How to distinguish winter garlic from spring garlic
Let's set the differences:
| Winter garlic | Spring garlic |
| Planted in autumn. | Planting time is spring. |
| The head contains up to 12 teeth located around the axial rod. | The head consists of 25 small teeth, which are arranged in several rows without an axial rod. |
| Spicy taste. | Soft taste. |
| It is eaten in summer and autumn, used for preservation and preparation, but it is poorly stored. | This is a short-lived garlic, and it will last well until next summer. |
Head of winter garlic
A head of spring garlic
How often can you eat garlic: benefits and harm to human health. In a special publication on our portal, we will talk in detail about how often you can eat garlic. You will learn what is contained in garlic, what garlic helps with when used for medical reasons, and the use of garlic in folk recipes.
Step-by-step instructions for planting winter garlic before winter
Let's consider all the key steps in preparation for the procedure and the scheme for planting teeth in open ground.
How to choose a suitable location and soil for winter garlic
Before gardening, it is very important to choose the most suitable place on the plot in the open ground, because the quality and quantity of a tasty and healthy harvest depends on this.
So, for the autumn planting of winter garlic for the winter, you need to choose a place according to the following rules:
- The vegetable crop loves sunlight very much, so the place should be open and well lit by the sun's rays throughout the day. You should not choose shaded areas (for example, next to trees or bushes), otherwise you will not see a good harvest.
- The site should be protected from drafts and winds on the north side.
- A small hill (for example, a warm garden bed) or a gentle mound works well. If you plant in a lowland, then with heavy rainfall or when the snow melts in the spring, moisture will accumulate in the garden bed and can cause rotting.
- Wetlands and waterlogged areas in the garden should be avoided; groundwater should not lie too high.
Important! Winter garlic should not be planted in areas where organic fertilizers such as manure . Otherwise, the plant will begin to fatten (grow tops), the heads will turn out loose, small and will be vulnerable to fungal diseases.
Basic soil requirements for planting and growing winter garlic:
- The soil is loose;
- Has neutral acidity (pH 6.5-7);
- Fertile;
- Air- and water-permeable.
By the way! Light loamy soil is ideal for vegetables.
But it is not worth planting in areas with dense, heavy, clay soil or light, sandy soil. Acidic and alkaline soils should also be avoided.
How to prepare the place and soil for autumn planting of garlic
You need to start preparing the bed for planting garlic before winter in the fall 1-1.5 months (ideally) before the event. During this time, the soil will settle naturally.
Advice! It is recommended to place the bed from north to south!
Bed preparation plan:
- clean up the area;
- improve the soil (if necessary);
- apply fertilizers;
- dig up;
- loosen and level with a rake;
- form;
- water.
So, the scheme for preparing a bed for autumn planting of winter garlic:
1) Clean up the place. First of all, we remove all debris, stones, weeds along with the roots (if there are any, of course).
2) We apply fertilizers. Now you need to evenly spread fertilizer over the surface of the selected area, preferably both organic and mineral (this tandem is more effective). So, you can fertilize the place with the following components:
- Humus, or even better compost (well decomposed), 1 bucket per square meter.
- Wood ash , 200 grams (glass) per sq.m.
- Superphosphate , 20 g per sq.m.
- Potassium sulfate , 20 g per sq.m. By the way, it is recommended to use this particular potash fertilizer, because it also contains sulfur, and garlic is very sensitive to sulfur deficiency.
Note! The application of phosphorus and potassium fertilizers is very important for this crop.
In particular, potassium is very important for winter garlic , because it increases the cold resistance of the crop and helps it survive the winter safely.
And phosphorus will help produce garlic heads rich in sugars.
3) Improve the soil. If the soil on our site does not meet the requirements stated above, it is recommended to improve it. You can make the land more suitable for growing winter garlic using the following methods:
- For heavy, clayey soil, it is recommended to add sand and lowland peat (one bucket of each substance per square meter) or at least one sand.
- For light sandy soil, add humus or compost and lowland peat (also 1 bucket of each substance per sq.m.).
- For acidic soil, you need to add wood ash or dolomite flour (200 grams per sq.m.) to the soil.
- For alkaline soil - high acidic peat (1 bucket per sq.m.).
4) Dig it up. Now you need to dig up the selected area using the bayonet of a shovel (25-30 centimeters).
5) Loosen it with a rake. After applying fertilizer to the future bed, you need to thoroughly loosen the soil with a rake.
6) Form a bed. Then we take an important step: creating a bed for planting and growing winter garlic. The best option is a high bed 20-25 centimeters high and up to 1 meter wide. It is especially important to make a high bed if your garden is in a lowland (especially if the soil is heavy).
7) Water. In order for the soil to settle, it is recommended to water from a watering can. If it doesn’t rain during the soil shrinkage (within 3-4 weeks), then it’s better to water it yourself a few more times.
By the way! In order to prevent fungal diseases, it is recommended to spill the soil with some fungicide, for example, the biological product “Fitosporin-M” or a solution of copper sulfate (1 tablespoon per 10 liters of water).
How to choose planting material (garlic cloves)
The choice of planting material must be approached responsibly. First you need to decide on the heads. It is best to choose cloves for planting from the largest heads, which have five to six cloves (no more).
Advice! The size of the cloves of the future harvest depends on the planting size: if you plant large cloves, then they will grow larger in the next season.
Carefully inspect the head: the cloves should not show signs of disease, damage, mold, rot, or stains . The cloves must have a complete shell , without damage or cracks.
Advice! If you want to plant a lot of cloves that vary in size, it is recommended to sort them first. And already in the garden, first in the row, you plant the smallest ones, then in another row - the medium ones, then the large ones. This way, you can get a more uniform crop size.
How to prepare garlic cloves for planting before winter
Preparing winter garlic before planting in open ground is very important, because thanks to it, the planting material takes root better and takes root in the fall, and has a higher immunity to pathogens.
Note! You only need to divide the garlic head into individual cloves just before planting!
The first step of preparation is that you need to disassemble the garlic head into cloves:
- Each clove must be separated from the others, and everything must be done carefully so as not to damage the outer shell and the bottom (that is, the root growth area).
- You should sort all the cloves and select the largest and healthiest ones. All small, damaged, sick ones need to be discarded.
- After this, it is recommended to lightly clean the bottom for better rooting, but this must also be done as carefully as possible so as not to damage the scales.
If you are interested in non-shooting varieties of garlic, then from such a head you should take only the cloves of the outer tier.
In order to properly prepare garlic cloves before autumn planting before winter, it is recommended to carry out treatment by disinfection (one of the methods listed below):
- Soaking in a solution of the biological fungicide " Fitosporin-M ", prepare the solution according to the instructions, keep the planting material in it for about 5-10 minutes.
- You can soak it in a solution of the Maxim fungicide , pickle it for 15 minutes, and prepare the solution according to the instructions.
- Can be treated in a 1% solution of copper sulfate (10 grams of substance per 1 liter of water). Let the teeth sit for 10-15 minutes.
- To disinfect cloves of winter garlic, soaking them in a solution of the fungicide “Fundazol” ; also follow the instructions.
- You can also treat the planting material in a pink solution of potassium permanganate (potassium permanganate) and leave for 30 minutes. However, this method of preparation is not very effective.
By the way! Many summer residents and gardeners do not treat planting material in disinfecting solutions, but simply plant it immediately in open ground.
Scheme for planting winter garlic in open ground
Having completed all the preparatory activities listed above, you can begin planting. It is recommended to plant garlic before winter according to the following scheme:
Step 1: Make planting holes (pits) or grooves.
Here's how to make holes correctly:
- For this you can use, for example, a small spatula.
- The distance between the holes is 10 centimeters from each other.
- The distance between the rows is 20-30 cm. In this case, the rows must be placed strictly parallel to each other. To make everything even, you can pull the rope and make rows along it.
- It is also important to know what depth to plant the cloves. The optimal depth of the hole is approximately 8-10 cm.
Instead of holes, you can make planting grooves . The distance between them and the depth of the groove is the same as that of the holes (i.e. the depth is 8-10 cm, and the distance between the grooves is 20-25 cm).
Advice! If you have not previously prepared the bed and soil, and you have heavy soil on your site, then it is recommended to put sand or light compost at the bottom of the hole or furrow (to create a cushion). If you do not prepare the soil or do not make a cushion, then due to the dense soil during the growth process, the clove may rise on the roots closer to the surface of the earth.
Step 2: Plant the cloves in the holes or grooves.
Advice! To protect garlic from pests and nematodes, it is recommended to place a small handful of tobacco dust at the bottom of the hole or groove.
Planting must be done strictly with the bottom down . At the same time there is no need to press the teeth in , otherwise the soil underneath will become compacted, and they will take longer and more difficult to take root.
The distance between the cloves is 10 centimeters from each other (you must initially make holes with such a gap, so the information is relevant for those who plant in grooves).
Important! It is necessary to plant winter garlic at the optimal depth, because if planted too close to the surface of the ground, the cloves can easily freeze, and if too deep, they can rot.
Step 3: Cover the cloves with soil.
Planting material in holes or furrows should be filled with fertile soil.
Advice! If, again, you have not prepared the bed and you have dense, heavy soil, then you need to fill the holes or furrows with heavy soil as well. In this case, the planting material will not rise up, the root system will develop normally. In addition, moisture will not easily penetrate light and fertile soil, accumulating around the clove above heavy soil.
Step 4: We water.
In addition to ordinary water, you can water the bed with winter garlic with a solution of the Fitosporin-M fungicide to prevent fungal diseases.
Step 5: Mulch the planting site.
It is necessary to use fallen leaves, peat, and humus as mulching material. The height of the layer is approximately 10 centimeters.
Preparing for landing
Winter varieties have many advantages. They produce higher yields and are resistant to diseases. In addition, in the autumn months, gardeners have more time for planting and related work. The varieties in question are undemanding in terms of care. The supply of the optimal amount of moisture in the ground will be enough for them to develop harmoniously.
For planting in the autumn, it is important to select options designed specifically for this hybrid, for example, “Komsomolets” and “Skif”. If you plant winter garlic in the spring, it is unlikely that the heads will end up in the ground later. Only lush, bright green tops will form.
Material for planting must be prepared in advance. The heads should be thoroughly dried and then divided into cloves. It is important not to damage the scales. Cloves with defects or signs of rot are removed. They are not suitable for subsequent planting.
Preparing the garden
It is better not to allocate for planting beds that have been fertilized with manure this season. Such fertilizers negatively affect the growth of garlic. The heads will end up loose and small in size. An excessive amount of unrotted organic matter also contributes to the risk of fungal diseases.
Prepare the bed before planting as follows:
- A couple of days before planting day, fertilize the soil with humus. A little superphosphate is added to it.
- They dig up and arrange the beds. Their parameters should be as follows: width - 1 m, and height - 20-30 cm.
- Disinfect the substrate with a solution of fungicides containing copper. This must be done according to the instructions.
- On the planting date, urea is added to the soil. It should be taken in the amount of 1 tbsp. l. per 1 sq. m.
Garlic does not like overly acidic soils. You can neutralize the pH by adding slaked lime in advance. An alternative is dolomite flour.
Caring for winter garlic after planting
If your winters are very cold, then with the onset of frost, the bed is mulched with sawdust, or covered with pine branches or straw, or even covered with spunbond. But in the spring, all the shelter will need to be removed during the first warm days, but the mulch can be left (some people specifically grow garlic in mulch).
Video: planting and mulching garlic in the fall
If the autumn is dry and there is little precipitation, it is recommended to water the beds a couple of times so that the rooting process goes faster.
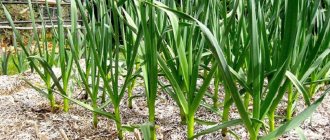
Naturally, the main care occurs in the spring. Some time after the snow melts, the first green shoots should already be visible. Watering is not required yet, because after the snow melts, the soil is saturated with a sufficient amount of moisture.
Next, of course, you will need to water, weed, loosen and feed the garlic. And also remove arrows in time.