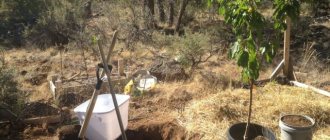
Description of the process of planting plum pits
Plum pits are a finicky material, and many gardeners are hesitant about whether they can be planted in open ground or whether it is better to germinate them in pots first.
The answer is simple: you can plant plum seeds both in open ground and in containers. The only factor that plays a role in this situation is climate. After all, it is more difficult to grow a tree in the northern regions, and it is unlikely that a plum from a seed will be accepted in a cold climate. Now let’s take a closer look at these two planting methods: planting in open ground and planting at home.
Planting at home
First you need to prepare the soil as described above.
After preparing the soil, you need to prepare the bone, to do this you need to hit it with a hammer, however, it is important to accurately calculate the force of the blow, because the bone should crack slightly, but not disintegrate. This procedure is necessary for the seed inside the seed to “wake up”
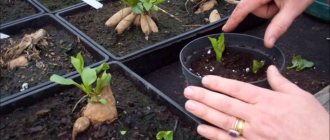
Next, the seed must be planted in the soil, deepening it 6-9 cm. The soil in the container must be kept constantly moist, but the seed must not be overwatered. The container must be kept in a cool place, but the bone will not withstand too low a temperature. In a few weeks, the first shoots will appear, which can be planted in open ground only after a year.
Did you know? When grown at home, the plum will begin to bear fruit in 5-6 years.
Planting seeds in open ground
If you do not want to waste time on the lengthy process of growing plums from seeds, you can plant the seeds directly in open ground.
To do this, add a little humus or manure to moist, slightly acidic soil and plant a seed. The planting depth is 6-10 cm, while the size of the hole should be approximately 15*20 cm. It is better to sprinkle the seed so that a small hump is formed. For additional protection, it is necessary to sprinkle poison around the pit for mice and other rodents. It is better to plant several seeds in one hole, because weather conditions are impossible to predict, and only one seed can sprout.
Important! The seeds may not sprout in the first season, and the first shoots may appear only after 1.5 years.
Stratification
Stratification is the first and most important preparatory stage, which determines whether the planted seed will germinate. © https://ydoo.info/qa/kak-vyrastit-slivu-iz-kostochki.htmlThe essence of the process is that the planting material must be kept in cool and humid conditions.
When germinating plums from seeds, it is important to follow the step-by-step instructions and follow all the rules:
- Having chosen a variety, free the pit from the pulp. Next you need to prepare the cotton fabric. It must be cut into small pieces into which the seed must fit. Each selected seed must be wrapped in cloth separately, placed in one container and moistened.
- The container with the wrapped seeds should be placed in the cellar, refrigerator or summer kitchen. The lower the air temperature, the better.
- The seeds and tissue should always be damp. To do this, they need to be watered regularly with a pipette.
Now we have to wait for the seed to sprout. The process usually takes 6 months, but it can be sped up. For example, a bone and the fabric in which it will be wrapped can be treated with growth stimulants (Epin or Ecosil).
If mold appears on the cloth, the seed should be immediately removed and washed under running water, and then re-wrapped in cotton cloth.
There is another stratification option. A seed can be grown not only in fabric. You can use crushed moss, sawdust, sand, peat.
The germination process in the substrate occurs a little differently:
- First you need to put the bones in water for three days. Planting material must be completely immersed in liquid. Soaking softens the seed shell and also removes inhibitors that prevent the seed from germinating.
- While the bone is in the water, you can prepare the container and soil. The soil must be moistened and treated with a solution of potassium and water (in a proportion of 5 grams per 1 liter, respectively). In the pot where the seed will grow, you need to make side holes. They are needed for good air circulation.
- The seeds must be placed in the soil so that they do not touch each other.
- Containers should be covered with transparent polyethylene or glass.
Now we need to provide the seeds with optimal conditions for germination. The most important thing is the right temperature, and there are certain steps:
- Warm up For the first 15 days, the seeds should be stored at a temperature of +15...+20 degrees.
- Cooling. On the 16th day, the temperature should be reduced to +1...+5 degrees. Under such conditions, the bone is stored for 60 to 80 days.
- Pre-sowing. Before planting the seed in open ground, the temperature is reduced to 0 or -1.
Monitor soil moisture. It shouldn't dry out. But if mold appears on the substrate, the soil should be sprayed with a 3% potassium solution.
Germination in a substrate is a longer procedure, but it is considered more successful. If everything is done correctly, the chances of having a healthy and strong tree increase several times. The first sign that the seed is ready for planting will be a cracked shell.
Transplanting into a vegetable garden or garden
If the seedling is obtained from a seed, it can be temporarily placed for wintering in a quiet place protected from the winds
It is important that in winter the tree is completely covered with snow and does not freeze. Plant several specimens at once at a distance of at least 30 cm from one to another
The soil must be well dug up and fertilized with humus.
Prepare for the fact that not all seedlings will survive until spring. But this is a critical test: the most durable samples can be safely transferred to a permanent place. Replanting is carried out in early May, when the soil has warmed up sufficiently to a depth. The first months of life the plant needs abundant watering. The earth is moistened in the morning, at noon and in the evening. This regime lasts 21 days until the seedlings take root.
The depth of planting a seedling in the soil is determined by the level of the first leaf. At first, you can organize a mini-greenhouse above the tree, protecting it from direct rays and preventing too rapid evaporation of moisture from the soil. The trunk of a young plum tree is fragile, so don’t be too lazy to tie it to a peg driven nearby. After about 1.5 months, the greenhouse film on top is removed.
A little trick: for an experiment, plant several sprouts at once. If among the plantings you come across a self-sterile seedling, then being next to its fruit-bearing neighbors will definitely benefit it. This way, pollen will be transferred faster from active ovaries to dummies.
The plum tree takes root better in deep holes - 30x50 cm (width and depth). The substrate is dug up and mixed with mullein and ash. The soil is shed with potassium solution and left to sit for a couple of days.
What is important to consider:
- The seedling is transplanted to a permanent place “fresh”, that is, immediately after being removed from the previous hole. If he still had to stand and the root system dried out, soak it in water for a couple of hours;
- The cutting should be even. Do not take forked or twisted specimens;
- Do not bury the root collar in the ground. If you ignore this rule, the trunk will settle into the soil some time after planting, which will slow down its growth. It is useful to bury the trunk around the perimeter, pouring a small mound of soil around it.
A plum tree planted in an open area is generously fertilized with humus, superphosphates and peat every three years. The basic rule of care is regular watering as the tree trunk dries. Try not to flood the soil, as a rotten root system can destroy the entire tree.
Transplantation into the ground
Experienced gardeners recommend replanting the plum seed into the soil in which the seedling will subsequently grow. A small amount of such soil is placed in a flower pot and mixed with a small amount of humus, in a ratio of ten to one, respectively.
You can also use the growth stimulants mentioned earlier. It is not recommended to use them in their pure form. It is advisable to dilute a certain amount in warm water and use it as a liquid for watering the seed.
The soil should be kept moist regularly. Otherwise, the seed will dry out without having time to sprout. When the first sprout appears, you need to care for the plum in the same way as any other indoor plant: water it on time and periodically loosen the soil.
When and where can I plant?
The plum tree is usually placed on a small flat area. Thus, the soil under the seedling will be better warmed up, and the plant will receive a large amount of heat. The tree can also be planted near the fence. But this must be the side where more sunlight falls.
If the tree is planted in a low area, then it is recommended to give preference to a small mound, the height of which will be at least 40-50 cm and the width from 180 to 200 cm. The optimal time for planting a plum is the early months of spring.
What will you need?
In order to provide the seedling with all the necessary minerals and nutrients that will ensure its healthy and active growth, you will need to stock up on some types of fertilizers. For planting plums, you need granulated superphosphate, wood ash, high-quality compost and peat.
In the process of mulching (that is, protecting and improving the properties of the soil), manure, hay or dried grass may be required. Over time, you will definitely need a wooden peg. With the rapid growth of a seedling, it is necessary to take care of its correct direction of growth. For stability and balance, the seedling is carefully tied to a wooden stake.
Soil preparation
The close occurrence of groundwater at the bottom of the planting hole can complicate the good and healthy growth of a plum seedling. Therefore, it is recommended to get rid of this problem by making your own drainage. To do this, broken bricks, expanded clay and any available fabrics are laid in an even layer at the bottom of the pit.
Nutrient soil is laid on top of the homemade drainage from one to two buckets of rotted plant debris, one kilogram of ash and two buckets of warm water. It is worth mentioning that the presence of a high acid content in the soil can complicate the adaptation of plum seedlings to a new location. To prevent this, it is recommended to treat the acidic soil with dolomite flour before planting. Then add 5 buckets of warm water.
Requirements for the landing pit
Preparation of a planting hole for a plum seedling planted in the spring should begin in the autumn. If the tree is planted in the fall, then preparation begins 15-20 days before the intended planting. The shape of the pit can be any, but its size has strict recommendations. So, for example, the height, width and depth should be no less and no more than 70 cm. When digging, the upper surface of the soil is discarded, and the bottom of the hole is thoroughly loosened.
Description of the transplant process
After all the preparatory work with the soil has been carried out, you can begin planting. So that a seedling sprouted in a pot can successfully adapt to new conditions, and at the same time prepare for the cold before the onset of autumn, it is advisable to transplant it at the end of April:
- The pit for planting should be filled with humus and high-quality compost. It is recommended to sprinkle a small amount of sand on the top surface.
- A plum seedling is planted along with soil from the pot in which it sprouted. No fertilizer is required on the top surface of the soil.
- The soil is compacted before planting. This way, air will not be able to reach the root system. By ignoring this step, you can allow the roots to dry out.
- If necessary, tie the seedling to a wooden stake.
- The plant is watered abundantly.
How to properly germinate a seed
The first stage of germinating plum tree seeds at home is called stratification. This is a slow germination method at low temperatures. The procedure must be carried out before winter, no later than November, so that the seeds are ready by the time they are planted in open ground. Take a thick plastic bag, container or glass jar and fill the container with fertile compost.
The soil should be moist, but not wet. Now put the seeds in a jar and shake it well. This manipulation will help make the soil loose and evenly distribute the seed material in the ground. The prepared container with seeds is sent to the refrigerator at a temperature of +2-+4°C. Thus, future plums should be stratified for 5-6 months. Prepared seeds are planted in mid-May.
Now you need to properly select and prepare a plot in the garden. The place should be comfortable, sunny and quite spacious, so that it is convenient to mulch and cover young shoots with burlap or film in case of frost. It is worth noting that temperatures below 0°C have an extremely negative effect on tree sprouts.
The soil must first be fertilized to a depth of 30-40 centimeters. For 1 square meter of plot you will need 50 grams of superphosphate, 50 grams of potassium salt and 2-3 kilograms of humus. The sowing depth should be about 6-7 centimeters, and the distance between seeds should be at least 5-6 meters. Carefully place the seeds, which have been stored in the refrigerator all winter, into the prepared holes. Before planting, they should already have elastic white roots. Fill the holes with soil and water well. In the future, make sure that the planting does not dry out and is protected from all kinds of negative external factors.
How to grow young seedlings?
After successful stratification, the next stage begins - growing young seedlings. Where to plant young seedlings: in open ground or in a pot? Everything here depends on the climate. If it’s already warm outside and the soil has warmed up well, then you can go to the dacha and plant the seedling immediately in its usual place. But it is worth considering that such a sudden climate change can be detrimental to the seedling. Therefore, it is better to plant the seed in a pot and germinate it at home, and when the tree gets stronger, it can be transplanted into open ground.
Growing seeds in a pot
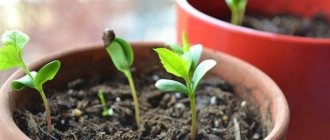
To germinate plum pits at home, you need to select a container. The diameter of the pot should be at least 20 centimeters so that the sprout is not cramped in it. You also need to make sure that there are drainage holes at the bottom that will remove excess moisture. The container must be disinfected with a weak solution of manganese, and a layer of expanded clay should be placed on the bottom. Now we need to prepare the substrate. Plum pits love light soil that allows moisture and air to pass through well. You can mix humus, leaf soil and vermiculite in equal proportions. It also doesn’t hurt to add perlite (0.5 part of the total mass of the substrate) - a natural volcanic rock that promotes rapid seed germination.
Fill the pot with the prepared mixture. The substrate should be well moistened. The seed is planted in the center of the container and buried 5 centimeters into the ground. Now you need to cover the pot with transparent polyethylene or glass to create a greenhouse effect. The container is placed on the windowsill, where there is enough sunlight. Now all that remains is to wait for the sprout to appear. Usually the seed germinates in 30-40 days. Throughout this period, it is necessary to ventilate the greenhouse daily, as condensation should not be allowed to form. In addition, regular air baths will help the plant get used to the environment.
Creating optimal conditions will help achieve good results. Try to control:
- Watering. The plant should be watered abundantly, but infrequently. 1-2 times a week is enough. You cannot water the seed in the usual way; it is better to use a spray bottle or syringe. The water should be warm and settled.
- Lighting and temperature. There should be enough light. If the room where the seedlings are located is dark, then you need to use special fluorescent lamps. For a seedling to germinate, a temperature of +25 degrees is needed.
- Fertilizer. The first feeding can be done only after the sprouts appear. While the seedling is growing, it is necessary to apply two more fertilizings with nitrogen fertilizers. One seedling requires 100 milliliters of solution.
When the first two leaves appear, you should pinch the plant by 1/3. This procedure activates the growth of the root system. If several seeds were planted in one container, then after the leaves appear, picking should be done. The seedlings are planted in separate containers, watered abundantly and placed in a dark place for several days.
To avoid getting a wild tree whose fruits will be dry and tasteless, seedlings must be planted in new soil every three months. At the same time, it is important to change the container itself, increasing its size each time. A young tree can be planted in open ground no earlier than after one year.
Transplanting a seedling into open ground
To transplant a seedling into open ground, you need to prepare the soil. If you plan to plant seedlings in the spring, then the soil must be dug up in the fall. Over the winter, the soil will rest, settle and become saturated with melt water. If there is an autumn planting, the soil must be prepared at the beginning of summer. Fertilizers must be added to the soil:
- compost (6 kilograms per 1 meter);
- superphosphate (60 grams per 1 meter);
- potassium salt (30 grams per 1 meter).
Now you need to dig a hole, the depth of which should be 60 centimeters and the width - 100 centimeters. Since the young seedling is still weak and may not withstand strong wind or rain, a stick should be placed at a distance of 30 centimeters from the center of the recess, to which the young tree should then be tied.
To fill the hole, you will need two buckets of manure, 2 buckets of sand, 30 grams of superphosphate and 20 grams of potassium sulfate. All components are mixed and poured onto the prepared area. From the earth mixture you need to form a hill on which the seedling should be placed. The roots of a young tree must be leveled over the entire surface. When adjusting the planting height, you should try to ensure that the root collar is 5 centimeters above the soil level. When filling a hole, it is important to avoid voids, since the plum does not like them. The soil around the tree must be compacted, watered, and the tree itself must be tied to a stick. The tree trunk circle should be sprinkled with sawdust.
Pot and soil
Growing plums from seeds is a labor-intensive and time-consuming process. And it is not known whether a plum from a seed will bear fruit. Before directly germinating the seed, you should prepare the necessary container for planting and soil. The pot must be large (at least 20 cm in diameter). It is advisable to disinfect it, especially carefully if it is not used for the first time. For disinfection, you can use a formaldehyde solution.
A drainage layer must be placed at the bottom to prevent moisture retention and ensure free access of air to the roots. You can buy ready-made or prepare it yourself. For this you will need: small pebbles or broken bricks, charcoal and coarse sand.
Next, you need to take care of the soil, which will provide optimal conditions for the seedling - ventilation, balance of moisture and nutrients, and which will prevent the appearance of mold and the spread of fungi. It has been experimentally proven that a substrate with humus, leaf soil or peat, vermiculite and perlite has these properties. The latter can be replaced with calcined river sand.
Varieties of wood
If you are serious about growing a plum tree from seeds (the photo shows the beautiful tree you can get), there are a few things you need to consider.
One of them is the correct choice of variety. The tree from which you take the seed must necessarily grow in your climate zone. Only in this case will the seedling be able to please you with beautiful fruits.
If the parent tree grows in a warm climate, then it is difficult to count on the success of the venture. Most often, a “wild” plant grows from such planting material. But even if this does not happen, the plum will “freeze”. This means you won’t see a wonderful, abundant harvest. Therefore, let’s consider which varieties are best to use so that plums from seed appear in your garden.
The following varieties can be grown in the middle zone:
- "Belarusian";
- "Minsk"
- “Vitebsk late”;
- "Volga Beauty"
In sharply continental climates and arid regions, the following varieties will take root well:
- "Egg Blue";
- "Morning";
- "Eurasia".
Types suitable for warm areas:
- "Kuban Comet"
- "Victoria";
- "Cromagne".
Steps
Part 1
Collecting seeds
- Buy ripe plums at the market.
Choose varieties grown in your area or in an area with a similar climate. This way you will know that this variety can grow in your climate. It is best not to take early ripening varieties, since the seeds in such plums are unlikely to have had time to develop to the desired stage. - Eat the juicy pulp.
To grow, choose the fruit whose taste you liked the most, since, with a high degree of probability, grown plums will inherit the taste qualities of the parent plant. - Try to ensure that there is no pulp left on the bone; its surface should be completely clean.
- Place the seed on the windowsill to dry for several days.
The seed inside the seed will dry out and shrink in size, making it easier to store. In addition, the shell of the pit will also dry out, making it easier for you to open it. - Take a small nutcracker.
Place the bone horizontally between the two ends of the tongs. Gently crush the seed.- Be careful not to squeeze the bone too hard. If you crush the seed, it will become unsuitable for growing.
- You should be left with an almond-shaped seed.
This is what you will need to germinate and grow a plum tree from. - Pour a glass of water.
Put a seed in it. If the seed has sunk, you can germinate it. If the seed is floating on top, you will need to continue cracking the seeds until you find a viable seed.[2]
Part 2
Seed germination
- Soak the seeds overnight in a glass of water.
The water should be at room temperature. - Fill a plastic bag or glass jar with fertile compost.
Water the soil moderately. The soil should be moist, but not excessively. - Place a seed or several seeds in the soil and seal the bag or jar tightly.
Shake the container with soil so that the seeds sink deeper into the loose soil. - Set the refrigerator temperature to about 4 degrees Celsius.
Place the jar or bag of seeds in the refrigerator to begin the stratification process. This process of low-temperature germination of seeds promotes their germination, and these seeds can then be grown into an adult plum tree.
Part 3
Growing seeds
- Choose a spot in the garden where you plan to plant your plum tree.
It is recommended that at least two plum trees grow on the site so that cross-pollinated varieties can bear fruit. - Find a place where the plant is not at risk of frost.
Choose a relatively sheltered location where you can mulch the soil and cover it with a covering material that will protect the plant from frost. Frost can kill your young plum trees. Choose places where the plants will receive sufficient sunlight. - Before planting, prepare sufficient well-drained soil and compost.
Adding soil ensures good drainage properties. - You can also grow your plum tree in a large pot and transplant it outdoors later if you are not yet sure where exactly you want to plant the tree.
To do this, you will need a large pot with holes to drain excess water. - Once the seed in the jar or plastic bag has formed healthy white roots, you can transfer it to soil.
Be careful not to damage the roots when replanting the seedling. - Dig a small hole slightly deeper than the length of the roots.
Form a small mound of soil in the center of the hole. Place the seed on this raised area and carefully spread the roots around. - Cover the planted seed with soil.
The distance between trees should be from 6 to 7.5 meters. - Water the area where the plum tree is planted and protect it well.
Do not allow the soil to dry out and water it deeply. Your plum tree should begin to bear fruit in the third to fifth year after planting.
How to grow plum trees
Once your seedlings are in the open ground, the hardest part begins - you need to grow them into full-fledged plum trees that will bear fruit. And this is not at all easy, since you will have to comply with a number of very important conditions:
- seedlings require high humidity for normal rooting and germination. In this case, we are talking not only about the soil, but also about the moisture content in the air;
- Seedlings should be watered frequently with warm water and care should be taken to ensure that the soil never dries out. Your seeds will not grow in dry soil. And if it is quite easy to create such conditions at home, then on a site in dry summer conditions it is much more difficult to achieve moist air;
- The area where the seedlings grow needs to be loosened properly so that air can flow freely to the roots of the seed. The looser the soil, the better the plant will develop;
- do not allow weeds to develop in the area with seedlings - even when preparing the area for planting, you need to remove all the roots. Weeds that grow quickly throughout the season can easily “clog” a small growing plum seedling;
- the seed will sprout in about one and a half to two months, and the soil must be constantly moist the entire time before it sprouts. If several seedlings have grown - this often happens - the weakest ones need to be removed, just do not tear them out of the ground so as not to damage the soil. Just trim them with a sharp knife;
- For the winter, you must cover your seedlings by mulching the soil with a thick layer of peat so that frost does not destroy the tender plants. This is a very important component of plum care.
And one more little trick - if you want to achieve fruits faster, then first plant the seedlings in pots and grow them at home. By replanting them several times as they grow, the plum seedlings will become significantly stronger and begin to bear fruit faster. You can plant seedlings from pots in the ground no earlier than a year after they begin to germinate at home.
They should be planted in the ground together with a large lump of earth from a pot. To do this, you need to prepare a fairly deep hole, fill it with a nutritious mixture of peat and humus and dump a lump of earth with roots out of the pot, after thoroughly watering it with soil.
Growing in a pot
You can grow nectarines from seeds indoors and then transplant them into the ground. If it is carried out in the spring, stratified seeds are used for this purpose. In autumn, you can plant pre-soaked seeds.
How to grow nectarine from a seed in a pot? The seed is deepened by 8 cm, the soil is moistened and covered with film.
It is necessary to carry out daily ventilation, slightly moving the edge of the film. Mold should not be allowed to form.
The pot (tub) should be selected with lower holes for draining excess moisture. It should be deep, since the peach family tends to grow long roots.
The room in which the pot with nectarine is placed should be bright and well ventilated. With short daylight hours, it makes sense to use artificial lighting.
When the young seedling grows up and gets stronger, it can be taken outside.
It is best to start the process of growing nectarine seedlings in a pot in the summer. In autumn, a young, overgrown tree is either brought indoors or transplanted into the garden.
Planting seeds in a container
How to grow a lemon tree from a seed at home
Before planting the seed in the ground, it must be watered abundantly. The pit goes deep into the soil to a depth of 5 cm; it should be placed in the middle of the container. Cover the top with plastic wrap.
The advantage of indoor plum harvesting is that the seedling is protected from bad weather and pests
Every day the film must be removed to ventilate the ground to prevent mold from appearing on it. Watering the soil is carried out as its top layer dries out. If all conditions are met, seedlings will appear in about 40-50 days.
Caring for plums after grafting
The ends of cuttings and branches after grafting require special care. Experienced gardeners recommend putting bags (made of polyethylene or paper) over the grafts and securing them with ropes. The size of the straps is 10-15 cm longer than the cutting itself. Such a shelter will maintain an optimal microclimate and promote speedy healing.
The effectiveness of vaccination can be assessed after three weeks. The event is considered successful if the scion is not dry, and a growth (callus) has formed at the site of its connection with the tree. Until complete healing, the junction should be observed, periodically loosening the bandage.
Using any of the plum propagation methods, you can achieve excellent results and grow a fruit-bearing tree.
It is important to follow the basic recommendations of gardeners and clearly monitor each stage of the process.
Planting a plum pit in the ground - on video:
Germination
The main procedure of this process is stratification. It involves keeping the material for planting in conditions with cool temperatures and optimal humidity levels. This makes it possible to germinate plum pits at home. The main components of the substrate can be the following:
- moss taken in a crushed state;
- lowland peat;
- wood sawdust;
- perlite;
- river sand with large grains of sand.
A very important step is the process of moisturizing the selected components. A solution consisting of 5 grams of potassium permanganate diluted in a liter of water acts as a humidifier.
It is necessary to pour in such an amount of liquid that the total moisture content in the substrate is at least 60 percent. When the amount of liquid is optimal, when squeezed in the hand, the substrate releases a little moisture, but does not deform.
In this case, the seeds must be kept in water for three days before planting in the substrate. They are immersed halfway in liquid so that the embryo has access to oxygen. You should also change the side with which the seed is placed in the water throughout the entire time. Remember that if you fill the entire seed, the embryo is in danger of dying. This procedure helps to wash out substances from the seed that inhibit the further growth of the plant, and also allows it to swell.
To prevent fungal formations from appearing in the pot or other container where stratification will be carried out, it is necessary to make holes. The air exchange process will take place through them. The holes are usually located on the sides. In addition, you should place the seeds themselves at some distance from each other, and also cover the container on top with polyethylene or glass material.
To carry out the stratification process as accurately as possible, you must follow the step-by-step instructions.
- The first step is to warm up. In the first 15 days after planting, the temperature should be at least +15 and no more than +20 degrees. You can choose any place with a warm temperature as the location of the pot.
- Next, a contrasting procedure to the first is carried out - cooling. Containers with bones are placed on the bottom shelf of the refrigerator. It is important that the temperature is from +1 to +5 degrees. This period lasts from 60 to 80 days.
- The final stage is pre-sowing. During this period, the temperature drops to 0 degrees. The duration of the period is from 25 to 30 days. A basement where the air temperature is low may be a suitable place to place the container. At this stage, monitor the moisture level of the substrate. The appearance of mold is possible, which must be immediately sprayed with a three percent solution of potassium permanganate.
It is important not to miss the moment when the bone is ready for transplantation. Its cracked shell will testify to this. In this case, you should move the seed to comfortable conditions as quickly as possible.
Propagation of plums by cuttings
The second popular method is propagation of plums by cuttings. It is quite painstaking, but productive. Cuttings are prepared in the first ten days of July, when the shoots are just beginning to harden and turn red.
The shoots cut from the mother bush in the early morning or evening are immediately placed in water. Next, cuttings (20-30 cm) with several leaves are cut from each of them. The cuttings are treated with a growth stimulant, for example, heteroauxin, and left for 14-18 hours. Their ends should be immersed in the solution by 10-12 cm.
The land for planting is prepared as follows:
- the beds are covered with peat and sand in a 10-centimeter layer
- the leveled surface is covered with a 2-centimeter layer of coarse river sand
- In the morning, water the soil and flavor it with a fertilizer solution (1 tsp superphosphate per 10 liters of water)
The cuttings are planted vertically to the bottom leaf to a depth of 3 cm. The distance between future seedlings should be 5-7 cm. The beds are covered with film. It is necessary to ensure that the temperature in the mini-greenhouse is 25-30 degrees. The cuttings are protected from direct sunlight and watered 2 times a day.
After 12-18 days (for difficult-to-root varieties after 30-40), adventitious roots form on the cuttings. From this time on, the temperature in the greenhouse can be reduced by periodically ventilating the greenhouse and lifting the film. In mid-October, the beds are sprinkled with dry leaves or peat (5-10 cm). This will allow you to save future seedlings until spring.
Caring for seedlings in pots
When seedlings appear, for their successful rooting and rapid growth, it is necessary to provide comfortable conditions, which include the following aspects:
- Watering - no more than 2 times a week, but plentiful. Use only water at room temperature, standing for 2-3 days. It is recommended to place a plate of water under the container.
- Lighting is abundant, but diffuse. It is important to avoid direct sunlight to avoid burns. If the container is in a dark room, it is necessary to illuminate the seedlings with fluorescent lamps.
- Temperature – for seedlings it is necessary to maintain a temperature regime in the range of +20-25 degrees.
- Humidity is high; to maintain it, it is recommended to regularly spray the seedlings with water.
- Top dressing - fertilizers are applied three times from the appearance of sprouts until the end of the growing season. A solution of 10 liters of water and 30 g of ammonium nitrate is used. Consumption per plant is about 100 ml.
- Picking - as soon as 2-3 leaves appear on the seedling, they are pinched ½ of the length of the root. This procedure promotes the formation of a strong root system. After picking, the young plant must be transplanted into new nutrient soil and watered.
Attention! To prevent the appearance of wild crops instead of high-quality plums, seedlings must be transplanted into a wider container every 3 months.
Care after landing
During the first two years, the tree does not need to be fertilized. It will have enough nutrients that you added to the soil before planting. After each watering, loosen and mulch the soil. Don't forget to remove weeds. Watering is carried out depending on the dryness of the climate; moisture should penetrate 40 cm into the soil. Do not allow it to dry out, otherwise the plant will not be able to bear fruit in the future.
Insecticide is used to control caterpillars and aphids
Protect the young tree from mechanical damage. If the bark is damaged, the plant begins to hurt and may dry out. Promptly remove excess shoots that emerge at the root or at the level of the trunk.
If caterpillars and aphids appear in small numbers, treat with a soap solution. If there are more pests, use products such as Karbofos or Aktara.
Before wintering, plums must be carefully prepared. Lay sawdust around the trunk, its layer thickness should be 30 cm, cover with dry leaves on top. Wrap the barrel with warm material that allows air to pass through well. If your region has snowy winters, a mound of snow will help to additionally insulate the plum.
Seedling care
The main condition for high-quality care of plum seedlings is taking care of the tree trunk circle. Its diameter must be at least 2 m. You will need to regularly remove the weed and ensure that the soil remains a loose texture. This will contribute to better ventilation of the soil and saturation with oxygen.
Systematic watering of the seedling is also necessary. 3-5 times per season is enough. On dry and hot days it is recommended to double this amount.
As for fertilizing, in the first 2-3 years it is practically not required, since the planting hole has been fertilized. The plant will receive minerals and nutrients from there. And only in the fourth year is it advisable to periodically “feed” the soil with special fertilizers.
From seed to tree
First of all, it should be noted that at least 4-5 years will pass from the moment the seed is collected until the tree is obtained. The grown plant will begin to bear fruit only after 5-6 years. At the same time, the first harvest most likely will not impress you with its quality. In the first year of fruiting, plums grow small. But if they do appear, then in subsequent years the tree will definitely delight you with juicy and sweet fruits.
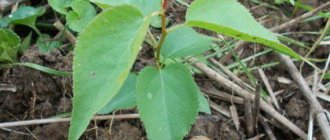
When the first shoots appear on the surface of the earth, it is important to ensure that the plant develops an even trunk. Shoots that are still growing by autumn are pinched at the beginning of September so that the tree can more easily endure the winter.
In cold weather, young plums must be insulated. It is better to postpone the formation of the crown until the first abundant harvest appears.
When growing a plum from a seed, there is always the possibility that it will not turn out to be a fruitful cultivated tree, but a wild one with small and sour plums. To prevent this from happening, experienced gardeners recommend germinating the seeds first in a pot and carrying out several transplants throughout the year. Only after this, the strengthened tree is planted in open ground.
Dates of fruiting
A plum grown from a seed will definitely bear fruit, but the quality of the harvest depends on proper care of the plant. The first plums will appear no earlier than in 4-6 years. To ensure a bountiful harvest, the plum tree must be fertilized and pruned regularly. The plant must be grafted. Without this procedure, not only will the harvest be meager, but the process of forming the first plums itself will begin several years late. In addition, the plum will not be able to maintain its grade.
Watching seedlings emerge from a planted seed that will later become a beautiful plum tree - the process is very exciting and not at all complicated. Seed material can be prepared indoors, in a flowerpot, or immediately placed in open ground. The success of the work depends not only on the quality of the seeds, but also on proper care.
Plum propagation using grafting
Among breeders, the method of propagating stone fruit trees using grafting is actively used, for example, plum grafted onto an apricot or plum. The method requires a professional approach and is accessible primarily to experienced gardeners. When grafting, a part of another plant is attached to the seedling. This improves pollination and creates optimal conditions for fruiting.
But, most importantly, the vegetative propagation method allows you to get several varieties of fruits on one tree at once, which makes it possible to save garden space without sacrificing quality. Breeders recommend not to do more than 8 graftings on one tree.
On the day of grafting, the tree is pruned and the sections are cleaned with the edge of a knife. The site of future vaccination is wiped with a damp cloth.
It is important that a bud remains on the opposite side, which will help attract the maximum amount of nutritious juices to the joint. The graft cutting is cleaned with a damp cloth and the middle part of the shoot with 3-4 buds is cut off obliquely.
It is necessary to exclude any contact with the cut
Careless touching with your hands can lead to infection and the cutting will not take root on the tree.
Selection of planting material
For greater confidence in the effectiveness of the process, several ripened seeds are used, which go through the stages of germination and stratification. But in any case, a tree often grows from a seedling, differing from its parent in taste and appearance (the fruits are smaller, more sour, or absent altogether). This is due to pollination with other plant varieties and genetic disturbances.
An identical tree can only be obtained by vegetative propagation.
Hybrids of Ussuri, Canadian and Chinese plums have excellent qualities and resistance to mutation. To do this, select the most ripened fruits, saturated with moisture, sun and vitamin reserves from the tree. Green seeds never sprout. When germinating several seeds, it is always possible to choose the strongest seedling.
How to grow mango from seed
Mangoes have long ceased to be a curiosity in stores, and some enthusiasts successfully grow a mango tree on a windowsill
It is important that the seed comes from a ripe fruit, in which the pulp is easily separated. After removing, rinse the seed in running water and scrape it with a knife.
To make it germinate faster, it is recommended to immerse the seed in water for a week. You can choose a universal soil, the main thing is not too acidic.
When planting, a quarter of the seed should protrude above the soil surface. Until the sprout appears, the container should be covered with film. Ventilate the greenhouse regularly, and after germination, remove the shelter. Mangoes can be replanted only after the tree has fully grown and taken root. Moist air and soil are also important for the plant. But you shouldn’t overuse spraying and watering to prevent mold from appearing on the leaves and roots.
In nature, the mango tree grows large, sometimes up to 18 m in height, and in indoor conditions it can easily grow up to 2 m. The plant does not really like transplanting, so prepare a large pot in advance.
Plum at home: photos of fruits, growing yellow and other varieties from seed
The autumn garden gives us a lot of delicious fruits. Among them, plums stand out for their variety, which will be discussed below.
Thanks to their unpretentiousness and ability to adapt to different weather conditions, plum trees can be found in different parts of the world. All of them can be classified according to various criteria.
Plums are distinguished:
- Prickly (thorn) - is a distant ancestor of damsons, has small, tart-tasting fruits.
- Chinese (willow-like) - has Manchurian, Ussuri and apricot subspecies.
- North American - the most famous of them is the black Canadian one.
- The classic domestic plum, the most common in our latitudes, has many types.
If we take into account suitability for food, we can highlight:
- edible – large tasty fruits are eaten;
- conditionally edible - growing wild, the fruits can be eaten, but they are smaller in size and not as tasty as the first ones;
- decorative - decorate the yard during flowering.
Edibles make up the lion's share of all varieties.
They can be divided like this:
- dessert - suitable for consumption raw;
- culinary - suitable for making various culinary delights and canning;
- universal - they are eaten fresh and can be used in cooking.
Take a look at the photos below depicting several types of domestic plums - and this is only a small fraction of all possible options:
Depending on how quickly the tree bears fruit, varieties are distinguished:
- the earliest (ripen in mid-July);
- mid-early (become ripe in early August);
- average duration of ripening (ripe in mid-August);
- late (ripen in late summer);
- very late (ripen in mid-September).
Based on the color of the peel, the fruits are distinguished as blue, dark purple, red, yellow, and white.
Below we consider in detail the varieties of the most popular home plum:
Types and varieties of home plums
There are more than 80 species of plums among domestic trees in the world. They grow in different climatic zones and differ in taste, size and color.
Homemade plums can be divided into the following types (with a brief description and names of the most popular varieties of trees of each type):
Mirabelle is a species that appeared as a result of selection of plum and cherry plum. The fruits are usually small, spherical, juicy, sweet, tasty, golden in color, with yellow flesh. Distributed in France (especially in Lorraine, where about 70% of world production is grown) and other European countries. Can be used without heat treatment. They are widely used in cooking; the fruit is used to make delicious preserves and even such an alcoholic drink as brandy.
Most of the yellow varieties of domestic plums belong to this species. They have yellow, very sweet flesh and a golden-colored skin. The most popular varieties of prunes are Mirabelle - Nancy and Mejiang. The second is smaller, softer, has a sweeter taste, and has red spots on its skin. It is used more for preparing culinary delights, while the fruits of Mirabelle Nancy are more often eaten fresh.
You can also find varieties such as Ruby, Golden Sphere, Little Mirabelle and September.
Thorn plum is a species that is somewhat reminiscent of its relative, the thorn plum. Its fruits in most cases are small, colored in dark shades of blue and purple tones with greenish pulp that is difficult to separate from the seed. They taste sweet, sour and tart. They are mainly used in cooking.
At the same time, they are very resistant to various temperature changes, high humidity, are not demanding of the sun, and grow well in the shade. Common varieties of these domestic plums are Merryweather (Britain) and Shropshire (Britain) - they have a rather sweet taste, so they can be eaten fresh if fully ripened.
Other common varieties of damson are Farleigh and Langley (Britain).
Is it possible to grow a plum from a seed?
It is quite possible to grow a plum tree from the seeds remaining after eating or processing fruits. But this requires compliance with some rules, which will be listed below.
Plum seed propagation
A strong seedling grows from a plum seed in just 1 year. If it is immediately grown in the place where the plum tree will subsequently grow, this will be a great advantage. On the contrary, after frequent transplants, the root system of the plant is injured, and it has to adapt to new conditions each time. This takes from 2 weeks to several months. Precious time can be used for the development of the plum.
Growing plums from seeds must begin with choosing a variety. Another important aspect is the question of where the seedling will grow. This may be a permanent or temporary location. You can use a schoolhouse, a shady place or an ordinary flower pot as a temporary shelter.
Important! Shkolka is a specially equipped bed for rooting cuttings and growing seedlings before transplanting to a permanent place.
Once the location has been determined, the rootstock variety should be selected. This is important from the point of view of the winter hardiness of the seedling. The seeds should be local varieties that are adapted to the conditions of the region where the tree will grow in the future. It is on this seedling that the desired variety will be grafted.
The rootstock for a plum can be not only a plum.
Can be used:
- plum;
- cherry plum;
- damson;
- thorn
The most suitable rootstocks are listed here, although plum can be grafted onto other stone fruits: peach, apricot. But they do not grow well in all regions. Sloes are also rarely used for growing from seeds, despite its unpretentiousness and winter hardiness.
Advice! When choosing fruits for growing rootstocks, you do not need to pay attention to their taste. The main quality is unpretentiousness. Therefore, it is better not to use plums purchased at the market for these purposes. Perhaps it grew in other climatic conditions.
Will a plum tree bear fruit from a seed?
A plum from a seed will definitely bear fruit. The question is: what fruits will it bear and when will it bear fruit? When grown by seed, maternal qualities are not transmitted (there are exceptions, but they are rare).
That is, to obtain a full-fledged, regular harvest, you need to graft a varietal plum onto a rootstock grown from the seed. The video will tell you how to do this:
Of course, there are cases of obtaining a successful combination of yield and taste of fruits. But this is the exception rather than the rule. Usually, a seedling grown from a seed does not begin to bear fruit early enough and has fruits that are different from those whose seeds were planted.
Warning! If the plum tree is not grafted, it begins to bear fruit 2–4 years later.
What sparked your interest?
Surprisingly, many summer residents wonder how to grow a plum from a seed. Why are they interested in this particular tree?
This desire is due to several reasons:
- Plum easily adapts to our climate. However, she is not “capricious”. Even minimal care is enough for this amazing tree to delight you with a delicious and abundant harvest.
- In addition, it should be said about the benefits of fruits for the human body. The concentration of nutrients in plums is quite high. In terms of their content, the tree takes an honorable second place, second only to raspberries.
- Plums are widely used in a wide variety of dishes. Juicy fruits become the basis for wonderful sauces. They make delicious desserts. Plums are used to make compotes, jellies, juices, and jams. In addition, delicious fruits are one of children’s favorite treats.
Such factors force people to look for ways to grow plums from seeds.
Sprouting kernels
In the autumn, fill a dense container with fertile, moistened compost.
Before planting, you should loosen the soil well and distribute the prepared plum seeds in it. After this, the seeds need to be placed in the refrigerator.
Please note that the temperature should be up to + 4 °C. This process is called stratification - storing seeds at a certain temperature to speed up their germination.
They should remain in this state for up to half a year. Some gardeners in February place the seeds in a vessel with damp sand and place them in the lower sections of the refrigerator.
When the kernels from the plum seeds begin to hatch, plant them in a pot with soil and place them on the windowsill. The seed prepared in this way is planted in May.
Preparatory stage
In order for the process of germinating plum seeds to be carried out successfully, it is necessary to acquire correctly selected fruits. When purchasing plums, it is recommended to pay full attention to the country in which the plant was grown. The imported origin of the plant will interfere with seed germination. This is due to the fact that the climate unusual for the plum will prevent its adaptation to the new environment. The plant will most likely die.
It is recommended to purchase ripe and soft fruit from the local market. Thus, the likelihood that the variety will take root will increase several times.
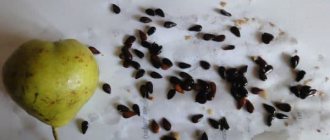
Collecting seeds
After removing the seed from the fruit, you will need to rinse it thoroughly in water and remove the pulp fibers. Then transfer it to a dry and warm place. You need to let it dry thoroughly. This may take several days.
After the plum pit has completely dried, you will need to remove its core. Special nutcrackers or regular pliers can help with this. It is necessary to remove the core very carefully so as not to damage it.
To make sure that the seed germinates, there is a little trick. To test for suitability, you will need a mug of warm water. A fertile seed placed in a mug will settle to the bottom. While the empty seed will float to the surface.
Seed germination
The removed kernel from the plum pit is placed in a pre-moistened piece of tissue. It is advisable to use natural fabric rather than synthetics. After which, the well-wrapped seed is placed in the refrigerator compartment, or in any other cold place. Cold is a guarantee that the fertile seed will germinate.
It is necessary to regularly check the kuso fabric for moisture. If it dries out you will need to re-moisten it. It will take at least 6 months for a plum seed to germinate. For example, if seed germination began in November, then most likely the sprout will appear in early April.
Growing seeds
A biostimulator will help speed up the germination process. You can buy it at any garden store. Not only the seed, but also a piece of tissue is regularly treated with a biostimulant. The appearance of mold is quite normal. But it is advisable to get rid of it immediately. In this case, the piece of cloth and the seed will need to be thoroughly rinsed in water.
In order for a healthy and fruit-bearing plant to subsequently grow from a seed, it is advisable to prepare in advance for subsequent planting. You will definitely need a flower pot. It should be made of clay or ceramic and be medium in size. It wouldn’t hurt to get a substrate made from ingredients such as garden soil, peat and sand.
Plum propagation: types, timing, planting features
Plum grows everywhere - from Western Europe to Eastern Asia, as well as in North and South America. The plant is successfully grown and used as food. The article discusses the intricacies of culture propagation and the features of the process.
Features of plum propagation
The main feature of plum propagation is the ability to cut off the cuttings with roots from the main plant . Typically, such manipulations harm trees, but in the case of plums, this is one of the ways it reproduces.
Near an actively growing young tree, shoots often appear that sprout from the main stem. These sprouts can be separated and a new plant can be obtained without purchasing expensive seedlings.
Types of reproduction
Plum trees can be propagated in several ways. Let's look at the most popular ones. Plum is one of the fruit plants that you can propagate yourself
By layering
A simple and original way of dividing a tree can be realized by forming stem layering. The sequence of this type of reproduction is as follows:
- At a distance of 15–20 cm from the top of the shoot, cut the bark down to the wood or remove a ring of bark from the branch.
- Place two handfuls of sphagnum moss around the cut area.
- Wrap the sphagnum moss on the branch in a black plastic bag.
- After the roots appear, cut the branch with the substrate from the tree and plant it in the ground.
In the spring, last year's shoots are used for tapping, and in the fall, woody stems of the current year can be used to grow roots.
Green cuttings
Cuttings can be carried out in almost unlimited quantities - the number of branches you cut, the number you plant. If there is enough space on the plot, plums can also be grown for sale in this way.
We recommend reading how to get rid of plum growths on your property forever.
Cuttings are harvested in early July, when the tree actively produces young branches and forms foliage on them . Select stems up to 30 cm long with several leaves, which are cut with a sharp knife. Do this early in the morning or late in the evening so as not to tire the plant. All cut cuttings are placed in a container with water for rooting.
To accelerate growth, stimulants are used - “Heteroauxin” or “Ribav-extra” , in an aqueous solution of which the cuttings must be kept for 14–18 hours. A drop of ethyl alcohol can be added to stimulants.
Root shoots
During the warm period of the year, the tree produces many shoots from the root system. If you do not care for the garden carefully enough, after a couple of weeks you can find entire thickets around the plum tree. The ground around the trunk is simply “teeming” with new shoots. They need to be removed so that the plant does not waste energy maintaining an entire colony of sprouts. Some of the root shoots can be used for propagation.
Important! When planting from the root, you need to maintain the same lighting, humidity and feeding conditions as the mother plant. In this case, the seedling will take root and develop quickly.
For jigging, shoots are selected that are as far as possible from the trunk of the mother tree - they are independent and quite “wild”. Such branches will “get used” to the surrounding conditions well and will hurt less. Method of planting with root shoots: in the fall, cut off the root connecting the sprout to the mother plant, and in the spring, transplant the sprout with a piece of root to a new place.
Bone
Many summer residents, eating fruits, want to grow them on their plot. To do this, seeds or seeds are dried and preserved. The plum tree, which can be grown from a seed with due diligence, is no exception.
To propagate plum seeds, you must perform the following operations:
- Scarification . Cold treatment is done in damp natural fabric or hard sandy soil on the bottom shelf of the refrigerator, on the balcony, in the basement or cellar. Freezing is carried out from October to March with constant moisture of the tissue or soil.
- Acceleration of germination . The seeds are treated with growth accelerators. This may be the above-mentioned “Heteroauxin” or other drugs - “Ecosil”, “Epin”, “Zircon”.
- Landing . After the seed swells and begins to crack, it must be planted in a pot with a moistened neutral soft substrate. During the summer, the young bush is cared for like an ordinary houseplant.
- Planting from a pot in garden soil occurs in the fall.
Gardeners plant many seeds each season to ensure they have enough rootstock. A plant grown from a seed will not necessarily be a new tree; perhaps, with its help, the properties of an existing one will be improved, or an experimental variety will be grown on its basis. It should be taken into account that varietal characteristics when sowing seeds - seeds are not inherited by all types of plums
Plum grafting
If all efforts to propagate a certain plum variety have not brought the desired results, and a wild one has grown from the seed, this situation can be corrected by grafting the plant using high-quality material from an already well-established crop .
The following material is suitable for grafting:
- mature, stably fruit-bearing crop;
- a cutting taken from the south side outside the crown;
- material cut before the onset of frost;
- length of the segment - up to 50 cm;
- It’s better if the scion is “sleeping” and the rootstock is already “awake”.
Source: https://fermer.blog/bok/sad/plodovye-derevya/sliva/sliva-vyraschivanie-i-uhod/5241-razmnozhenie-slivy.html