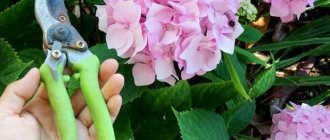
Growing coniferous plants is not difficult. You can grow many evergreens yourself. They take cuttings well and are propagated by seeds. True, they grow quite slowly, especially in the first years of life. But often, growing planting material yourself is the only opportunity to realize your ideas on the site. It’s no secret that planting material is quite expensive.
And if you need a lot of plants, for example, to plant a hedge, then it’s certainly better to do this. Autumn is the time to take woody cuttings from conifers. In winter, of course, they do not form any root system, but “frozen” cuttings take root much better in the spring. You can take cuttings in the spring, after frost, but at this time there is even more work in the garden than now, in the fall.
There are pros and cons to growing conifers on your own property.
pros
- Obtaining planting material in the required quantity.
- There is no way to find the plant you need on sale, but you can take a cutting or buy seeds.
- Experience in growing and breeding conifers.
Minuses
- Since plants grow slowly, you will not see the final result very quickly.
- Caring for plants takes a lot of time and effort.
- The result is not always predictable. This refers to the habit (appearance, varietal characteristics) of the plant.
- You need additional knowledge to help you properly care for plants and fight pests and diseases.
There are more disadvantages and yet, the end justifies the means.
Pros and cons of propagating conifers by cuttings at home
To grow conifers, one of the selected schemes is used: they can reproduce by division, seeds, and cuttings. Experts consider cuttings to be one of the most effective methods of crop propagation. Advantages of self-propagation by cuttings:
- the opportunity to obtain a copy of the selected mother plant;
- ease of the procedure;
- the ability to fully control the process.
A disadvantage of cuttings may be the species feature of the selected tree.
Thuja is an evergreen shrub that takes root well after cuttings. Young shoots completely repeat the varietal characteristics of the mother plant, which is why thuja is considered especially suitable for cuttings.
Juniper is one of the representatives of the Cypress family, which is undemanding and grows in different climatic conditions. Cuttings are suitable for tall varieties. Junipers creeping along the ground are propagated by layering.
Cypress is an evergreen conifer that is propagated by cuttings and layering. It takes root well in the soil, it is almost never sent for growing, and during the winter the shoots are able to develop a strong root system.
Fir, varietal species of pine and sequoia are almost impossible to root on your own. For breeding in nurseries, grafting and layering are used.
Information! For cuttings, choose adult plants whose age does not exceed 10 years. Old trees produce shoots with low germination rates.
Reproduction of conifers by layering
Reproduction of conifers by layering, or, as this method is also called, dividing the bush, is used quite rarely. The method is not suitable for all conifers, but only for young, multi-stemmed, bush plants.
Horizontal layering in the spring is bent to the ground and buried in the soil. To make the branches take root faster, a shallow cut is made on the shoot under the bud, and all small branches are removed. To prevent the branch from straightening, it must be fixed with a stone or wire.
In addition, you should monitor the humidity at the point where the shoots come into contact with the soil. After about a year, when the roots are already sufficiently developed, the branches are separated from the mother bush and replanted. Sometimes it may take longer to form an independent root system. The first winter after removal, the young coniferous plant must overwinter together with the mother bush.
This propagation method is absolutely harmless to the mother plant, but is considered the least productive. In addition, it is only suitable for coniferous bushes with flexible branches, an indefinite or horizontally creeping crown shape (cypress, yew).
On an industrial scale, coniferous shrubs are not propagated this way, since in most cases the result will be a lopsided plant with an irregular crown shape.
Conditions and care for coniferous cuttings in the first months
That's all. Now we wait. You will have to wait a long time - 2, and sometimes 3 months. All this time, we ventilate the cuttings once a day, removing the jar for half a minute, if necessary we moisten them with a spray bottle, and spray them with fungicide when the first signs of mold or something suspicious appear.
Separately, it is worth mentioning the temperature. According to my observations, at first (2-3 weeks) the cuttings are better suited to cool temperatures of +16...+18°C, and then the temperature should be raised to +22...+24°.
For good rooting of coniferous plant cuttings, they also need light. Winter cuttings, for all its advantages (you have time and you can control the temperature), have a big disadvantage - without additional lighting, few cuttings or nothing at all will take root. Get at least a regular 10-watt LED lamp and place it over the cuttings.
The rooting process has begun. But don't rush to rejoice. For example, junipers can “feign life” for three months, but at the same time they have already dried out, and the needles easily fall off when touched. It happens... Apparently, one of the important factors was violated. Analyze the entire chain:
- Cuttings – fresh, not overdried;
- The substrate is light, sterile, breathable;
- Normal humidity – both over-drying and over-moistening are not suitable;
- There is enough air - it should flow to both the needles (ventilate) and the roots (holes);
- Light – cuttings can die from direct sunlight, and without additional lighting they will not take root well.
When is it better to propagate conifers by cuttings?
Cuttings of shoots from the mother tree are permissible at any time of the year. The safety of the genetic material does not depend on the timing of cuttings. Experts are of the opinion that the best time for cuttings is winter. In the first ten days, sap flow processes in trees are activated.
During the period that passes from the moment of harvesting before winter until the start of planting, coniferous plants have time to take root well. In summer, strong, lignified seedlings are planted on the site.
Propagation of conifers by cuttings before winter
Harvesting of conifers is carried out before the onset of winter. This increases the plant's chances of successful spring and summer planting.
To carry out cuttings of conifers before winter, select the upper shoots or tops. The length should not exceed 20 cm. After cutting, the cuttings are cleared of needles, leaving only part of the bark. If the bark separates in some places, it is completely removed.
Rooting conifers with cuttings before winter is possible in several ways or by mixing them:
- with water;
- on the sand;
- under the film.
The simplest and most effective way is to root conifers using water. It is not suitable for all types of plants. Shoots of pines, fir, and cypress trees do not take root well using the water method. Thuja and juniper send out shoots quite quickly.
Propagation of conifers by cuttings in autumn
You can grow conifers by cuttings in the fall. Autumn cuttings differ little from winter cuttings. When using soil, the shoots are left on the terrace or veranda and brought into a warmer room before the onset of winter.
Propagation of conifers by cuttings in summer
For summer cuttings of conifers, the method of rooting in boxes is suitable. In summer, shoots need to be watered frequently due to hot weather. In the fall they are moved to the garden bed or put indoors for the winter to be planted the following season.
Propagation of conifers by cuttings in spring
Spring cuttings of conifers are carried out very rarely. Experts believe that this period is not suitable for rooting. The shoots spend the summer outside; in the winter they need room warmth.
Reproduction of coniferous plants by grafting
Reproduction of conifers at home is also carried out by grafting. This method is used for those breeds that are reluctant to propagate by cuttings or seeds. This method of propagating conifers is widely used when it is necessary to obtain a special shape of the plant crown.
Three-, four-, or five-year-old healthy seedlings serve as a rootstock for propagating conifers. Scion cuttings are taken from the top of the crown. Cuttings begin to be harvested in the first month of spring and are stored in the cellar until the grafting procedure. The vaccination itself is carried out in the second half of summer, when the weather is dry. How to correctly carry out the lateral cleft grafting procedure:
- cut cuttings 10 cm long from the top of the shoot;
- both ends of the cutting are cut off with a wedge and cleared of needles;
- the upper part of the shoot is split to a depth of 1.5 cm, then the prepared cutting is inserted there (in this case, it is important to ensure that the cambium layer of the rootstock branch coincides with the scion);
- Next, the grafting site is tied with a thick woolen thread and, in hot weather, protected from the sun's rays with a paper cap.
In order for the procedure to give a 100% result, the cambium layer of the scion is carefully applied to the cambium layer of the rootstock, cutting off 4–6 cm of bark, and then bandaging it tightly. This method of grafting is called “per bark”.
If everything is done correctly, after a month the cutting will take root and the bandage can be removed. In order for the scion to actively grow, the top of the rootstock is cut off.
This method of propagating coniferous plants is quite complex and requires certain skills and professionalism from the gardener.
Planting cuttings in the substrate
And now comes the moment of planting the cuttings in the substrate. As a substrate, you can use something loose: sand (but be sure to first disinfect it, say, in the oven), peat (treated with a fungicide), perlite, vermiculite, or a mixture of them.
Before planting the cuttings, the substrate should be moistened, but do not spread the dirt, it should be just damp. The cuttings are stuck to the depth of the needles removed from them (2 cm). Here it is important not to stick them in too thickly, make a gap between them, they should not touch their needles. In places of contact with high humidity, moisture will stagnate and rotting processes will begin, which is not acceptable.
But how to ensure high humidity - the key to good rooting? The container with the planted cuttings, be it a box, container or flower pot (the container must have holes for water to escape and air to reach the roots), must be covered with something transparent that transmits light, is sealed and retains moist air inside. There are many solutions here. In amateur conditions, these are glass jars, cut plastic bottles (colorless), PE film...
The cuttings are stuck to the depth of the needles removed from them (2 cm). © Igor Bilevich
How to root conifers from cuttings
Rooting, which is carried out before winter, consists of several successive stages.
- First, the stalk is cut or broken off. In this case, a piece of wood with remnants of bark should remain at the base.
- A fresh cut is powdered with a root-type biostimulator. This will help the cuttings take root faster.
- A suitable container with high sides is selected for the seedling, then it is filled with wet sand. Before planting, it is spilled with a weak solution of manganese.
- A depression is made in the sand. It is convenient to use a wooden stick with a diameter of at least 6–8 cm.
- The shoots are buried in holes at a distance of 3–5 cm from each other.
- The soil is compacted so that there are no voids left inside.
- The container is covered with plastic film or a plastic cap. This helps create a greenhouse effect inside the container. Thanks to this, the soil will be moistened in a timely manner.
Plantings are removed to shaded areas where the temperature is constantly maintained at at least +22 °C.
Many people use rooting cuttings in water before winter.
- The prepared material is released into a root growth biostimulator solution for 12 hours.
- At the same time, sphagnum moss is prepared. It is soaked in water, then the excess water is squeezed out.
- The moss is laid out on plastic film up to 10 cm wide and up to 1 m long.
- The cuttings are placed on the moss so that the tip of the shoot is visible above the tape.
- The film with moss is rolled up like a snail, pressing tightly to the surface.
- The prepared snail is tied with a tourniquet and placed in a bag with a small amount of water.
This design can be hung from a window as a flowerpot. After rooting, the seedlings are planted in prepared soil.
Information! For summer and spring cuttings, a biostimulator is not used.
Rules for preparing cuttings of conifers
The result of breeding conifers by cuttings in winter depends on the choice of material. When examining an ephedra, suitable branches are selected based on the following characteristics.
- The shoots should not be younger than 1 year, while branches of 3 years of age are considered the best option for breeding before winter.
- The shoots must be externally developed, look strong, and have no flaws.
- The length of shoots for junipers, cypresses, thujas should not exceed 15 cm, the length for spruce and fir - up to 10 cm.
For cuttings, choose a cloudy day and make the cut in the morning. In order to have a good idea of the sequence of actions during the propagation of conifers by cuttings, many breeders watch videos with master classes by specialists. This is justified for the reason that the success of further rooting depends on the quality of the cuttings and the choice of shoot.
Reproduction
Pine propagates through seeds, cuttings and grafting. For the first method, you need to pick up a ripened cone and pull out the grains from it. This can be done by putting it in a paper bag, which on its part should be placed in a warm place.
Shake the container with the contents occasionally. When heated, all the petals of the cone open, and the seeds easily come out of the axils.
Before planting, the seeds are treated with stimulants to increase the germination rate. The process is carried out in the autumn. They are sown in wet sand at a shallow depth, and the container is taken to a cool room.
The ambient temperature is maintained within 1-5 degrees. This could be a basement or any other cool room.
In the spring, the containers are brought into a warm room, and the soil is sifted to extract the seeds.
They are again sown in prepared loose and light soil, deepening each seed by 2 cm. A greenhouse is made over the crops using glass or film, and the entire container is placed in a bright and warm room. The substrate must always be wet; for this you need to sometimes water it with a spray bottle with soft water at the ambient temperature. When the shoots appear, the greenhouse can be removed. To prevent the sprouts from getting sick, it is recommended to treat them with a fungicide solution.
The sprouts are cared for throughout the entire season; it is possible to plant young ones only in the fall, and insulate them with spruce branches for the winter.
When cuttings are taken, all the characteristics of the mother plant are preserved.
This is one of the most ergonomic methods of propagating coniferous plants, in which it is possible to take a lot of source material from one tree. But propagating pine by cuttings is difficult, a small percentage takes root, and if not properly cared for, it is possible to lose all the seedlings.
Pine cuttings:
- Cuttings are carried out in the spring and a young tree not grown in the wild is selected to obtain the starting material. Young annual branches are selected and grow upward. The cutting is taken together with the part of the tree to which it is attached, the so-called heel.
- In order for all the resins to come out of the wood, it is recommended to keep the cuttings in water for about 3 hours, after which they are treated with disinfectants. To enhance root growth, you need to keep the branches in a stimulating solution for about 12 hours.
- A container is pre-prepared with a pre-prepared substrate and drainage at the bottom. The soil should be light and loose; for this, peat is mixed with turf soil and sand in equal proportions.
- The cuttings are buried 4-5 cm, placing them at a distance of 10 cm from each other.
- After planting, you need to organize a greenhouse and add bottom heating. And if for the most part there are no problems with the first one, then organizing proper heating at home is quite difficult.
- Gardeners advise placing containers in boxes with half-rotted compost, manure or simple autumn leaves. During decomposition, enough temperature is released for the cuttings to become warm.
- The cuttings are placed in a lighted place; they can be rooted outside in intentionally prepared beds; for this purpose, the compost is laid out under drainage.
- After planting is completed, a greenhouse is built.
The rooting period of pine is long; therefore, seedlings should not be touched in the first year after planting. A good root complex will grow only by the end of next autumn, provided that the cuttings were planted in the spring.
Growing from seeds
At home, pine is most often propagated in the same way as in nature - by seeds. They usually reach maturity by mid-January, at which point you can begin collecting planting material. Autumn seeds can also be used, but their germination rate will be much lower.
The cones that have fallen from the conifer must be brought into the house and placed in a container, for example, in a cup, and placed on a radiator - then after a few days the scales open and the seeds themselves spill out to the bottom of the container.
Planting is done in winter or spring . In the first case, the seeds are placed in boxes, and in the second - directly in open ground. It is believed that the first method allows germination to be controlled and is therefore more effective, and in open ground the seeds often become food for rodents.
Stratification is not required for these seeds, but it may speed up germination. It is known that in their natural habitat, seeds begin to germinate after winter swelling in melt water and subsequent warming with the onset of spring. These conditions can be simulated at home. To do this, planting material is placed in damp sand and put in the freezer, kept for a couple of months, then taken out, rinsed in warm water and put back in the sand, but in a warm place.
Such measures are necessary if you plan to plant the seeds in the fall, otherwise they may not sprout.
If you intend to plant seeds directly in open ground, you should prepare planting holes. To do this, dig a hole 35-45 cm deep in the ground, pour a 20-25 cm layer of drainage onto the bottom, and lay on top a soil mixture consisting of peat, turf soil and sand in equal parts.
Small seeds are buried 1 cm, leaving a distance of 5-6 cm between them. Of course, seedlings can appear even with denser planting, but then they will lift the top layer of soil and expose unformed young roots, and this will inevitably lead to drying out of the seedlings .
After planting, the hole should be mulched; for this, crushed pine bark, sawdust or a layer of peat are used.
In order for pine seeds to germinate, they must be moistened, since water drains down very quickly from sandy soil. It is advisable to irrigate the soil several times a day. If germination is carried out in a box, you can do it easier - place the containers in trays with water and cover the top with plastic wrap. As water evaporates, it will remain on the surface of the film without leaving the space.
The first shoots begin to appear a month after planting.
Growing conifers from cuttings
Further care for conifers includes several rules:
- After planting for rooting, the shoots need regular moistening. Once a week they are sprayed with warm water from a spray bottle. The soil should not be over-moistened or over-dried.
- For full development, the culture requires a temperature regime between +18 and +22 °. Frost-resistant species will feel comfortable at temperatures from +16 °C.
- Shoots need regular ventilation. To do this, the boxes are opened for several hours every day, gradually increasing the period of time.
- Plants are fed with special preparations for conifers 1–2 times during the winter.
- To saturate the soil with air, regularly loosen the soil.
Information! Daylight hours for the growth of coniferous plants should not be less than 10 - 12 hours.
Many breeders plant coniferous plants after rooting in closed greenhouses. It should be taken into account that young plants at this stage need warm soil. The soil index should not be lower than +25 °C, the indoor air temperature can fluctuate from +18 to +20 °C. In addition, it is necessary to monitor the humidity: at this stage its indicator should be higher than usual.
There are several signs by which you can determine that mistakes have been made in caring for conifers:
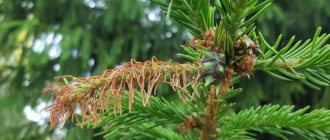
- Redness or browning of the needles indicates the presence of a fungal infection (this can be caused by excess moisture or planting in soil that has not been disinfected);
- The shedding of formed young needles is a signal of a lack of nutrients and possible acidification of the soil.
Fir propagation
How to propagate fir
Species fir is propagated by seeds, which are harvested at the very beginning of the ripening of cones, and decorative varieties are taken from cuttings.
Fir propagation by cuttings
Cuttings for rooting 5-8 cm long should be taken only from young trees, and these should be annual shoots with one (not two - this is important) apical bud and always with a heel. If you want to get a cutting with a heel, then it is better not to cut it, but to tear it off with a sharp movement along with fragments of the bark and wood of a more mature shoot. Cuttings should be harvested in the spring, before sap flow begins, on a cloudy morning from the middle part of the crown on its northern side. Before planting, carefully remove burrs from the heel.
Make sure that the bark on the heel does not peel off from the wood. To avoid the further development of fungal diseases, the cuttings are kept for 6 hours in a two percent solution of Fundazol, captan or a dark pink solution of potassium permanganate. Then the cuttings are planted in a mixture of sand, humus and leaf soil in equal parts and covered with a transparent cap. In order for the cuttings to take root faster, it is advisable to arrange the bottom heating of the substrate 2-3ºC above room temperature. The cuttings should be kept in a bright, but not sunny place, with daily ventilation.
For the winter, the container with cuttings can be moved to the basement, and in the spring it can be taken out into the fresh air. It will take a long time for the cuttings to take root - the fir will first grow callus, and only in the second year will roots appear.
Growing fir from seeds
Collecting fir seeds is not easy, since the cones of mature trees ripen high, and as soon as they ripen, the winged seeds from them immediately scatter. But if you are lucky enough to get a slightly unripe cone, dry it, remove the seeds and store them in the refrigerator or in the basement with high humidity until sowing - fir seeds need stratification before planting. In April, the seeds are sown in a bed to a depth of 2 cm in soil made of sand and turf and covered with film without watering to avoid the formation of a crust on the surface of the soil and to speed up the emergence of seedlings.
When the sprouts sprout after 3-4 weeks, start watering, loosening and weeding the beds. In the first winter, the seedlings are covered with spruce branches. Next year you can plant the seedling in a permanent place. Fir from seeds initially grows very slowly: in four years it reaches a height of 30-40 cm, since it mainly develops the root system. But then growth accelerates noticeably.
What to do with cuttings
Cut branches should not be stored. We need to start rooting them as quickly as possible. If you did not have time to prepare the soil in advance, and the cuttings have already been cut, wrap them in a damp cloth and place them in a dark and cool place.
1. Using pruning shears, cut the needles from the bottom of the cutting. Then dip the branches in the Epin solution for 12 hours. For 0.5 glasses of water, 2 drops of growth stimulator are enough.
The needles need to be cut only from the bottom of the branch.
2. While the cuttings are soaking, prepare the sphagnum moss: place it in a plastic bowl or container and fill it with water. Then spread the lightly squeezed sphagnum moss on gauze or a diaper.
Sphagnum moss should be well moistened
3. Pour Kornevin into a flat bowl, dip the base of the cutting directly into the powder, which is then placed on sphagnum moss and covered with a diaper or gauze.
Thanks to the root formation stimulator, the cuttings will take root faster
4. Roll the fabric, tie it with an elastic band, place it in a thin plastic bag and hang it on the window frame.
For successful rooting, cuttings need light, but they must be protected from direct sunlight
By mid-spring the cuttings should take root. Then they can be planted for growing in open ground, and after 1-2 years - to a permanent place in the garden.
Also, cuttings of coniferous plants can be rooted in pots with a diameter of about 15 cm, filled with a mixture of peat, garden soil, sand and pine bark in equal parts. Plant 5-7 cuttings in each pot, deepening them by 2.5-3 cm.
Place a plastic bag or a cap made from a plastic bottle over the pot and place it in a bright place with an air temperature of 17-19°C. Periodically spray the soil with a spray bottle. It should always be slightly moisturized.
After 1-2 months, the cuttings will take root, and with the onset of consistently warm weather they can be transplanted into open ground.
As you can see, cutting coniferous plants is not a difficult task. Using this method, you can acquire a beautiful coniferous garden without any special material costs.
At the bottom, remove all the leaves using a knife. But it is undesirable to touch the growth point at the very top. Next we prepare a place for planting seedlings. To do this, take a wooden peg and stick it into the ground to a depth of 3 cm. We strongly compact the ground near the stem. The following cuttings should be planted at a distance of about five centimeters.
Summer residents use a watering can or sprayers to wet the cuttings. It is necessary to remove the film or other covering at the moment when growth begins to appear on the cuttings. However, this does not mean that roots can appear; often seedlings begin to grow only when callus forms on the cuttings.
Now you have become familiar with how to propagate conifers by cuttings, which means you can start working now. It is only important to find powerful cuttings from a healthy plant, then their development will be rapid, and the conifers themselves in the future will have a lush crown and a powerful root system.
You will need
- 1. Cuttings of coniferous crops, for example, any varieties of western thuja, juniper, cypress, at least 3 cuttings from each variety;
- 2. Drainage (expanded clay), 3 l;
- 3. Light fertile soil, better than purchased “For conifers”, 5-10 l;
- 4. Washed sand, 3 l;
- 5. Planting box with drainage holes;
- 6. Polyethylene film 1 sq.m.;
- 7. Sprayer with very fine spray;
- 8. Preparation for stimulating root formation “Heteroauxin”, 1 package;
- 9. Drug for stimulating growth processes “Zircon” 1 ampoule;
- 10. Arcs for the greenhouse, rubber strapping.
Instructions
We are preparing the seat. We put drainage expanded clay in the box, then soil, and on top a 3 cm thick layer of washed river sand, pour boiling water over the substrate, and let it cool.
Preparing the cuttings for planting. Place them for 8-12 hours in a solution of heteroauxin (200 mg) zircon (4 drops) per 1 liter. water (stimulates root formation and helps wash off the resin from the cut). We remove the needles up to half of the cutting so that they do not rot when they come into contact with the substrate, make holes with a pencil and insert the branches into the soil, lightly squeeze it with your fingers. Please note, this is important - how do you If you remove the branch, orient it in the ground, do not turn it upside down!
We invite you to familiarize yourself with the Best stoves for a Russian bath: top 10 models of 2021
We spray the cuttings and build a greenhouse over them using polyethylene, arcs and rubber strapping. Do not forget to regularly spray the cuttings with ordinary water in the greenhouse (2-6 times a day), each time closing it tightly after this procedure. For a month, once a week, spray the cuttings with the Zircon solution (2 drops per 1 liter of water, do not exceed the dose!
If you took cuttings of conifers in February, then until May leave the greenhouse in the light (a must!), but not in the south. Then you can leave the greenhouse at home, or move it to the garden, in partial shade (which is more favorable for rooting). If you produced it in May, then build a greenhouse right in the garden. Frequent spraying and regular (but not excessive) watering are the basis for rooting.
Planting conifers by cuttings in open ground
Despite the fact that when conifers are propagated by cuttings for the winter, the shoots have time to become sufficiently strong, some of them require growing. This is the name for planting on areas of open ground for a period of time that passes before planting in a permanent place of growth.
Sometimes young conifers can remain in cultivation for 2–3 years. To do this, choose protected areas that can be additionally covered in winter, during frosts.
There is another way to grow coniferous seedlings - to school. It is suitable for growing conifers from cuttings that were obtained in large quantities before winter.
On a school plot with dimensions of 1.5 by 1.5 m, you can plant up to 100 specimens. About 30 - 35 pieces will be ready for planting in a permanent place of growth.
Young coniferous plants are transplanted into the school using a transshipment method. If they took root with the help of moss, then it will be enough to separate part of the moss and bury it in the prepared hole.
After planting, arcs are pulled over the shoots and covered with special industrial material. This is necessary for protection from direct rays of the sun, which can cause burns during the adaptation stage, as well as for protection from draft winds.
For planting in a permanent place, choose strong coniferous seedlings with a developed root system. Before this, 2–3 winters may pass after cuttings. This is not surprising, because we are talking about growing trees that will exist for about 30 - 40 years or more. After planting in an area where trees will grow continuously, control over growth and development is noticeably reduced. Trees need regular but not frequent watering, as well as 2-3 feedings per year.
Recommended conifers for cuttings
The following conifers can be propagated by cuttings:
- thuja,
- cypress trees,
- juniper,
- interesting miniatures of coniferous trees,
- yew (roots worst of all).
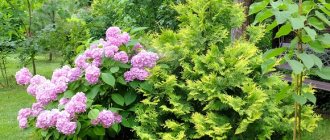
Thuja or yew are often used as a background for plants or hedges, so you need a lot of them for the garden. Buying several dozen seedlings is a considerable expense, so it’s worth propagating them yourself.
The following conifers are not suitable for propagation by cuttings: spruce, fir, pine.
These conifers are propagated differently - by seeds or grafting.
Searching for seedlings in the forest
The recommended age of pine trees is 1-2 years.
Another important point that it is advisable to draw your attention to is the orientation relative to the cardinal points. It should be remembered and repeated at your dacha.
Pines have a tap root system, so when removing a tree from the ground, it is worth going deep enough to select a space around the trunk of at least 20 cm.
The tree with the earthen clod should be removed and moved to a new planting site. It is known that the roots begin to die within 15 minutes after they are released from the protective earthen coma.
Another good piece of advice is that when removing a tree from the forest, it is recommended to take with you a sufficient amount of soil, which is then mixed into the soil of the planting hole. It is clear that this will contribute to the rapid rooting and subsequent development of the seedling.
Transportation of the tree should be careful, and it is advisable to periodically spray the earthen ball on the roots.
The planting hole should easily accommodate the root of the tree. One bucket of water is poured onto its bottom and mineral fertilizers for conifers are added to the soil.
How conifers reproduce
There are 2 ways to propagate coniferous plants:
- seeds;
- vegetatively, using cuttings.
Seeds
When propagated by seeds, the acquired genetic characteristics of the plant are not preserved: non-standard color, shape, disease resistance, etc.
Seed germination is influenced by many factors:
- time of collecting seed pods;
- conditions for their storage;
- depth of seed placement in the soil;
- caring for seedlings, etc.
As a rule, the germination rate of coniferous seeds at home is low, not exceeding 10-15%.
Cuttings
When propagating by cuttings the picture is reversed:
- 100% varietal characteristics of the plant are preserved;
- the survival rate of seedlings obtained from cuttings is about 90%.
Based on these objective data, it is recommended to propagate coniferous plants at home by cuttings.
However, this method is not applicable to all common conifers.
Cuttings of thuja, juniper, yew, and cypress take root well.
Worse are fir and conika spruce.
It is very bad; pine and larch cuttings practically do not take root.
Peculiarities of reproduction of coniferous species
In the natural environment, coniferous plants typically reproduce by seeds. Conifers do not have flowers or inflorescences in the generally accepted sense of this concept. However, they do have male and female reproductive organs called strobili. Male organs - microstrobiles - are shoots that carry pollen, which pollinates female organs - megastrobiles, after which fruits (cones or berries) are formed. The seeds ripen in the fruits, with the help of which coniferous trees reproduce.
However, not all conifers have strobili, and this method of propagation is not available to everyone. In addition, planting conifers with seeds will give the expected result (that is, the grown plant will be identical to the mother one), only if the seed material is collected in the wild. Varietal and decorative coniferous species often give deviations with this method of propagation, that is, the purity of the variety is not preserved. Therefore, at home, propagation of coniferous plants is usually carried out by the vegetative method using cuttings, layering or grafting.
Preparing the substrate for planting
The main condition for the survival of cuttings is the presence of loose soil mixture and 100% air humidity around the seedlings. The formula for successful survival looks like this:
moisture + air + nutrition = rooting.
Rooting in soil mixture
The soil should consist of 1 part leaf soil, 1 part peat and 1 part sand. The vessel where the cuttings will be rooted must have a good drainage system. The soil is well watered before planting. So that it is moist, but not soggy. The cuttings are simply stuck into the ground to the bottom edge of the needles. The top of the planting is covered with a plastic bottle cut off from the bottom. Such a nursery is placed in a warm, bright place, but not in direct sunlight.
Rooting in the "snail"
Some craftsmen suggest rooting cuttings in the so-called “snail”. To do this, a wet substance (moss, toilet paper, diaper stuffing) is placed on top of a plastic bag without a bottom or on plastic film (the author of the method calls it a diaper).
The cuttings are placed on the substrate at a distance of 5-7 cm from each other. Then all this is rolled up and placed in a vessel.
The top is also covered with a plastic bottle without a bottom or a plastic bag. The package is placed in a lighted place (hanged near a window).
There should be almost 100% air humidity under the bottle (package).
The structure is placed in a warm, bright place, but not in direct sunlight.
Caring for cuttings during the rooting process
The rooting process takes place within 2-3 months, depending on the condition of the cutting and rooting conditions:
- soil and air temperatures;
- percentage of humidity in the minigreenhouse;
- presence of growth stimulants.
Based on this, caring for cuttings consists of regularly moistening the soil and air - this is conveniently done through the lid of the bottle.
Once a week, add substances that stimulate root formation to the water for irrigation.
Ventilate plantings to prevent mold.
Growing seedlings
3 months later, after the roots appear on the cuttings, they are planted for growing.
To do this, carefully dig up the soil in a greenhouse or a place closed from drafts, removing all weeds. Make grooves in the soil and sprinkle them with sand. Seedlings from the nursery are placed there obliquely. Sprinkle the top with fertile soil and lightly compact it.
The growing stage usually takes place within a year.
A sign of seedling maturity is the appearance of needle growth and an increase in height.
After this, the seedlings can be planted in a permanent place.
Propagation of conifers by cuttings - what are the features?
Reproduction and rooting of coniferous plants by cuttings depends on the species and genus of the plant. For example, varieties such as thujas, junipers, yews, and cypresses get along well. Fir, as well as Konika spruce, take root much worse. If we talk about pine and larch trees, strengthening them with the help of cuttings is incredibly difficult; rarely can anyone achieve even minimal results. It is important to choose the cuttings themselves wisely. It is best to take green young shoots, making sure that the cutting belongs to an even, dense, healthy plant.
If you choose a bad shrub, your new “seedling” will be exactly the same. It is also not advisable to take side shoots, since the future plant may begin to bend during growth, which means it will not have a beautiful, even shape. And even pruning conifers will not lead to a positive result. It should be remembered that there are several rules for planting cuttings that you should also be aware of. By following them, you will do your job perfectly.
In the photo - growing conifers from cuttings, xn--80ahnajqy6av.xn--p1ai In the photo - growing conifers from cuttings, xn--80ahnajqy6av.xn--p1ai In the photo - propagation of conifers by cuttings, oldtax.us In the photo - propagation of conifers by cuttings, oldtax. usPhoto of propagation of conifers by cuttings, florissimaltd.ruPhoto of propagation of conifers by cuttings, florissimaltd.ruIn the photo - propagation of conifers by cuttings, supersadovnik.ruIn the photo - propagation of conifers by cuttings, supersadovnik.ruIn the photo - rooting of conifers by cuttings, hvoinie.ruIn the photo - rooting of conifers cuttings enkami, hvoinie. ru
How to grow coniferous trees from seeds: scarification
The seed method of propagation of conifers can guarantee the identity of only natural varieties, while cultivated forms do not, for the most part, repeat the characteristics of the variety.
Conifer seeds contain a large amount of oils and quickly lose their viability. Seeds with dense, unbroken covers can be stored warm for up to 2-4 years, and in sealed containers at temperatures close to 0ᵒ C for more than 15 years. Significant fluctuations in temperature and humidity during storage lead to a reduction in this period. Seeds with poorly formed or damaged covers are not suitable for storage and require immediate germination.
To grow conifers from seeds, it is necessary to master the basic agrotechnical techniques developed for more efficient germination including scarification, stratification and snowing.
Scarification means breaking the dense and impenetrable covers of the seed, which prevents its swelling and germination. Under natural conditions, this process is carried out due to the work of soil microorganisms and the treatment of seeds with enzymes during the digestion of food by animals.
For the vast majority of coniferous seeds, scarification is not necessary, but this procedure always ensures more efficient germination. The only “northern” conifers for which seed scarification is necessary are junipers and yews. The fruits are washed from the juicy coverings, dried, and then placed in concentrated sulfuric acid for 30 minutes. After such a “cruel” operation, the seeds are carefully washed in running water, sown or stratified. A simpler, but less effective way to scarify dense integuments is to shake the seeds in a jar lined with coarse sandpaper on the inside. Disturbance of seed covers is carried out immediately before sowing - such seeds are unsuitable for storage.
Advantages of cuttings of conifers over other methods of purchasing seedlings
When buying ready-made conifer seedlings, we, as a rule, purchase an already viable plant - this is a definite plus of the purchase. The older it is, the more expensive it is - this is a minus. In addition, we may sometimes buy something completely different from what the seller stated and the quality of the seedling may not be the best.
When purchasing, be careful and carefully inspect the plant. The needles should have a rich, bright color characteristic of this variety. The crown must also meet all aesthetic parameters, not be one-sided, curved, and in the case of narrow and columnar forms, not have several tops. Yes, all these defects can be corrected with proper care and proper haircut, but it is best to avoid this at the purchase stage.
Buying seedlings is good, but this is not our method. We want to grow with our own hands. This can be done by collecting and sowing the seeds of a coniferous plant, although many of them will require long-term stratification.
Read more about stratification in article 6 rules for stratifying seeds at home.
But with this method, you will most likely lose those properties and features that were inherent in this particular variety. To make it clearer: by collecting blue spruce seeds, you will end up with mostly green seedlings, and by collecting the seeds of a beautiful columnar thuja, you will get something shapeless and shaggy.
The third option remains - propagation by cuttings. It is with this method that the resulting seedling will have the entire set of characteristic features of the mother plant - both the shape and color of the needles.
Winter is a great time to take cuttings from coniferous plants. And the gardener has plenty of time during this period, and this is done simply. True, there is a fly in the ointment in this barrel of honey: not all coniferous plants reproduce by cuttings. For example, juniper and thuja are good (thuja is even very good), spruce is worse, but this method of propagation is not suitable for pine. Therefore, before you start, study the plant, read about methods of its propagation.
Now let's actually get started. You need to find a donor plant that is interesting to you and tear it off, yes, yes, tear off the blank for the cutting. Do not use a knife or pruning shears; this is done by hand. Find one or two years of growth and tear it away from the plant so that a piece of wood from the previous year remains. That is, the torn off branch should have, as they say, a “heel”. This is very easy to do with your hands - with a sharp movement the branch “snaps away” (sorry for the not entirely correct expression) from the mother plant.
A few of my observations: if you take a piece from a vertical, narrow plant, then it is better to take vertical shoots from the upper part, and if you want to root a creeping or spherical form, then you can take a twig from any part.
Don’t go too small; large cuttings have a larger supply of nutrients and are more likely to survive until their own roots form, that is, to take root (the optimal length is 8-15 cm). If you are preparing future cuttings far from home, stock up on a plastic bag where you put them. At home, you can store the twigs wrapped in a bag in the refrigerator or basement for a couple of days.
The beginning of cuttings - we find a one- to two-year growth of conifers. © Igor Bilevich We tear off the branch with our hands. so that a “heel” is formed. © Igor Bilevich
The next operation is to clear the lower part of the workpiece by about 2 cm from the needles; it is to this depth that the cutting will be buried in the soil substrate. To reduce moisture evaporation, the needles on the upper part can be trimmed a little, but by no means all; the cutting needs photosynthesis, maybe even more than an adult plant.
Very often, cuttings of coniferous plants do not take root, not because they dry out, but because they are affected by diseases, the spores of which are inevitably present on them. Therefore, the next important step is to disinfect the cutting, for which it is immersed in a solution of a fungicide, for example, Fundazol. This is not just a short-term dipping, but immersion in the solution for several minutes so that the drug penetrates the internal vessels of the cutting (this drug is systemic).
Then you can stimulate the future formation of roots by keeping the cuttings for the prescribed time in any stimulant: “Kornevin”, “Heteroauxin”, honey, aloe juice, etc.
The next operation is to clear the lower part of the workpiece by about 2 cm from the needles. © Igor Bilevich The next important step is to disinfect the cuttings. © Igor Bilevich You can use something loose as a substrate, for example, vermiculite. © Igor Bilevich
Propagation by cuttings
Pine can be propagated even with the help of a cutting - a small twig. This process is very slow, but the end result will undoubtedly please all conifer lovers.
This method of reproduction is asexual. This means that during the cultivation of a young conifer, new gene variations will not be formed and the resulting plant will be completely identical to the parent.
Propagation by cuttings is usually carried out in June-July . During this period, the branches will be sufficiently formed, but will not yet leave the stage of active growth. Due to the long daylight hours, the cuttings have time to fully take root. In regions with warm climates, pine can be propagated using this method earlier. But in winter, this work will not lead to success, since daylight hours are short and during this time the cuttings simply do not have time to get enough natural light. Rooting will be very slow, although artificial lighting can be a good solution to this problem.
Growing a pine tree from a branch is not difficult. To do this, you should find a wild pine tree and cut off a young branch from it. The younger she is, the sooner the first roots will appear.
The branch is removed with pruning shears; the length of the shoot should not exceed 9-10 cm.
When propagated by branches, the speed at which roots appear is largely determined by the composition and structure of the soil. The more fertile the substrate, the more active the formation of the root system. It is best to use a mixture of sand and peat, taken in equal quantities. For drainage, coarse-fiber peat or rotted bark of coniferous plants can be added to the prepared substrate. It is advisable to add a little perlite - it will provide aeration and facilitate the flow of oxygen to the roots.
Peat contains a large number of different microorganisms, and some of them do not have the best effect on the condition of the tree, so the prepared soil must first be disinfected. To do this, it can be calcined or treated with a pale solution of potassium permanganate.
Immediately before rooting, the cuttings should be treated with “Kornevin” or any other root formation stimulator. The more woody the scion is, the more saturated the solution you will need.
It is best to take a wooden frame or greenhouse as a planting container. In both cases, the future seedling must be covered with film.
Keep in mind that when propagating pine shoots, you should under no circumstances plant the branch directly into open ground - this will have the most adverse effect on root formation and the survival rate of the plant as a whole. The sequence of actions when rooting cuttings is as follows:
- the prepared container must be filled with soil mixture and moistened;
- Using any hard object, make a depression in the ground and place a branch in it;
- the top layer of soil should be crushed and compacted;
- To prevent the appearance of rot, the planting site must be additionally sprayed with a solution of a fungicidal preparation.
Sprouting branches prefer partial shade, so they need to be protected from bright sunlight. Water the seedling as needed and sparingly. The shoots need a constant flow of water, but if there is more than needed, the root system will simply rot. The film must be removed from time to time to allow the seedlings to ventilate. Typically, full-fledged roots begin to form after 4 weeks, the overall rooting process takes 2-4 months.
After a year, the branches with roots become suitable for replanting in open ground. The more powerful and strong the root system is at this moment, the greater the likelihood that the plant will take root in the soil and begin to actively grow.
For planting, it is better to choose shaded places, but it is better to avoid full shade. The soil should be sandy loam with low acidity. It is better to plant in the spring on a cloudy but warm day.
First, you should prepare a planting hole about 1 m deep; the width of the hole should be 2-3 times the diameter of the earthen ball. The bottom is laid out with expanded clay, pebbles or any other drainage layer of 10-15 cm. After this, the hole is filled with a mixture of river sand and turf soil in a ratio of 3 to 1, a seedling is placed there, sprinkled with soil mixture, compacted and watered.
The tree trunk area should be mulched after completion of work.
This method is most suitable for inexperienced gardeners - it does not require special knowledge and skills in working with plants.
Growing pine at home is not difficult. But still, regardless of which method you use, be prepared for the fact that you will only be able to get a new tree in a few years. If you do not have a fair amount of patience, it is better to purchase a ready-made seedling in any nursery.
To learn about the peculiarities of pine propagation, see the following video.
Many gardeners call the propagation of coniferous plants their hobby, which they do not for profit, but for their own pleasure. And it’s not surprising, because although this process requires full dedication, it is in itself very exciting and interesting. Evergreen trees and shrubs serve as a decorative addition to any garden plot. In addition, they bring undoubted benefits due to their ability to purify the air, which is why they are always very popular. Reproduction of coniferous species is possible by several methods, which are discussed in detail in the article.