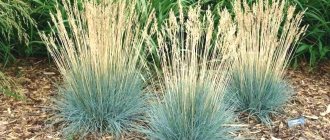
Features of growing hosta seedlings
Of course, the method of propagation through seeds is longer and more labor-intensive, but it allows you to enjoy the process and see all the stages of plant development.
Note! If you are interested in seed propagation, please note that sowing directly into open ground or a greenhouse is not practical. It is necessary to grow seedlings with control of all stages, conditions, and the necessary care.
But before you start sowing seeds for seedlings, you need to decide whether you are ready to put up with the disadvantages of this event. Reasons why hosta seed propagation is unpopular:
- Growing seedlings and growing plants will take a lot of time.
- Plants acquire their usual decorative appearance approximately 4 years after planting the seedlings.
- The offspring of varietal plants exhibit a wide range of varietal characteristics (color, leaf size).
It is advisable to grow hosta through seedlings if:
- If you are interested in the process.
- If you just want to grow seedlings for your garden, without any specific preferences for color or leaf size.
Step-by-step instructions for planting hosta seedlings
A necessary condition for proper planting of hosta seeds for seedlings is the completion of all stages. Following the instructions step by step will help you sow correctly and get strong seedlings.
Choosing a suitable container
A wide and low container is suitable for sowing seeds For example, a plastic or wooden box, a pot, a plastic container. Young seedlings have a weak and rather short root system, for this reason there is no point in choosing containers that are too high. The optimal height of the container is 7-8 (maximum 10) centimeters.
An important condition: there must be drainage holes to remove moisture after watering. Often, seedling containers are sold without these holes, so you need to make them yourself (with an awl, a nail, scissors).
You can plant it either in a new container or in a container that has previously been used for other seedlings. To minimize the risk of fungal diseases, it is recommended to disinfect the container, for example, spill it with a dark solution of potassium permanganate, wipe it with chlorhexidine.
Preparing the soil
Soil requirements for growing hosta seedlings: well-drained, air- and water-permeable, neutral acidity (pH 6.5-7), disinfected.
The optimal soil composition is: peat (2 parts), perlite (1 part) and vermiculite or sand (1 part). For example, you can mix the indicated ingredients, or you can replace peat with universal soil for seedlings.
Do-it-yourself soil can be contaminated with pathogenic microorganisms and fungal pathogens. In an unfavorable situation, young and vulnerable hosta seedlings may become ill. To prevent such an unfavorable phenomenon, it is necessary to disinfect the soil mixture . The most effective methods: steaming (hold over steam for 90 minutes, stirring) or calcination (bake in the oven in a thin layer for 30 minutes). And in order to restore beneficial microflora after such aggressive interventions, it is necessary to spill the soil with a solution of Fitosporin.
Preparing hosta seeds
The first step of preparation: buying seeds. The freshest hosta seeds have the best germination . Therefore, before purchasing a product, study the collection date and expiration date. Of course, you should avoid purchasing products that are expired or expired. You should also refuse to purchase if the package with seeds is dirty, wrinkled, or damaged (this indicates that the storage conditions have been violated).
Second step of preparation: pre-sowing treatment of hosta seeds. After all, it cannot be said that the seeds of this crop have very good germination. Therefore, the gardener’s task is to help the seeds germinate faster and more friendly. You can prepare seeds in the following ways:
- Soaking seeds in a solution of a growth stimulator , for example, Epin-Extra, Zircon, Energen. You need to soak according to the instructions on the package. Immediately after treatment, you need to sow the seeds into the soil.
- Stratification (exposure to cold to simulate natural conditions). To do this, you need to place the seeds between two damp pieces of cotton cloth or between cotton pads, place them in a bag and put them on the bottom shelf of the refrigerator for 30-45 days. At the same time, it is important to periodically check the seeds: if the fabric begins to dry out, be sure to moisten it;
- if mold appears, then you need to soak the seeds for 30 minutes in chlorhexidine, and then rinse in clean water, and replace the fabric and bag;
- Also, if you notice that the seeds have hatched ahead of schedule, then immediately sow them in the ground.
Hosta seed sowing scheme
After all the preparatory measures have been completed, you can begin directly planting the seeds. It is recommended to follow this scheme for sowing hosta seedlings:
- Step 1: A drainage layer is laid on the bottom. 1-2 centimeters is enough. Fine expanded clay, crushed brick, and perlite are suitable.
- Step 2: The container is filled with soil, the surface of the earth is leveled.
- Step 3: Lightly moisten the surface of the soil with a spray bottle with warm water.
- Step 4: Now you should make holes 0.5 centimeters deep, the distance between the holes is 2-3 cm.
- Step 5: Sow the seeds in the holes (it is advisable to put 3 seeds in 1 hole, in case some specimens do not hatch).
- Step 6: Fill the holes with a layer of soil or vermiculite (layer thickness 5 mm).
- Step 7: Moisten the surface of the earth generously with clean water at room temperature, always from a spray bottle.
Caring for young plants
Pittosporum tobira plant description, care and diseases, watering and propagation
Growing hostas will appeal to those who do not like to dig in the soil or who easily do not have time to do it. An adult plant amazes with its unpretentiousness, but young specimens require some attention.
movement behind the hosta:
- Relatively recently planted plants need to be watered systematically. Do this in the morning or evening. The darkened tips of the flower indicate that it lacks liquid.
- It is better to abandon loosening and replace it with mulching with peat. Thus, moisture will be retained and the underground part of the hosta will not be injured. When the plant matures, the need for weeding will disappear by itself: the dense foliage and roots that have grown will not allow them to reproduce.
- The flower has nothing against feeding, despite the fact that it can live without it. Fertilizers (ammonium nitrate, superphosphate, potassium sulfate) are applied in the spring, before and after flowering. If the hosts were planted in perfectly prepared soil, nutrients begin to be applied after a couple of years.
The culture is resistant to almost all pests and diseases. In order to protect the plant, preventive measures are taken against slugs.
Hosta is a perennial for lazy gardeners, undemanding and colorful. There is no special wisdom in propagating funkia from seeds. Cultivating a plant in this way is an opportunity to create a unique garden decor with your own hands.
Hosta flower - planting and care, hosta from seeds
Fascinating notes:
- How to quickly germinate beans: methods of germination and seed preparation
- Sand cherry: care, protection and reproduction from diseases
- How to make a beautiful and stylish pond on your property with your own hands?
- How to build and decorate an unnatural waterfall with your own hands
Relevant articles selected according to important queries:
- In winter, when hurricanes are raging outside the window, mounds of snow are turning white, it’s nice to have a colorful corner of flowering plants in your apartment. To such catchy...
- Gloxinia is one of the most beautiful indoor plants. It belongs to the genus Gesneriaceae. Its flowers, shaped like bells, have a variety of…
- In order for cucumbers to produce a harvest as early as possible, they need to be grown from seedlings. An inexperienced gardener can also produce this effect...
- To obtain a beautiful and blooming decorative balcony, surfinia, better known as ampelous petunia, is often used. Falling clusters of catchy...
- Celery is a fairly useful herb. Thanks to the serious amino acids, amino acids and essential oils that are included in its composition, it…
- Among all the spices, vegetables and fruits on the site, it is possible to find some “pluck and eat” delicacies. This is possible sorrel, and chives, and...
Rules for caring for hosta seedlings at home
After sowing the seeds, you need to concentrate on caring for the hosta seedlings. This is important both at the stage of waiting for seedlings and in the future. In general, we can say that the agricultural technology for growing at home is similar to seedlings of other crops, but there are some nuances.
So, in order to properly care for hosta seedlings, you must perform the following activities:
- The container should be covered with a lid (or film) until the seeds germinate; it will maintain an optimal level of humidity. to ventilate the mini-greenhouse for 1/2 hour a day, and also wipe off drops of condensation from the lid.
- The temperature for seed germination is 20-25 degrees Celsius . Under such conditions, the seeds will germinate in about 14 days (at a lower temperature it will take longer).
- After the seedlings emerge, you need to remove the lid (or film) and place the container with the seedlings in a bright place with a temperature of about 20 degrees.
- Like any other seedlings, hosta seedlings need good lighting. Therefore, the container should be placed on a bright windowsill, and if the daylight hours are shorter than 12 hours, it is advisable to supplement the plants with phytolamps.
- Hosta is a moisture-loving plant , so even at the stage of growing seedlings, you need to water it properly. Watering is done when the top layer dries. You need to pour water carefully, not at the root, so as not to wash away the soil. A syringe or syringe will help you add water in doses. The quality of the water is also important: it must be clean, settled, and at room temperature.
When and how to propagate hosta by dividing the bush
Hosta (or funkia) is a herbaceous plant of the Asparagus family. The main advantage of this ornamental plant is its very beautiful foliage. It is easy to care for and grows quickly, so it is very popular among gardeners. Hosta is suitable for growing in the shade; it is not without reason that it is called the “queen of the shady garden.” The only condition is that it must be protected from drafts and strong winds.
How does a hosta reproduce?
The host can reproduce :
Hosta seeds are propagated mainly by breeders; for an amateur gardener this method is too labor-intensive. But, if you really want to, you can try it. The most important thing is to choose good planting material. Experts recommend treating the seeds in a biostimulating solution for better germination. Then place the seed into the soil to a depth of 6 mm, sprinkle with perlite and lightly compact the soil. The first shoots will not appear soon; in a year only small leaves of about 1.5 cm are formed.
It is best to propagate hostas by cuttings from late May to July. The process of taking hosta cuttings is quite general. After cutting, the leaves of young cuttings are cut by a third to reduce evaporation. After planting, the funkia, which begins to grow, gets sick, the leaves fade. It is important to water the plant during this period and protect it from direct sunlight. Within a few days the bush will “come to life”.
Hosta propagation by dividing the bush
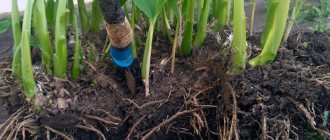
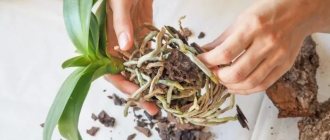
Most often, hosta propagation is carried out by dividing the bush. Even a beginner can handle this if he knows how to divide the hosta. An adult plant (4-5 years old) needs to be divided. The number of divisions obtained depends on the size of the bush. It needs to be dug up and divided into several sections with foliage (one pair of rosettes of leaves for each). Planting material is planted at the same depth at which the parent plant previously grew. The interval between plantings should be about 30 cm. How to divide a hosta bush step by step is written below.
Important ! Young plants need good watering until they are completely rooted.
Hosta propagation by dividing the bush
When is the best time to divide a hosta?
Inexperienced gardeners often wonder when they can divide the hosta and plant it. The bush should be divided if it has already reached its normal size. In this case, the division process will only improve the appearance of the hosta. For example, if the center of the crown no longer grows, but only shrinks, it means it’s time to divide the plant. The main thing is not to overdo it.
It can take 5 years, sometimes more, from planting cuttings to a fully formed shrub. The varietal characteristics of a plant appear as it grows; they are, as a rule, not noticeable in a hosta that is beginning to develop. If you often divide the bushes, you may never see all the features of the variety.
Many people prefer to divide the plant into seedlings exclusively in the spring. But in dacha literature it is said that the best time is to divide the hosta :
- Spring – early May;
- Summer - any month;
- Autumn – early September.
It is easiest to divide hosta in the spring; summer is considered preferable. If necessary, you can divide the bush in the fall, 30 days before frost, so that the plant has time to take root properly.
How and when to plant hosta seedlings
The timing of hosta picking is determined by the appearance of the plants: the seedlings should grow their first true leaf .
Requirements for a new container for picking: the container must be individual (cups, pots), volume - about 250 ml, depth must be greater than the diameter.
As for the soil, the soil according to the same recipe as for sowing seeds is suitable. The main thing is that it is sterile and disinfected.
Hosta seedlings are picked in the following way:
- Water the plants a few hours in advance.
- Fill the container 2/4 full with soil and top with a 1/4 layer of sand.
- Make a large hole (it’s convenient to make a hole with a stick or just your finger).
- Carefully, without damaging the root system, pick up one plant at a time. It is convenient to pick up with a stick, teaspoon or fork.
- Transfer the seedling, without shaking the soil off the roots, into the hole in a new container. The roots should lie flat without bending.
- Fill the hole with soil and lightly compact the soil with your hand.
- Water thoroughly.
Caring for hosta seedlings after picking
Picking is always a traumatic process for any plant. In order for the seedlings to continue to grow and develop, it is necessary to provide the hosta seedlings with certain care after picking:
- After picking, watering is done from below (that is, through the pan). Until the top layer of soil becomes wet, you cannot drain the remaining water from the pan.
- Immediately after picking and watering with plain water, it is advisable to water the plants with a solution of a root formation stimulator , for example, Kornevin. The solution will improve and speed up rooting and minimize stress.
- Plants take root and especially need life-giving moisture. Do not allow the soil to dry out for a long time, or even less the earthen clod to dry out.
- For the first 4-5 days after picking, you need to protect the hosta seedlings from direct sunlight ; the plants should be slightly shaded.
- 1-2 weeks before planting in open ground, you need to harden the plants . To begin with, you just need to open the window in the morning and evening for 30-60 minutes. After a couple of days, you can start placing the plants outside (in the garden, on the balcony). However, remember that you can only put plants outside if the air temperature during the day is not lower than 18 degrees Celsius! In this case, you need to start small, first the plants are exposed for half an hour, and then the time increases daily. The same is true with lighting: you need to start from the shade, gradually bringing the plants into the sun's rays.
Landing
Hostas are planted in soil with humus. Its structure does not play a big role. The main thing is to avoid sand and heavy loams. Before planting, the soil is dug up quite deeply with organic fertilizers.
The landing time in the Urals and in the Moscow region depends on the air temperature. The main rule is that frost should no longer appear by this time. And all other planting conditions are no different for all regions.
It is important to know that different varieties of hosta react differently to sunlight. So hostas with thin leaves prefer shade
And varieties with denser leaves prefer a little more light. Golden hostas like to grow in places where there is some sun in the mornings and evenings and some shade during the day.
To plant the hosta, a wide hole is dug so that the roots can grow horizontally. You can add a little sand to the hole, as well as peat and manure or compost soil. All this is mixed and filled 2/3 full, then the landing site is watered. When planting, the roots need to be well spread. The bud must not be lower than the level of the site; it cannot be deepened. After planting, the soil is watered and mulched to about 1-2 cm with peat.
When choosing a place for a hosta, it is worth considering that it can grow on it for many years. It does not need to be moved or dug up. Over time, the bushes become more beautiful and larger. Shaded, moist areas are perfect for this plant.
Planting hosta seedlings in open ground
Note! It is not necessary to plant seedlings in open ground in the first year. You can transplant the plants into large pots for growing, and plant the plants in the garden the following year.
The timing of planting hosta seedlings in open ground should be selected based on weather and climatic conditions: when the soil temperature remains stably above 10 degrees Celsius and the threat of return frosts disappears . That is, approximately at the end of May, at the beginning of June (relevant for the Middle Zone (Moscow region), Siberia, the Urals, in the south you can plant earlier).
An important step in planting: choosing a suitable location in the garden. The soil should be nutritious, drained, moisture-absorbing, loose, moderately moist (but without stagnant water), the place should be protected from wind and drafts. The area should be protected from sunlight at midday, but not in deep shade.
Important! It is advisable to grow the plants in the first years of their life in a specially designated bed for growing seedlings. And then, in the fourth year, transplant it to a permanent place in the garden.
The planting holes should be slightly larger than the earthen ball of the seedlings. The distance between the holes is from 20 to 70 cm (depending on the variety; the larger the variety, the larger the gap), but on average, a gap of 30-40 cm is acceptable. Hosta seedlings are planted in the garden using the transshipment method, that is, the whole lump “rolls over” from one place to a new hole.
Note! This article describes in detail about the spring planting of hosta in open ground.
This decorative foliage plant can maintain its decorative effect for many years. If everything goes well, the host can feel great in one place for up to a quarter of a century. At the same time, without requiring any cosmic efforts from the gardener. Therefore, in terms of the longevity of this plant, all the time spent on growing seedlings is minimal, especially since its beauty and unpretentiousness will pay for all the costs.
Hosta seed propagation preparation
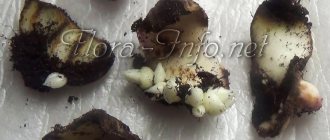
Virtually all types of hosta can be grown from seeds. The plant becomes mature 6-8 seven days after pollination is complete. This happens in August or September.
You must not miss the moment when the seed boxes turn brown and open. This is a signal that it is time to stock up on planting material.
Hostas will sprout together if the raw materials are stored correctly. The collected seeds are carefully dried at high temperature (30-350 C) to evaporate the liquid as completely as possible. Before sowing they are kept at 2-40 C.
Secrets of reproduction:
Hosta propagation using this method begins with containers and sterilization of the soil for planting. The destruction of fungi and microorganisms is the key to the health of future seedlings. The soil for the culture is watered with a concentrated solution of potassium permanganate and kept for 30 minutes in a water bath. Medical alcohol is used to disinfect containers. It is possible to buy the substrate in a special store. The necessary components in its composition are perlite, peat, vermiculite. The germination of seed depends on its processing. The raw materials are soaked in growth stimulants (Epin, Zircon, Kornevin). Some experts advise doing stratification
Germination energy will increase significantly if the seeds are kept in the cold for 2-2.5 months. For successful cultivation of crops, it is fundamentally important to prepare seeds in a timely manner, store them correctly, and prepare containers and soil for sowing.
