How to plant an orchid? This question invariably arises from the owner of this beautiful flower. Essentially, you need to replace the soil once every three years, and also for emergency reasons, which you will learn about below. If you do not replant orchids, this will result in sad consequences: greasy and compacted substrate, inability of the root system to fit into the pot, rotting, etc. Let's figure out why, under what conditions and when to replant orchids.
Remember! Replanting an orchid should not be done just like that, because the plant takes a long time to get used to its new place of residence. You need to disturb a flower only if there is a good reason. It is advisable to do this in spring, when the orchid enters the active growth phase.
Reasons for planting orchids
The reasons for planting orchids can be planned or emergency. The planned ones include changing the substrate every two to three years (depending on the quality) due to its compaction and decomposition. This allows you to maintain comfortable living conditions for the orchid.
Emergency reasons include the following:
- Soil decomposition occurs quickly.
- Root system rotting.
- The appearance of harmful insects in the substrate.
- The root system does not fit into the pot.
Most orchids purchased in stores are hybrids. They are adapted to growing at home and can bloom for a long time (up to six months), but they do not have a resting phase as such. That is why it is difficult to choose the most suitable time for transplantation. Most experts are inclined to believe that plants need to be replanted in the spring (this is the very beginning of the active growth stage) or after flowering (when the flowers fall and before budding).
Transplant timing
Let's start with when is the best time to do seating. Naturally, the most appropriate time is the beginning of spring, when growth processes in all plants are activated. The orchid is no exception. The flower tolerates spring interference in its existence more easily and quickly, recovers and takes root better. If your orchid has begun to displace the substrate from the pot and has become overgrown with babies, it’s time to start the planting procedure.
The exception is when the flower is sick. There’s no point in waiting, but it’s better to try to save at least part of the orchid.
Step-by-step algorithm
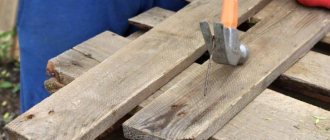
The step-by-step algorithm is simple, but requires some preparation. First, make sure you have inventory. We need a basin or other large container in which we will clean and process the root system. Also make sure you have a flower pot that will fit the size of your particular orchid. You can’t do without the following devices:
- A sharp tool, such as scissors, a knife or pruning shears. Be sure to sterilize the instrument.
- Inert materials for drainage layer. You can give preference to vermiculite, perlite or expanded clay.
- Bactericidal drugs. The best choice is ordinary activated carbon, but you can give preference to simply crushed cinnamon.
- Fungicides. They are needed in the presence of fungal foci for treatment.
- Insecticides. They will be needed if you need to get rid of parasites and harmful insects.
- Warm and soft water. It is advisable to use settled or purified water.
In principle, you can purchase a ready-made substrate. However, experienced flower growers recommend preparing it personally, using high-quality ingredients. In this case, it will be possible to achieve full development and growth of the plant, reliable protection from diseases and pests.
Now you can start transplanting. Proceed, adhere to the following algorithm:
- The first stage of the procedure is to remove the orchid from the old container, clean and inspect the roots. First you need to carefully remove the plant from the pot. If its structure allows, gently press on all sides and remove the orchid. Otherwise, the pot needs to be broken or cut. The plant should be placed in a previously prepared basin with warm, settled water. Leave it in this form for 1-1.5 hours so that the substrate separates from the roots. Do not tear pieces of bark from the roots under any circumstances. After the specified time has passed, rinse the plant under water and leave to dry. At this time, inspect the roots and stems for dry areas or rotting areas. If the roots are healthy, they are fleshy, elastic and dark green.
- Next, you need to trim the roots, process the cuts and dry the plant before planting. Take a sharp and disinfected tool. They need to trim damaged, diseased or dried roots, capturing up to two to three centimeters of healthy tissue. Also trim off any yellow, dry or damaged leaves. Root sections should be treated with ground cinnamon or crushed activated carbon. Treat leaf sections with an antiseptic. If necessary, use an insecticide (if there are residual insect habitats) or a fungicide (if there were signs of rotting). Leave the plant to dry for 8-12 hours.
- Now we need to place the prepared plant in a new container. First, let's prepare the substrate. The bark should be poured with boiling water or calcined in the oven, then dried or cooled. Mix the bark with other substrate components required for your particular orchid variety. The pot should be disinfected. Then a drainage layer (1.5-2 cm) is laid. Place the plant in the center of the container, distribute the roots evenly and, holding with your hand, sprinkle the roots with the prepared substrate. The latter should not be laid tightly, since the roots need to breathe, but at the same time the orchid should stand tightly in the pot.
- It remains to carry out the first watering. This can be done immediately if the drying of the substrate and roots was completed normally, or after 1-2 days.
Remember! The root collar, or rosette, does not go deep into the substrate, but remains on the surface.
Recommendations for caring for young flowers
An orchid takes 4 years to fully mature. Before this, “young” flowers are kept in pots suitable for the size of the bush. The container must match the volume of the roots. A mandatory requirement is the presence of a drainage layer, since water should not stagnate near the roots.
Expanded clay, brick chips, and foam granules can be used as drainage. The latter material will do if the window sills in the house are cold. The substrate is prepared from pine bark, sphagnum (moss) and charcoal. Some gardeners add high-moor peat; this substance populates the soil with beneficial microflora and does not allow it to dry out quickly.
Sometimes young flowers have roots pointing upward. Do not try to force them back in: the plant is fragile and can be seriously damaged. Spray such roots with warm water to prevent them from drying out or cover with moss.
Teenage orchids need to be watered more often than adult plants. After all, the pot in which they develop is smaller. Add growth stimulants and other fertilizers to the irrigation liquid. Provide proper lighting and adhere to the required temperature conditions, and then at the right time your beauty will give her first flowering.
How to plant baby orchids?
How to plant baby orchids? The planting process itself is similar to transplanting an adult orchid, but there are some subtleties that you need to know. In particular, you should understand what a child is. This is the name given to a small plant that forms on the mother specimen: in leaf axils, on peduncles, on the trunk (from dormant buds), on the roots. The location of appearance depends on the type of orchid.
You can plant the baby in a separate container after its roots reach at least two centimeters in length and at least 3-4 leaves appear on the stem. In principle, the roots indicate the readiness of a young plant to grow independently.
You need to separate the baby from the adult using a sharp, disinfected instrument. In this case, a small part (up to 1 cm) of the baby is left. You can completely cut out the baby only from the axil of the leaf. Then the cut sites on both the child and the adult must be treated with an antiseptic (ground cinnamon or crushed activated carbon). It remains to dry well.
Take a small transparent container with a hole in the bottom. Next, lay out a small layer of drainage. Install the baby and, holding it, fill in the substrate. Be careful not to damage the roots. Now you need to build a greenhouse to ensure the growth of the plant. A plastic bottle, glass jar or plastic bag will do. You can water the baby three days after planting. Sphagnum moss can be used to maintain moisture. Remember that the baby must grow for at least a year, and only then can it be cared for like an adult.
Advice! Immediately before planting in the substrate, it is advisable to soak the plant’s roots in water with growth stimulants. This will ensure accelerated growth of the root system.
When is seating required?
It is recommended to plant an orchid in a number of cases. Only healthy and strong shoots are used for cultivation.
Over time, the substrate used begins to deteriorate and loses its original properties, so replacement is required. If moss predominates in the pot, then replanting is performed every 2 years, if tree bark is used - every 3 years.
Another reason is that the container has become small, the root system has nowhere to grow and the flowers need to be divided so that they can develop calmly
Features of cuttings at home
You need to know the features of cuttings at home if you want to propagate orchids in this way. By the way, it is considered the most difficult and time-consuming. But at the same time, if everything is done correctly, the method is quite effective. Please note that cuttings are only suitable for monopoidal and fast-growing orchid species, such as vanda or dendrobium. In principle, you can use the method for sampodial orchids, but the result will be slightly worse.
You can resort to cuttings only after the orchid has completely faded.
Cuttings are performed as follows:
- Cut the side shoot into cuttings, each 6-10 centimeters long. In this case, each cutting should have at least 2-3 dormant buds.
- Treat the cut areas with cinnamon or activated carbon. Dry for five hours.
- Lay the shoots horizontally on a nutrient substrate (wet sphagnum moss or a special product, as in the photo, will do) and leave it like that until roots appear (at least five of them).
- Plant the cuttings in the substrate, placing them vertically. Keep in mind that you need to maintain a temperature of 23-25 degrees and a humidity of 30%-40% in the room, and also do not forget about sufficient lighting, but without direct sunlight.
Note! You can also take cuttings from a faded peduncle. The only difference is that the length of one cutting should be about 10-15 centimeters.
What soil should I replant in?
Every novice gardener asks the question - in what soil should I plant Phalaenopsis?
Substrate for Phalaenopsis can be purchased at the store. The main component of purchased substrates is pine bark.
Other components can be added to it: sphagnum moss, charcoal, fern roots.
The main thing you should focus on when choosing soil is its looseness and good ventilation. The components must be of a large fraction and not caking. Fine-grained soil is unsuitable for Phalaenopsis orchids. It is better to purchase pure pine bark.
Another option is to prepare the soil yourself. For this:
- Collect pine bark from fallen trees (do not touch living pine trees!)
- Rinse the bark well in water.
- Using pruning shears, chop into pieces measuring 1.5 - 3 cm.
- Boil the bark for a few minutes to remove residual resin, pests and pathogenic fungi.
- After boiling, rinse the bark again with boiling water or re-boil.
- Place on trays to dry.
On a note! The orchid can be transplanted into a substrate that is not completely dried.
Reproduction in different ways
Flower propagation can be done in different ways: by aerial roots, bulbs and by dividing the bush. The method of planting by means of aerial roots is considered the simplest and most accessible for every gardener. It is used for mature and well-grown plants. The procedure boils down to dividing the roots. The separated part is then simply planted in the substrate and waits for the plant to grow.
Dividing an orchid bush is a method suitable for sympoidal species, which include cymbidiums, dendrobiums, cattleyas, odontoglossums, oncidiums, miltonias, etc. The reason lies in the fact that these plant varieties have several growing points, so you can easily divide the rhizome into separate parts.
So, first the plant needs to be soaked in warm, settled water for half an hour, and then cleaned of the old soil. Using a disinfected sharp object, you need to divide the rhizome so that at least three pseudobulbs remain in each part. The cut areas need to be processed, the plant dried, and then planted in a prepared container with substrate.
It is rational to plant with bulbs if the orchid is cramped in the pot. The procedure is performed during a planned transplant. The algorithm is as follows:
- Remove the plant from the container in which it is growing.
- Clean the roots from the substrate by soaking.
- Cut the bulbs using a disinfected sharp tool. Only bulbs with roots are suitable.
- Treat the cut areas.
- Plant the plants in containers with soil prepared for them.
It is advisable to plant the bulbs in dry soil and then spray it daily.
general information
Orchid seedlings are not a complicated process, but they require attention and precision. Even an inexperienced florist can carry out planting at home. The main thing is to know when to do it.
- Replanting is possible if the plant has become large and dividing the aphid into pieces of any of its parts will not cause fatal damage to it.
- If more than 2 years have passed since the last transplant.
- When the flower no longer fits in the pot and sprouts a large number of aerial roots (more than 5).
- When babies appear on the flower stalks, which can develop into full-fledged orchids.
It is best to propagate and replant an orchid in the spring and summer, when the conditions for keeping the flower are most favorable.
Features of planting orchids of different varieties
The peculiarities of planting orchids of different varieties must be remembered. Let's take a look at the rules for planting popular varieties:
- Cymbidium. It needs to be replanted every three to four years after flowering. Seating is mainly done with bulbs. Moreover, the plant must have at least six pseudobulbs.
- Cumbria. She has a negative attitude towards transplants, so there is no need to disturb the plant for no reason. Planned seating is carried out every two to three years. You need to plant them in bulbs, acting carefully so as not to damage the roots. After this, you cannot water the plant for a week.
- Cattleya. An orchid is replanted by dividing the bush, but not more than once every two to three years.
- Wanda. At home, only vegetative propagation is possible by separating the children. It is advisable to do this during planned seating.
- Dendrobium and phalaenopsis. These varieties are propagated by any of the species, including through broken fragments.
As you can see, planting an orchid at home is as easy as shelling pears. The procedure is available to every gardener. You need to do everything correctly, adhering to the algorithm, so that everything works out exactly: the new plant takes root, and the old one does not die. Now you will not have problems propagating plants at home, because you know how and what to do. Remember that you need to select the appropriate planting method for a particular orchid variety in order to achieve maximum results. You can watch a video that explains in detail how to properly replant a plant.
Features for some species
Cymbidium
This terrestrial epiphyte is replanted every 3 or 4 years. The procedure for propagation and planting is carried out immediately after flowering. One of the important conditions for reproduction is the presence of at least 6 pseudobulbs in Cymbidium. The plant is divided into sectors of 3-4 pseudobulbs with leaves and roots, dead roots are removed and planted in a new container with prepared soil mixture.
Cumbria
Cambria, like many orchids, has a negative attitude towards transplants . Planned replanting is carried out every 2-3 years, depending on the condition of the substrate.
Reproduction is done by bulbs . In this case, the bulbs are carefully separated from each other, trying not to damage the roots. If the roots are damaged, they must be treated with crushed activated carbon or cinnamon.
For good stability and rooting they should :
- Attach to the support stick;
- And do not water for a week.
Cattleya
The transplantation and propagation procedure is based on the same principles as for other species when dividing a bush . It is better to carry out this procedure during the period of planned replanting once every 2-3 years, during the period when active root growth begins:
- The plant is removed from the container;
- Soaked;
- Clears;
- And processed;
- Then the rhizome is divided so that each part has at least 3 bulbs;
- And after processing and drying, it is planted in a container prepared in advance.
Wanda
If in nature Vandas can reproduce not only vegetatively, but also by seeds, then under home conditions seed propagation is impossible . Transplantation is carried out in the same way as most orchids, once every 2-4 years.
The most effective method for planting Vanda is considered to be the separation of children , or, as they also say, basal rosettes, from the mother plant. Of course, it is best to perform this procedure during a planned transplant:
- Using a sharp, disinfected instrument, the baby is separated from the “mother”;
- The cut areas are treated with crushed activated carbon or cinnamon (ground);
- The babies are placed in small containers with a substrate of bark, charcoal and sphagnum moss;
- A support is installed for the vertical position of the children in the container and a greenhouse effect is created (mini greenhouse);
- Ventilation and removal of condensate are carried out daily;
- Periodically, as necessary, the mulch layer of moss is sprayed;
- Once the roots grow and the young plants become stable, the greenhouse is removed.
Dendrobium
Reproduction of Dendrobium even in a natural environment does not cause difficulties. Therefore, there are many ways to reproduce it . Under natural conditions, it is capable of reproducing from broken small fragments if it lands in a fertile place.
At home, it is best to plant it using vegetative methods .
Children
The baby, very similar to a small copy of the adult plant, emerges from a bud formed at the very base of the stem. This serves as a signal to produce offspring. There is an opinion that after several such cycles of breeding offspring, the mother plant begins to die off. You can see the baby in the photo, we will tell you step by step when to separate her from her mother.
Baby on the dendrobium.
As soon as roots of 3-5 cm in size appear on the baby, it can be separated with a piece of the trunk and placed in the substrate, then creating a small mini-greenhouse .
Advice! Experienced gardeners recommend planting simply in sphagnum moss.
Dividing the bush
An adult, sufficiently expanded Dendrobium orchid can be divided, thereby obtaining several copies . Moreover, such specimens will be adult plants.
The division process comes down to:
- Removing the main bush;
- Cleaning and processing of the root part.
The plots are made in such a way that each has at least 2 stems and young shoots. Do not forget to treat the cut sites to avoid infection.
Cuttings
It is possible to plant this type of orchid with stem fragments having several internodes. These fragments should be laid on damp sphagnum or sand. Having created a greenhouse effect, good lighting, temperature, wait for the babies to appear.
Then the children are seated in a permanent place of growth. Many gardeners use transplantation using the cutting method.
Dividing the bush
Planting orchids by dividing the bush is a method that is best suited for well-developed, healthy and large orchids.
When the orchid develops 7-8 leaves, and they are quite healthy and large, the flower is divided. To do this, you need to visually divide the beauty into 2 parts. Each of them should have leaves and roots. Otherwise, the seating arrangement will end badly for one of the halves.
Pruning is carried out with a clean tool so as not to introduce any infections into the plant. The cut is treated with charcoal or an antiseptic. After division, the top is strengthened on new soil. It is not recommended to water immediately. This will help prevent rotting.
After the procedure, less than 2-3 leaves and roots remain on the mother bush. This will allow the plant to safely survive stress and recover.
Important! Before planting an orchid, you can prevent diseases and parasitic infections.
Seating for children
This is the safest method and is suitable for all types of orchids. It is also called the lateral shoot method. After flowering, a period of rest begins. If the peduncle does not die, then live buds remain on it, which sometimes develop into a full-fledged plant.
The growth of the kidneys can be stimulated, and sometimes they themselves begin to grow imperceptibly. Stimulation is carried out with cytokinin paste. It contains phytohormones that stimulate growth.
If a baby begins to grow from the bud, then nothing needs to be done. The main thing is to carefully monitor its development. First a small shoot appears, then leaves develop. There may be 2-3 of them. After some time, the roots begin to grow. The leaves may dry out, but there is no need to worry, because this is normal and does not in any way affect the growth and development of the baby.
The roots are constantly growing. When their length reaches 5 centimeters, the baby can be cut off. Under no circumstances should it be separated from the peduncle. This will lead to her death. Cut it off with part of the peduncle instead. From the grown bud, 2-3 centimeters recede up and down. The cut is made with a clean tool, and the sections are rubbed with charcoal or treated with an antiseptic. After these procedures, the baby is seated on new soil. In the first weeks, watering is carried out rarely, but they are sprayed every day.
Read more about preparing soil for orchids. It is important to choose the right composition that will promote the growth of a young flower.
In this article we told you how to properly plant an orchid. We outlined important points when transplanting and separating parts of the bush. We also discussed the manner of leaving after seating and important details of this process.
Division by bulbs
This method of planting is suitable for Dendrobium, Cambria orchid, Cattleya, Cymbidium.
This method of planting is used when a flower becomes cramped in a pot and new bulbs begin to grow for which there is not enough space. Before planting, the orchid is carefully removed from the pot, being careful not to damage the root system. If the flower cannot be removed. Then the walls of the container can be slightly dented. When. When the roots have grown to the walls of the clay pot, it will have to be broken so as not to tear the roots when removed. Another method of extraction is abundant watering. Water softens the soil and allows you to carefully remove the orchid.
The bulbs must be carefully separated. Use a sharp knife for this. The sections are rubbed with charcoal or treated with an antiseptic. After separation, they are placed in new soil.
There is no need to cover the bulb too much. It is best to leave it closer to the surface, filling only a quarter. Spraying is carried out every day. They begin to water the bulbs only when they are fixed by roots.