Author: Natalya Category: Fruit and berry plants Published: June 23, 2018Republished: February 23, 2019Last edits: November 2, 2020
- Landing in the ground
- Japanese medlar (Eriobotrya japonica)
- Beneficial features
Medlar, or cup tree, or ezgil (lat. Mespilus) is a genus of deciduous plants of the Rosaceae family. According to The Plant List, there are only three species in the genus. The word “loquat” was borrowed from the Turkish language, into which it came from Greek. German medlar, or common medlar, is grown as a cultivated plant; it does not come from Germany, as one might assume, but from South-West Asia and South-Eastern Europe. The medlar was brought to Germany by the Romans. Today, it is found in the wild in Azerbaijan, South Ossetia, Georgia, Armenia, the North Caucasus, on the southern coast of Crimea and even in the central regions of Ukraine. This plant has been grown for more than 3000 years. It was introduced into culture by the ancient Greeks; in the ancient Roman era and the Middle Ages, medlar was already the most important fruit plant. However, then interest in it gradually faded away; it was replaced by other crops, including those imported to Europe from the New World. Nowadays, medlar can be found rarely.
Description of the plant
In nature, there are about 30 species of this plant. But despite such diversity, only some of them can be grown at home. Particularly popular is the Caucasian or German medlar, as it is also called. Japanese medlar also develops well at home and in open ground.
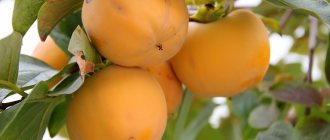
These types of fruit trees differ significantly from each other. The only thing similar about them is the fruits, which taste good. Japanese medlar berries are very similar in appearance to apricots. The pulp is soft and juicy. They tolerate transportation and long-term storage well.
The ancient Greeks first began growing medlar more than 2,700 years ago.
As for the German medlar, it is not intended for fresh consumption. Before tasting the berries, they need to be well aged and slightly frozen. It is these conditions that give the pulp tenderness and pleasant taste.
Fruits are rich in useful substances such as:
- potassium;
- iodine;
- vitamins A, C, B;
- folic acid;
- selenium;
- manganese;
- calcium.
The plant is native to the Balkan Peninsula, Iran, and Asia Minor. It can often be found in the Crimean mountains and the Caucasus.
The plant belongs to the group of heat-loving crops, so medlar is increasingly grown at home. In a room it can reach 2 meters in height. Leaf blades are leathery. Each of them is shiny on top and velvety on the bottom. During the flowering period, the room is filled with a pleasant almond aroma, which lasts for quite a long time.
The flowers are self-pollinating. But despite this, many housewives, in order to increase productivity, carry out artificial pollination. At the end of flowering, berries appear in place of the buds. Their diameter varies within 8 cm. The fruits grow in clusters.
How to grow Japanese medlar in the country?
Having tasted the taste of an exotic fruit, vacationers often become eager to grow it in their summer cottage or in a greenhouse. In Russian regions with a subtropical climate, Lokva is grown in open ground. The berries are used fresh. They prepare wine, jam, jam, marmalade, juices, liqueurs and compotes.
In regions with cool climates, medlar is grown indoors in flower pots or cache-pots with automatic watering, placed in greenhouses or winter gardens. The tree can reach 1.5 meters in height, for this reason it is necessary to choose the right size flower pot. It is recommended to immediately plant Lokva in a spacious LECHUZA CLASSICO Color flowerpot, and then transplant it into a larger pot. You can choose any shape, color and texture of the LECHUZA flowerpot that best suits your style.
If it meets environmental requirements, it blooms and can form a fruit crop for 4-5 years. More often it is a beautiful ornamental plant, the leaves of which can be used in the form of decoctions to treat bronchitis with a prolonged cough, as a gargle for sore throats. Decoctions and infusions of leaves and berries are used for kidney diseases and to cleanse the body of toxic substances.
Crown formation
Geranium at home - where is it better to place it in an apartment, in a flowerpot or on a windowsill?
In nature, Japanese medlar is found in the form of a slender tree about 6–8 m high or in the form of a dense-leaved shrub with a rounded shape. At home, the plant rarely grows above 1.5–2 m. Even at the stage of formation of the 2–3rd leaf, you should decide on the future shape of the medlar. To grow a bush at this stage, the sprout should be pinched; if you want to grow a tree, then after 6–8 months the side shoots begin to be pinched for better tillering.
Planting seedlings
Eriobothrya is tolerant of soil types, but its acidity and proximity to groundwater are of great importance for successful cultivation. The soil should be moderately fertile with pH=5-6.5. If the soil’s physical and chemical properties are not suitable, then prepare a soil mixture. The planting hole is dug almost 2 times larger than required. The excavated soil is enriched with humus or compost. The composition is approximately the following: chernozem and humus in a ratio of 1:1 or chernozem, high peat and sand - 2:1:1.
The soil mixture is fertilized with kemira or nitrophoska 80-100 g/pit and shoveled well. The bottom of the pit is drained by 20-25 cm, crushed gravel, expanded clay and other materials. Fill the cone with half of the prepared soil mixture. Fill a bucket of water. Place a seedling on top of the cone and carefully cover it with the remaining mixture.
The root collar of the seedling should remain at ground level after soil compaction. A low roller (trunk circle) is poured around and another bucket of water is poured out. After absorption, the soil is mulched with shavings, sawdust, chopped straw, peat, humus or other fine mulch. Tie the seedling to the support with tape or twine through a gasket.
Japanese medlar is a self-pollinating and cross-pollinated crop. When growing fruits, for normal pollination it is necessary to plant 2-3 seedlings with an interval of 3-4 meters. When using Lokva as a decorative one, the distance between seedlings is reduced to 1.5 - 2.0 m. This scheme allows you to form a hedge, individual clumps on mowed lawns in the design of the site.
Popular medlar varieties for home cultivation
Growing rosemary on the plot and at home
For growing at home, it is recommended to choose varietal medlar, the seedlings of which repeat the best qualities of the mother plant:
- Morozko is the most suitable medlar variety for growing indoors, in a greenhouse or in a winter garden. Due to the low degree of fragility of wood, the plant can be given any shape. Large aromatic fruits, devoid of astringent taste, are colored red-brown and have a high content of vitamins.
- Tanaka - large yellow-orange pear-shaped fruits reach a weight of 50–80 g. The juicy, aromatic pinkish pulp has a delicate sweet and sour taste.
- Champagne - this variety is characterized by large, pubescent fruits of a rich yellow color. The light creamy pulp has a delicate, melting taste and pleasant aroma.
- Premier - the orange-yellow fruits of this variety are characterized by creamy, juicy pulp with a delicate sour taste.
- Sales - distinguished by brightly colored orange fruits, weighing 80 g and reminiscent of apricot in taste.
The fruits of the listed varieties are not only characterized by high taste, but are also perfectly stored and suitable for transportation.
If you follow all the simple agrotechnical recommendations, even a novice gardener can cope with the fascinating process of growing medlar at home, who in 4-5 years will be able to harvest exotic fruits without leaving home.
In the summer in Sochi I tried medlar, brought three seeds home and planted them (though after 9-10 days, not within three). And I conveniently forgot about it. In August, this miracle grew, all three shoots sprouted. I puzzled over what was growing for me for a long time, then I remembered, but not the name. Now I went to your site, thank you, I found out. True, for some reason it seemed to me that the sun suited him. So, you still need to put it in the shade?
At work and at home I stuck a Japanese medlar seed into the ground. Both there and there they ascended safely. And in both cases, for some reason, 2 sprouts stick out from one seed, and not at all like in a lot of photos on the Internet! Why?
In the spring I received a 15-cm medlar sprout. When it got warmer, I took it to the dacha, transplanted it into a spacious container and tried to keep it in the sun. Now it is 70cm. plant (although some kind of parasite is gnawing on the edges of several leaves). It’s a beauty. Due to the cold weather, it’s standing in the dacha in the house, and now we’ll take it home until the next dacha season. I’ll consult on how to care for this curiosity.
I planted 9 medlar seeds in two wide but not deep pots and a month later all nine sprouted. Now they have 4-5 leaves....I will carefully transplant them into separate pots
More information on the topic: https://onwomen.ru
Types of medlar
A very modest genus of medlar has only 3 species. Of these, 2 are used in gardening.
Japanese medlar. The plant is in the form of a spreading tree up to 8 m in height and has rather thin branches covered with dark bark. The oval foliage, up to 25 cm long and 7-8 cm wide, has a pubescent leathery surface. The leaves grow on small petioles. Paniculate inflorescences bloom in September-October at the ends of the shoots. They consist of white or yellowish flowers with a diameter of 1-2 cm. The heat-loving variety absolutely does not tolerate negative temperatures. By the end of spring, round or pear-shaped fruits ripen. They are located in clusters of up to 12 pieces. The berries have juicy, aromatic pulp and bright yellow skin. Varieties:
- Tanaka - orange-yellow pear-shaped fruits with pinkish flesh and a sweet and sour taste;
- Champagne - yellow fruits with fleecy skin and delicate pulp;
- Silas - apricot-like fruits weighing up to 80 g;
- Morozko - a variety for home and greenhouses produces large red-brown fruits without astringency.
Japanese medlar
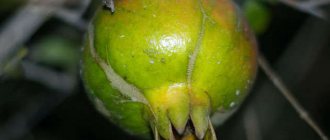
German medlar , Caucasian or Crimean. A deciduous plant in tropical conditions can grow up to 8 m in height. Its smooth, highly branched shoots are covered with dark green oval leaves 8-15 cm long and 3-4 cm wide. In autumn the foliage turns red. White flowers bloom in May. The fruits ripen in autumn. They are round in shape and reddish-brown in color. There is a small amount of seeds inside. Before the onset of frost, the flesh is tart, sour and hard, and then becomes soft and sweet. The species is winter-hardy and suitable for open ground in temperate climates.
Medlar
Medlar in landscape design
Growing cherry tomatoes at home in pots
German medlar has a lush, spreading crown, and it attracts designers with its brown-red leaves. Gardeners often plant two or three plants to the north of other crops, since mature trees provide an excellent barrier from the cold wind in winter. The medlar itself will not suffer from the cold, since the adult plant is very resistant to frost. Also, this crop is grown as a central point in a garden plot, which is relatively small in size. The fact is that the crown of such a tree looks very impressive even without foliage, and in spring it is decorated with fragrant, flat, saucer-like flowers, painted white or light pink. Repeated flowering of this plant is observed in August or September. In autumn, the foliage changes its color to yellow-red or brown-red. Unusual fruits make medlar even more spectacular. This plant retains its decorative value throughout the season, so it is recommended to plant it in a row along the path in the garden; the result will be a park alley created from trees with closed crowns and straight trunks.
Medlar: beneficial properties and disadvantages
- Beneficial features
The fruits of this crop consist of such useful substances as iodine, zinc, magnesium, iron, selenium, potassium, phosphorus, calcium, sucrose, fructose, sodium, malic and citric organic acids, pectins, phytoncides and tannins, which can get rid of diseases gastrointestinal tract, will lead to the normalization of intestinal function and relieve pain in the presence of stones in the kidneys and urinary tract, and also contains a whole set of vitamins A, C, B1, B2, B3, B6 and B9. To eliminate inflammation and to help stop intestinal bleeding, a decoction is made from these fruits, but only unripe ones. They also make a decoction from the leaves, which are collected during flowering; it is believed that such a decoction has an anti-inflammatory, strengthening and hemostatic effect. The fruits of this plant are also used in the preparation of tinctures, which are used in Japan for therapeutic effects against asthma and bronchitis. The fruits of this tree are quite often used in the diet, as they contain a sufficient amount of dietary fiber, citric acid, antioxidants, fructose, plus they are considered low in calories. They also help in the treatment of diabetes, cleanse the body of waste and toxins, eliminate symptoms of kidney dysfunction, help get rid of intestinal colic and intestinal disorders, increase the filtering capacity of the kidneys, help strengthen the immune system, eliminate runny nose, lead to normalization of blood pressure and promote improvement functioning of the digestive and visual organs. Experts recommend consuming these fruits during pregnancy and lactation, as they are endowed with a high content of macro- and microelements, as well as vitamins. But it is worth noting that they should be eaten only by women who do not have an individual intolerance to this product. The insides of these fruits are actively used in cosmetology. Masks are prepared from it, giving the skin a healthy tint, helping to smooth out small wrinkles, and can eliminate pigment spots.
The fruits of this plant are perfect for preparing various dishes, such as compote and jam. The juice obtained from such fruits has a fairly rapid fermentation process, so it is used to make liqueur, wine or liqueur. The seeds of this plant are also used, for example, they are used to prepare a drink that tastes quite similar to coffee.
- Contraindications
Like all products, medlar has its contraindications. You need to be very careful when giving this product to children, as allergies may occur. It is strictly forbidden to eat these fruits, especially unripe ones, for people suffering from gastritis with a high level of acidity, gastric or duodenal ulcers, or who have inflammation of the pancreas. But it is worth noting that jam or preserves made from these fruits have a very good effect on a weakened and sick body.
How to plant medlar
Medlar (Lokva, Eriobothria japonica or Shesek) is an evergreen ornamental and fruit tree (shrub) of the Rosaceae family of the Apple subfamily. The main cultivated species are Japanese medlar and German medlar (common). Due to the difference in the taste qualities of the fruits and the varying degrees of difficulty in growing these two types of medlar, the Japanese medlar is most widespread in the southern regions of Russia and the CIS countries.
Can medlar grow and bear fruit at home? Of course it can, like any other fruit-bearing tree (shrub). To do this, the plant needs to create conditions that are as close to natural as possible, and also follow some simple rules for growing and caring for it. Conditions for keeping medlar:
Loquat growing from seed
The fastest way to grow an adult plant is from a seedling or cutting. But if you still have medlar seeds after eating delicious fruits, then the planting material is already available. A significant volume of the entire ripe fruit is occupied by large, brown and shiny seeds, from which the medlar at home will grow. Despite the fears of many plant growers about the capricious nature of the plant, medlar from seed at home grows remarkably well and bears fruit.
How to grow medlar (fruit) from a seed? Not as difficult as it might seem at first glance. But it is still necessary to follow some rules. Four stages of proper preparation of medlar seeds for planting:
1. Medlar fruits should be quite large and mature, the seeds should be noticeably heavy, not empty.
2. The seeds removed from the fruit must be washed and dried for 3 days, but no more.
3. With dried seeds, it is necessary to carry out a scarification procedure to destroy the hard shell of the stone by thoroughly rubbing it on all sides with sandpaper for 3-5 minutes.
4. After scarification, the bones must be placed in water at room temperature for 3 days. To speed up seed germination and protect future plants, you can add a few drops of the biostimulator Epin#187 or Zircon#187 to the water.
How to plant medlar? To plant fully prepared medlar seeds in the ground, you need the following:
1. Container for planting. You can use any clay, ceramic, or plastic pot for germinating medlar seeds. It is better to use a small container for planting. This is done so that the soil does not turn sour in a large pot when watering.
2. Soil for planting. The planting mixture can be made independently from equal parts of low-lying peat, leaf soil, humus and special sand for plants, or purchased at a flower shop.
Loquat growing at home
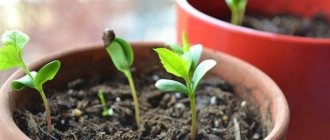
Loquat seeds are planted in early spring. A layer of medium-sized expanded clay and an earthen mixture are poured onto the bottom of the pot. Plant the seeds to a depth of no more than 1.5 cm and water with settled water at room temperature. The pot with the planted seeds is covered with a plastic bag to create increased humidity and placed in a lighted place without direct sunlight. Water moderately, without creating stagnation of water, but also without allowing the soil to dry out completely. The soil in the pot is kept moist.
How long does it take for medlar to germinate in a home greenhouse? Properly prepared medlar seeds begin to germinate 3-4 weeks after planting. When the sprouts reach a height of 2-3 cm, the greenhouse begins to be ventilated daily. After the sprouts are completely accustomed to the drier air in the room, the bag is finally removed. It is advisable to maintain the air temperature in the range of +18-8230 +20 °C, and periodically spray the sprouts with warm boiled water.
Approximately 1-1.5 months after emergence, young seedlings are planted in separate pots so that the plants do not interfere with each other’s further growth and development. Young plants require good natural light without direct sun exposure, regular watering (2 times in summer, 1 time per week in winter), spraying, maintaining optimal temperature conditions and fertilizing with organic fertilizer 2 times a month in the spring-summer period. Every spring, grown plants are transplanted (transferred) into a pot of larger diameter.
Diseases and pests
Medlar is not a very capricious plant, but systematic disturbances of the microclimate and improper care can lead to the disease:
- Root rotting occurs when the soil is excessively moistened or water stagnates, especially in cold conditions.
- Loquat leaves curl and wilt when infected with fire blight. The problem can arise when the plant is kept in conditions of low temperature, excessive soil moisture and high levels of nitrogen in the soil.
- Loquats grow slowly in low light or depleted soil conditions.
Loquats can be attacked by aphids, sooty fungus and scale insects.
Properties of medlar
This plant is valued not only for its decorative qualities and interesting fruits, but also for its beneficial properties. And medlar has a lot of them, all thanks to its rich composition.
Useful properties of medlar:
- the fruits have a rich vitamin composition: vitamins C, A, B1, B2, B3, B6, B9. All of them are present in this useful plant;
- mineral components - iron, potassium, magnesium, calcium, iodine, phosphorus, sodium, selenium, zinc. Which are so necessary for our body;
- sugar - in the form of fructose and sucrose;
- organic acids such as citric, malic;
- phytoncides and tannins responsible for the astringent properties of medlar fruits.
Medicinal properties of medlar
Loquat pulp is used to treat bronchial asthma, as well as various breathing problems. To prepare a medicinal solution, alcohol or rice vodka is used.
Recipe: five medlar fruits with seeds are thoroughly ground, after which two tablespoons of honey and 100 ml are added. sake. All this needs to be mixed well, then poured into an airtight container and left to infuse for a week.
You need to take a tablespoon three times a day before meals. The medicinal tincture fights coughs, improves breathing and removes phlegm.
Tannins and phytoncides are indispensable for the gastrointestinal tract. They normalize its activity, help cope with diseases, relieve pain during exacerbation of stone disease of the kidneys and urinary tract. Medlar helps stop intestinal bleeding and copes with inflammatory processes.
Medlar. Negative effect on the body
It is worth noting that medlar, in addition to its large number of good properties, also has negative effects. Therefore, we should definitely tell you about them too. But it's not all that scary. There are few disadvantages to medlar.
- The fruits of this Japanese plant should not be given to children and adults who are prone to allergies.
- Loquat can also be dangerous for those suffering from diseases of the gastrointestinal tract, with low acidity.
- Contraindicated for people suffering from ulcers and inflammation of the pancreas.
- Now let's talk about how to grow medlar at home. This is not difficult to do. All you need is desire and a little work.
How to grow medlar at home?
You can grow this unique plant at home. To do this, we need to remove the seeds from the purchased fruit. But there is one caveat. Boarding time is limited! Since there are no more than three days, otherwise the seeds will not be suitable. After three days, the seed will dry out and the seed will not germinate.
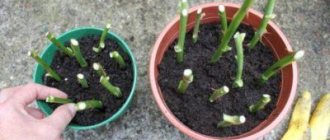
The best substrate, made with your own hands, is a mixture of sand, peat, leaf soil and humus. If you can’t make your own soil, you can buy it in the store. You can use any pot for planting. To be sure, you can plant 5-6 seeds in one pot. We plant the seeds to a depth of approximately 2 cm. We moisten the soil before planting. Having completed all these operations, cover the pot with film. And put it in a sunny, warm place. The plant is moisture-loving, so we water it four times a week. If the soil is dry, moisten it with a spray bottle. Also, condensation must be removed from the film that covers the pot, otherwise mold will grow.
Important point! The main thing to remember is that as soon as the sprouts appear, they must be removed into the shade. Direct sunlight is contraindicated for the plant. The first shoots will appear after about a month.
When the first shoots about 2 cm high appear, the protective film must be removed. Young seedlings develop quite quickly, and when they reach 10-15 cm in height they need to be planted. If this is not done, the plant roots will become very intertwined and die. It is also worth considering that plants may die during transplantation - this is normal and, unfortunately, no one is immune from such an outcome.
The remaining plants will begin to develop and get stronger. After three years, you will be able to enjoy the flowering and aroma of medlar. This is mainly the period from autumn to early winter. But the fruits will appear by the New Year. You should also take into account that medlar is replanted every 4-5 years. True, medlar rarely bears fruit.
Loquat propagation
If you are interested in the medlar plant, then you should know that growing such an exotic plant at home is accessible to everyone. Medlar can reproduce in different ways: seeds, layering, cuttings.
Most often propagation is used by seeds (seeds). Such propagation is attractive because the young plant will have all the qualities of the mother medlar.
The seeds are taken from a ripe medlar fruit, washed, dried for 3 days, and soaked for several hours in a weak solution of potassium permanganate. The seeds need to be planted in loose, moist soil to a depth of 2-3 cm. Cover the pot with glass or film and wait for germination.
Read also: Varieties of perennial Volzhanka
You will receive the fruits of such a plant in 4-6 years.
If you want to get fruits in the first year, you will have to propagate the plant by air layering. To do this, you need to root the medlar branch: use a utility knife to remove a small strip of bark from the branch (you need to remove the bark in a ring).
We cut a transparent plastic bottle lengthwise and secure it with tape in place of the bark cut into a ring. The bottle is filled with soil. This soil requires regular watering.
After about 2 months, roots will appear. When the root system has grown sufficiently, the bottle is removed and the branch is cut from an adult plant. The cut branch is planted in a separate pot and awaits fruit.
The tops of medlars that grew last year are excellent for propagation by cuttings. The top is cut off at a distance of approximately 15 cm.
The lower cut is treated with activated carbon powder - this is a kind of protection and disinfection of the cutting.
Plant the cuttings in soil suitable for medlar to a depth of 3 cm.
If the room temperature is 25-27°C, the cuttings will take root in about a month.
We hope that this article will help you grow a beautiful medlar and become the owner of an exotic plant in your garden or home. We wish you success!
Growing loquat in the garden
Planting medlars in the ground
Three-year-old medlar seedlings grown at home from seed can continue to be grown as house plants or can be planted in the garden. Medlar needs well-drained soil, neutral or slightly acidic, and the plant is undemanding to the composition of the soil. Groundwater on the site should lie no higher than one and a half meters below the surface. If you decide to plant several seedlings at once, keep a distance of 4.5 m or more between them.
In the photo: Fruit-bearing medlar tree
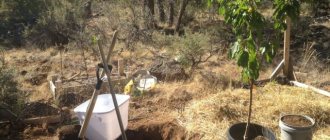
Medlar is planted in open ground when it is at rest, that is, in spring or autumn. Clear the area intended for loquat from weeds and dig it up with bone meal. Prepare a soil mixture of equal parts of coarse river sand, turf soil, humus and deciduous soil. Dig holes one third larger than the volume of the root system of the seedling with a ball of earth. Drive a stake into the center of the hole of such a height that it reaches the lower branches of the medlar, transfer the seedling from the pot into the hole and fill the space with soil mixture. As a result of planting, the seedling should be at the same depth at which it grew in the pot. After planting, water the plant generously, and when the water is absorbed and the soil settles, tie the seedling to a stake and mulch the soil around it with a layer of compost or rotted manure 7-8 cm thick so that the mulch does not touch the trunk.
How to care for medlar in the garden
Caring for medlar is not much different from caring for other fruit crops. How to grow medlar in your garden? You will have to water the plant, trying to saturate the soil with moisture, but not to waterlog it. After watering or rain, it is advisable to loosen the soil in the tree trunk circle and remove the weeds that appear there.
Medlars are fed 2-3 times per season with both mineral and organic fertilizers, but young plants require more frequent feeding: once every 3 weeks. Of all organic fertilizers, the plant prefers mullein solution.
In early spring, before sap flow begins, it is necessary to carry out sanitary cleaning: remove diseased, broken, frostbitten branches that thicken the crown. For the first 3-4 years, you need to shorten the skeletal branches by a third of the growth per outer bud. The branches intertwined inside the crown are cut to 2-3 buds. From the age of four, the crown of the medlar, like the crown of any fruit tree, is formed, and when the formation is completed, the shape is simply maintained by pruning.
Loquat propagation
You already know how to grow medlar from a seed, but this plant can also be propagated vegetatively - by cuttings. To do this, a cutting 15-20 cm long with two nodes is cut from last year's growth, the lower leaves are removed, and the plates of the upper leaves are shortened by a third. They do this in order to reduce moisture evaporation. The sections are powdered with ash, after which the cuttings are planted strictly vertically in a pot with expanded clay and a peat-sand substrate. The cuttings are buried 4-5 cm. After planting, the soil is watered. Caring for cuttings consists of regularly watering the substrate and spraying the cuttings with boiled water. It will take about a month for the medlar to root, and when you are sure that the plant has grown roots, transplant it into the garden. The further development of the seedling may be very slow, but do not despair: if you meet the conditions for growing medlar, sooner or later the cutting will definitely begin to grow.
In the photo: Formation of medlar fruits
How to replant medlar
Medlar is transplanted using the transshipment method. The volume of the new pot should be 5-10 cm larger than the previous one.
The method of transshipment is that the plant is carefully removed from the old seat and carefully lowered into a larger pot, having previously added soil to the bottom. After this, the voids in the pot around the plant are filled with fresh soil.
If the plant is under 5 years old, then replanting will be required every spring. Medlars older than 5 years require replanting every 3-4 years, but the top layer of soil in the pot must be changed every year.
Growing medlar care rules
This unusual and valuable fruit of the Rosaceae family has about 30 species in nature. However, only one is suitable for home cultivation - Japanese medlar. It is worth noting that this is a fairly tall plant. It does not bush very much, but it can grow up to one and a half to two meters in a room. Each leaf has an oblong shape.
At the same time, they are quite leathery, have a glossy surface and a velvety backing. The pleasant aroma of bitter almonds fills the room when the Japanese medlar blooms.
It is worth noting that the plant is capable of self-pollinating, however, to increase the number of fruits, it is advisable to carry out artificial pollination. All fruits have a bright orange hue, but as for the shape, they can be either round or elongated.
In terms of taste, many say that it is somewhere between pear and cherry with a certain pleasant sourness.
It is worth noting the special juiciness of all medlar fruits. The pulp itself is very healthy, not only tasty. It can improve intestinal function and overall digestion. Helps well in case of urolithiasis. It is quite possible to consume this fruit both raw and after processing.
Although the plant itself is not very demanding on conditions, it is best to create home-room conditions for it. Of course, it is also possible to grow on the ground in the middle zone.
This is a very ancient fruit. It is known that the Greeks grew it three thousand years ago. The best way to grow is to take a regular cutting, but growing from seeds is also quite possible. The presence of a ripe fruit is already enough to grow this plant right on your windowsill. Fruit ripeness is fundamental for successful cultivation.
Usually, to do this, it is simply lightly rubbed with a file or sandpaper. This will cause the seeds to hatch much faster. After scarification, it is recommended to soak the bone for 24 hours in water. All floating samples are discarded.
The seeds that remain at the bottom are planted in a specially moistened loose substrate. It is worth noting that plants are extremely sensitive to watering. For this purpose, exclusively settled water is used. Stagnation of moisture is not allowed, so the pot needs adequate drainage. In addition, loosening the soil will be required.
To obtain a healthy plant, as well as successfully grow fruits, it is necessary to choose the most appropriate place for installing pots in the room.
A window sill on the south or southeast side would be ideal. The plant appreciates hot sunlight extremely highly. It is not afraid of direct sunlight, of course, when it grows up.
Newly hatched seedlings must be removed from direct sunlight, as plants need some time to adapt to the powerful radiation.
The maximum lower temperature threshold is 15 degrees. In summer, the plant is quite capable of surviving days and nights on the balcony or in the garden. In winter, the plant goes into a kind of sleep, so it can be kept on the windowsill, but watering is done less frequently.
Autumn and winter temperatures in the middle zone are not terrible for this plant. She is able to quite successfully tolerate temperatures down to 5 degrees when she hibernates. That is why a good option for it is to install it on a glazed loggia or balcony, even without heating. It is worth remembering that in this case you should not water it at all.
The ideal soil for the plant would be any ready-made flower mixture. If you want to prepare it yourself, then for this you will need 4 parts of turf soil, a couple of parts of leaf soil, 1 part of fairly coarse sand, and 1 part of nutritious fatty compost soil. Drainage is required.
You should provide a certain greenhouse by covering the container with film, and then the seeds will germinate faster. Do not forget to ventilate the greenhouse and regularly moisten the soil. It is worth noting that the root system is sensitive to transplants, so it is recommended to do this as rarely as possible.
Types and varieties
About 30 species of medlar grow on earth. So what does the mysterious medlar look like, which many have heard of but never seen?
This is a fruit plant from the Rosaceae family of the Apple subfamily. There are deciduous and evergreen forms. Habitat: subtropics of south and southeast Asia. It can be found on the Japanese islands and Abkhazia.
The most popular are the German medlar, which is also called Caucasian, and the Japanese loquat. They have learned to grow these species even in central Russia.
The names of medlar, or muchmule, as they say in some countries, are assigned according to the place of growth:
- Abkhaz medlar in Abkhazia;
- Turkish - in Turkey, where it is called Yeni-Dunya;
- Azerbaijani - in Azerbaijan.
Japanese loqua
This is an evergreen tree up to 8 meters high with large glossy oval-shaped leaves. It is found in the wild in China and Japan.
Japanese loqua
Due to the high demands on temperature and watering, difficulties arise when growing in open ground.
Germanic eriobothrya
The second name is ordinary ezgil. It was brought by the Greeks to German lands. It also received other names based on its place of growth:
- Abkhazian;
- Crimean
An ornamental plant up to 3 meters high, unpretentious. Resistant to frost. Does well in areas with warm winters and cool summers.
Growing medlar from seed at home
You can grow medlar from a seed indoors. After the seed is removed from the fruit, it can lie for no more than 3 days, and then it must be planted in the substrate. As a rule, seeds bought in a store grow into trees that cannot bear fruit. If you plant a seed that you personally removed from a medlar fruit, then the chances that the plant that grows from it will bear fruit are very high.
If you wish, you can buy a soil mixture for planting ready-made in a special store, or you can also make it yourself; to do this, you need to combine humus, peat, leaf soil and sand, which should be taken in equal parts. Take a pot that has holes in the bottom for drainage. At its bottom, you first need to make a good drainage layer from expanded clay, after which the remaining space must be filled with prepared soil mixture. The seeds are sown in a moistened substrate, and they need to be buried only 20 mm. You can sow up to 6 seeds in one container. The top of the container must be covered with glass or film. Crops are harvested in a well-lit and warm place, for example, on a windowsill. The first seedlings should appear after at least 4 weeks. The plant will need to be protected from direct rays of the sun, ventilated every day, and also remove condensation from the shelter in a timely manner, otherwise the seedlings may develop a fungal disease due to dampness. After the height of the plants reaches 20 mm, the cover must be removed from the container, and the container itself must be moved to a place where the air temperature is never less than 18 degrees. In the summer, containers with seedlings can be moved to fresh air (terrace or balcony), and the plants will need reliable protection from drafts, wind and scorching sun rays. The soil mixture in the container should be slightly moist (not wet) all the time; for this, the seedlings must be watered 2 or 3 times every 7 days.
The emerging seedlings are characterized by relatively rapid growth. So, after 4 weeks, the height of the plants can reach 15 centimeters. Grown plants must be planted in individual deep pots, which are filled with a substrate consisting of peat, coarse river sand and humus. It should be noted that transplanted weak plants most often die. But the transplanted powerful and large bushes will become even stronger over time. Flowering of a bush grown indoors will occur only in the 3rd year after transplanting into an individual pot, and this will happen in the last autumn or first winter weeks. Closer to the New Year, the first fruits may form.
You can start forming the crown only after the bush has faded, but you don’t have to do this. Some flower growers prefer that the medlar bush look natural; to do this, they need to cut out only weakened, injured branches that thicken the crown and are affected by disease.
Growing in open ground
Spring planting of Eriobotrya japonica will allow the seedling to develop a good root system and above-ground crown during the warm season. When planting in autumn, you need to choose the period so that the seedling “sleeps”. If it begins to grow in the fall, it may die from temperature changes. For planting, choose places heated by the sun without drafts and constant wind. In mixed gardens, good neighbors are pears, quince, hawthorn, and apple trees. Lokva does not tolerate nut plantings and does not like the proximity of apricots.
Care for medlar in apartment conditions
In order for a young plant to feel good, you need not only to water it correctly, but also to choose the optimal place in the room.
Also, special attention should be paid to watering. After all, a lot depends on the amount of moisture
Lighting
This is one of the important conditions for growing medlar at home. The tree grows best on windows facing south. It also feels good in the southeastern part. The plant produces a bountiful harvest only if the flowerpot is not in the shade.
Room temperature
Medlar is a tropical plant, so the indicators must be appropriate. The optimal numbers are 20 – 250 C. When growing indoors, you must ensure that the thermometer does not fall below 150 C. In the warm season, it is recommended to take the pot out into the fresh air. This could be a balcony or terrace. In winter, the tree is kept on the windowsill or away from the window. In the second case, installation of additional lighting is required.
Substrate for planting
Before planting medlar, you need to prepare the mixture. A peat substrate is best. You can buy it at any flower shop
When growing such a tree, it is important to ensure that the soil has neutral acidity levels.
To prepare the soil yourself, you will need:
- four parts of turf soil;
- one part sand (coarse);
- two parts of deciduous soil;
- one part compost.
All components must be mixed well. The resulting substrate does not require additional processing, so it can be immediately used for the procedure.
Transfer
If you follow the rules of soil renewal, you can be sure that the tree will always grow well and bear fruit. Unfortunately, not everyone knows when to replant a medlar, so often the leaves begin to fall off and the tree does not grow in size.
The soil should be changed once a year. To do this, you need to use the “transshipment” method. If the plant has grown significantly, then the flowerpot will need to be replaced. Mature crops need to change the soil every three years. The pot should be several centimeters wider than the root system itself. Be sure to place drainage at the bottom of the container. To do this, you can use pebbles or crushed broken bricks. Small crushed stone also performs its tasks well.
Fertilizer
The tree should be fed from early April to September. The number of procedures performed should not exceed two times every 30 days. Complex preparations are best suited for this. A good option are products designed for cacti and indoor roses.
Irrigation
Watering the crop directly depends on the season. In the summer, when it is hot outside, the tree needs to be irrigated frequently and abundantly. The soil should always be slightly moist. Winter is a dormant period for the tree. Therefore, the procedure must be carried out to a minimum, while ensuring that the earthen lump does not dry out completely. Water for irrigation should be taken only at room temperature. It is recommended to let the liquid sit well before use.
Trimming
It is necessary in order to form a beautiful bush. Using scissors, you need to periodically remove the tops of the shoots. To speed up their growth, you will need to cut off the peak part of the plant. This significantly activates the growth of lateral branches.
Pests
The tree is often attacked by insects. The plant can also suffer from improper care. If the medlar leaves begin to dry, you need to carefully examine their back and front sides. Often, such a sign appears as a result of the development of insects. In the case of foreign individuals, the tree must be treated with an insecticide. Also, wilting of leaves can be observed as a result of waterlogging of the soil. If nothing is done, the root system will rot and the plant itself will die.
In order to get rid of sooty fungus and scale insects, systemic medications are the best option. You can also treat the plates with water and laundry soap, but only after this procedure, you should bathe the trees under a warm shower.
To ensure that growing medlar at home brings only positive emotions, you should follow the tips and rules. Timely watering, proper fertilizing and the right choice of location will allow you to grow a healthy and beautiful tree with an unusual appearance and colorful fruits. Delicious and incredibly healthy berries will become the best fruit for lunch.
Rules for growing plants indoors
Loquat in a pot at home is a real decoration for a family nest. She is not very demanding in care. Follow a few rules, and your home will look beautiful, have a pleasant aroma, and your children will enjoy exotic fruits.
To grow medlar in a pot, you can use both shoots and seeds. For those who decide to use the first method, you will need to separate last year's shoots. Cut the branches into small cuttings and place them in moist soil. Then cover the container with a glass jar and place in a warm place for a month.
The fruits of the plant are used to treat pathologies of the intestines and genitourinary system.
As for growing medlar fruit at home from a seed, this is the simplest and most popular method. Anyone can grow an exotic tree in this way. If everything is done correctly, your windowsill will soon be decorated with a beautiful plant.
The first thing you need to start with is choosing ripe berries. You need to remove the seeds from them and remove the pulp.
Place the seed in a container and rinse well under running water. Then place the seed on the windowsill to dry thoroughly. Since the grains are covered with a dense shell, apply scarification. To do this, you will need to take sandpaper and rub the seed with it. You can also use a file. Processing with these methods allows you to destroy the dense part, thus accelerating the germination of the bone.
The second step in growing a medlar tree at home is soaking the seeds. To do this, you will need to immerse the seed in a container of water. It is important to ensure that the liquid is at room temperature. All seeds that float can be thrown away. They are not suitable for planting. Only those grains that remain at the bottom of the container should be planted in the soil.
After the first shoots appear, the container must be moved to partial shade. This is due to the fact that the seedlings are afraid of the scorching sun and may stop developing.
After the appearance of a full third pair of leaves, plants can begin to form. It is during this period that the medlar should be pinched. This will allow you to get a beautiful tree that will delight the eye for many years.
