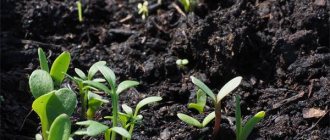
Propagation of plants by seeds
Some amateur gardeners note that propagating actinidia by seeds is the most acceptable way. The plants take root well, take root, and grow hardy. But the sex and properties of the culture can only be determined when they grow up. Such a seedling will begin to bear fruit in the 7th year of the growing season (with other methods - in 3-4 years). Breeders propagate kolomikta by seeds when developing new varieties of the crop. For breeding, take the material as fresh as possible. Dry seeds will take longer to germinate. The crop is sown before winter or spring. Before sowing, they are specially prepared, hardened, and germinated.
Pre-prepare the ground. The following composition is recommended:
- sand - 1 part,
- rotted compost - 1 part,
- garden soil - 1 part.
From January-February to June, the process of seed germination occurs. When carrying out work, follow the diagram:
- Pour clean, damp sand into a wooden box.
- Place the seeds, pre-soaked in water for 4 days, in a cloth and in damp sand.
- Keep the seeds for 2 months at a temperature of 18-20 degrees. Keep the sand moist.
- Ventilate the seed once every 10 days.
Carrying out germination and sowing of seed material step by step
After preparing the seeds, carry out the germination and sowing procedure in the following sequence:
- The culture should be kept in the refrigerator for two months, ventilating and stirring once every 10 days.
- In spring, keep the seeds at a temperature of 10 degrees for two weeks. After removing from the refrigerator, place the seeds to germinate on damp filter paper and cover with plastic on top.
- When the seed material begins to hatch, begin the process of sowing into the ground.
- The planting depth is 0.5 cm. Planting should be done according to the pattern of 2 cm in a row, 2 cm between rows.
- Place the container with the seeds in the greenhouse in partial shade. Keep the soil moist.
- When the sprouts have 3-4 true leaves, pluck them. Planted on ridges in June.
- In the first year of the growing season, seedlings are grown in beds and covered with spruce branches and leaves in the winter. Or they dig boxes into the ground and cover them.
- In spring, plants are planted in a greenhouse according to a 1x20 cm pattern.
When propagating kiwi, protect the sprouts from cold and animals. Place supports under the vines. In the third year of development, the seedlings will bloom. At this time, unnecessary male sprouts are removed from them. Seedlings will take root well if they have formed a strong root system. You can plant the vine in a permanent place in the fall.
2 colomicts should be placed in one hole. After 2 years, the weak plant can be removed. The seedlings are fed once every 2 weeks with an aqueous solution of chicken manure (1:15). To sow actinidia in September before winter, seeds begin to be prepared in April, choosing a site on the north side. The area is dug up and organic matter is added. At the end of spring next year you will see vine shoots. Carefully water the plants, plant them at a distance of 10-15 cm. In winter, seedlings should be covered with leaves until they reach three years of age. At this age, in the spring, the seedlings are transplanted to a permanent place. To do this, in the fall they dig holes 0.6 meters deep and 0.6-0.7 meters in diameter and drain them. Seedlings are planted at a distance of 0.5 meters from each other.
Pruning different varieties and preparing for wintering
When pruning, you should take into account the different features and varieties of actinidia:
- Colomikta and polygamy have fruiting buds that form on short and long branches. If you trim them, you can significantly increase the yield of the vine for the next year.
- Arguta bears fruit only on short shoots, so for varieties of this plant it is necessary to intensively thin out this crop in combination with short pruning and careful pinching. Lianas of this variety bear fruit throughout the life of the crop, so they do not need to be replaced.
- Actinidia kolomikta requires shortening of shoots only from 7-10 years of age; earlier, even young seedlings of the crop are not pinched. To do this, one of the old vines is replaced with a new and stronger one.
After shortening the shoots in the fall, the plant needs to be covered, which prevents the crown from freezing and the death of the vine. To do this, you need to cover it with special light fabrics, and the trunk circle with spruce branches.
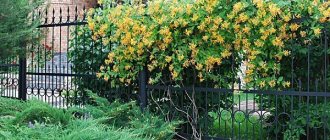
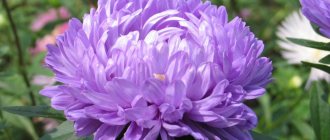
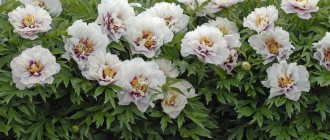
Actinidia can act as a beautiful hedge or be used to create other decorative landscape compositions. But to create a spectacular appearance of this plant, regular pruning is necessary, which should be carried out in accordance with the recommendations of gardeners.
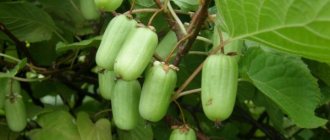
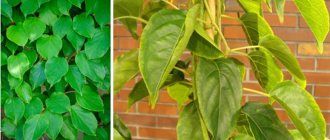
Actinidia is a woody vine that is distinguished by the special taste of its fruits, which contain a high content of ascorbic acid. Actinidia is unpretentious in planting and care, and is distinguished by its longevity. The crop can bear fruit for up to 40 years.
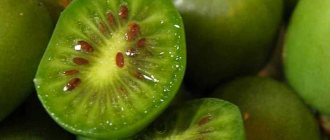
The liana can climb to great heights using supports. The plant is dioecious, shade-tolerant, and winter-hardy. The leaves are leathery, finely toothed. The crop should be grown on moist loamy soil; actinidia does not do well in dry places. The fruits of the crop are greenish, the seeds are small. Actinidia fruits contain a large amount of vitamin C, much more than in lemon. The drug is often used as a laxative, antiscorbutic, and anthelmintic.
The kolomikta berry contains 4 times more vitamin C than black currants and 13 times more than lemon. After processing, the berries do not lose their beneficial properties.
The fruits contain pectin, which allows the removal of heavy metal salts and radioactive isotopes from the body.
Propagation by green cuttings
The most acceptable type of propagation of actinidia is vegetative, in which the varietal characteristics of the original vine of the plant and its gender are transmitted. Reproduction of actinidia by cuttings gives a 60%-100% yield of rooted plants, which begin to bear fruit as quickly as possible. Actinidia propagation by green cuttings is carried out from the second ten days of June to the beginning of July.
For work, it is advisable to have an adult vine at your dacha, from which you can cut annual shoots for cuttings. They can be cut from any part of the shoot, excluding the top. When preparing cuttings, follow the rules:
- The cutting length is approximately 10-15 cm and includes 2-3 buds.
- The lower oblique incision is made 2-5 mm below the kidney.
- The superior straight line is 2-5 mm above the kidney.
- Remove the leaves under the bottom bud.
- The leaf above the upper bud should be shortened by a third to reduce sap flow (transpiration).
- It is recommended to treat green cuttings with a root growth stimulator (for example, heteroauxin) according to the instructions for the drug. Tie the sprouts into a bundle and immerse them in the prepared solution for 6-12 hours (immerse 3-4 cm deep).
Prepared cuttings are planted in a greenhouse.
Actinidia care basics
Proper planting and complete absence of pests make caring for actinidia easier. For better plant growth and increased fertility, it is advisable to provide it with supports - trellises (galvanized wire between the posts).
Important! Planted cuttings from lignified actinidia cannot be replanted for at least two years - their root system must become stronger.
Watering and fertilizing the soil
Watering actinidia is moderate. Excessive moisture should not be allowed (the soil at the roots serves as an indicator). All actinidia love spraying the leaves with water dust (morning and evening).
Fertilizers are selected taking into account the preferences of the plant (slightly acidic and acidic soils) - potassium chloride, ammonium sulfate, ammonium nitrate, wood ash, etc.
Chlorine-containing fertilizers such as
lime and fresh manure are strictly contraindicated.
Before feeding actinidia in the spring, after the snow melts, you need to shallowly loosen the soil near the roots (3-5 cm). Do not dig up - you can damage the roots. You need to feed:
Important! Actinidia are sometimes affected by leaf spot and gray fruit rot. Young plants (shoots and especially roots) can be eaten by cats
To preserve the roots, the planted sprouts are fenced with a metal mesh.
How to trim correctly
Caring for actinidia involves regular pruning of the plant.
. Pruning is necessary for a young vine (for its proper formation) and an adult plant (the constant growth of the vine leads to thickening, darkening, and reduced yield).
When planning pruning, consider the following:
- The most optimal time for the procedure is considered to be the summer months, immediately after flowering has completed;
- in the fall, about a month before frost (the timing of frost may vary in different regions) - pruning is not recommended (the awakened buds and young shoots will not ripen and frost will kill them). In the southern regions, sanitary pruning is carried out after the end of leaf fall;
- in early spring (when the sap moves through the vine), pruning is prohibited - any violation of the integrity of the plant is fraught with its death.
Important! Each actinidia variety has its own specific characteristics that must be taken into account when pruning. For example, in a kolomikta tree older than 8 years, one old branch is cut off annually and replaced with a young shoot
Colomikt in the form of a bush bears fruit poorly and needs trellises. In argut, the main vine lasts a lifetime, but it needs to be thinned out more intensively and cut shorter (short shoots bear fruit), etc.
Pruning young actinidia is associated with the formation of the plant.
- the first year - cut off the above-ground part, leaving 2 - 3 buds;
- the second year - all shoots are cut off, except 2 - 4 vertical ones (sleeves). After the end of leaf fall, their apical buds are cut off;
- third year - the strongest side shoots are selected and tied to the left and right trellises;
- the fourth and fifth years - further gartering of the strongest and fruit-bearing branches, pruning of weak, thin, broken and non-fruit-bearing branches.
Winter hardiness of actinidia
Actinidia varieties grown in our latitudes have fairly high frost resistance (kolomikta can tolerate frost down to -35...-45 degrees C).
For the first 2 - 3 years of life, it is better to cover young plants for the winter with a cushion of leaves, spruce branches or polyethylene. The greatest danger for vines is not low temperatures in winter, but spring frosts (young actinidia sprouts, flower buds and buds are most sensitive to them)
. A temperature drop below zero by 8 degrees can destroy a young shoot.
Planting actinidia near a residential building partially neutralizes the risk of frost, but problems may arise from rainwater runoff from the roof.
Rooting green cuttings in ditches
This method is not labor-intensive; the time before the vine begins to bear fruit is significantly reduced. To propagate actinidia, use these tips:
- Root the plant in shallow grooves (depth 40-50 cm). Place drainage, such as broken brick, at the bottom of the trench.
- A 3-centimeter layer of sawdust should be poured on top to prevent silting of the drainage.
- Fill the ditch with a mixture consisting of the following components: humus - 0.5 parts,
- peat crumbs - 1 part,
- sand - 1 part.
- Clean sand - 2 parts,
Peat (perlite, vermiculite) – 1 part.
(Only sand can be used).
Please note that on summer days the moisture in the greenhouse does not evaporate too much, it is recommended to whiten the film with a solution of lime and chalk. The greenhouse is regularly ventilated.
Experienced gardeners organize automatic watering to regulate humidity. The formation of roots in the cuttings will begin in a week. After 20 days, the root system will be fully formed. The film can first be lifted for hardening, and after a week it can be completely removed. The yield of rooted seedlings with this method is 70-100%. The roots are formed strong and fibrous. Cuttings should be transplanted into open ground for growing in early autumn. When they take root, perform the first fertilizing with fertilizer:
- Ammonium nitrate – 30 grams per 10 liters of water
- Or a solution of stale manure diluted 6 times with water.
After two or three years of cultivation, the kiwi is placed in a permanent place.
Use of lignified cuttings for propagation
For this planting method, cuttings are taken in November-December. Earlier, for example, spring harvesting, weakens the original plant and deteriorates the quality of the harvested cuttings. The initial plants must be elite, highly productive, and healthy. In October, after the leaves fall, actinidia is pruned. Cuttings are cut from annual branches (length 15-25 cm, with 3-4 buds), tied into bunches with the tops in one direction. Please note that biennial shoots do not take root. Thick growing ones are difficult to root; they rot because they are not mature enough.
It is recommended to store harvested cuttings at a temperature of 0 to 5 ° C in damp sand (sawdust, peat) in the basement or in the refrigerator. Gardeners recommend storing cuttings prepared in the fall in snow piles. The land for planting should be loose and fertile. When planting in soil of one year of use, plant according to a pattern of 20x8 cm. When planting in soil of the second year of use - 45x10 cm. The survival rate of lignified seedlings depends on the weather. In warm weather it is higher. In April, sprouts are planted in protected soil. Plant vertically or slightly inclined at a distance of 10x10 cm. One or two buds should remain on the surface. Kolomikta should be fed with organic matter once every two weeks until the fall and covered in winter. Keep away from animals. The following year in the fall, the cuttings are planted on the site.
Actinidia shelter for the winter
Is it necessary to cover
Some types of actinidia easily tolerate frosts down to -35 degrees (according to some sources, even down to -50).
But due to the fact that the root system of actinidia is superficial (located very close to the surface of the earth), it is still necessary to mulch around the root collar. Such shelter will be quite enough for the successful overwintering of an adult plant.
However, young bushes (planted this spring or autumn) in the first couple of years after planting require mandatory shelter for the winter, otherwise in the spring you will see green leaves only at the bottom of the bush, and long vines may freeze completely...
When and how to properly cover for the winter
You need to start covering actinidia only after the vine has matured, the foliage has turned yellow and fallen, and most importantly, the weather has been consistently cool, closer to 0 degrees (similar to grapes).
In general, you can remove actinidia from the trellis in advance and lay it on the ground, and cover it a little later (depending on the weather).
The trunk circle of an adult actinidia can be preliminarily mulched with pine litter, rotted sawdust, peat, and then additionally put spruce branches on top of the bent and secured shoots (so that the snow is better retained).
Video: preparing sea anemones for shelter - laying shoots, pinning them and protecting them from cats with a net
Now let’s talk in more detail about sheltering young actinidia bushes.
So, you need to remove the vines from the trellis, lay them on the ground and pin them (secure with staples).
Next, you need to create an air-dry shelter. Namely, you will need to put up a frame, fill the inside with straw or spruce branches, and put a polypropylene bag (from sugar) on top or cover it with spunbond, in short, use a breathable covering material (in no case, not film, otherwise it will dry out).
Video: actinidia shelter for the winter
Spring return frosts
In most cases, the winter shelter is removed already in April, but often the weather presents unpleasant surprises in the form of May frosts, which can destroy the awakened buds. In this case (if there is a threat of spring return frosts), actinidia (especially Arguta) should be covered with a covering material - agrofabric (for example, spunbond or lutrasil).
Protection from animals (cats and cats)
It is rightly believed that actinidia is interesting to cats... Unfortunately, it is the young shoots and leaves that attract their attention, which they like to gnaw (sometimes even at the root). Accordingly, actinidia needs not only shelter, but also real protection
That is why some summer residents plant it in a cage (cover it with a net), namely, they surround the base of the bush with a metal mesh 1 m high and 50 cm wide, so that pets cannot get through to the main shoots
Accordingly, actinidia needs not only shelter, but also real protection. That is why some gardeners plant it in a cage (covered with a net), namely, they surround the base of the bush with a metal mesh 1 m high and 50 cm wide, so that pets cannot get through to the main shoots.
Actinidia produces the same pheromones as valerian. Accordingly, if you remove it, lay it on the ground, in short, stir up the bushes, the aroma emitted will definitely attract local cats.
The same applies to the spring sap period, so in the spring the plants must be covered with a net.
Video: cat and actinidia
Thus, now you know what to do with actinidia in the fall - how to properly trim it and cover it for the winter, so that it overwinters well and next year again pleases you with abundant foliage, luxurious flowering and a harvest of delicious berries.
Video: actinidia arguta - propagation, pruning and shelter for winter and spring during recurrent frosts
Propagation of lianas by layering
Actinidia is grown by layering. This is the easiest method for amateur gardeners, although it is not particularly productive.
When carrying out work, follow the order:
- To root actinidia in early spring, you first need to dig a shallow (7-10 cm deep) ditch at the base of the bush, fill it with humus, peat chips, and wood ash.
- One of the lower strong annual shoots should be tilted horizontally or in an arched manner, pinned to the ground with a wooden hook, the top should be brought to the surface and lightly pinched.
- Fill the ditch with a layer of loose fertile soil.
- Make sure the soil is loose and moist and do not allow it to dry out.
- As the sprout grows, the soil layer is increased to 15 cm.
- In the fall, roots and shoots will appear in the place of fixing.
- Next year they will quickly come into force, and in a year they will bloom. In the fall of next year, the cuttings can be transplanted to a permanent location.
- The sprouts should be regularly watered, weeded, and loosened.
The young vine should be separated from the original vine after 2 years.
Pruning in autumn
The peculiarity of actinidia pruning lies in the structure of the vine. The plant consists of 3 types of branches:
Growth or vegetative. Such branches do not bear fruit. Vegetative-generative. Fruits are formed only at the top and bottom of the branch. Generative. The side shoots on which the bulk of the fruit is formed.
When determining which species a shoot belongs to, you need to take into account the fact that the vine forms fruits only on the branches of the growing year.
Why trim
As soon as cold weather approaches, gardeners think about the advisability of removing branches. Due to ignorance of the intricacies of growing actinidia, many summer residents do not prune the plant, which has a very detrimental effect on the vine.
Pruning should be done in order to:
- prevent excessive crown density;
- increase resistance to diseases;
- activate the growth of new branches;
- increase the volume of the harvest and its quality;
- give the vine the desired shape.
Judging by the number of positive properties that autumn pruning of actinidia carries, manipulation is necessary for the exotic plant for further development.
When is it better to prune - in spring or autumn?
The optimal time for pruning actinidia is in early spring, when the plant has not yet woken up, and in late autumn after shedding its leaves.
You should not delay the spring trimming: if you carry out the manipulation in April, when sap flow begins, the plant will secrete sap for a long time in the cut areas. Poorly healed wounds can cause the death of the vine.
Timing for pruning in autumn
As soon as stable sub-zero temperatures are established at night and the vine has shed all its leaves, you can begin autumn pruning. Depending on the weather of the climatic zone where actinidia is grown, the branches are removed in October-November.
Important! It is impossible to prune the vine before the specified time - due to the removal of branches when the sap flow has not yet ended, the plant will bleed sap for a long time, as a result of which it will become very weak and die
How to properly prune actinidia in the fall - instructions and diagram
Due to the fact that actinidia grows shoots very quickly, in order to prevent the crown from becoming too thick, the vine needs to be pruned regularly
Proper pruning not only increases immunity to disease and improves productivity, but also makes actinidia more resistant to cold, which is very important when growing relatively heat-loving specimens
Planting garden blueberries in spring and autumn
How to plant blackberries in spring: tips and tricks
Blackberry care in spring
Planting garden blueberries in spring
The sequence of autumn pruning of actinidia is as follows:
Remove dried, diseased, mechanically damaged or too sagging branches until the second living bud. One or two fruit-bearing branches for 3 years are replaced by young ones. The age of a branch is determined by the color of the bark and its thickness. Growth branches are shortened, leaving a shoot at the base at least 50 cm long. Mixed shoots are shortened to a length of 30-40 cm. Old, poorly fruiting branches are cut off into a ring. Pruning in subsequent years comes down to thinning the crown and cutting off dried branches.
As a result of carefully following the instructions for autumn pruning of actinidia, which even beginners in gardening can handle, you can achieve abundant fruiting and maximum decorativeness.
Video: pruning actinidia in the fall for beginners.
Care after pruning
After finishing work in the area where actinidia grows, they rake up fallen leaves and cut off shoots, put them in heaps, and then take them out of the area and burn them.
After pruning, fertilizing is not applied to the vine. After all unnecessary branches are removed and productive ones are shortened, actinidia begins to be prepared for shelter.