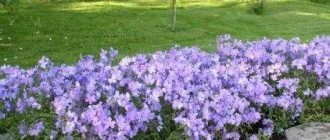
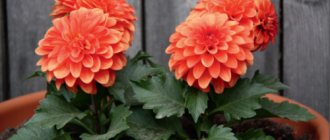
Description of Phlox Drummond
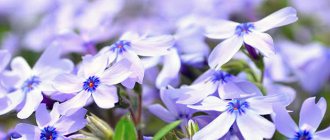
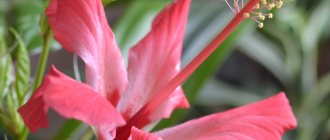
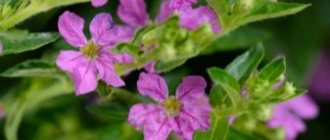
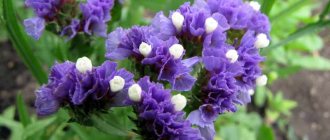
The only representative of annual phloxes pleases owners with different colors. Among the most popular are plants with peach, coffee, chocolate, and plum petals. There are also brighter ones - lilac, pink.
The shape of the petals also varies. The attention of gardeners is attracted by terry, star-shaped or trapezoidal inflorescences.
The disadvantage of the Drummond species, which gardeners note, is its poor flowering when planted in the shade or in a damp place with infertile soil. In addition to weak flowering, Drummond phlox in such conditions is often affected by root rot. An overdose of nitrogen fertilizers, such as fresh manure, also negatively affects the flowering of phlox. In this case, branching is activated, but inflorescences are almost not formed.
Extreme heat and moisture deficiency are additional reasons for the insufficient flowering of Drummond varieties. Among the advantages is good resistance to diseases, spotting, verticillium wilt, and pests - nematodes. The variety also tolerates frost, the green part quickly recovers when the temperature rises.
Currently, more than 20 species of Drummond phlox are known. Most have a height of no more than 50 cm and a flower diameter of about 2 cm. They are collected in inflorescences, so they look large and bright in appearance. Phlox blooms until late autumn, starting in May, which is the main reason for its popularity. The plant has the following characteristics:
- Erect branched stems with small hairs.
- Branched superficial root.
- Leaflets with sharp ends are oval in shape.
- The flowers are small in size, but bright in color. The diameter of each does not exceed 4 cm. One flower can have a monochrome color or combine several shades.
- Phlox fruits resemble a small oval box.
Naturally, leaf sizes, petal shades, flowering times and duration differ depending on the varietal characteristics. All varieties of annual phlox Drummond are usually grown from seed to seedlings.
Varieties
The difference in characteristics allows gardeners to choose the most suitable Drummond varieties for planting in their compositions. The most popular are:
- Star Rain.
Drummond variety, which forms a tall bush for an annual. The height of phlox Star Rain reaches 50 cm. It blooms for a long time, the flowers resemble stars, which was the reason for the beautiful name. It is drought-resistant, loves the sun, and almost completely stops flowering in the shade.
- Constellation.
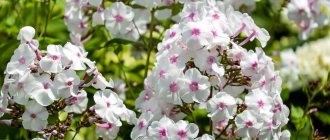
Phlox of this variety forms a fairly lush bush with large flowers up to 3 cm in diameter. It is distinguished by its bright colors and fragrant aroma. Color shades range from white to deep red. Phlox Constellation is suitable not only for making flower arrangements on the site, but also for cutting into bouquets.
- Twinkling star.
This variety of Drummond phlox is classified as low-growing. The height of the Twinkling Star does not exceed 25 cm. One of the varieties called “star-shaped”. The flower consists of tricolor petals divided into pointed lobes. The average diameter of the flowers is 2-3 cm, but when massed they have an attractive, catchy appearance. Flowering period June-September. Feels equally good in open ground and in flower pots on the windowsill.
- Caramel.
Caramel is another type of Drummond phlox. Characteristic features are a highly branched bush 60 cm high and caramel-colored flowers. Petals with rounded edges, the middle of the flower is cherry-colored, the edges are golden.
- Chanel.
Chanel - a species with low bushes. The height of this variety of Drummond phlox is no more than 30 cm. The plant is densely strewn with medium-sized flowers (3 cm) with multi-layered petals. The color of the flowers is almost monochrome in pink and does not fade in the sun. Blooms from June to late September.
Features of growing Phlox Drummond
Annual phlox Drummond is grown only from seeds. The duration and abundance of flowering of the Drummond variety depends on the planting site and method of cultivation. Therefore, it is recommended to grow the plant in seedlings and plant it in an open area with good lighting. Drummond's annual plant tolerates drought well, but does not do well in the shade. To grow a beautiful flower on your site, you need to fulfill the requirements of agricultural technology:
- provide good lighting;
- avoid lowlands and dark places;
- Do not plant the plant on heavy or too light sandy soil.
Before planting, you will need to take measures to structure the soil.
If you sow Drummond seeds directly into the ground, this will delay the onset of the flowering phase due to the long germination period. In this case, phloxes begin to bloom at the end of summer. The only way to speed up the start of flowering for gardeners who do not want to bother with seedlings is to sow the seeds in the ground in the fall.
When to sow Phlox Drummond for seedlings
The optimal time for sowing Drummond phlox for seedlings is March or April. To determine a more accurate date, it is best to use the recommendations of the lunar calendar. It takes into account the phases of the moon, which greatly influences the growth and development of plants.
The second factor is the end of frost in the region. Drummond seedlings begin to bloom 50-60 days after sowing. Therefore, by the time of transplantation into the ground, a stable warm temperature should be established, and not only buds, but also the first flowers will form on the seedlings.
Recommendations for sowing seeds in open ground
Bonsai maple - growing from seeds at home
Seeds do not need to be germinated indoors. You can immediately sow them in open ground. Many gardeners who have no time to tinker with flower seedlings do just this: after the warm days of May arrive, they drop phlox drummond seeds into the beds, having previously moistened the planting site. Experienced gardeners believe that seeds should be placed in the ground, leaving a distance of 10-15 cm between them. With denser sowing, only the strongest seeds will germinate.
Important! The top of the bed is covered with non-woven (geotextile) fabric.
Rules for autumn sowing and subsequent care
Many gardeners sow seeds in open ground before winter. Having chosen one of the sunny autumn days, the capsule fruits are collected from the withered stems of the best plants. The seeds are laid out in pre-prepared grooves in early November (in the southern regions in December), after the first frost freezes the upper layers of the soil.
The future flower bed is sprinkled with dry soil and lightly trampled down. First, caring for phlox drummond sprouts consists of loosening the soil and feeding the plants. The first time the soil is loosened after all the seeds have hatched. Weak and underdeveloped shoots are removed.
Of all the sprouts, only strong ones should be left
Sprouted seedlings must be fertilized with nitrogen-containing fertilizer. Fertilizers are first applied to the soil immediately after the first shoots appear. The second time phloxes are fertilized 9-10 days after the first feeding. The next portion of fertilizer is applied during the formation of buds.
Sowing Phlox Drummond for seedlings
Sowing of seedlings is carried out at home, usually in March. Before starting the procedure, be sure to prepare the necessary equipment and materials - soil, containers for seedlings, and carry out pre-sowing treatment of seeds.
Preparing the container and soil
For sowing, you can use soil purchased at a specialized store or prepared yourself. If you decide to buy a package with the mixture, then you should choose the composition for seedlings. If you cook it yourself, you will need to mix peat, turf soil and sand in the ratio (2:2:1). Peat can be replaced with humus in the same quantity. A week before sowing, treat the soil with a solution of potassium permanganate. Add 0.3 kg of wood ash to 10 liters of the finished mixture.
It is convenient to sow annual Drummond phlox using planting boxes, which are thoroughly washed with a disinfectant solution and dried. If you don’t have boxes at hand, you can take flower or peat pots. It is important that the containers are high, because the root system of Drummond phlox seedlings develops very actively.
Seed preparation
The only preparatory step for phlox seeds is soaking. However, you need to be extremely careful with sprouted seeds so as not to damage the sprouts when planting.
Planting Phlox Drummond for seedlings
Place the soil mixture for phlox seedlings into the prepared boxes, leaving 2-3 cm to the top edge. Then you can start sowing.
Moisten the soil surface with a spray bottle. It is advisable to add a little plant growth stimulator to the water. This is an optional requirement, but it won't hurt to do it.
Place phlox seeds on the ground either randomly or in rows, as convenient. It is impossible to bury it, otherwise the period of uneven germination will increase significantly.
Sprinkle a 1 cm thick layer of the same substrate on top.
Moisten the crops with a spray bottle.
Cover the box with a dark film, which will have to be removed daily, ventilate the crops and check the degree of drying of the soil. If necessary, moisten the soil and remove condensation from the film.
As soon as the cotyledon leaves appear above the surface, remove the film and place the box in a sunny place.
The next steps for gardeners are to provide high-quality care for Drummond phlox seedlings.
Seedling care
The temperature must be maintained within + 18-21 °C. Seedlings also require good lighting.
The main attention should be paid to watering. It is performed as needed. You should not let the soil dry out, but overmoistening is also very harmful for seedlings.
Once a month, phlox seedlings of the Drummond species are fed with solutions of mineral complexes. It is important to read the instructions for diluting fertilizers and remember that half the dose is taken for seedlings. You can alternate with organic matter - infusion of ash or liquid organic fertilizer.
In the phase of 2-3 true leaves, the sprouts need to be planted in separate containers. For large seedlings you can use 1 container per 2 plants, for small ones 1 per 3.
Water the phloxes first so as not to injure the roots. For the first 3 days, shade the phlox seedlings from direct sunlight. As soon as the phlox seedlings take root, feed them with nitrogen fertilizer.
After growing 6 leaves, be sure to pinch the top of the Drummond phlox to stimulate branching.
Hardening of seedlings should begin a month before the planned date of planting in open ground.
Annual phlox flowers: planting and care
In order for phlox to delight with bright and long-lasting flowering, it is necessary to ensure proper planting and care of the plants. There shouldn't be any difficulties with this. The rules are simple and understandable to every gardener, and the result of following them will exceed all expectations.
Selection and preparation of planting sites
For Drummond phlox, it is important to choose the right place on the site. This will ensure active growth and abundant flowering.
It must be remembered that the plant perfectly tolerates high temperatures, ultraviolet radiation and temporary lack of moisture, so a sunny space open to the rays is suitable for it.
Phlox Drummond also responds well to low temperatures. The first autumn frosts damage only the flower petals, while the stems and foliage remain intact. Therefore, the flowering of this plant continues until the onset of constant sub-zero temperatures at night. Usually this is mid to late September.
When choosing a place for planting, it is very important to pay attention to two factors that can not only harm flowering, but also lead to the death of Drummond phlox:
- Too heavy or, on the contrary, light soil (loamy, sandy loam and sandy). In the first case, the dense structure of the soil leads to the accumulation of water in it. As a result, phlox roots are damaged by various types of rot. This can cause the death of the flower. In the second case, the soil, due to its structure, is not able to retain moisture in the required amount, and during the hot summer the plant feels uncomfortable, although it is quite resistant to drought. Therefore, before planting Drummond phlox, you can adjust the soil composition if necessary. Also, the plant will “thank you” for adding humus or humus.
- When planting phlox, you should avoid shady places with high humidity. Otherwise, flowering may not occur at all.
It is better to choose a sunny and open location with fertile soil. Before planting, the soil must be dug up, removing the roots of the weeds. It is recommended to apply organic and mineral fertilizers intended for flowering plants. This will have a positive effect on the appearance of Drummond phlox, the quality and duration of its flowering.
Growing Phlox Drummond from Seeds
Annual Drummond phlox is grown from seeds. It is important that the planting material is healthy: not dry, without signs of rot or other diseases.
Usually the seeds are planted in the spring . The optimal time is the last ten days of April or the beginning of May. To do this, it is necessary to prepare shallow (2–3 cm) furrows, water them, and apply organic or complex mineral fertilizers if desired. The seeds are scattered evenly in them or planted in “nests” of 4 at a distance of 10–15 cm from each other. When the seedlings have several leaves, the small phloxes will need to be threaded. To retain the required amount of moisture in the grooves, it is recommended to protect them with covering material.
Some gardeners practice sowing before winter. This is possible due to the excellent frost resistance of Drummond phlox. The only danger is the possible onset of above-zero temperatures in the depths of winter. If they persist for several days, the plants may begin to grow, and in this case die after the return of frost. To prevent this from happening, in warm weather the soil is covered with dense material: this will reduce the risk of the soil thawing under the influence of temperature and sunlight.
This method is usually used in areas with mild winters. After establishing a stable snow cover on the soil, rows are made by pressing, seeds are planted there (preferably 4 seeds in one nest) and sprinkled with black soil, which must be stored in advance. After this, a layer of snow is thrown over the planting site. Its thickness should be about 20 cm. In April, with the arrival of warmth, the phlox will begin to grow.
How to pick phloxes (video)
How and when to plant seedlings
In order for Drummond's phlox to please you with early flowering already in May, you need to take care of the seedlings in early spring, which is quite easy to do at home:
- In March, you should prepare containers with nutritious soil, plant seeds in them in rows and sprinkle with soil without pressing. Cover with polyethylene, creating the effect of a greenhouse, which must be ventilated daily. When the soil dries, it can be sprayed with a spray bottle.
- When the first shoots appear (and this usually happens after a week), the film is removed and the container is placed in a well-lit place. In the future, it is necessary to ensure that the soil is sufficiently moist.
- After forming two full leaves, you need to make a pick and plant the phloxes in separate pots. In April, they are taken outside during the daytime so that they adapt to the conditions.
- In May, you can plant seedlings in the ground when the frosts have stopped.
Usually, when planting Drummond phlox on a plot, you can already notice the formed buds. They will bloom very soon.
Watering and fertilizing
Excessive amounts of moisture and its lack will negatively affect the flowering of phlox. Therefore, watering should be moderate. It is necessary to water when the top layer of soil has dried out. Sometimes in hot weather the inflorescences can dry out - then they need to be carefully cut off. This will give impetus to the formation of new buds.
Phlox Drummond responds well to the application of nitrogenous fertilizers. also likes complex mineral fertilizers and organic fertilizers. It is recommended to use these fertilizers at 2-3 week intervals from the moment the plant is planted in open ground. This contributes to the appearance of bright and lush inflorescences. Fertilizing should be done at the root level so that substances do not get on the leaves and petals. Phlox Drummond also loves gentle loosening of the soil.
Protection from pests and diseases
Like other garden plants, Drummond phlox can be affected by fungal, viral and bacterial diseases. In addition, they are often chosen as victims by pests: spider mites, aphids and others. To reduce the risk of all these problems, it is first necessary to follow the rules for growing, especially avoiding waterlogging of the soil.
For prevention, phloxes are sprayed with Bordeaux mixture or Epin. The latter increases the immunity of vegetation. Soil treatment with ash has also proven itself well.
It is important to inspect phlox regularly. If signs of disease or pest damage appear, measures should be taken using folk remedies or special chemicals.
Planting seedlings in open ground
The best time to plant annual phlox seedlings in open ground is May, when the threat of frost has passed. By this time, the varieties are already forming buds. Plants with buds planted during this period begin to bloom in June and delight the owners.
Preparing the landing site
For annual phlox Drummond, you need to choose a site with well-drained soil and a neutral or slightly acidic reaction. Fertile sand without clay admixture is very suitable. For deoxidation, lime must be added. Dilute heavy loam with peat, organic matter or sand. Clear the area of weeds, loosen it and begin planting seedlings.
Preparing seedlings
Seedlings must be hardened off before the day of planting, gradually increasing the time the seedlings spend in the open air. Before planting, water the phlox to make it easier to move the plant.
Landing rules
Leave a distance of at least 20 cm between the bushes. This is the average value. The parameter depends on the Drummond phlox variety, or rather, on the height of the adult bush. Add a little humus, ash and sand to the bottom of the hole.
Seedling method
When grown as seedlings in March, phlox blooms earlier. Pre-sterilized soil is poured into the boxes.
They purchase a ready-made substrate for flowering plants or prepare it from fertile soil or humus and sand with peat chips.
Furrows are made with a distance of 7 cm. Seeds are placed one at a time in a row 5 cm apart in moistened soil, sprinkled with a small layer, covered with glass or film. Place in a warm and bright room. The earth is moistened. Shoots appear after 8-10 days and the film is removed.
When two true leaves are formed, they are planted, and after a week they are fed with nitrogen. Water with warm water when the soil dries. With the formation of the fifth leaf, pinch it off.
In April, seedlings are hardened off by taking them outside to the balcony for a period of 15 minutes, a month later - for the whole day.
May is the time for planting in open ground. Choose a site where there is no sunlight at noon. Make holes according to the size of the seedling's earthen ball. Water it with water, lower the plant, add soil and compact it. Then water it.
Plant care
Phlox is one of the plants that does not require special care.
The gardener needs:
- 3 weeks after planting, feed the plants with nitrogen fertilizer.
- Water the bushes regularly, spending per 1 square meter. m 10-15 liters of water. Watering with root water, warm water, in the morning or evening.
- Combine fertilizing with watering. During the season you will need 3 feedings. May – organic with minerals. June - more potassium and nitrogen (ash, urea). July or August - superphosphate.
- Loosen, remove faded inflorescences and weeds, which increases the duration of flowering of annual phloxes.
- Pinching the tops increases the branching of the bushes.
Many people earth up phlox to avoid drying out of the root system during the hot season.
Growing using seedlings
In order for Drummond phlox to bloom earlier, you can use the seedling method. The first flowers of plants that were grown through seedlings may appear as early as early May.
At the very beginning of March, phlox seeds are planted in special containers for growing seedlings.
For faster germination, the layer of soil with which the seeds are sprinkled must be thin.
Film is stretched over the boxes with plantings. Every day it is removed for ventilation. The very first shoots appear within a week.
Containers with seedlings are placed on a sunny windowsill. Young seedlings are sprayed from time to time with a spray bottle.
Phlox Drummond seedlings
Plants are picked into separate cups when the first pair of leaves appears on them. The first fertilizing with nitrogen fertilizers is carried out after picking and adaptation of flowers.
Video about picking phlox seedlings
Phloxes are watered only when the top layer of soil is dry.
There should be little water. All this is done in order to prevent seedlings from becoming infected with blackleg and various root rots. Pinch phloxes when 5-6 leaves appear. Pinching helps to achieve good bushiness of plants.
With the onset of warm sunny days in mid-April, seedlings begin to harden . It is taken out to the balcony or outside, increasing the time spent in the open air every day.
During hardening, seedlings must be protected from drafts and direct sunlight.
And in early May, the seedlings are transplanted to a permanent place in the garden. The first flowers will appear very soon, and in some low-growing varieties, buds are already formed by the time of transplantation.
Phloxes are planted in the garden in early May.
In order for annual phlox to bloom continuously, it is necessary to provide them with good care. During flowering, it is necessary to promptly remove dried and faded buds. Fertilizers must also be applied on time.
You can also use your own seeds to grow Drummond phlox . In the fall, plants that have bloomed are removed from the garden along with their roots. Phloxes are placed in a room where the temperature is maintained at 23-24 degrees. After 3 weeks, the bushes, which were laid out on paper, dry out. Dried inflorescences must be rubbed with your hands so that the seeds fall out. They are stored in a fabric bag or paper. The storage area must be dry.
Reproduction
Phlox of the Drummond species is propagated by seeds.
Many gardeners prepare their own material for sowing. As soon as the bush has completely faded, the seeds need to be collected and dried. Be sure to place the seeds in a box or fabric bag. They tend to “shoot”, so you can lose a significant part of the collected seeds. Before collecting, you should note the plants that bloom most luxuriantly or that you like in shade. If seeds of hybrids marked F1 were planted, then you should not collect seeds from these phlox bushes - they will not convey varietal characteristics.
In order not to monitor the ripening of seeds, gardeners cut the bushes after the flower petals have shed and send them to ripen without access to sunlight. Seeds are stored in paper bags with a mandatory marking of the variety.
How to get your own seeds?
If you have mastered the rules of planting and caring for plants purchased in stores, you can stock up on your own seeds in the fall.
What plants are suitable for propagation?
The first step is to notice each variety in some way during flowering. You can stick self-adhesive price tags, which are sold in rolls, on the stem, writing the variety number on each (and in a separate notebook indicating which variety goes under which number). Some gardeners knit ribbons or threads of different colors on the stems.
It’s good if, when planting store-bought seeds, you pay attention to the packaging information. Plants marked F1 are not suitable for future seed collection, as they are hybrids. They will never produce flowers similar to the variety from which you collected them. But as an experiment, you can plant the seeds collected from the hybrids somewhere in an inconspicuous place on the site. It happens that flowers grow with an unusual color or shape of petals, which do not retain the characteristics of the variety, but are quite spectacular in themselves.
It is almost impossible to obtain high-quality seed material at home from F1 hybrids or tetraploid varieties, since the seeds do not retain the characteristics of the “parent”
Plant bags without the F1 mark separately so that you can then collect seeds from these plants. During flowering, sweep up the most lush and well-blooming phloxes. They will make good seed material.
Rules for drying seeds
The seeds of the plant ripen almost all at the same time, so after the petals fall off, you can cut the plant at the root and lay it for ripening in a warm room (23-25 degrees) without direct sunlight.
It is better to choose a dry sunny day to collect seeds. Cutting is done after lunch so that the morning dew on the petals is completely dry.
The prepared flowers are laid out on sheets of newspaper, each variety separately, and left to dry. As a rule, the green mass dries completely in 3 weeks. To ensure even drying, you need to stir the flowers periodically. A signal that the phlox is completely dry is a dry stem that breaks easily in your hands.
Then do this:
- Dried inflorescences are carefully rubbed in your hands over a clean newspaper so that the seed pods fall out. The seeds of an annual plant are noticeable, so you will see whether they have all fallen out or not. You can immerse the plants in a linen bag and trample them with your feet.
- All large debris is removed by hand. There should be a dry mass of leaves, seeds and dust mixed on the newspaper.
- To separate seeds from this mass, sieves with cells of different fractions are used. First - with large ones to sift out large debris, and then - with small ones to remove dust. As a result, seed material mixed with garbage of the same fraction will remain on the table.
- You can remove unnecessary things by winnowing the seeds. To do this, on a windy day, spread a wide sheet on the grass and slowly pour seeds onto it from a bowl. Keep the container about a meter off the ground. The seeds fall on the sheet, and light debris will be carried away by the wind. This procedure can be done at home using a hair dryer.
After all the steps described above, the cleaned seeds are scattered into paper or fabric bags, labeling which variety is which, and hidden in a dry, dark place for storage.
Diseases and pests
Seeds purchased in specialized stores are already treated against fungal infections. But this does not prevent gardeners from soaking the seed in a solution of potassium permanganate for 30 minutes.
This method does not protect against pest attacks; they are in the ground. Threadworms, caterpillars, and slugs are dangerous for Drummond phlox. To combat it, wood ash, tobacco chips, lime and chemicals are used. It is best to treat the bed before planting seedlings with special preparations according to the instructions.