Potato tubers need preplant preparation no less than, for example, tomato and cucumber seeds. If you just plant potatoes, they will, of course, sprout, but it will not be easy for them to withstand various unfavorable factors. And by preparing the tubers according to all the rules, you will save time on subsequent medicinal treatments of plants, guarantee a harvest and improve its quality.
Even a novice summer resident can carry out all the procedures. But if you wish, you can choose only some of them that seem most suitable and convenient. And you should start preparing tubers for planting with landscaping.
Why prepare tubers for planting?
- The preparatory stage launches biological processes in the tubers, due to which sprouts form on the seed material and the root system emerges. The shoots from such planting material will be friendly, even, strong and early.
- Also, during the preparation period, the gardener will have the opportunity to identify and reject tubers with putrefactive phenomena, with thin sprouts that will not produce good shoots.
The prepared seed material will ensure 100% germination, because Even in a seemingly good tuber, the eyes may not wake up due to violation of storage conditions or some disease. This will save the gardener from the appearance of bald spots on the potato plot.
Tuber selection
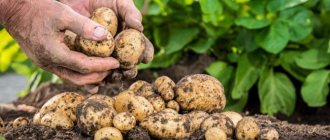
Experienced vegetable growers select tubers during harvest or in early spring. To do this, the root system must contain a large number of tubers, and the bush itself must be healthy.
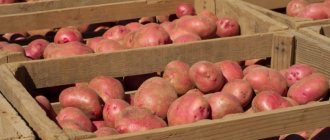
When preparing potatoes, it is necessary to remember that tubers of different size and quality can produce rare shoots and different bush productivity. After the initial selection of root crops, they must be calibrated into fractions.
It is advisable to place large tubers weighing more than 80 g in the first fraction. The second fraction is formed from medium-sized plants weighing from 50 to 80 g. As a result, planting material weighing 30–50 g will remain.
Important! Tubers selected according to their shape should not be mixed, as the tops will grow unevenly. Planting unsorted tubers complicates further plant care, since seedlings will begin to appear unevenly.
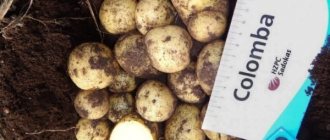
Small potatoes can only be used when they are collected from productive and healthy bushes. In order for the eyes to develop, immediately after sorting and calibrating, the tubers should be placed for 1–1.5 months to warm up and germinate.
Main stages of preparation
Anyone who believes that pre-planting preparation of tubers is carried out only in the spring, immediately before planting in open ground, is largely mistaken. Experienced gardeners begin this preparation even before storing tubers for winter storage.
Pre-planting preparation includes several important steps:
- landscaping;
- calibration;
- germination;
- disinfection;
- growth stimulation.
It cannot be said that all of them are strictly necessary, but each of them is capable of giving a yield increase of 5-15%. Each gardener already has his own proven method of preparing potatoes for planting, and most often this is germination. In addition, the tubers can be dried and heated. But first things first.
Options for germination of seed material.
- Dry germination in the light.
- Wet germination in the dark.
- Combined germination.
Dry germination in the light
To germinate tubers in the light, it is necessary to provide the seed material with 2 important conditions: the presence of diffused light and compliance with the temperature regime. The role of light plays a very important role.
- Under its influence, strong sprouts are formed with signs of the formation of roots and leaves.
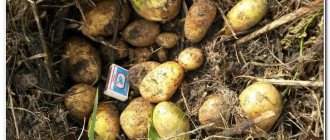
- In the light, solanine is formed in the tubers, as a result of which they turn green. This is poison and such root vegetables cannot be eaten as food, but for planting material it is very useful. Firstly, the tubers are not damaged by rodents (we also read about the dangers of solanine), and secondly, greened potatoes become resistant to diseases.
Planting material is laid out in 1-2 layers on a flat surface, it can be a window sill, a table or just the floor. If there is not enough space, you can arrange the tubers in wooden and plastic lattice boxes and place them one on top of the other. With this option, the boxes will have to be constantly swapped to ensure uniform lighting.
In the first 10-14 days, planting material is kept at a temperature of 18-20⁰C, this will help awaken the sleeping eyes. Then the temperature is reduced to 10-14⁰С - this way the sprouts will be stocky, strong and will give even and strong shoots in the future.
The average duration of the germination period of tubers in the light is 30 days.
Wet germination in the dark
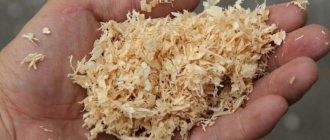
The tubers, as in the previous case, are placed in baskets or boxes and sprinkled with wet humus, peat, and sawdust. The container is placed in a dark room with a temperature of 12-15⁰C. This option involves constant control over the moisture level of the substrate and its timely moistening.
The advantages of wet germination are as follows:
- The tuber not only forms strong shoots, but also develops a root system.
- Planting material loses less moisture and, consequently, nutrients.
- The germination period is reduced to 15-20 days.
The disadvantage of this method can be considered such a factor as the impossibility of planting sprouted tubers on time (the weather has sharply worsened or heavy rains have occurred). This can lead to intertwining of the root system and upper shoots. It is necessary to immediately reduce the temperature in order to slow down the development and growth of shoots.
Combined germination
Often, gardeners combine the two methods described above in order to get the maximum benefit for germinating seed potatoes.
For the first three weeks of pre-planting treatment, the tubers are kept in the light, observing all the necessary conditions. Then the tubers are placed in a suitable container and sprinkled with wet sawdust (humus, peat) and removed until roots form at the base of the sprouts.
Drying
It will take 1-2 weeks to wilt seed potatoes and this method is used when, for some reason, it was not possible to remove the tubers from the cellar in time. Planting material is laid out in one layer in a warm room with a temperature of 16⁰C and above.
The presence of light is not a prerequisite, but its exposure has a beneficial effect on the health of the seed material and increases resistance to diseases.
When warm, tubers lose some of their moisture (as they say, they wither), but at the same time, enzymes are formed that accelerate the awakening of eyes and the appearance of sprouts.
Warming up
In a situation where there is very little time left before planting, and the seed potatoes have just been taken out of a vegetable pit or cellar, they resort to the heating method. If you plant cold tubers in the ground, you will have to wait quite a long time for germination.
To help the tubers awaken the dormant germs of the sprouts, it is placed in heat, but this is done gradually. First, they keep it at a temperature of 10-15⁰C for 1-2 days, and only then increase the readings to 20-25⁰C.
Dividing tubers into shares
To save planting material, as well as when introducing a new variety, experts recommend cutting the tubers into segments. This preparation of potato seeds for planting (cutting) requires compliance with several general rules:
— Only sprouted tubers are cut. The material for planting is kept for about three days (until a protective crust forms). — The weight of each slice must be at least 25 grams. — There should be more than two sprouts on the surface of the lobe skin. — Store cut tubers in a heated room at an air temperature of 18 to 25 degrees and humidity of 94% to 96%. — The potatoes must receive enough light. — Cutting is carried out with stainless steel knives. After each cut, the blade is disinfected in a 0.1% manganese solution or 0.5% salicylic acid solution.
At what temperature can I plant?
The soil
For successful rooting of potato tubers, two soil indicators are important: its temperature and humidity.
Experienced gardeners and professional farmers recommend planting potatoes when the soil temperature is +7-8 degrees at a depth of 10-12 cm.
This temperature is possible if the thermometer outside does not fall below +8 degrees. The recommendation to choose this particular temperature is justified by the fact that it is under such thermal conditions that potatoes begin to grow roots. That is, in this case, we can be sure that when we throw the tubers into the ground, they will take root. If the soil temperature is lower, the tubers will not be able to take root and will simply rot. However, there is an option to grow potatoes at lower soil temperatures: +3-7 degrees. But in this case, it is necessary to place already germinated seed in the ground. However, you should be sure that there will be no sub-zero temperature outside. Therefore, plant potatoes only when the night frosts have already passed and the heat remains stable.
Humidity
As mentioned above, soil moisture is the second most important indicator for successful potato germination.
It is important to place the tubers in soil that is not too wet, otherwise they can become infected with various unpleasant diseases leading to rot and complete loss of the crop. So, if the soil humidity is above 75%, you cannot plant potatoes.
Soil composition
For potatoes, the mechanical composition of the soil is also important. The lighter the soil, the faster it warms up in the sun, dries, and the faster potatoes can be planted in it.
And, conversely, heavy, clayey soils take a long time to dry out from rains, since they are too dense and maintain low temperatures for a long time: therefore, in this case, you will have to wait a while with planting root crops. If the soil is too light and loose, then you cannot delay planting. Since such soil quickly becomes dry, it is important that the tubers have enough moisture for growth and development. Most likely, in this case, additional watering will be required, since rainwater will quickly be absorbed into the ground. All garden soils are divided according to their mechanical composition into:
- Light – sandy and sandy loam;
- Medium – light and medium loam;
- Heavy – heavy loam and clay.
The lighter the mechanical composition, the faster the soil warms up in the spring, and the earlier potatoes can be planted in it. And the faster it dries, so you don’t have to worry about increased soil moisture, even after long heavy rains. In a couple of days everything may dry out. It is for this reason that you should not delay planting potatoes on light soils. After all, in soil that is too dry, potato tubers will not be able to develop well. They may require additional watering. Accordingly, on the contrary, the heavier the mechanical composition of the soil, the slower its warming up in the spring and the more moisture it contains. For this reason alone, the timing of planting potatoes in the same region may differ by one or even two weeks.
Potato planting dates in 2021
Unlike many others, potatoes are what is called an early planting crop. This means that it needs to be planted while moisture remains in the soil after the snow melts, i.e. early. It is especially important to take advantage of natural moisture in non-irrigated areas.
Planting is considered early in the spring, at the beginning of May: by this time the ground is already sufficiently warmed up, the sprouts on the seed should be ready, and dangerous frosts that can damage the seedlings are not expected. As a rule, when planting in early May (usually on May holidays, taking advantage of weekends), seedlings can be seen already on May 20-25.
Of course, these are general recommendations that should be adjusted depending on climatic conditions: in the southern regions, potato planting often begins at the end of April, in colder regions - at the end of May.
Table for planting seed potatoes in the ground for 2021
| Month | Favorable days | Unfavorable days | Neutral days |
| April | 1, 2, 7, 8, 10, 14, 23, 24, 28 | 3, 4, 9, 15, 16, 17, 20, 21, 22, 29, 30 | 5, 6, 11, 12, 13, 18, 19, 25, 26, 27 |
| May | 2, 3, 5, 6, 7, 11, 12, 15, 16, 25, 26 | 8, 14, 29 | 1, 4, 9, 10, 13, 17, 18, 19, 20, 21, 22, 23, 24, 27, 28, 30, 31 |
| June | 1, 2, 3, 4, 5, 8, 12, 18, 22, 25, 30 | 21, 29 | 6, 7, 9, 10, 11, 13, 14, 15, 16, 17, 19, 20, 24, 28 |
If you do not need to harvest an early harvest, but, on the contrary, want to harvest a late harvest, then start planting potatoes in mid-June. But in this case, you will have to monitor the tricks of the Colorado potato beetle even more carefully. Indeed, during this period, the activity of the Colorado potato beetle and the damage it causes to plants have the most detrimental effect on the quantity and quality of the future harvest. Therefore, before starting late planting, you should cultivate the soil and also remove all weeds; be sure to loosen the soil, this will allow the upper layers to be saturated with oxygen.
Treatment against pests and diseases
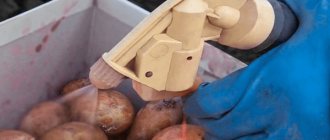
Despite the fact that this crop cannot be called demanding in care and capricious, problems may still arise during cultivation - tubers in the ground are an excellent treat for various insect pests. It is also possible to contract diseases. Therefore, it is recommended to treat potato tubers against diseases and pests immediately before planting . Such preparation in the spring at home will help to avoid many problems in the future.
Note! The treatment must be carried out depending on the rules in the instructions - you can soak it, or you can spray it.
Depending on the purpose, you can treat the planting material as follows:
- To protect against pests (especially against the Colorado potato beetle and wireworm), it is recommended to treat the tubers in a solution of a chemical insecticide, for example, Imidor Pro, Matador, Tabu, Force, Prestige.
- To prevent and protect against fungal diseases (scab, rhizoctonia), you can treat the tubers in a solution of fungicides, for example, Fitosporin, Bordeaux mixture, Thiram, Pencikuron, Fludioxonil, Maxim.
Important! When using any medications, you must carefully follow the instructions for use. Act carefully, observing safety precautions.
- As protection against late blight, you can treat the tubers with a solution of drugs - Epin, Fitosporin-M, Bioglobin, Poteytin. The drugs strengthen the immune system, making them more resistant to the disease.
- Before planting, you can soak the potatoes in a combined preparation that acts as a fungicide and insecticide, for example, Copper sulfate, Prestige, Clubbershield.
Important! After treating potato tubers by soaking, do not rush to plant them in open ground. You must first dry them, and then proceed to the event.
Methods for planting potatoes
The culmination of the entire process is the actual planting of potatoes in the ground. And here there are many (up to 2 dozen) methods, to varying degrees popular and widespread. Each method has its own advantages and disadvantages, so, as a rule, the most convenient one is chosen. We bring to your attention methods for planting potatoes that are applicable in a relatively small summer cottage or garden plot and do not require professional equipment, except for a walk-behind tractor.
How to treat potatoes before planting
Dressing of planting material is carried out using chemicals, folk remedies, and growth stimulants. To avoid negative consequences, do not neglect the instructions for the drug; you should also prepare solutions according to the indicated dosage and carry out the procedure 2-3 days before directly planting seed potatoes in the ground.
Chemicals
Among the drugs with high effectiveness against fungal and bacterial diseases are:
- Fitosporin. The biological product is based on the cells and spores of the bacterial culture Bacillus subtilis. The proteins produced by it have a strong fungicidal and antimicrobial effect. The advantage of the product is the possibility of its use at all stages of vegetable crop development: from seed treatment to flowering bushes. In order not only to disinfect root crops, but also to accelerate their growth, you need to add Gumi to this preparation.
- There is another variety on the market - Fitosporin M , which is effective both as a preventive and therapeutic agent, allowing you to quickly restore damaged bushes. Available in powder, paste and liquid form. A working solution based on it is able to resist diseases such as various types of rot, cancer, late blight, powdery mildew, and fusarium. The main thing is to avoid exposing the diluted liquid to direct sunlight. Treatments are carried out before germination or before planting in the morning or evening, preferably in cloudy weather. The preparation for processing potatoes does not contain toxic substances.
- Prestige. The biostimulating agent contains two active components: the insecticide imidacloprid and the fungicide pencicuron. The first promotes the effective destruction of parasitic individuals (thrips, beetles, lepidoptera, homoptera), and the second prevents the occurrence of fungal diseases (scab, rhizoctania). Treated seed potatoes exhibit greater resistance to irrigation errors and changes in temperature conditions. The duration of action of the drug Prestige is 40-60 days, which is convenient for varieties with early ripening.
- Maksim . This product has proven itself exclusively on the positive side; its operating principle is based on the use of a natural antibiotic-like substance - fludioxonil. The drug provides protection for potato plantings from various types of rot, blackleg, and scab. The solution is prepared at the rate of 4 ml of product per 50-100 ml of water. This amount is enough for 10 kg of root vegetables. Validity period 80-85 days. Treatment with Maxim will also be effective before storing potatoes.
- Matador. This insecticidal agent poses a threat to all harmful insects that attack plantings, in particular from the Colorado potato beetle, wireworm, their larvae, cutworms, and small aphids. The working fluid is prepared from 1 liter of the drug and 5 liters of water. Early potato varieties should not be treated with it.
- Copper sulfate, used to treat potatoes before planting, helps protect them from fungal infections and late blight. The manipulation is carried out 2-3 days before planting the seeds in the ground. This technique has a beneficial effect on plants, improves their immunity, activates all growth processes and helps increase the productivity of the planted variety. A suitable container for preparing the working solution is a wooden or glass container; an iron container will not work. Copper sulfate dissolved in water should be used within 10 hours from the moment it is diluted. The preparation for treating potato tubers is used at the rate of 1 tsp. for 3 liters of water. First they are immersed in it, and then dried.
Processing potatoes to stimulate growth
In addition to treating against pests and diseases, you can prepare seed potato tubers in the spring by soaking them in growth-stimulating preparations. Thanks to them, the tubers will germinate faster in the soil, the plant will be stronger and more stable.
The following medications can be used at home (use according to instructions):
- Potato mortar;
- Zircon;
- Epin-Extra;
- Poteytin;
- Silk;
- Bioglobin.
By the way! If you are a supporter of organic farming, you can treat the potato tubers in a solution of wood ash before planting. It is necessary to dilute 1 kg of the substance in 10 liters of water and soak the planting material for a short time.