When artificially hatching turkey eggs, it is important to properly prepare the material, place it in the incubator, adjust the modes and monitor the development of the embryo. If you make even one mistake, it’s a big risk to lose your entire bookmark. The rest of the article details all the rules and basics for successfully incubating turkey eggs.
Choosing a turkey breed for incubation
To get maximum profit from turkey breeding, it is important to choose a breed with optimal productivity.
Experienced poultry farmers recommend choosing one of the following breeds:
- North Caucasian bronze. This is one of the most popular turkey breeds. Adult turkeys gain weight up to 15 kg, turkeys - up to 8 kg. A turkey lays up to 80 eggs per year.
- Bronze broad-chested. This popular meat breed is similar to North Caucasian turkeys. Weight of turkeys – 19 kg, turkeys – 12 kg. Egg production – 100-120 pieces per year.
- Station wagon. The breed is characterized by rapid weight gain. The weight of turkeys is 10 kg, turkeys - up to 18 kg. Egg production – 60-70 pieces per year.
- Moscow white. A highly productive breed that easily adapts to different weather conditions. The weight of turkeys is 8 kg, turkeys – up to 16 kg. Egg production – up to 100 pieces per year.
More information about turkey breeds suitable for home breeding is described in the article, which is located here.
It is also important for successful incubation how healthy the hen is - genetically and physiologically, because the quality of the eggs selected for hatching depends on this. When choosing eggs for breeding, they are taken from laying hens that differ in the following parameters:
- broad chest;
- massive hips;
- straight and powerful legs;
- long and straight keel;
- healthy eyes - they should be round, with clearly defined edges.
How to choose eggs for incubation?
Turkey eggs for incubation
The weight and size of a turkey egg for subsequent incubation depends on the breed of turkeys and their parameters.
Thus, the following breeds are most widely bred on farms:
- North Caucasian bronze - the optimal weight of the incubation product is about 100 grams;
- bronze broad-chested - it is worth selecting a product weighing about 85 grams;
- white broad-breasted - for breeding young animals, use a turkey product weighing from 80 to 90 grams;
- white and bronze Moscow - for which the incubation product has an average weight of 85 g.
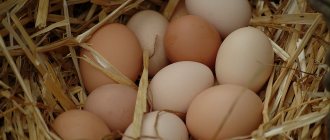
Only medium-sized eggs should be selected for the incubator. Excessively large or very small specimens produce a low hatchability percentage and weak young animals. There should be no growths, roughness or damage on the shell.
The color of quality eggs is white, light beige, with a slight brown tint. The pigmentation is not very bright, but not pale either. All specimens with greenish-blue spots are not suitable for incubation. The form must be correct. Ball-shaped and overly elongated eggs are also considered defective.
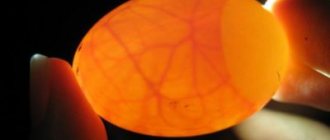
The internal qualities of the product are determined by viewing through an ovoscope. The incubated egg must meet the following criteria:
- one yolk;
- the yolk is placed in the center;
- when turning over it moves slowly;
- the yolk is unclear in its outline;
- there are no extra air chambers except at the blunt end;
- the white is transparent.
Failure to meet at least one of these criteria is a reason for rejecting the eggs, because it will not be possible to hatch turkey poults from them in an incubator at home.
Features of incubators for hatching turkey poults
With natural hatching of turkey poults - under a turkey baster - the hatchability is higher than in an incubator. But if the purpose of breeding chicks is sale, then only an incubator can ensure the production of a large number of individuals.
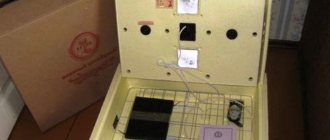
An incubator is a device in which, thanks to heating and thermal insulation, a stable temperature and humidity are maintained. All incubators operate the same, but their design may differ.
Incubators are classified according to the type of heating:
- With top heating. This option is closer to natural incubation - the hen sits on top of the eggs, and the embryo is located in the upper part of the egg. But technically this design is not rational - warm air, rising upward, is removed outside by ventilation.
- With bottom heating. Warm air tends to rise only after it warms up the eggs. This method is more economical than the previous one.
The problem with incubation is uneven heating. To avoid this, you have to turn the eggs. There are incubators with the following types of inversion:
- With automatic. Convenient but expensive option. The eggs are turned over without human intervention - according to the established program.
- With mechanical. There is a rotating mechanism that is activated by mechanical force - by pressing a lever.
- With manual. The eggs have to be turned by hand. This option takes a lot of time.
Incubators are classified according to their purpose:
- industrial - for large farms, designed for thousands of eggs;
- farm - up to 5,000 eggs;
- household - up to 300 eggs.
An important disadvantage of network-powered incubators is the risk of power outages. The consequence of this situation is the death of the eggs. The devices are classified according to the type of power supply:
- No additional power source. They operate from a 220 V network. If the current in the network is lost, the devices turn off. Thanks to thermal insulation, the temperature is maintained for some time, but not for long.
- Autonomous. Along with mains power, there is a 12 V battery - such devices operate uninterruptedly.
Does it need to be washed?
The question of whether you should wash an egg before incubation is controversial. Some chicken breeders do not recommend doing this, since this will reduce the hatchability of turkey poults. There is no exact answer to this question, since all farmers conduct their own experiments on this matter.
If you don't want to put dirty eggs into the incubator, you can try cleaning them with sandpaper . But this must be done very carefully.
Turkey products can be washed in a formalin solution at a temperature of 32 degrees or in a weak solution of potassium permanganate. The eggs need to be placed on a mesh, and then immersed in the solution and all dirt removed.
TIP : Afterwards, you should not wipe each product separately, as this can damage the protective layer.
Selecting suitable eggs and storing them
You cannot put eggs into an incubator without preliminary selection - there will be a very high percentage of rejects. Eggs are selected for incubation:
- fertilized;
- weighing 80 g, in some breeds - 90 g;
- without shell defects, without sagging, cracks, inclusions;
- with a white, beige or slightly brownish shell.
Eggs are selected that meet standard parameters - spherical specimens that are too small or too large, with green or blue spots are rejected.
Eggs of the same size are selected for the incubator. All selected eggs are subjected to ovoscopy (candling). Turkey eggs can be stored for no more than 10 days. If you keep eggs longer, hatchability deteriorates.
Dependence of hatchability on the duration of egg storage:
| Duration, days | Hatchability percentage, % |
| 5 | 85 |
| 10 | 73 |
| 15 | 62 |
| 20 | 54 |
| 25 | 0 |
In the room where the incubation material is stored, the following conditions are maintained:
- temperature – 8-12 °C;
- humidity – 80%;
- lack of light.
When eggs are in storage, they are turned at least once every 4 days.
Egg storage
The success of incubating turkey eggs largely depends on the correct storage. As experience shows, the longer the incubation material is stored, the lower the percentage of hatchability of turkey poults.
For example, the probability of chicks hatching when using eggs that have been stored for less than five days is 85%, and when using incubation material that has been stored for ten days, this probability drops to 73%.
The use of eggs stored for 20 days results in the appearance of chicks in 54% of cases. After 25 days, the eggs lose their incubation value, since the probability of turkey poults hatching in this case is zero.
Incubation material is stored in disinfected trays that allow it to be placed vertically. Newly laid eggs are placed in the tray with the blunt end facing up. After four days, they are turned 180 degrees so that the sharp end is at the top.
If the poultry farmer does not adhere to this rule from the very beginning, installing the material at random, very soon this will lead to confusion, as a result of which some eggs will be turned over many times, while others will not.
The absence of regular revolutions provokes improper development of the embryos. As a result, the chicks hatched from such eggs will not be viable.
To ensure that eggs do not lose their incubation value, they must be stored at a temperature of 8 to 12 degrees in a room that excludes direct sunlight and with a humidity level of at least 80%.
Preparing the incubator
Before laying the eggs, prepare the incubator:
- The day before the start of incubation, the apparatus is cleaned, washed, and disinfected. Pour clean, unfiltered water into water containers.
- Half a day before laying the eggs, the incubator is heated to 38-38.3 °C. Humidity is adjusted to 60-65%.
In simple models, you have to use thermometers - at least two, they are placed at a distance of 2 cm from the eggs. More advanced incubators have built-in temperature sensors that display information on the control panel.
Transillumination
Ovoscoping or candling will determine the freshness of each egg. An industrial ovoscope can test several eggs at once. But you can also make it yourself.
When translucent, the yolk should be in the center and not have clear contours. As for the air chamber, it should be located at the blunt end of the egg.
Preparing and laying eggs
Features of preparing and laying eggs:
- 24 hours before the start of incubation, the eggs are warmed to room temperature.
- Clean from dirt by wiping with a cloth soaked in a solution of potassium permanganate or hydrogen peroxide.
- Different marks are placed on both sides - for example, “+” and “-”. Eggs are marked if they have to be turned by hand - the marks help to turn them correctly.
- Eggs are placed in a machine with automatic turning so that the sharp end points down at an angle of 45 degrees. In devices of another type - with manual and mechanical turning, eggs are laid horizontally.
- The eggs are turned for the first time 12 hours after the start of incubation. Next, the eggs are turned over every 3-6 hours. The intervals between turning over should be the same.
Video review of preparing and laying eggs in the incubator:
How to incubate? Step-by-step instruction
Preparing the incubator begins 24 hours before laying the eggs, having carefully studied the manufacturer's instructions before doing so.
Bookmark instructions:
- To maintain the required level of humidity, the tray located below is filled with water.
- Place two thermometers in the incubation chamber, positioning them so that they are 2 centimeters above the level of the eggs.
- To monitor humidity, a strip of cloth is attached to the bottom of one thermometer, and the tip of the second is placed in a tray of water.
- Each egg is marked on both sides (most often there is a cross on one side and a zero on the other) using a simple pencil. Thanks to the marks, you can rotate the material 180 degrees, avoiding any confusion.
- The eggs are placed into the incubation chamber with great care, ensuring that the markings on the side facing up are the same.
- To avoid the embryos sticking to the shell, turning the eggs should be regular (the schedule for these manipulations will be described in detail in the next section of our article).
- After 25 days in the incubator, egg turning is stopped to give the turkey poults the opportunity to be born without problems.
Turkey egg incubation chart
Transillumination at different stages
In order to promptly reject low-quality eggs, they are periodically candled. Ovoscopy procedure:
| Duration, days | What is visible? | What eggs are rejected? |
| 8 | Assessment of the condition of embryos. During normal development of the embryo, you can see the circulatory system and the air chamber located at the blunt edge. The embryo is not yet visible - it is in the yolk. | Unfertilized and with a blood ring around the yolk. |
| 13 | By this moment, the allontois has already closed. The embryo is visible as a dark spot. The vascular network is visible. | With the absence of blood vessels. If only a dark spot is visible, dangling and loose, the embryo is dead. |
| 26 | A healthy embryo occupies the entire egg. The entire space is dark, only the air chamber is visible - its boundaries are uneven and moving. You can see movement and protrusion of the neck. | If there is no movement, the development of the embryo has stopped. Also, growth arrest is indicated by the small size of the embryo and the absence of blood vessels in the transilluminated areas. |
In addition to candling, shell temperature measurements are also performed:
- Until the 13th day – 37.6-38 °C.
- From 14 to 20 – 38-38.5 °C.
- After 20 – 39 °C.
Incubation stages
Incubation of turkey poults occurs under the regular supervision of the farmer and is accompanied by examination of the masonry through an ovoscope. Control scans are carried out on the 8th, 13th and 26th days.
By the eighth day, the first stage of incubation of turkey poults is completed, as a result of which a fairly well-developed circulatory system can be seen inside the egg in the embryo. The embryo itself cannot be clearly seen, since it is still completely in the yolk.
In its place, only a zone is visible, somewhat lighter than the rest of the yolk mass, with a vascular network. If the egg is slightly rocked from side to side, it will be possible to see the movement of the embryo through the ovoscope. If, when examined, a dark spot is visible inside - the so-called. blood ring, which means the embryo is dead and the egg can be removed.
By the 13th day, with the second candling, you can see a clear outline of the embryo, at the sharp end of the egg there is a closed allantois. A very clear network of vessels, which also closes at the sharp end. In dead embryos, the vessels are atrophied, and no blood is observed in them. They look like an ordinary shapeless dark spot, easily dangling from side to side. Such eggs should be discarded.
On the 26th day, the embryo should occupy all the space in the egg. There is no gap at the sharp end. The air chamber is large. The embryo is moving, preparing to hatch. Neck protrusions are visible. If no movements are observed, then the future chick has frozen.
Table of modes for the entire incubation period
The temperature and humidity maintained in the incubator are adjusted to the body temperature of the turkey hatching the chicks.
Turkey egg incubation modes:
| Stage | Days of incubation, days | Temperature, °C | Humidity, % |
| 1 | 1-8 | 38-38,3 | 60-65 |
| 2 | 8-14 | 37,6-38 | 40-45 |
| 3 | 15-24 | 37,5-38 | 60-65 |
| 4 | 24-27 | 37 | 65-70 |
Rules for placing eggs in an incubator
Only eggs that have been warmed to room temperature should be placed in the incubator for turkey eggs.
Loading into the device can be either horizontal or vertical. With the horizontal method, the eggs are laid out on a grid, not forgetting to mark the top side with a marker so as not to get confused when turning over. In the version with vertical placement, eggs should be placed with the sharp end down in trays at an angle of 45°.
The eggs are laid with the pointed end down
Often, incubators are designed in such a way that when loading horizontally, there is no mechanism for automatically rotating the trays, so the farmer will have to do it manually. Machines with vertical placement most often provide automatic rotation.
Since incubating turkey eggs at home is very dependent on turning, it should always be done in a timely manner.
The first turning must be carried out after the clutch has been incubated for 12 hours. Further, this procedure is recommended to be carried out at least every three hours until the 24th day of incubation inclusive. In general, the number of turns per day can reach 8 to 12 times.
It was noticed during research that when eggs are placed in an incubator in the direction from north to south, the chicks are born slightly earlier than when placed in the direction from east to west.
To prevent overheating and maintain the required level of humidity, the masonry must be sprayed during incubation.
This procedure should be performed from the 1st to the 12th day twice a day while ventilating the incubator, and from the 13th to the 24th day the number of sprayings can be increased to three times a day. From the 25th day, as well as turning over, spraying stops.
Incubation time
Incubation duration is 27 days. The first pecks appear on days 25-26. And by the end of the 27th day, the chicks hatch en masse. Removal duration is 6-8 hours.
You should not often open the incubator to see how the hatching is progressing - wet chicks can become hypothermic. The hatched turkey chicks must dry out before they can be removed from the incubator.
If hatching is delayed, and after 8 hours some chicks have not appeared, it is recommended to make two removals - when the first batch of chicks has dried, and then take out those who were late.
How do embryos develop?
The egg begins to divide in the turkey’s oviduct; by the time incubation begins, the embryo consists of 10 thousand cells. After only 36 hours of being warm, the early structures of the heart and head become visible. Cells move from one part of the gastrula to another as it folds into a three-dimensional embryo, the correctness of these movements is directly determined by the temperature regime.
The next stage is the growth phase. At this time, the organs of the embryo develop, and the embryo itself gains mass.
Note! The correctness of the outlines and sizes of organs, the proportions of the embryo are disrupted as a result of underheating.
The last stage is maturation, the “plateau” phase. It occurs as soon as metabolic rates stabilize, usually on the 25th day of incubation. The growth of the turkey slows down as the lack of oxygen entering through the shell becomes noticeable. The chick's heart and liver accumulate glycogen, the main source of energy at hatching.
Ovoscopy
Egg candling is performed as the phases of the embryo's transformation into a turkey chick change.
- The first time an ovoscope will be needed on the 8-10th day to select the infertility.
- The second candling on the 14-15th day should show complete darkening of the egg.
- Control ovoscoping is carried out before the release of young animals on the 25th-26th days.
To make an ovoscope at home, you need to take LED lamps or flashlights, otherwise the embryo may overheat.
Incubation Features
Along with the development of the embryos, the breeding conditions also change:
- On days 1 to 8, it is important to turn the eggs on time. Do at least 6 inversions.
- 8 to 14 day. The eggs continue to be turned 6 times a day. Starting from the 10th day, the incubator is ventilated and cooled - 2 times a day for 5-10 minutes.
- 15 to 24-25 days. Now 4 inversions are enough. Monitor the humidity and temperature conditions - the eggs should not dry out or overheat. Increase the humidity in the incubator. The apparatus is regularly ventilated - the embryos consume oxygen from the air, it is necessary to ensure the supply of fresh air. The incubator is ventilated and cooled 4 times for 10-15 minutes.
- 25-27 days. There is no need to ventilate or turn the eggs. The temperature is reduced - the chicks must get used to the environmental conditions.
During incubation, ventilation operates - the apparatus for this purpose has ventilation holes blocked by moving partitions. The frequency of opening the partitions depends on the design of the device.
The entire process of breeding turkey poults in an incubator is presented by the breeder in the video below:
conclusions
- Any type of incubator for home use or for a poultry farm is suitable for hatching turkey poults, even a foam one: with automatic and manual turning method, with heating from below or above, household or farm. The main thing is to choose a chicken/turkey or guinea fowl incubator with the required capacity.
- Eggs for laying should be selected carefully: how many pieces are needed for incubation, the size, shape of the white egg, the smoothness of the shell and its norm - everything matters. Eggs cannot be stored for more than 10 days before laying.
- In order to hatch the maximum number of turkey poults, it is necessary to strictly follow the recommendations for maintaining (there are graphs and tables in the card on the device for proper incubation) a certain temperature and humidity regime (make sure that the water does not have time to evaporate, this factor can greatly influence the ability to hatch). turkey) and not make mistakes, it is equally important to ventilate the incubator with the clutch and turn the eggs that are lying the required number of times.
- There are 4 stages of incubation (there are 4 stages to incubate/incubate a broiler, broiler chicken, turkey). Each of them is associated with certain stages of embryo development, collection (collecting newborns) and requires different temperatures, humidity and turning regime.
- To preserve the brood, it is necessary to care for it from the first days, to provide sufficient heating during rearing, high-quality protein food and warm drink.
The hatching process and subsequent care of turkey poults
When hatching begins, fresh air must be supplied to the incubator. But drafts are excluded - the chicks can catch a cold and die. While the process is going on, you should not look into the incubator so that the wet turkey poults do not become hypothermic due to the cold air entering the incubator when the lid is opened.
Most turkey poults hatch at the same time. The interval between the first and last hatched is a day or more. During mass pipping, the temperature is reduced to 37 °C.
The first two weeks are the most difficult. It is important to organize ideal conditions for turkey poults:
- The hatched chicks are placed in a box with a heating pad. Lay fabric on the bottom. The optimal temperature is 35 °C.
- From 6 to 10 days the temperature is reduced to 30 °C.
- By day 30, the optimal temperature is 20 °C
Aviary keeping of turkey poults is allowed on the 10th day.
The shells remaining after hatching are boiled for 20 minutes and fed to the turkey poults. These chicks need more care than other poultry. For 9 weeks they are kept warm, fed easily digestible fortified food with a high protein content.
On the first day, turkey poults are fed only boiled eggs mixed with wheat or corn flour. When the chicks are a week old, the egg is removed from the diet.
In the first two weeks, turkey poults are fed:
- onion feathers;
- grated carrots;
- millet;
- low-fat cottage cheese;
- corn grits;
- nettle and dandelion.
From the 15th day, turkey poults are given boiled and finely chopped offal.
Trays with chalk, fine gravel, and shells are placed next to the feeders. First, turkey poults are fed at intervals of 3 hours. Over time, the number of feedings decreases.
If the chicks do not have a mother hen, they have to be taught to eat by tapping their finger on a bowl of food. By dipping the turkey poults' beaks into water, they are taught to drink.
In the first few hours, poultry farmers give turkey poults glucose and vitamin C diluted in water. Potassium permanganate is added to drinking water for disinfection.
Bookmark
ATTENTION : An important rule that applies to experienced poultry farmers is to lay only fresh eggs. If you don't have a turkey and you bought eggs from a neighbor or farmer, checking the freshness won't be as difficult as it seems.
Place the eggs in a bowl of clean water. If they sink to the bottom on their side, this means they are very fresh. If they remain on the surface, they must be thrown away. The bookmark is placed on its side.
For those who dream of breeding different birds, it will be useful to read the following articles:
- Features of incubation of peacock eggs.
- How to incubate quail eggs?
- What is Muscovy duck egg incubation and how to do it?
- The nuances of incubating guinea fowl eggs.
- Detailed algorithm for incubating ostrich eggs.
- Rules for incubating pheasant eggs.
- Step-by-step process for incubating turkey eggs.
- Subtleties of incubating duck eggs.
- How are goose eggs incubated?
Common mistakes made by newbies
Beginners often make mistakes when incubating turkey eggs:
- Low temperature. Leads to delayed hatching. Turkey poults are born weakened, inactive, and there may be swelling on the head and neck.
- Overheating of eggs. Hatching begins earlier than expected. Turkey poults are born underdeveloped. They usually do not have a retracted yolk sac and their internal organs sag.
- Overwatering. Hatching is delayed. Chicks, not getting out of the shell, can choke on amniotic fluid. The chicks are born weak, the fluff is dirty and stuck together.
- Dryness. The mass of eggs decreases. The chicks hatch early, the poults are small and weak.
- Lack of turning over. The embryos dry to the shell and die. If you rarely turn the eggs, the majority of the chicks die, the rest are born with defects, sick, and weakened.
Common mistakes
Turkeys are capricious in breeding and rearing, so any violation of technology can be fatal. Inexperienced owners most often allow eggs to overheat in the first stages of incubation, fearing that the machine cannot reach the specified mode for a long time.
In this case, you just need to wait a little without changing the value on the display: uniform heating of the egg mass takes about a day. Panic at the hatching stage also makes it difficult to maintain an adequate regime; frequent opening of the lid lowers the temperature and worsens the conditions for the chicks to hatch.
Co-incubation
Reasons why turkey eggs are allowed to be hatched together with chicken eggs:
- Chicken and turkey eggs are almost the same size. At the same time, they are not at all similar in appearance - you can’t confuse them in an incubator.
- The hatching regimes for chicken and turkey eggs - temperature, humidity and candling time - are almost identical.
Incubation of chickens and turkey poults differs in the number of turns - turkey eggs have to be turned more often. And chicken ones need daily ventilation from the 11th day.
Chicks hatch on the 21st day, and turkeys hatch a week after the chicks.
When incubating together with chickens, there is also a negative point - in the last days, chicken eggs need to be provided with high humidity - 80%, and this can adversely affect the development of turkey poults. For such a case, it is advisable to have a second incubator, where the eggs that are first in line to hatch are transferred.
Goose eggs can also be hatched together with turkey eggs. They have identical temperature conditions and the number of turns is the same. Geese hatch 1-3 days later than turkey poults. On the 28th day, the humidity is increased so that the goslings hatch, but this increase will not harm the turkey poults, since they will have hatched by this time.
The most common mistakes
Very often, novice poultry farmers do not observe the temperature regime, mistakenly believing that minor deviations from the norms will not harm unhatched turkeys. Overheating the masonry, as well as overcooling, is strictly prohibited. Overheating of the masonry leads to the death of bird embryos. And even if turkey poults are born, they will have deformities. When the clutch overheats, the chicks begin to hatch a little earlier than expected. As a rule, the process occurs unevenly. When the clutch is overcooled, weak offspring are born. Chicks have weak legs and swelling may be present. Such turkey poults often die at an early age.
Failure to comply with air humidity standards also leads to serious consequences. If the air humidity inside the incubator is too low, the weight of hatching eggs decreases slightly. In addition, the shell becomes hard. It is very difficult to peck at a hardened shell with a soft beak. In addition, chicks are born prematurely, which can negatively affect their health.
With high air humidity, turkey poults are born later than expected. Some of the chicks choke on amniotic fluid during birth.
If the masonry is not turned in a timely manner, the embryo sticks to the shell, which leads to its death. Therefore, you need to turn the clutch as many times as indicated in the incubation table.
Advantages and disadvantages of breeding turkey poults in an incubator
Advantages of using an incubator:
- the possibility of simultaneously producing a large number of turkey poults;
- thanks to a large selection of incubator models, each farmer can choose an option to suit his needs;
- the cost of incubators is relatively low, and the gain in free time is colossal.
Disadvantages of incubators:
- if the device is energy-dependent and does not have an autonomous source of energy, there is a risk of death of the eggs - all or a significant part of it - in the event of a power outage;
- the need to disinfect the device.
The key to successful hatching of turkey poults is the correct selection of an incubator and adherence to incubation regimes at all stages of the process. But raising chicks is half the battle; it is important to preserve the young, and this will require maximum attention and care from the poultry farmer.
0
2
Copy link
Selecting an incubator
Before we look at how turkey eggs are incubated at home, we will say a few words about the equipment that you cannot do without. To hatch turkey poults, you will need to get an incubator.
There are many models on sale today. First of all, we determine the size of the incubator. If you are not going to breed birds on an industrial scale, then it is enough to get by with medium-sized equipment. If you plan to sell chicks, then purchase incubators with a capacity of 70-100 eggs.
Pay attention to the functionality of the incubator. It is desirable that it be equipped with an egg turning function. With such equipment the process will not take much time. If it is not possible to purchase an automatic incubator, which is quite expensive, then opt for semi-automatic models. Their price is much lower, but the entire masonry is turned over by pressing a lever.
We will not dwell on this issue any further. If you have any questions, you can consult with specialists in the store. Let’s just say that Blitz 72 incubators are especially popular.
Useful video on the topic
Like the author!12
- Even more interesting:
- Incubation of duck eggs
- Proper incubation of goose eggs
- How to properly hatch quails in an incubator
Discussion: there is 1 comment
- Peter:
02.02.2019 at 19:25I didn’t succeed in raising turkey poults for the first time because I made some mistakes. But now I don’t do them and I’m happy with the result.
Answer
Incubation
Incubation periods
Incubation of turkey eggs is divided into four periods:
The first is from laying to the eighth day. The embryo begins to form organs, grows to 1.5 cm and begins to absorb oxygen from the surrounding air.
The second - from the eighth day to the middle (14 days) of incubation. The embryo develops a skeleton, beak and claws, and its gender is also designated.
The third - from the middle to the first squeak. During this period, all the egg white is used and the yolk sac is retracted. The chick is covered in down.
The fourth - from the first squeak to the end of the output. With the first squeak, the chick begins to use its lungs for breathing, opens its eyes and pecks through the shell.
First period: from bookmark to 8 days
Warming the eggs well is the main task of the first week.
You need to open the lid as little as possible so as not to let out the heat and not cool the eggs unnecessarily. You can increase the temperature setting to 38-38.3 °C. Don't forget to reduce it at the end of the first period.
Turning eggs
Eggs should be turned every 8 hours or more often at an angle of at least 90°.
During incubation, eggs must be regularly rotated at an angle of at least 90°. This should be done every 8 hours or more often (but not more than once per hour). Rotating the eggs is necessary so that the embryo does not stick to the shell. If this happens, it will be impossible to save him. Rotation also helps to better supply the egg with oxygen and more uniform development of the embryo.
In models without automatic turning, in the first week the eggs can be turned only twice a day - every 12 hours. Also, in such incubators you can move eggs from the edges to the center and vice versa for uniform heating.
When incubating turkey eggs for 24 days, you need to stop turning.
Humidity in the incubator
Maintain humidity at about 45% and increase to 70% at the outlet.
When incubating turkey eggs, a particularly dry regime is required. The relative air humidity in the incubator should be maintained at 45%, and at the hatcher should be increased to 70%. For more detailed recommended humidity values by day, see the incubation table.
The best way to monitor the humidity in the incubator is to use an electronic hygrometer. Such devices are sometimes included in the equipment of the incubator. If there is no built-in hygrometer, you can purchase a separate device. It does not require any special accuracy; you can use instruments with an error of 3-5% and a measurement range of 30 to 80%.
If it is not possible to use an electronic hygrometer, you can use a psychrometric table for determining humidity. Values are based on a dry bulb reading of 38 °C. To determine humidity, compare the readings of a thermometer wrapped in several layers of wet gauze with the table. The wet bulb thermometer should be placed in the air flow from the fan.
2nd ovoscopy
It is necessary to remove unfertilized eggs and check the development of the circulatory system in the rest.
The second candling can be done no earlier than 192 hours after the start of incubation (8-8.5 days for turkeys). Eggs, when scanned, the picture has not changed since the moment of laying, are removed. These eggs are dead or unfertilized.
During the second ovoscopy, the development of the circulatory system of the embryo is assessed. Without experience, it is difficult to distinguish and compare what you see with descriptions and images. Therefore, you can break several eggs to see what state of the egg corresponds to what you see in the ovoscope.
With good development, the developing circulatory system can be distinguished, but the embryo itself is not visible. The egg takes on a pinkish tint. The threads of vessels reach almost to the very edge of the egg at the sharp end.
If the vessels do not reach the edge, but penetrate beyond the middle of the egg, development can be considered satisfactory. In such eggs the embryo may be partially visible. These eggs can be safely left - they may well close the gap and develop into normal chicks.
If the embryo is clearly visible in the form of a comma and is located close to the shell, and the circulatory system is poorly developed and occupies less than half of the egg, development is very delayed. Due to lack of blood, these eggs are pale and transparent. Such eggs are less likely to successfully complete incubation.
Second period: from 8 days to the middle of incubation
The main thing in the second period is the drying of the egg.
During the middle period, high humidity in the incubator is especially dangerous. It is better to maintain the humidity level at 40-45% these days. Any additional containers with water must be removed (those provided for by the design must be left), and the ventilation holes must be opened to the maximum.
At low humidity, water evaporates faster from the egg, metabolism improves and the removal of its products is accelerated. It is also impossible to lower the humidity too much, since this is harmful to the embryo, and it is impossible to restore the moisture supply in the eggs.
3rd ovoscopy
Controlling the development of the circulatory system and moisture evaporation - increasing the air chamber.
It is carried out in the middle of incubation, on the fourteenth day. During ovoscoping, they also look at the development of the circulatory system of the embryo.
With good development, a dense network of vessels completely covers the egg and closes at the sharp end. The air chamber has become 3-4 times larger.
In eggs that are lagging behind in development, the circulatory system has approached the sharp end, but has not yet closed.
In severely retarded embryos, a large gap is visible at the sharp end of the egg. The protein in that part most likely will not be used.
Third period: from the middle to the first squeak
The main thing is to ensure a good supply of oxygen.
Ventilation
In the third period, you need to open all the ventilation holes, once a day you can remove the tray for 10-15 minutes.
At the end of the first week of incubation, the egg begins to absorb oxygen from the surrounding air. And if at first you need very little, then by the end of incubation - 8 liters per day per chick. If there is insufficient supply of fresh air, the embryos may suffocate.
In the second period, ventilation is needed, but small or slightly open holes are sufficient. In the third period, all available ventilation holes must be opened. In general, fresh air is never a bad thing. The main thing is that the incubator can maintain the required temperature and humidity.
Egg cooling
From day 14, you need to remove the tray once a day for 15-30 minutes to cool the eggs.
During the first half of incubation, the egg absorbs heat and the surface temperature is lower than the air temperature. From day 14, the temperature of the egg becomes equal and then begins to exceed the air temperature in the incubator. During this period, an incubator with 50 eggs emits from several tens to hundreds or more W of heat. In the last days before hatching, the temperature of the eggs is two to three degrees higher than the ambient temperature.
During the second half of incubation, the eggs need to be cooled. For turkey eggs, it is enough to remove the tray from the incubator once a day for 15-30 minutes and leave it in a room (with a temperature of 18 to 25 ° C). When the eggs have cooled to such a temperature that no heat is felt when the egg touches the closed eyelid, they should be placed back into the incubator.
Excessive hypothermia is dangerous, so within the next half hour the incubator must warm up the eggs again.
Spraying eggs
Only waterfowl eggs are sprayed, so this is not necessary when hatching turkeys.
4th ovoscopy
It is necessary to check the size of the air chamber and the readiness of the chick to hatch.
Conducted 2 days before the start of withdrawal. This determines the amount of water evaporated from the egg and the readiness of the chicks to hatch.
With good development, the air chamber occupies a third of the volume of the egg, and the sharp end is not visible at all. At the border of the air chamber we can discern a tubercle; this means that the chick is ready to hatch.
If the sharp end is not visible, but the air chamber is less than 1/3 of the volume and has a smooth border, the development of the chick is delayed and it is not yet ready to hatch. Such an egg will most likely hatch into a weak chick.
If unused protein shows through at the sharp end and the air chamber is small, development is severely delayed and there is very little chance of producing a viable chick from that egg.
Fourth period: conclusion
Every 8 hours, remove hatched and dried turkey poults from the incubator.
During hatching, the highest humidity during the entire incubation is needed (70%) so that the shell and subshell membranes do not dry out. Dried shells are more difficult to break, which prevents the chicks from hatching. Before pecking, the chick breaks the shell of the air chamber, takes its first breath and emits its first squeak. After this, he begins to peck at the shell and turns counterclockwise inside. When the fish pecks in a circle, it breaks the shell and comes out of it.
The weaker the turkey chick, the less and weaker the bite he gets. With a good bite, the shell breaks off in larger pieces.
Between the appearance of the first chick and the appearance of the last, approximately 40 hours pass in turkeys. Immediately after hatching, the chick should be left in the incubator for several hours so that it can dry out. It is optimal to pick up hatched and dried chicks every 8 hours.
Rules for choosing material for incubation
Before setting up an incubator, the poultry farmer should become familiar with which eggs should be selected. Specimens that are considered suitable are those that:
- the shell is clean;
- there are no shell defects;
- no foreign inclusions;
- the shell color is white, beige, with a faint brown tint, small specks are often found;
- the shape is regular, cone-shaped.
Material for laying in the incubator
Specimens not suitable for reproducing offspring:
- with spots of green and blue;
- with an irregular shape: spherical or excessively elongated;
- excessively large or small.
The optimal weight is considered to be 80 g, but in some breeds eggs weigh more than 90 g. They are selected for the incubator so that the size of all specimens is approximately the same. Having completed the selection procedure based on external characteristics, ovoscoping is carried out.
Ovoscopy
When scanning, pay attention to:
- number of yolks: there should be only one;
- location of the air chamber: located at the blunt edge;
- the location of the yolk and its mobility: it is in the center and moves slowly when turning;
- shell integrity, presence of defects;
- the presence of foreign inclusions, for example, blood clots: normally they should not be present.
Ovoscoping is carried out immediately before laying the selected eggs
Ovoscoping is the final stage of rejecting the incubation material. There is no point in candling eggs in advance, because some of them may spoil during storage.
Prices for ovoscope
Ovoscope
Timing and features of the process
The incubation process takes 28-32 days. The first pecks appear on the shell 25-27 days after laying. Once the eggs begin to peck, they stop turning them over. To ensure uniform appearance, the air temperature is increased to the maximum permissible level for the period and maximum oxygen supply is ensured. Then the air temperature is gradually reduced.
See also
Description and characteristics of turkeys of the white broad-breasted breed, cultivationRead
The chick hatches in 10 hours. There are cases where this requires 20 hours. During the first 10 hours there is no help for the turkey; he must peck through the shell on his own. If it is difficult for the chick to break through the shell after 20 hours, they are helped to do this in any convenient way. The turkey is then left in place to dry completely. After complete drying, the turkey poults are transferred to specially prepared boxes with additional lighting.
Incubation of turkey eggs at home
Preliminary preparation involves two important factors: the selection of eggs and the presence of a functioning incubator designed for a certain number of eggs.
How to select the right material for breeding turkey poults
Eggs for incubation can be purchased. Chicks can be hatched at any time of the year, observing the conditions for incubating turkey eggs, but the choice of period depends on the existing conditions of detention.
The turkey becomes a good mother, but while hatching her offspring, she often crushes the eggs with her weight. Therefore, poultry farmers prefer to hatch birds in an incubator.
If there is a family of turkeys on the farm, the eggs are collected and prepared for incubation:
- It is better to collect eggs from a young female from 8 months of age.
- The female's instinct to hatch offspring may awaken. When 12-15 eggs accumulate in the nest, they are taken away.
- It is better to collect eggs for incubation in the spring, since turkey poults are afraid of the cold.
- Collected eggs are carefully inspected before being placed in the incubator, selected by size. The shell must be clean, without cracks or growths.
The first ovoscopic examination of eggs should be carried out in order to discard material unsuitable for reproduction (with two yolks, an air chamber shifted to the side, the presence of foreign inclusions, immobile whites dried to the shell).
How to store turkey eggs for incubation
It takes a certain amount of time to collect the required number of eggs.
- During collection and preparation for incubation, eggs are stored at a temperature of 12-140 C.
- The collection period should not exceed 10-12 days , otherwise the eggs will lose viability. After 20 days, the hatchability of turkey poults is reduced to 50%.
- In a healthy egg, the air chamber is on the blunt side, so the collected eggs are placed in a dry tray with the sharp end down.
- During storage, the egg must “breathe”. The eggs should be placed separately so that they do not lie with their shells tightly touching.
- After 3-4 days , the eggs are turned over so that the embryos do not suffocate before being placed in the incubator.
- It is not recommended to wash turkey eggs before placing them in the incubator. Heavily contaminated areas are wiped with a damp cloth soaked in water or a weak solution of potassium permanganate.
When buying turkey eggs, it is impossible to confuse them with the eggs of other birds. They have a specific cone-shaped shape and are covered with small specks. The cost of purchasing “live” material pays off after the young animals are hatched. Turkey poults are always in price at the market.
Preparing the incubator
Factory-made or home-made incubators are checked for serviceability before laying eggs and must be warmed up. It is necessary to clarify the operation of the thermostat, the temperature readings on the thermometer, and pour water into the pan to maintain humidity.
It is advisable to have two thermometers in the incubator - a simple one and a wet one. The inside walls and grate on which the eggs are laid must be disinfected. Any deviations can lead to the death of embryos in the first days of incubation.
Requirements for the incubator
If incubating turkeys involves future sale, you cannot do without special equipment. The incubator provides constant temperature and humidity. There are two main types:
- with heating from above - the method is considered more natural (this is how the turkey warms the eggs);
- with heating from below - the option is more economical.
It is important not to forget to turn the eggs, otherwise the heating will be uneven (models with a converter are suitable). Requirements for the device are made based on the final goals and the expected number of embryos.
Features of storing hatching eggs
Proper storage conditions ensure a high hatch rate of turkey poults. The chick's embryo begins to form even before laying. Before transferring to the incubator, the following rules must be observed:
- if it is necessary to store eggs for more than three days, the room temperature is kept within 15-18 °C, humidity 75-80%;
- 5-6 days - 12-15 °C and 80-82%, respectively;
- from 6 to 8 days - the temperature is reduced to 8-12 ° C, the humidity is increased to 83-85%.
Attention! It is not recommended to store eggs for incubation longer than the specified period - the percentage of chicks hatching is reduced significantly.
