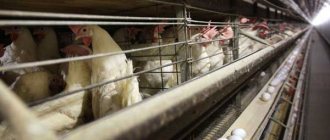
The main goal of artificial rearing of young animals is to obtain the required number of birds in the household all year round. Incubation will allow you to get rid of your dependence on brood hens and increase the productivity of your farm or poultry house. But in order for the hatching of chicks by incubation to be effective, it is necessary to create an optimal microclimate for the birds. You will learn more about the choice of eggs, types of incubators and monitoring the quality of their work below. We draw your attention to the fact that only compliance with all these recommendations will allow you to obtain an optimal brood of high viability.
This article will tell you how to train a chicken to sit on eggs.
Egg requirements and selection rules
Incubation is a complex process from a technological point of view, the success of which depends on compliance with humidity and temperature conditions. If the room temperature is too high during incubation, the embryos will develop intensively, but the output will be too small. In cold conditions, chicks develop slowly and, after hatching, are sedentary. If the temperature is significantly lower than normal, then part of the offspring dies.
“Overheated” chickens are poor young animals. They are small, not always healthy, and usually have an ungrown umbilical cord.
Air humidity also needs to be monitored very carefully. If the air masses are dry, the parameters of the air chamber increase, which is fraught with biting ahead of schedule. High humidity, on the contrary, delays these processes, and chickens often peck with their beak and skin glued to the shell.
Not all eggs are suitable for incubation. Selection is carried out taking into account the weight and color of the shell. There is no point in taking eggs that are too small; with dark stains and spots on the shell, the embryos develop worse. You should also consider the parameter table for chickens.
| Indicators | Egg hens | Meat chickens |
| mass of eggs for breeding stock (grams) | 52-65 | 54-67 |
| obtaining food eggs, raising young animals for meat | 50-67 | 50-73 |
| shape index (ratio of small and large diameters, %) | 73-80 | 76-80 |
| Fertility (%) | 95 | 93 |
| breeding healthy young animals (%) | 81 | 75 |
Egg selection
Success in the business depends not only on the efforts of the owner, but also on the quality of the eggs. Therefore, before properly hatching chickens in an incubator, pay attention to their selection. Interestingly, the process of breeding chickens must begin with the chicken. Indeed, you need to make sure that she is not sick with anything and does not have genetic diseases. Otherwise, the genetics of the chicks will also be damaged. Next, we pay attention to the eggs, the quality indicators are as follows:
- odorless, possible deviations - moldy, acrid, grape, putrefactive and other odors;
- freshness – with a shelf life of no more than 5-7 days;
- correct storage - at a temperature not lower than 10-12°C, those that have been in the refrigerator must be disposed of;
- optimal shape - for chicken eggs it is an oval shape slightly narrowed on one side, without growths or depressions. Spherical or excessively elongated ones are also subject to rejection;
- without damage - carefully check the shell for cracks and dents; dirty dried spots are acceptable only in small quantities;
- optimal weight (50-60 g) - weak chicks often emerge from small ones, and large ones end up with two yolks.
The shell of eggs is porous so that air can penetrate through it, and also has its own microflora. It is strictly forbidden to wash or wipe eggs.
When checking eggs, they must be examined using a special device - an ovoscope. When translucent, pay attention to differences in shades of the contents. You need to find the yolk and the air chamber. The yolk should be in the center or slightly close to the blunt end. You cannot take an egg in which the yolk is adjacent to the inside of the shell. The air chamber must be at the blunt end. The normal volume for it is about a teaspoon. An egg with a small air chamber is not suitable.
Ovoscopy
Ovoscoping is a simple and effective method for assessing the quality of chicken eggs. It allows you to identify cracks, growths, depressions, and pimples on the shell. All of these defects make eggs unsuitable for hatching under incubation conditions. Samples with a notch are eliminated, but if the farmer wants, he can seal the notch using a thin strip of glue with starch. If the egg has an irregular shape, then the embryo in it will not fully develop.
Ovoscoping is a method that helps determine whether an egg is suitable for incubation and whether there are any abnormalities by examining it with a beam of light.
Eggs with cracks cannot be placed in the incubator because moisture escapes through the defects in the shell.
The device allows you to assess the condition of the air chamber and, accordingly, the degree of freshness of the egg. The smaller the air chamber in the area of the blunt end, the younger the testicle. When the yolk sharply shifts to one end when turning, we can talk about a rupture of the cord.
Common mistakes of novice poultry farmers
The most common errors when breeding:
- Lack of experience in working with the device. It is necessary to find out exactly how the incubator works before laying eggs and read the instructions.
- Too long or short storage.
- Placing eggs of different sizes in the incubator or eggs of different breeds.
- Improper handling of the incubator and preparation of the material: uncleaned device or shell, laying eggs with microcracks, growths. Inside the tray, the eggs may burst, covering the rest with liquid. If you do not follow this in time, the chickens will suffocate inside the eggs.
- Problems maintaining constant temperature or humidity.
- No turning over while inside the tray.
Storage
Incubated eggs are stored in an upright position, with their blunt end facing upward. Only clean rooms are suitable, the air temperature should be around 18 degrees, and the humidity should be at least 80%. The maximum storage period for eggs is 6 days, but it is advisable to keep it for no more than 2 days.
| Incubation period | Days | Temperature | Humidity | Turn | Ventilation |
| 1 | 1-7 | 37.8-38.0 °C | 55-60% | 4-8 times a day | — |
| 2 | 8-14 | 37.8-38.0 °C | 50% | 4-8 times a day | — |
| 3 | 15-18 | 37.8-38.0 °C | 45% | 4-8 times a day | twice a day for 15 minutes |
| 4 | 19-21 | 37.5-37.7 °C | 70% | — | — |
The incubation period is 20-21 days; the entire batch of chicks, provided they are properly maintained, comes out within 24 hours. After pecking, it will be possible to select the young - the best are considered to be chickens with shiny down, healthy strong legs, active, and responding well to different sounds. Good chicks have bulging, clear eyes and a short beak. Look also at the stomach - ideally it should be elastic, with a soft umbilical cord.
It is recommended to kill weak chickens, since they have very little chance of becoming viable individuals.
Incubation
The incubator is a box made of polystyrene foam or polystyrene foam, it can have different sizes, the main components are the base and the lid. The main task of the incubator is to maintain the specified humidity and temperature inside the chamber; some models are equipped with an automatic egg turning function. Temperature regulators and heating elements are located in the incubator lid, water tanks responsible for maintaining humidity at specified levels are located at the bottom of the structure.
Among Russian poultry farmers, the incubators most often used are “Laying hen” and “Ideal hen”.
Coup
Eggs must be turned over during incubation. Depending on the incubator model, it can be manual, mechanical or automatic. Manual units are the cheapest, but you have to open the housing to flip them, which causes sudden temperature changes.
Preparation
Laying eggs in the incubator is always preceded by preparation. Clean and disinfect the internal surfaces of the incubation chamber, wash trays and trays, treat them with a solution of lime chloride, rinse with clean water and dry thoroughly. Set the required incubation temperature, select humidity, check the operation of the mechanisms responsible for ventilation and turning the eggs. Turn on the empty incubator to make sure it is working properly.
Indicators of temperature, humidity, and ventilation during incubation.
Bookmark
Incubation of chicken eggs begins with laying. If the eggs were stored at low temperatures, they will first need to be kept in a warm room for several hours. Large specimens are laid first, after 6 hours the medium eggs are sent into the chamber, and after another 6 hours the small ones. Thanks to this procedure, the young animals will approach at the same time.
Theoretically, laying eggs in an incubator can be done at any time of the day, but experienced farmers say that it is better to do this in the evening.
Determination of unfertilized eggs
There are several ways to identify unfertilized eggs at the incubation stage:
- transillumination with an ovoscope on the fifth day of incubation;
- breaking of several eggs from the same batch - if there is no blastodisc (round white spot) in them, then fertilization has not occurred.
Incubation of chicken eggs (video instructions)
This video provides step-by-step instructions on the process of incubating chicken eggs - from choosing the material to hatching the chicks. These tips are suitable for both novice breeders and experienced farmers:
Breeding chicks is not too hard work. However, proper preparation of eggs for incubation, their selection and control of the microclimate throughout the entire incubation period is extremely important. If all the rules are followed, then the chickens can be easily hatched even at home.
1
0
Copy link
Monitoring the operation of the incubator
Let's consider the main parameters of the incubator that need to be monitored during its operation.
Temperature
The optimal indicator for indoor air is 18 degrees. Please note that there is always an error in the readings of household incubators - the temperature cannot be the same in the container . Strong deviations should not be allowed, as they negatively affect the breeding of young animals.
In the incubator, the temperature should be 37.8-38.0 °C in the first three stages of incubation and 37.5-37.7 °C in the last.
Humidity
The humidity level at all stages of incubation is different and ranges from 45% (see table above). You can adjust the indicators using baths filled with water. In small incubators, humidity usually does not exceed 60-63%. Often high air temperatures are combined with low humidity levels, and vice versa.
Even in fully automated models, humidity and temperature must be constantly monitored.
Ventilation
At the very beginning of incubation, ventilation is limited because rapid warm-up is required. In the future, the embryos already require a sufficient amount of oxygen, otherwise the embryo will form incorrectly and turn its head towards the sharp end of the egg.
Turning eggs
It is necessary to turn the eggs over so that the embryo does not stick to the inner shell of the shell. He can be:
- Manual - opens the container lid.
- Mechanical - when you pull the wire, the grid where the eggs are located moves.
- Automatic - all operations are carried out automatically using an electric motor.
Turning the eggs ensures proper development of the chick.
Cooling
Incubation is a complex process from a technological point of view, the key influence on the results of which is compliance with humidity and temperature conditions. Therefore, monitor the temperature indicators and promptly cool the eggs in accordance with the requirements for each stage of incubation. Cooling of eggs is carried out twice a day, starting from the 9-10th day of incubation to reduce the shell temperature to 28-30°. Cooling is carried out with the heaters turned off and the doors of the incubation device open. Cooling is not carried out for more than an hour.
Transillumination with an ovoscope
Checking with an ovoscope for the presence of an embryo
The ovoscope allows you to identify defects that cannot be detected with the naked eye. If you don't have one, you can use an ordinary flashlight.
What can you see with it?
- Consider foreign inclusions;
- Assess the condition of the yolk;
- Check the correct position, size and shape of the air chamber;
- It is better to identify hidden shell defects.
The table shows exactly what to pay attention to.
| Object of study | Flaws | Causes |
| Egg | Blood clots | There was a hemorrhage in the oviduct |
| Dark spots | Mold colonies | |
| Yolk | Two yolks | Genetic disorders |
| Doesn't budge | Stuck to shell due to improper storage | |
| Moves freely | Broken cord (chalaz) | |
| Not visible, but content color is red-orange | Spilled and mixed with protein | |
| Air chamber | Increased | Long term storage |
| Incorrectly placed | The shell membranes are damaged | |
| Shell | Light stripes | Hidden damage that masks an additional substance |
| Spotted | Different thickness. May collapse during incubation |
Table No. 1. List of possible disadvantages when examining an egg with an ovoscope
Incubation periods
There are 4 incubation periods in total:
- Days 1-7 – the first day is taken to be the moment of laying. The temperature 37.8-38.0 and humidity 60% do not need to be changed at this stage - the developing embryo needs comfortable, stable conditions. The only thing you have to do is turn the eggs.
- 8-14 days – reduce the humidity and continue to constantly turn the incubated material.
- 15-18 – start ventilating the incubator 2 times a day , gradually reducing the air temperature in it in order to speed up metabolism and improve gas exchange. The ovoscope at this stage shows a densely filled internal space. A squeak is already coming from the eggs, the chick is trying to stretch its neck towards the blunt end of the egg and, as it were, break through the air chamber.
- 19-21 – temperature drops to 37.5-37.7 degrees , humidity rises to 70%. During this period, it is advisable not to touch the eggs at all.
Development of a chicken embryo by day.
For the first three periods, the incubated material is turned constantly - ideally every hour, but keep in mind that the time intervals between turns should be the same. Excess eggs are removed based on the results of ovoscopy at the first stage.
Farmers often determine the well-being of chickens only by their squeaks. Normally, the sound should be monotonous, calm, and gentle. If it is heavy and loud, the birds are cold.
Chicks normally hatch at 21 days. A healthy chicken breaks the shell with three strong blows, placing its head at the blunt end and its neck at the sharp end (this way it can rest its paws against the walls of the shell and break it). The chicks dry out on their own and are then placed in a dry, warm place.
How to turn eggs in an incubator
The eggs are usually turned by hand at least three times a day. To avoid confusion, a cross is drawn on one side of the egg. After the 18th day, the eggs do not need to be turned, but it is better when the incubator is spacious and you can place them at a distance from each other. The chicken itself will try to take the optimal position, and the egg will try to turn without our participation.
To check for living embryos, eggs are ovoscoped on days 6-7.
If the egg is translucent, it is infertile. Living embryos move, the spot on the egg pulsates.
Infin1 Member FORUMHOUSE
I bring a flashlight from my phone to the back of the egg: after a week of incubation, the infertile one glows, and if fertilized, the egg is completely or partially dark. I boil the eggs, clean them and put them in the freezer; when the chickens hatch, I feed them this egg.
On days 16-17, the eggs are candled to check the air chamber. If the chick is developing normally, the chamber will be large, almost 1/3 of the egg. The rest of the egg is not translucent - this is the chicken.
Development of the embryo
If no changes are visible in the egg during candling, most likely it is simply not fertilized. It will need to be removed from the incubator.
Eggs are checked during incubation using an ovoscope. Your main goal is to evaluate the circulatory system of the embryo and its compliance with developmental standards.
0-7 days
During normal development, the vessels are clearly visible and have a pink tint, but the embryo is not yet visible. The vascular lines approach the sharp end of the egg. If the development is satisfactory, then the mesh is moderately developed and barely passes the middle of the shell. The embryo still has a chance to catch up with its brothers, so the egg is left behind. A poorly developed embryo lies near the shell, looks like a dark spot in the shape of a tadpole or comma, the vessels are underdeveloped, the egg has a pale tint.
During this period (0-7 days), the rudiments of all the most important organs are created in the embryo.
7-11 days
With excellent development, ovoscoping shows coverage by the circulatory system of the entire space inside the egg, including its sharp end. The dimensions of the air chamber must exceed the original ones by several times. If the development of the embryo is good, then the network of vessels approaches the sharp end, but does not close on it. The embryo lags behind in development, but not critically. Poor development is characterized by strong sedimentation of the embryo and a decrease in its shadow.
At this time (8-11 days), the embryo develops its first claws, beak and skeleton.
Last period
The final ovoscoping is carried out a couple of days before the expected date of incubation. Its task is to determine the readiness of the embryo for hatching by assessing the volume of protein used and water evaporated. If there are no gaps at the sharp end, the air chamber is large and occupies a third of the volume, and its borders look like a bump, development is good. A small air chamber with smooth boundaries indicates that the embryo is lagging behind - the chick will hatch, but will be rather weak. In situations where the air chamber is very small, and the sharp end contains an unused large supply of protein, they speak of a hopeless lag (the chick will not hatch or will quickly die).
At this time (12-20 days), the embryo is already covered with down, and its claws acquire a stratum corneum.
Rules for good chick hatching
In order for chicks to hatch well, you need:
- Install a tray with water in the chicken coop , since dry air has a very negative effect on productivity indicators - due to dryness, the shell shells harden, and the chickens are unable to break through them.
- The eggs need to be laid on their sides and placed freely - for a normal exit, the chick needs a circular peck, which is almost impossible if the laying is too tight.
- A couple of days before the expected incubation date, the turning of the eggs will need to be stopped. Now it’s enough just to have high-quality ventilation of the chamber.
Calm squeaks from the egg at the final stage of incubation are a good sign, the chicks are comfortable. If the sounds are demanding or plaintive, the brood experiences discomfort (for example, it is cold).
Please note that the lack of space and inconvenient location do not allow the chick to make a sufficient swing to strike - in this case, even a completely healthy chick cannot break through the thin shell. Normally, the peck is located between the blunt side of the egg and its middle part.
You can find the approximate dates for hatching and hatching of chicks in this table.
| Bird species | The beginning of the bite | Start of output | Mass withdrawal | End of output |
| Chickens laying eggs | 19 days 8 hours | 19 days 18:00 | 20 days 6 hours | 21 days |
| Meat chickens | 19 days 22 hours | 20 days | 20 days 12 o'clock | 21 days 8 hours |
Signs of a Healthy Chicken
The selection of chicks obtained during incubation is carried out quickly - the process should not take more than 30-40 minutes, even if the batch is very large. At the same time, the quality of the young animals is assessed and selection is made for rearing. Healthy and strong chicks are active, mobile, have beautiful, uniformly colored fluff, clean shiny eyes and strong legs. Also, the condition of the young is indicated by such organs as the beak (it should be short and thick), the belly (elastic, not saggy), the head (quite large), and the umbilical cord (closed, without traces of blood).
Chickens of egg breeds normally have pink-yellow legs.
Minor defects are allowed that do not lead to the rejection of young animals. These are dull fluff, weak pigmentation, an enlarged abdomen (but insignificant), clots of dried blood in the umbilical cord area (up to 2 mm in diameter). If the bellies are too small or droopy, the chicks are very lethargic and are discarded. Any deformities are a reason for the destruction of young animals.
conclusions
- For successful incubation, you need to select the right material.
- Incubators can be manual, mechanical, or automatic.
- Before laying the eggs, the incubator is thoroughly prepared.
- The main indicators are humidity, temperature. Eggs also need to be ventilated, cooled, and ventilated.
- The development of embryos is controlled at all stages of development. There are 4 stages of embryo development in total.
Also read about how to incubate quail eggs and turkey eggs.
How to lay eggs correctly
Before laying eggs in the incubator, they are heated in a room at 22-25°C (at temperatures above 27°C, embryo development will be incorrect) for 8-10 hours.
Laying time is best in the 2nd half of the day, in this case the chickens will appear during the day and not in the middle of the night. Eggs of the same size are laid at the same time. Depending on the type of incubator, they need to be placed in trays on their sides or placed vertically on the sharp end. How exactly to do this is written in the instructions for the incubator.