Loading…
Loading…
Grafting is the transplantation of a small fragment of one plant with vegetative buds to another. Cherry grafting is carried out on cherry plum, plum, cherry and, in fact, sweet cherries. The operation is needed to give the delicate heat-loving tree greater resistance and limit growth. When two trees become one, a more winter-hardy cherry rootstock will allow cherries to bear fruit in the Moscow region.
When is the best time to vaccinate?
Vaccination should be done in warm weather
- The most suitable time for grafting is spring, when there is a high probability of fusion between the shoot and the rootstock. But when performing the procedure, the temperature should not fall below 0°C. Cuttings do not tolerate cold well.
- Cherries are also grafted in the summer. But in order for the shoot to take root before autumn, the procedure must be performed on a cloudy day without rain.
- Vaccination is also allowed in the autumn. At this time, the circulation of sap in the trunk decreases, but the rootstock and scion can grow together well if the procedure is completed before the cold weather.
Preparation and storage of cuttings
Cuttings for spring grafting are harvested mainly in November, after the end of leaf fall and the tree going into hibernation. It is also possible to harvest cuttings at the beginning of December, but provided that there were no severe frosts. Harvesting cuttings during the January and February thaws is impractical - the survival rate of such a scion is close to zero.
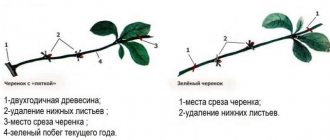
Only annual shoots (grown over the past spring and summer) with a diameter of 5-6 cm are suitable for cuttings. A prerequisite is that the cut cutting has an intact growth bud at the top and several formed leaf buds on the sides of the cutting.
But it is much more important (and much more difficult) to preserve the cut cuttings until spring. The best option for storing them is in a mixture of peat, sawdust and sand. The cuttings are placed in this mixture, brought into the cellar or basement and left to wait until spring, making sure that the mixture always remains slightly damp. Cuttings are preserved in this way in the spring and take root best.
If you don’t have a cellar or basement, you can also store the cut cuttings in a refrigerator near the freezer. The cut cuttings are wrapped in several layers of moistened cloth, then, to prevent the moisture from evaporating, they are packed in a plastic bag and sent to the refrigerator.
Spring grafting of cherries with freshly cut cuttings is also practiced, but it is not always successful. But with summer and autumn grafting there is no choice - they are carried out only with freshly cut cuttings.
Rootstock
The best rootstock for cherries is cherry
Before you begin the procedure, you should understand the basic concepts. The plant that is grafted onto is called the rootstock. And the transplanted part is the scion. A separate bud or a fragment of a shoot with several buds is used as a cutting. For the procedure to be successful, parts of closely related plants that belong to the same species must be used for grafting.
Important! Before grafting, you need to make sure that the cherry tree is compatible with the selected rootstock.
Sweet cherries are also called Bird Cherries. This crop is a representative of the Plum genus, the Rosaceae family. It ripens early. The cherry harvest is harvested at the end of May - the first half of June. The natural habitat is the southern territories of Europe, so the rootstock should increase the frost resistance of the cherry. To achieve this result, you need to reduce the size of the plant.
The most popular is cherry grafting. The plants are very similar in structure and structure. This ensures good survival of the shoots. The following varieties can be used as a rootstock:
- Magaleb cherry, which is characterized by high resistance to low temperatures. This is the main plant that acts as a rootstock for cherries.
- Pika cherry is a medium-sized crop that has good compatibility with sweet cherries.
- VSL is a hybrid plant obtained by crossing steppe cherry with Lannesiana. The culture is compatible with all varieties of cherries.
- Vladimirskaya, Griot and Lyubskaya cherries.
- Hybrid cherry varieties - Colt, Gisella, Piku.
Other crops are also used as rootstocks. Cherry grafting is done to improve the taste of the fruit. The desired result can be achieved as early as next year.
| Variety | Region | Period of the year |
| Lighthouse, Late pink | most regions of Russia (middle zone) | April May |
| Fatezh | cold regions (Siberia, Ural) | June August |
Grafting onto a plum tree is not the most successful option, since the trees have different structures and the cuttings take root somewhat worse. But experienced gardeners are able to cope with this task.
Advantages and disadvantages of cherry grafting
Fruit trees age over the years, produce less yield and dry out. Then they have to be changed. Sweet cherries are no exception. Also, the condition of plants deteriorates if the climate or soil composition in the growing region is not suitable for them. In this case, a successful way to solve the problem is to graft the cherry onto a crop adapted to local conditions. Most gardeners use grafting to grow new varieties or propagate existing ones. Then you don’t need to look for a new seedling or uproot an existing tree on the site.
The main advantages of vaccination:
- obtaining larger fruits;
- increasing productivity;
- strengthening resistance to infections typical for the culture;
- increasing resistance to adverse environmental conditions;
- quick harvest.
The procedure has no disadvantages. If all actions are performed correctly, the plant turns out healthy, strong, and bears fruit abundantly. Unlike seed propagation, grafting preserves all the varietal properties of predecessors and guarantees successful survival of cuttings.
Vaccination methods
Scheme of cherry grafting methods
There are several methods of vaccination:
- copulation;
- improved copulation;
- on the bark;
- into the cleft;
- half-split;
- in a corner cutout;
- into the side cut;
- bridge.
Harvesting cuttings
For all vaccination methods, this procedure is performed the same way. It is recommended to harvest cuttings in the fall, when the flow of sap has stopped, the leaves have fallen and the plant has entered a dormant period. But you can do this at the beginning of winter.
Important! You should not harvest in the second half of January and February, when a thaw is possible. The likelihood that such cuttings will take root is very low.
We select annual shoots with a diameter of 5 mm that grew during the growing season. Each cutting should have a growth bud in the upper part and leaf buds on the sides.
You can store shoots in two ways:
- The most reliable is the use of peat, sawdust and wet sand. The cuttings are placed in a substrate and stored in a cool place. The mass is periodically moistened. Such shoots remain fresh until grafting and take root well.
- The second method is storage in the refrigerator. First, the cuttings are wrapped in a damp cloth, then in a plastic bag. This will help maintain the required air humidity. The bag is placed in the refrigerator compartment, which is located one or two levels below/above the freezer.
Important! Some gardeners practice replanting freshly cut shoots, but this method cannot be called reliable, so its use is not recommended.
Step-by-step description of each method
Regular copulation
Copulation of cherries onto cherries is used if the rootstock and scion are of the same thickness
Now you can proceed directly to the vaccination. The copulation method is used if the rootstock and scion have the same thickness - up to 1.5 cm. The process is performed as follows:
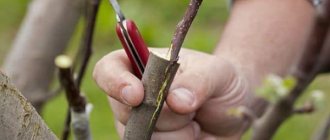
- On the branch and the lower end of the shoot we make identical oblique cuts 3–4 cm long.
- Next, we put one on top of the other so that they completely coincide.
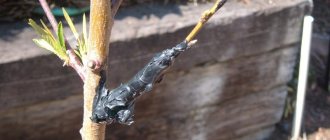
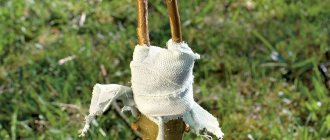
- We tightly wrap the film around the grafting site.
- We treat the upper cut on the cutting with garden varnish.
Improved copulation
Improved copulation allows for strong fusion
This method allows you to obtain a more durable fusion. But the process has some differences from the previous one, namely:
- First we make a cut. Then, using a knife, we make peculiar tongues on the scion and rootstock. To do this, you need to retreat from the lower end of the cutting and branch a distance equal to 1/3 of the length of the cut.
- Next, we apply the shoot to the rootstock so as to connect the tongues.
- We move the cutting down until the end of its cut coincides with the beginning of the cut on the branch.
- We isolate the grafting area with film and cover the upper part of the cutting with garden varnish.
In addition, there is a method of budding with a shield. It is used when the amount of cutting material is insufficient or there is poor bark retention on the rootstock.
Practical instructions for simple and improved copulation (video)
Vaccination for bark
Grafting for the bark is carried out at the beginning of the growing season
The procedure is performed at the beginning of the growing season, when the bark is freely detached from the wood. The step-by-step instructions look like this:
- Using a saw, remove branches.
- In the places where the cuttings will be inserted, we make longitudinal cuts.
- Then we cover them with pieces of plastic film and tie them.
- We make punctures in the appropriate places and insert the graft.
- We tie the connection area tightly.
Into the cleft
Cleft grafting is a more complex option.
Vaccination is carried out during dormancy, before the onset of the growing season (late March - early April). For a successful result, you must do the following:
- We begin the work by cutting down the branches. The age of the trees should be taken into account. On a young plant, you need to retreat 40 cm from the place where the branches depart from the trunk. If the tree is old, the distance must be increased to one meter. But at the same time, the thickness of the cut branch should not exceed 5 cm. We leave some of the branches to provide nutrition to the root system.
- We perform cutting along the periphery and in the central part. On the main branch we remove approximately two branches.
- We clean the sections formed after sawing with a knife.
Then we move on to the procedure. For grafting you will need a special hatchet. And the process itself is performed as follows:
- We place the tool in the middle of the cut and use a hammer to split it into 10 cm in length.
- We remove the ax, then insert it with the wedge-shaped part into the slot and move it apart a little.
- We place the cuttings.
- We take out the ax, the gap closes and holds the graft.
- After the procedure, we treat all damage with varnish. If the cuttings are not held tightly in the splits, they should first be tied and only then coated. If the thickness of the grafted shoots does not exceed 3 cm, it is not necessary to use varnish.
- We tie the cuttings with polyethylene. We fold a piece of film into three layers and make holes in the locations of the shoots. We put polyethylene on the cut and tie the edges tightly around the stump.
- On the cuttings, we first make cuts 1 mm deep on both sides, then make cuts from them in the lower direction.
- The lower edge of the shoot should look like a wedge.
- We insert it into the split. The shoulders rest against the cut end of the hemp.
- After cutting down the knot on the stump at an angle of 45°, we make an oblique cut. We retreat 1 cm from the edge. We split the cut with a knife, insert the cutting and fix it with film.
This method is recommended for thin branches, the thickness of which does not exceed 2 cm. Grafting is performed with only one shoot.
Half-split
The semi-split grafting method is considered gentle
The advantage of this method is minimal damage to the plant, since only a small part on the side is split. So, for vaccination you need to do the following:
- We place the hatchet blade on the end of the hemp cut so that it extends 3 cm, and make a split. He must not reach the opposite end.
- We prepare the cuttings according to the method described above. We insert them into the edge of the split, place the film folded in three layers, and tie it tightly with twine.
- In this case, there is no need to use garden varnish.
Into corner cut
The method of grafting into a corner cut is used when the diameter of the branches is 2 cm
This method is used for branches with a diameter of 2 cm. The instructions look like this:
- We cut a corner notch on the stump. We place the end of the knife at a distance of 3 cm from the end and at an angle of 30° we make a cut with a depth of 6 mm.
- Then we make a similar movement, but now in the opposite direction. This way we get another parallel cut 7 mm long.
- We process the lower end of the shoot. We cut it with diagonal cuts on both sides. The cutting should fit tightly into the rootstock.
Side cut
The lateral cut grafting method requires precise movements
The grafting is done in the side part of the branch. The tree is not pruned until the cuttings have fully grown.
- We retreat 20 cm from the base of the branch and make oblique cuts. One of the sides should be 1 cm longer than the other.
- We cut the cuttings with diagonal cuts on both sides.
- We give the escape the appearance of a wedge. In this case, one edge should be longer than the other.
- We place the shoot in the cut and tie it tightly with film.
If you need to graft an old tree that has thicker bark, you should make straight cuts instead of oblique ones, and give the cuttings an even wedge shape with diagonal cuts 4 cm long. Then you need to insert it into the cut and wrap it with film.
Bridge grafting
The bridge grafting method is carried out at the initial stage of sap flow
The method is suitable for trees whose trunks were damaged by hares during the winter. Grafting is carried out at the initial stage of juice movement and has the following features:
- We install the shoots by the bark around the circumference of the tree in several places. One end of the cutting should be located below the wound, the other above.
- We protect the edges of the damaged area until it reaches healthy tissue.
- We make cuts in the bark above and below the wound.
- Then we insert the cuttings, fix them with film, coat them with varnish and wrap them in burlap. But first we process the edges of the shoots, making oblique cuts.
Please note that before grafting, all buds are removed from the cuttings.
Types of rootstock
Cherry belongs to the family of pink plums and is considered the oldest type of cherry. There is even an opinion that it was bred artificially by the “first breeders” of Ancient Greece. Therefore, the choice of mother plants is quite wide - cherry, plum, cherry plum, and even bird cherry.
When choosing a rootstock, you should focus on fruit crops that are resistant to the climate of the area, and whose quality is not much different from the desired variety. You should also take into account the characteristics of the plant - the beginning of sap flow, yield, duration of the growing season, taste and juiciness of the fruit. Rootstocks must be strong, easily propagated by cuttings and seeds, resistant to the climate of the region, diseases and pests.
Cherry grafting onto sweet cherries is carried out to increase immunity, productivity and ease of fruit harvesting. Old trees reach a height of 5-10 m, especially in warm climates, which makes gardening difficult. In addition, the trees are growing. Thanks to the scion, the mother plants are renewed within 3-4 years. If the garden is uprooted, you will have to wait twice as long for a new harvest.
The best option for cool climates is grafting sweet cherries onto cherries. This fruit crop is considered the most resistant, has a strong root system, and easily adapts to climate change. Good options for Russian varieties are Magalebka or Antipka, and for cherries of foreign selection it is better to use dwarf hybrid plants - VSL-2, Griot, Vladimirsky. These species are resistant to various types of rot, bacterial cancer, and beetle. No renewal will be required for 15-20 years.
In warm climates, experienced gardeners recommend that beginners graft onto cherry plum. This is a truly successful type of rootstock - resilient, adapted to the vagaries of weather, diseases and pests. The mother plant can be grown in the garden or in the wild.
The most difficult option is grafting cherries onto plums. It is difficult to suppress the qualities of the mother plant - after a few years, plums and cherries can be harvested from the same tree at the same time. In addition, due to the difference in sap flow, fusion occurs poorly, and if the experiment was successful, the tree needs careful care in the future.
Caring for the graft
The grafted tree must be treated with an antiseptic, pinched and trimmed
- Young leaves formed as a result of grafting often attract pests. Therefore, they need to be sprayed regularly every 2-3 weeks. Tanrecom or Biotlink preparations (3 ml per 10 liters of water) are suitable for this.
Important! Make sure that no shoots appear below the grafting site, otherwise they will take all the nutrition and the cutting will not be able to develop.
- 1–2 months after the procedure, a splint is applied to each vaccination. This helps prevent it from being damaged by gusts of wind or birds. For this purpose, you can use rowan or hazel shoots. The diameter of the tire must match the size of the graft. It needs to be tied in two places on the scion and rootstock.
- At the beginning of August, the tops of the shoots that grew on the graft are pinched. This is necessary in order to stop their growth and achieve better ripening. But if apical buds have already appeared on the shoots, pinching is not carried out. After the leaves fall, the splints on the grafts must be removed.
- The following year, with the onset of spring, the shoots are pruned. The height depends on the desired crown shape.
For example, if a gardener wants to get a tree in the form of a bowl or bush, you need to step back 40–70 cm from the ground. If the goal is a tiered crown, pruning is performed at a distance of 80–120 cm from the ground.
- When horizontal branches form on the graft, they are pinched at a level of 50 cm from the base.
- In the third year, all annual shoots are shortened to 50 cm. If their length is less than this size, pruning is not performed. Remove branches that grow inside the crown, as well as those that have sharp corners.
Scion preparation
- Grafting plums onto cherries is often carried out in the spring, after the snow has melted, the buds swell, and sap flow begins, but cuttings are harvested in the fall after the leaves fall.
- Cut shoots should be at least 10-15 cm long and have 2-3 buds. After cutting, the scion is placed in the refrigerator on the bottom shelf, where it will not freeze too much. The cuttings are first placed in moistened sawdust and wrapped in a damp cloth.
- The day before the procedure, the scion should be removed from the refrigerator and placed in a container with warm water.
- Next, the terminal end of the shoot is removed and a beveled cut is made. After these activities, the scion is ready for the procedure.
Grafting plum onto cherry
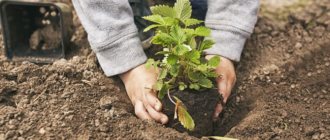
How to plant grafted cherries correctly?
Transplantation of grafted cherries occurs according to a typical scheme.
Grafted cherries are replanted in the usual manner. For the procedure, it is recommended to select seedlings whose age does not exceed 2–3 years. In this case, you need to take into account some nuances. A young tree can be planted in spring (before sap flow begins). But preparatory work has been carried out since the fall.
Important! Cherries are dug out of the ground along with a lump of earth and covered with soil so that the bark of the plant is not damaged in winter.
In the fall, the planting pit is also prepared. It is filled with a mixture of equal parts of humus and peat with the addition of 100 g of mineral fertilizer. Next, you need to take into account the following nuances:
- If, before planting, diseased areas are found on the root system, they are removed, and the damaged areas are sprinkled with ash.
- When placing the plant in the planting hole, make sure that the roots do not twist.
- The voids are filled with earth mixed with a nutrient composition prepared from humus and peat (1:1).
- The root collar should protrude 6–8 cm above the soil, otherwise, after compaction of the soil, the tree will settle, as a result of which the cherry may die.
- The soil is well compacted, and the plant is watered abundantly with water with the addition of Heteroauxin. Five buckets of water require 10 ml of the drug.
- The surface of the soil is covered with a layer of humus or peat.
- In order for the roots to take root better, after transplantation the branches are shortened by 1/5 of their length.
- The tree is tied to pegs so that gusts of wind do not damage it.
Transplanting adult cherries is done with minor changes. In order for the root system to fit into the hole, the size of the hole must be at least 70x70 cm. Until the tree grows, it needs to be watered with 3-4 buckets of water every three days.
Grafting allows you to increase the resistance of cherries to unfavorable climatic factors and improve the taste properties of their fruits. But in order to get the desired result, you need to comply with the timing of the procedure and take into account the individual characteristics of the tree.
- Author: Yana Dmitrova
Hello! Let's get acquainted, my name is Dmitrieva Yana, a manager of foreign economic activity by education. Rate this article:
- 5
- 4
- 3
- 2
- 1
(9 votes, average: 4.9 out of 5)
Share with your friends!
Is it possible to graft cherries onto plums?
It is better to graft sweet cherries onto related crops - cherries or cherries. However, grafting onto plum or cherry plum is also possible and gives good results. In this case, the survival rate is worse than that of related crops, so to obtain a satisfactory result it is necessary to pay attention to all the details of the procedure.
Did you know? In Japan, umeboshi plums are highly valued because they have a sour and salty taste that is unusual for foreigners. One such plum contains as much citric acid as several lemons.
Cherry grafting technology
If you grow stone fruit crops on a suburban plot or in your yard and you want to increase the area planted with fruit trees, you need to take into account that cherries do not reproduce from stones, but by grafting.
In order for the escape to take root correctly and quickly:
- For the rootstock, choose a healthy stone fruit that produces a stable harvest.
- A large number of cuttings of different types and ripening periods are not added to the tree.
- For grafting, take strong branches that are located closer to the trunk.
- The binding is removed after the bark has formed at the junction of the shoot.
In the first year, the flowers on the grafted cherry are picked and the emerging ovary is removed. If this is not done, the tree will grow and develop poorly. Experienced gardeners recommend using cherries and cherry plums as rootstocks, which are well adapted to the local climate. After 4 years, an established cutting can be used for work again.
In the spring, any of the methods is suitable for grafting, from simple copulation to the most complex technology; you can take both pre-prepared shoots and green branches.
To change the cherry variety, start re-grafting. This procedure is in demand when the planted plant turns out to be unproductive; small and tasteless berries ripen on it.
Cherries up to 10 years old are used as a rootstock. The process is started in the spring, when frost is no longer expected. Re-grafting with a bud or eye can be done even at the end of summer and is quite effective.
