Trees on a trellis
If there is not enough space in the garden, but your soul craves fruit, then growing trees on a trellis along the walls is the ideal solution. Thanks to this, the house will be surrounded by flowers during the flowering period and in the sweet smell of ripened fruits during the harvest period. In addition, this is a very interesting solution from a design point of view, since the tree can be given any desired shape.
Advice from experienced gardeners
Before you start growing trellis crops, you need to familiarize yourself with the recommendations of experienced gardeners:
- Use only zoned varieties of apple trees for planting.
- The design of the trellises must be durable and withstand strong gusts of wind.
- Pruning the crown can be done only before the buds swell, and the formation of branches can be done during the period of active sap flow.
- It should be remembered that fruiting apple trees need more frequent watering than young non-fruiting ones.
By following the basic rules, you can grow not just beautiful, but also productive apple trees. Growing trellis apple trees allows you to significantly reduce the planting area and decorate the garden with unusual plant shapes. Caring for such crops is easier and more convenient.
Apple tree on a trellis
In addition to beauty, growing apple trees on a trellis has an undoubted benefit - they become more fruitful.
diagram of planting an apple tree on a trellis
The trellis itself is a rigid frame made of wooden or iron posts and a frame onto which slats or wire are attached. Thanks to him, the direction of growth of the branches of the future tree will be chosen in the future. Planting an apple tree on a trellis is almost identical to planting an ordinary apple tree.
The planting pattern depends on:
- Abundance of harvest
- Increasing its quality
- Abundance of food
- Plenty of light and warmth
- Boosting immunity
- Absence of fungus throughout the entire trunk
- Preventing the increase in the population of pests and all kinds of diseases
The planting scheme helps determine the minimum distance that should be placed between future trees. It is created based on the characteristics of the variety of the selected seedling, the ability of the soil to supply it with water, the presence in it of the necessary nutrition for the future tree and other characteristics of the soil.
There are two types of apple tree planting schemes: average and individual. The first scheme includes a list of planting requirements without taking into account the composition of the soil, special characteristics of the site, variety, and other things. It takes into account exclusively the climate in the place where the seedling is destined to “live” and the width of its branches.
For planting on trellises, low varieties of apple trees are taken, and sometimes even “dwarfs”. This means that planting requirements will be formed based on their largest dimensions, taking into account pruning. It is 4 meters, which will separate one row of trellises from another. The trees themselves should be at least 2.5 meters apart from each other. An individual planting scheme takes into account what is omitted in the average, including the variety of apple trees.
Semi-dwarf varieties of columnar apple trees prefer to be planted in such a way that they are located 1.2 meters from one another. For dwarf varieties, this space can be reduced to sixty cm. For such “baby” varieties as Melba, Lobo, Spartan and Welsey, the space between the trees can be four meters. And from them to their neighbors in the garden - one meter less.
If the seedling was taken at random or the apple tree variety is unknown, then the space between the trees should be taken based on the width of the crown. For trellis beauties, this variable can be counted by the upper branches, which are assigned this role. It should be increased a couple of times and the resulting figure can be considered the minimum distance between trees.
Proper placement of young trees will not only contribute to a pleasing garden design. Thanks to a properly selected design, you can increase the life of the tree and organize the space in the garden according to the owner’s plans.
pruning an apple tree on a trellis
The easiest way to trim apple tree shoots is when forming a hedge. At the same time, the strongest shoots are limited in growth so that they rush in two directions. To achieve this, the side branches are attached at an angle of ninety degrees to the trunk.
The lower side sprouts are wound in a horizontal position to the wire frame of the trellis. After this, the upper shoot is shortened above the bud so that the cut is 50 cm higher than the shoots. The next year, the lateral shoots are cut off along with the competitive shoot, and the upper shoot is cut again according to the same principle. The resulting sprouts are directed diagonally so that they grow in a slightly elevated position. This will help them keep up with the growth rate of the apical shoot.
At the end of summer, a green hedge with spreading branches will be ready. Gardeners take their time and carefully monitor the formation of buds on the tops of apple tree branches, periodically tying them in an elevated position.
After pruning, a strong shoot hatches from the topmost sprout of the “trunk” of the future apple tree. The “trunk” also sprouts from lateral buds. The two strongest of them should be fixed at an angle of 90 degrees to the trellis structure. This will create a second row of branches and determine the direction in which the future crown will grow.
After winter, the apical sprout is truncated again. This gives impetus to the release of new buds on the sides, from which the third row of branches will subsequently be formed. In addition, all shoots rushing upward at the base are eliminated.
Raised shoots from the side branches are laid horizontally on a trellis in the last week of August. These sprouts, along with the rest, will later turn into fruit branches.
The top rows of branches should be no longer than those below. The growth of fruiting plants on a trellis reaches a maximum of 2 or 2.5 meters. A tiny garden will give the impression of being dense and lush if the trees with a weak-growing rootstock are no more than 1.8 or 2 m in height. When their topmost branch reaches this mark, it must also be secured at a right angle to the wire frame of the trellis. All sprouts that begin to grow upward from the bent “trunk” must be truncated to the base.
shaping an apple tree on a trellis master class
To give the apple tree its shape, you must first select a sprout to plant. One-year-old “babies” are most suitable, but if there are none, then two- and three-year-olds are also actively taking root. It is better to take a seedling rootstock that is weak-growing, if not dwarf, and certainly clonal. You can recognize this by the lobe on the rootstock itself.
It is better to take the following diagram: 3 meters from sprout to sprout and 2.5 to the adjacent row. This scheme takes into account both the limited space allocated for trees and the width of the bottom row of their branches.
To give the tree the desired shape you should:
- For a seedling planted in the ground, the trunk is cut down to three buds, leaving 30 cm from it. In September, sprouts will appear from three buds, two of them should be fixed at a right angle, one should be directed up the trellis frame.
- On a two-year-old sprout after winter, the overgrown shoots again need to be shortened to three buds. After the summer they will throw out a new part of the shoots and there will be nine branches.
- Emerging new shoots also need to be directed at right angles, allowing small branches on the sides to grow freely and slightly raised in order to give the tree splendor.
- In the third year after wintering, all nine branches are cut down to three buds in order to get twenty-seven sprouts by the end of summer. All but one of their buds is removed. By the time sprouts appear, the lower rows of branches will produce many fruit buds.
To further adjust the shape, it is necessary to eliminate all growth buds, with the exception of one, and not touch the flowering buds. The tree does not need a “body kit” in the form of an extra mass of branches. When the seedling reaches the desired “growth”, the upper shoot is also bent at a right angle and attached to the trellis. The distance between the side branches should be at least 50 cm. Anything that interferes with the comfortable growth of branches is cut off at the bud or sprout stage.
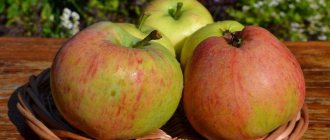
Trees formed in this way bear fruit when they reach two years of age. Their leaves and fruits are larger, more textured, with a more saturated color. With a successful combination of circumstances, you can collect up to a kilogram of apples from each row of branches.
Growing fruit trees
Trees on trellises If the area is small and it is impossible to arrange a garden of fruit trees on it, then you can resort to the method of growing trees on a trellis. And you won’t need a lot of space, and from an aesthetic point of view it will be original and impressive.
Growing trees on a trellis: history and essence of the method
This technology is not new; the trellis method for fruit trees began to be used several centuries ago in Europe, mainly in France and Switzerland, from where it spread to other countries.
The essence of growing on trellises is that the tree is located in one plane, first it is formed in a special way, and then attached to a support. Today, not only fruit trees are grown using the trellis method, but also berry bushes, grapes, pumpkins, cucumbers, etc.
For growing on trellises, trees and shrubs characterized by slow growth are selected. DachaDecor.ru advises checking before purchasing from a nursery what kind of rootstock the manufacturer used.
In nurseries, it is common practice to graft varietal trees (shrubs) onto the root system of species crops, and sometimes onto a completely different crop. An apricot is often grafted onto a plum; grafting a pear onto a quince is also common.
This grafting is done in order to limit the size of the root system and at the same time improve early maturity. Depending on the rootstock of an apple tree of the same variety, one can grow 1.5 m in height, the other 9 m. Naturally, harvesting from a small apple tree is much easier.
Therefore, trees with a rootstock from a dwarf or semi-dwarf crop are grown using the trellis method. We recommend that you read the material about a dwarf garden at the dacha.
How to install supports for fruit trees on trellises
Growing trees using the trellis method involves the use of specially installed supports, existing walls or a fence. To do this, it is recommended to choose a garden area that is well lit by the sun and not blown by cold winds.
The basis of the trellis is a massive, reliable structure made up of pillars and frames; a flat screen made of slats or wire is fixed to it. The tree trunk is attached to a pole, and the branches are distributed along slats lying in the same plane.
Thus, we seem to be transferring the tree from three-dimensional space to two-dimensional space.
Seedlings intended for the trellis method are planted in the usual way, like other fruit trees, the only thing is that the gap between them is much smaller. Make sure there are other fruit crops growing nearby, as this is necessary for cross-pollination.
Apple tree trellis:
The trellis provides a chance not only to competently arrange a very cramped space in a small garden, but also to decorate the wall of the house with an overgrown tree.
wall-mounted method of growing an apple tree on a trellis
To form a trellis apple tree against a wall, you need to choose the wall of the house that is most often illuminated by the sun. The south or southeast side is suitable. The southwest may also be suitable for a trellis, but the west or east are less favorable for comfortable tree growth.
- Before planting, a frame is built. Between it and the wall it is necessary to make an indentation of at least eighty or about a hundred cm wide. This is important to make it easier for the tree to breathe. In addition, access from the rear will make caring for the plant easier.
- Many beginners mistakenly attach wire or board grating directly to the wall. In addition to the seedling, it damages the wall of the house due to the accumulation of moisture on the leaves. It is absorbed into the wall masonry, softening and destroying it.
- The very basis of the trellis is made of lightweight materials - a wooden or iron frame with zinc wire material. The wire is most often covered with electrical tape to avoid the effects of corrosion on the plant.
- The all-wood trellis decorates the wall of the house on its own. To save wood from rotting and drying out, it is painted. The color for painting needs to be neutral - green, brown, white. This will allow the trellis to “merge” with the wall or not be conspicuous because of the wood. When creating a trellis, the gap between the slats should not exceed thirty centimeters.
- Plants do not like ice crust and excessive humidity, although it inevitably arises from water flowing from the roof. That is why, before installing the trellis, water should be drained from the roof using eaves and pipes.
- The dimensions of the recesses for planting are meter-sized in all respects. Occasionally they are replaced by trenches whose width is more than eighty centimeters. Trees absorb and accumulate water, so it is necessary to waterproof the part of the building where the trellises are planned to be placed.
- Gravel or crushed stone is poured into the excavations to create a drainage layer. After planting, the plants are covered with fertile soil. After analyzing the soil on the site, sand with clay and minerals are added to it. In addition, you can add a little organic matter to feed it.
- The fruiting plants near the walls begin to change, giving them shape, when the height of their seedlings becomes more than 50 or 60 cm. This protects the building from destruction due to untimely sprouts or an overgrown root system. If this cannot be avoided and sprouts appear, they are cut off entirely.
- Next, it is customary to give the tree the shape of the selected palmette. This is an ornament that is recreated using branches. It has two types: free-form and ideal-shaped palmette. The second form is known for its longevity, but its attractiveness suffers due to this. With it, the branches are arranged near the walls so that the masonry is not visible at all. As they grow, green sprouts frame doors and windows. Weakened sprouts are cut off, and strong and fruit-bearing ones are positioned so that they all have enough space to grow.
- A symmetrical palmette is much more decorative; its branches are thirty cm apart from each other. If for some reason there are not enough buds on the trunk to form a new row, then they are grafted.
- To speed up the appearance of fruits on the tree, fruit shoots are also grafted onto it. During the growing season, the apple tree needs several pinchings so that the “shoulder” of the tree is formed on time.
Other care is the same as for any other fruit in the garden. A combination of several varieties of apple trees will not only give the crowns a variety of shapes, but also decorate the wall of the house with fruits of different sizes and colors.
trellis in the garden for an apple tree
The name "trellis" originated at the turn of the fourteenth and fifteenth centuries. Then artificial frames were used to give shape to fruit trees as an element of living ornament, which decorated palaces and ordinary houses. Soon, gardeners noticed that on a trellis the fruits were more numerous, voluminous and intensely colored. This led to the popularization of the trellis in conventional gardening.
There are much more palmettes or ornaments for a garden plot than for a house plot.
- The fan ornament is the simplest of the existing palmettes. It is used to decorate dwarf and low-growing varieties of apples and pears. The pattern is represented by a group of six to eight skeletal branches spread out on a trellis in the form of a fan. They are formed for a maximum of three years, giving them different directions - from an almost right angle of growth of the branches to a sprout growing strictly upward. In the first year, the upper shoot is cut off, and the sprouts, from which the first row of branches will later be formed, are laid at a height of 40 cm above the ground. The rest is not cut off, only fixed on a trellis. If there are “bald spots” in a fan shape, they are filled with lateral processes. To avoid dominance of the sprout in the center, it is either truncated or inclined along the growth of the remaining branches on the trellis.
- Ornament in the shape of a candelabra . When an annual sprout is planted, it is crowned 0.3 meters above the ground. Two strong shoots are given complete freedom, but the sprout in the center is cut off. The next year, the side branches are fixed at a right angle, and the sprout in the center is again truncated. The sprouts at the ends of the first row of branches are directed upward and truncated by at least 0.2 meters. This gives impetus to the formation of new shoots. Another year later, a second pair of shoots directed upwards is formed on the first row of branches. The distance between the “candles” will not exceed 0.5 meters. “Candles” are trimmed as they grow, this helps to give the entire candelabra splendor due to the side shoots. When the top sprout reaches its maximum length, the “candles” closest to it need to be shortened more than the others. It is not necessary to make do with four “candles” on a green candelabra; there can be six or eight of them.
- The Ruzin ornament is essentially a type of green “fan”. Suitable for low apple trees with ring-shaped fruit formation. In this type of shaping the tree, you do not need to use pruners. To do this, in two-year-old sprouts, the lateral branches are tied to the trunk, bent into arcs. The sprout in the center is also bent in an arc, and the shoot released by it is bent in the opposite direction. This lasts until the tree grows two meters. If there are several such trees, their branches can be tied together. Everything else is mercilessly truncated so that there is at least 0.5 meters between young branches. A frame made of foreign materials is almost not needed.
- Ornament with branches located at an angle of 90 degrees . This ornament is also suitable for apple trees, whose fruits ripen on ringlets. In this case, the tree has four or more rows of branches, and each consists of a pair of branches. When planting, seedlings are placed in the ground at a distance of up to 4 m from one another. The gap between the rows depends on the variety, although it is never less than 0.4 meters. The shape of the tree is given very slowly - they do not grab the upper tiers until those below are laid. All shaping comes down to truncating the trunk. The side branches are tilted so that they fill the space between the rows.
- Ornament Marchand. This ornament has the shape of a banner. To give the tree the shape of a shaft, the sprouts are planted at a distance of one and a half meters at sharp angles and attached to the trellis frame with the help of a rope. It is created by four rows of thin wires located at a distance of 0.4 -0.5 meters. The shape of the “cloth” of the banner is created from nine branches, directing them at an angle of 90 degrees. All other branches are simply tied to the trellis canvas, without particularly worrying about their growth.
- Delbar ornament . Suitable for dwarf apple varieties. Depending on the growth rate, seedlings are “spread” at intervals of 1.5 meters and up to 4 meters. Then the annuals are crowned as soon as they reach forty cm. A pair of strong shoots appear in this place. The angle of their inclination on the trellis depends on how far away the other apple tree is. Equidistant sprouts are taken from each branch and secured in such a way that they grow in the direction opposite to the base. At the point of contact they are fused. They are also spliced together by intersections with the branches of neighboring apple trees. All other shoots are directed at right angles. The height of the hedge cannot be more than two meters.
- Boucher-Thomas ornament . To create this very interesting wall from an aesthetic point of view, one-year-old sprouts are required. When planting, they are separated by a distance of one and a half meters and bent to the ground at an acute angle. All even “kids” should be tilted to the right, odd ones – to the left. The place where the rootstock is cut should be at the bottom to encourage uniform sprouting. Of those that appeared on the lower stem half, the strongest ones are chosen. The rest are eliminated so that there is 50 cm between the remaining sprouts. The selected sprouts are tilted in the direction opposite to the growth of the trunk. A pair of shoots are produced on the lower branches, directing them parallel to the trunk. This creates a "lattice" of shoots. The crowns and touching branches of neighboring trees can be tied together to form a living wall. This form requires almost no pruning and leads to increased fruiting the very next year after planting. All sprouts that thicken the crown and deprive neighbors of the sun are eliminated. Trimming the main green mass is only necessary for rejuvenation.
Apricot on a trellis
In addition to apple trees, many fruit-bearing trees, including apricots, can be shaped. It is suitable for home wall decoration. In addition to creating the visual effect of a “living wall,” such a neighborhood promotes the rapid growth of the tree. The wall gives off heat and protects it from frost. Gardeners advise forming an apricot tree in the form of a fan.
Apricot pruning on a trellis
Apricots are pruned in the same year that they were planted. Two branches growing upward are left as the future crown. The side branches are bent and can be tied to the lower wires of the trellis or to the trunk itself. It is important to do without pruning, otherwise the tree will weaken.
Apricot cannot get rid of unnecessary ovaries and risks losing branches. They can break under the weight of ripened fruits. This is what makes it dependent on all types of pruning. Removing shoots to give shape is necessary to thin out the density of the green mass of the tree so that the light falls evenly on all branches. A tree as fruitful as the apricot ages quickly and often needs rejuvenation. And, of course, eliminating weak or frozen sprouts.
At the beginning of April, all diseased and weakened shoots are cut off to give the seedling time to gather strength and use it to grow and produce fruit. Only after this they resort to truncation of the remaining shoots to give the top of the tree a fan shape.
If the apricot variety is fast-growing, then all sprouts can be safely cut off by one-half of their growth, if not, by one-third. There should be no side shoots on the main branches.
Apricot sometimes likes to give an unpleasant surprise by growing fruits on the upper and lateral shoots. It is to avoid this that the lateral shoots are removed along with the diseased and crooked growing ones. Pruning in the fall is necessary to evenly distribute fruit and deciduous branches throughout the tree. If you are greedy and skip this pruning, then there will be more fruits, but they will be smaller and of lower quality.
A third of all fruit shoots are removed from a two-year-old sprout so that the tree does not deplete its strength. Everything that remains is truncated to 0.5 meters. On the main branches that have thrown out the seventh pair of leaves, you can dive.
Experienced gardeners usually barely touch the branches of the crown. To give it shape, removing crookedly growing branches is enough. Rejuvenating cutting of shoots occurs once every three years, not earlier. All green shoots are cut off by 30 cm. After two weeks, when the branches are covered with new green shoots, it is recommended to remove them and save the three strongest ones. These will subsequently form the second row of the main frame of the tree. The only time of year in which apricot pruning is not carried out is winter.
formation of apricot on a trellis
To give the future tree its shape, the sprouts are at least halfway on the sides and attached diagonally to the trellis. The “trunk” is cut 25 cm higher than the top of the last branch. In the fourth week of May, all crookedly growing new shoots are cut off, and others are pinched after the third pair of leaves. The branches on the sides are fastened at right angles and the tree is left to overwinter.
The next year, all newly formed branches are removed except for the two strongest ones. They are attached to the trellis canvas and trimmed, making them smaller than the branches of the previous row. Their lateral processes are also shortened. The closer to the end of the branch the sprout is, the shorter it should be. There should be a distance of 40 cm between the rows of branches.
The topmost sprout is cut seventy centimeters above the last branch, the lowest branches are pruned. The upward growing shoots that appear on them are eliminated, the rest are cut in half. When they reach six cm in height, they are pinched.
The last upper branch, which plays the role of a fan-shaped crown, is formed only by the fifth year of the tree’s life. To ensure an abundance of fruits and inhibit growth, the conductor is removed from it. All subsequent care consists of giving the “fan” volume by thickening the lateral growth. Sprouts from the overlying row are placed on the lowest row of branches, and from the third on the second row. All other sprouts are truncated.
In the future, there is no need to resort to strong shortening anymore, since this will affect the quality of the fruit. Only unnecessary, weakened and broken shoots need to be eliminated.
Features of caring for espalier trees
In many ways, the agricultural technology of plants on a trellis is the same as for conventional planting. But there are also peculiarities.
Since dwarf rootstocks are chosen for such plantings, their root system is shallow and more sensitive to lack of moisture. Trellis trees are watered more often than usual - about once every 10 days, pouring 3-4 buckets of water under each. To retain moisture longer, it is best to mulch the soil.
Pruning and tying branches requires certain skills and patience. It is akin to the art of bonsai, especially if you plan to create a complex shape. From the point of view of agricultural technology, everything is much simpler. Trees are pruned twice a year - in spring and at the end of summer, removing shoots that extend beyond the intended contour.
Nowadays, many nurseries sell ready-made shaped trees along with a support, and all you have to do is maintain their shape. You can also contact a landscaping company. We will suggest where it is best to place the trellises, design them, plant them and help shape the trees.
Pear on a trellis
The pear tree is perfect for any type of trellis. Tree varieties with wide branches are more suitable for decorating the walls of houses, while their dwarf sisters are more suitable for garden formations.
pruning and shaping pears on a trellis
The pear is an extremely heat-loving tree, so it is literally created for a home trellis. In addition, low trees can be used to perfectly fence off a seating area in the garden.
When forming, the main task should be to create a strong “skeleton” of the tree. This determines whether the pear will be able to survive the future abundance of fruits or whether it will break under their weight. If you thin out its sprouts too much, the pear throws out a lot of new buds.
Since the tree needs strength to do all this, the least need to resort to is using pruners. The upper branches of the tree are arranged in a fan shape so that the pear tree and its neighbors have enough light.
Immediately after planting, all excess shoots of the pear seedling are cut off, and the remaining ones are attached to the trellis canvas at an acute angle. In the first year, the tree grows so slowly that you only need to increase the growth angle of the lower row of branches.
In the first five years, the pear is shortened by only one-fifth of the entire shoot. This brings the ripening of the first fruits closer. Pear branches need to be bent at right angles to the trunk, otherwise they begin to grow upward and form the first fruits much later.
At the end of spring, new branches are only attached to the trellis frame, and from the second week of July they are already thoroughly bent down using twine. If the gardener is late with spring work, then the young shoots growing upward can be removed.
The first row of branches is formed from two strong shoots growing no lower than sixty centimeters from the ground. In the spring, young shoots that are growing incorrectly are cut off. The topmost sprout is shortened above the last couple of branches by forty cm.
Three-year-old branches have a mass of new shoots. If they have not reached thirty centimeters, you can leave them alone, they will bear fruit. But if they are taller than thirty cm, then they are cut off, leaving only a couple of eyes at the base. It is better to tear out the rest of the green shoots.
If young branches are trimmed correctly, the top of the tree will grow to the sides. It can be given a fan-shaped shape, controlling the direction of development.
What is a espalier tree?
Trees in which a flat crown shape is artificially formed are called trellis trees. During the process of growing a seedling, gartering is done in a special way, allowing the branches to grow in a common plane.
The trellis serves as a load-bearing support. The design includes several pillars, between which rows of wire are evenly stretched. The technology also allows for attaching wire to a building wall or fence. In this case, there is no need for pillars.
The trellis method is only suitable for growing trees grafted on a dwarf rootstock. This allows them to grow in width while maintaining height. The type of crown of a trellis tree is determined by the method of formation.
Peach on a trellis
Peach feels best on the sunny side of the house, against the wall. Thanks to the exchange of heat with the wall, its fruits ripen faster. It is better to arrange the upper branches of the peach in the form of a fan.
peach pruning on a trellis
The peach tree has an extremely fast metabolism. Moreover, most of the tree’s forces are spent on forming branches that grow vertically upward. That is why cutting off excess shoots will rejuvenate it and allow you to redirect your energy to creating fruits.
From mid-March to mid-April, all forks on the branches are shortened. Peach loves to send out sprouts on the sides. Over time, they break and collect ice, so you need to get rid of them. Young shoots need to be trimmed with a sharp blade. If after this there is a “wound” larger than a centimeter in diameter, it needs to be treated.
The undoubted advantage of pruning at this time is that the swollen buds show how many fruits will be on the branches. Usually, a couple of the most fruitful branches are not touched, and the remaining ones are eliminated. During spring pruning, all shoots are truncated by a third.
The main part of the work on cutting down the green mass of the tree and giving it shape takes place in the summer months.
At that time:
- Weakened and non-fruitful sprouts are eliminated
- All shoots that thicken the crown are thinned out
- Branches with many ovaries are slightly truncated. This allows them to grow stronger and not break under the weight of future fruits.
You can thin out new shoots in June. In autumn, peach is pruned for wintering. Then they get rid of diseased or weakened shoots, all the remaining ones are cut off to two buds. These works must be completed before October fifteenth.
To rejuvenate the plant, all four-year-old shoots are broken off.
shaping a peach on a trellis
The branches of the peach are directed at an angle of 45 degrees upward and are not particularly flexible, so it is easiest to give the peach a fan shape.
After planting, all but four shoots are removed from the seedling. From these, both rows of branches and the crown of the future tree will be formed. It is better to prune and remove all young growth in the spring.
The four shoots preserved on the seedling are attached to the trellis at an acute angle. When the growth of the seedling reaches almost 50 cm, additional six sprouts are placed in a fan-shape and secured at an angle to the trunk. The topmost shoot, if it has almost reached thirty cm, is cut off along with the remaining unnecessary green mass.
The sprouts are cut into three or four buds. In the next two years, two pairs of strong lateral shoots are formed on the main branches. They are trimmed a little so that they sprout and can add volume to the tree. The top shoots are thinned out so that they grow at the same distance. At least three are required. Once pinched, they will produce six branches that can be used to form the top of a green “fan.”
DIY wood trellises
There are three types of trellises suitable for fruit trees. Other types of ornaments are too fragile and will not support the weight of a growing tree.
This:
- Wooden trellises
- Iron
- WPC trellises
All types have their own disadvantages and advantages. Wood, even impregnated with a special composition, does not last long. Iron rusts, and WPC has few colors and is not able to amaze with its variety of shapes.
To make a wooden trellis you need:
- Hammer
- Self-tapping screw
- Screwdriver
- Nails or, if you prefer, screws
- Wood carving hacksaw
- Antiseptic-treated bars made from durable wood
If oak or ash is used for the bars, then its width cannot exceed 3 cm.
The base of a trellis made of beams is very diverse, but for trees you need an ordinary rectangular shape.
To make it you need:
- To create a trellis, you need a beam three cm wide and three or two and a half meters long. Those parts of the timber that are intended to be in the ground should be treated with an anti-rotting compound and wrapped with moisture-proof insulation.
- The resulting wooden “piles” are dug fifty centimeters into the ground. Using a plumb line, make sure that they stand strictly perpendicular to the ground. Depending on how branchy the tree turns out to be, the distance between the piles should be at least three meters.
- Then longitudinal beams are attached to the “piles” using screws, nails and other fastening materials. The joints can be insulated with waterproof glue. Trample the soil at the base of the “piles”.
- The moment has come when slats are built into the prepared frame so that their intersection corresponds to the selected internal pattern of the form. The slats are nailed onto the base and glued together with wood glue.
- All that remains is to saturate the trellis with compounds against moisture and rot, and also paint it in the chosen color.
- If it is placed against the wall, then the distance from the house to the form is at least thirty centimeters. The trellis is attached to the wall of the house with iron fasteners.
The metal trellis structure is more suitable for garden areas due to the ability to give it the most amazing shape. Unfortunately, it is not as transportable as a wooden trellis, and begins to corrode more quickly.
- The simplest rectangular frame is made from reinforcement with a diameter of 2 or 3 cm. The height of the frame should be twenty centimeters higher than the tree.
- On one side, metal profiles are welded to it. After this, the base is concreted in the ground at a distance of 3 m or more from each other. One and a half or two centimeters thick wire is welded onto these iron posts. Most often it is mounted horizontally, but it can also be positioned crosswise.
- After installation, the trellis is either painted or wrapped with insulating material to protect the wood from corrosion products.
WPC trellises are very similar to wood trellises in terms of installation.
Advantages of the trellis method
First of all, when growing using the trellis method, gardeners note an increase in the productivity of apple trees. In addition to fertility, trellis crops have an attractive appearance; their unusual shapes serve a decorative function. With the help of trellises, you can delimit an area into several zones, isolate certain zones from each other, or decorate the area with beautiful alleys and arches. In a small area, you can plant several times more apple trees.
Apple tree grown using the trellis method.