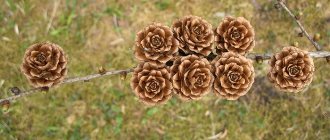
Advantages and disadvantages of growing from seeds
There may be several reasons why you may decide to grow thuja from seeds. For example, the opportunity to obtain an unlimited number of seedlings to form a green hedge or simple research interest in this truly creative process.
Important! Seedlings grown from seeds do not retain varietal properties. Most often, this method is used to develop new varieties.
With the growing popularity of thuja among landscape designers and amateur gardeners, growing planting material is becoming a profitable business that does not require investment.
It is enough to make sure that in the most modest Russian nurseries, seedlings of even far from exotic varieties are rarely sold at a price below 2,000 rubles - this does not include shipping.
To preserve the exceptional characteristics of the variety, it is recommended to propagate thuja by cuttings.
And although cuttings are more often used to propagate these conifers, keep in mind that sowing and growing young plants at home is not such a difficult matter, although it will take a lot of time. Moreover, not every region has the opportunity to purchase healthy cuttings of the exact variety that you like. And another undeniable advantage of such ¾ seedlings is the ability to make selections from the first days and, as a result, get beautiful, healthy plants.
Read more about propagation and cultivation of thuja.
Types of indoor thuja
The thuja genus is divided into six main species, each of which has produced many new varieties. In indoor floriculture, two types are used: thuja occidentalis and thuja orientalis.
Western
Eastern
There are a number of differences between them that determine whether they belong to a species. It was previously believed that the western thuja has a pyramidal shape, while the eastern thuja is closer to the shape of a shrub. Nowadays, plants of different shapes have been bred in each species:
- pyramidal;
- spherical;
- dwarf and others.
Thuja globulus
Also, the color of the leaves of modern thuja can be dark green, yellowish and even bluish. Therefore, it is necessary to be able to distinguish between eastern and western thuja by the structure of branches, leaves and the shape of cones. Modern botany classifies thuja orientales, which is also called biota, to a separate genus - oriental planum.
Below is a table highlighting the similarities and differences between the Western and Eastern Arborvitae, as we will continue to call them.
| Main features | Thuja Western | Arbor vitae |
| Branches | The plant is single-trunked, and the branches are turned in different directions relative to the trunk. This gives lushness to the plant. | The branches at the base branch into several trunks growing parallel to the main trunk. The branches are raised up. |
| Escapes | The shoots are short and their ends are curved upward. | The light brown shoots are flat and form a system of plates located radially relative to the trunk. |
| Leaves | The scales on flat leaves are wedge-shaped. The needles turn brown in winter. | The leaves are round and scaly. They grow up to 1.5 cm, and are located tightly on the shoots, overlapping each other. |
| Cones | The cones are light brown in color and have an oblong shape, without “horns”. Length - about one centimeter. | The cones become red-brown and brown as they ripen. The cones have “horns”. Cones size: 1.5 cm long and about 1 cm wide. |
| Seeds | The seeds are flat-shaped with two wings, light brown in color. | The color of the flat branch seeds is brown. The size of the seeds is comparable to a grain of wheat. Their shape is oblong-round. |
This may be interesting: Indoor Soleirolia (Gelxina): care and other nuances of growing
Thuja eastern and western can be grown both in gardens, parks, and indoors, on balconies and loggias. They grow slowly and are easy to trim and form a crown. They are used for growing bonsai.
The following varieties have proven themselves well for growing indoors:
- Western Golden Globe;
- Western Teddy;
- Western Miki;
- East Aurea Nana;
- Dwarf.
Selection and collection of seeds
When choosing the large quantities of seeds on the market today, your main parameter should be freshness. For this reason, many people decide to independently collect the cones that appear on thujas already in the first fruitful year.
Fruits collected in the fall, from September to December, are suitable. You can easily find light brown or brown-orange tightly closed cones on the tree. To go for them, choose a dry day, or even better, there should be no heavy rains several days before.
To extract the seeds, simply lay the brought material loosely on paper in a warm, dry place, wait for the cones to dry, open, and within a day or two you will receive a scattering of small seeds ready for germination.
Preparation and stratification
To awaken the seeds and give them a signal for full development, regardless of the current time of year, it is necessary to carry out stratification. This is a procedure for simulating the natural conditions that seeds would survive in winter and spring: cold, the greenhouse effect of fallen leaves, moisture, which softens the shell and additional microelements necessary for full growth.
Did you know? In 1883, the Krakatoa volcano erupted in Indonesia, which destroyed all the plants on the island. After about 10 years, palm trees, ferns, various types of flowers and shrubs grew from the seeds that were preserved in the soil.
It is not difficult to do this at home. First of all, dried and selected whole seeds without flaws must be kept in a humid environment with a low temperature. This can be gauze or matting, placed in the refrigerator or underground for 4-5 weeks. Skipping this part of preparing seeds for sowing can lead to the fact that, without waking up, they will simply rot once they fall into the ground.
You need to be prepared that after such hardening, some of the planting material will be rejected. Some will be visually too dry, some will rot. Therefore, it is important to check the condition of the seeds throughout the cooling period and remove weak and dead ones.
Even if you bought the seeds from a trusted manufacturer, it would be a good idea to disinfect them. And for seeds collected independently from cones, this procedure is simply mandatory. For example, a regular solution of potassium permanganate with a concentration of at least 1 g/100 ml of water is suitable, in which the seeds are placed for 1 hour. Don't be afraid of the dark cherry color of the resulting liquid. Thuja seeds, which look fragile, like all conifers, are quite tightly protected by a shell.
We recommend reading about diseases and pests of thuja.
The last step in preparing the seeds is soaking. To germinate seeds, place them in warm water for 10–12 hours. Depending on the variety, the soaking period can be extended to 24–36 hours. An indicator of readiness for sowing is a hatched sprout.
How to grow thuja from seeds
Propagation of thuja by seeds is a long process that requires compliance with certain growing conditions and rules of agricultural technology. You should be prepared for the fact that thuja seedlings grow very slowly. It will take at least 5 years to get a beautiful young tree from seed. It will be possible to plant seedlings in a permanent place only for 3-4 years, when they get stronger and gain strength.
You can grow strong, viable trees at home on a windowsill or directly in a garden bed. When grown outdoors, young plants will need to be provided with secure cover each fall.
Even with proper feeding and favorable conditions, the growth of sprouts after planting with seeds is no more than 8-10 cm.
Collection and preparation of thuja seeds
Thuja seeds need to be collected in late August - early September. At this point they are ripe, but the cones have not yet opened. After collection, they are laid out on newspaper and left to dry in a well-ventilated area. The ideal temperature is +6-7 °C.
After drying, the cones open and the seed is poured onto the newspaper.
It is better to plant thuja immediately after harvesting in the fall, since the seeds lose their viability within 3 months by almost 50%. When planting in spring, stratification is necessary.
If you sow seeds in the fall and leave the plantings outside, the likelihood of seedlings increasing due to natural stratification. Sprouted seedlings are more resistant to weather disasters, tolerate winters well and grow more actively.
Seed preparation
When planting seeds in spring, stratification is first carried out. The collected seeds are wrapped in a cloth, placed in the ground outside and left until spring. Thus, the seed material will undergo natural stratification. The first shoots will look like dill.
Hardening in the refrigerator is no less effective. Stratification in this way is easily carried out at home. The seeds are placed in a jar, sprinkled with wet sand or sawdust on top, and sent to the refrigerator for 2-3 months (optimal temperature - 5 ° C). When carrying out stratification in the refrigerator, you will need to monitor the sprouts for a long time, providing them with proper care.
After preparation, some of the seeds will be rejected. Some of them will dry out, others will rot.
Soil preparation
The land for planting is prepared in advance. For sowing, soil rich in nutrients is required, which is supplied with ash and nitrophosphate. You can make lighter soil using sand and sawdust.
If it is possible to leave the area under the thuja to rest for a year, then add humus to the ground. This will promote the growth of young plants.
Time and place of sowing
When growing thuja at home, the optimal time for sowing is February-March.
- The seeds are removed from the refrigerator and soaked in warm water for a day.
- Make furrows 1 cm deep in the container, lay out the seeds, and sprinkle soil on top. Maintain a distance of at least 1 cm between individual plants.
- The top of the soil is carefully sprayed with a spray bottle.
- The container is covered with glass or cling film to create a greenhouse effect.
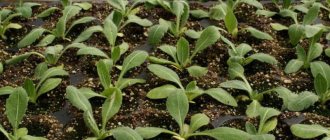
The container with the seeds is transferred to a warm, lit room. The shelter is periodically removed for ventilation. After the first shoots appear, the box with the growing thuja is moved to a cooler room, periodically ventilated and sprayed.
Sowing
The land for sowing thuja seeds must be prepared in advance. It should be rich, nutritious soil, flavored with ash and nitrophoska. You can lighten it with sand or sawdust. If it is possible to enrich the soil with humus in advance on the site and let it sit for a season without load, this will have a good effect on the growth of young animals.
The container for planting can be either a pot or a box. The main thing is to ensure drainage with pebbles and a thin layer of sand laid on the bottom. The soil laid on top must be shed with water in advance and allowed to dry to avoid air pockets, which can become a source of rot.
Care during emergence
As soon as the first shoots appear, you will want to feed them, but you should refrain from excessive care for a week or two. If the soil has been prepared well, then there are enough nutrients in it for the first days of life, but stimulating a weak sprout that has not formed a minimal root system is dangerous. This can lead to stretching and death. For the same reason, it is important for seedlings to spend the first weeks away from direct sunlight, in an evenly shaded place.
Important! Thuja is quite sensitive to various diseases. To disinfect ordinary soil and peat base, it is necessary to use a strong solution of potassium permanganate.
After 10–15 days, when you see that the shoots have settled evenly in the ground, you can begin regular feeding, once every two weeks. Only mineral fertilizers are acceptable, namely nitrogen, potassium and phosphorus. Ash, beloved by all conifers, will also be optimal.
But even with feeding and observing the temperature regime, the newly grown seedlings will not grow above 8–10 cm per season. This is a feature of conifers that should be taken for granted and not try to argue with nature.
You might be interested in reading about the flowering of thuja.
It is important for seedlings to survive the first winter at home; experiments even with planting in a greenhouse do not give good enough results. During the second season, the young growth will grow to another 15–18 cm, and only by the third will they reach a selling height of 40 cm. By this age, young thujas need not only to be watered and sprinkled, that is, the crown should be sprayed, imitating natural precipitation, since the evergreen plant evaporates a lot of moisture. Around this time, it makes sense to start forming the crown, depending on the variety and the task at hand.
Caring for thuja at home
Thuja is an unpretentious plant and does not require special care, but some nuances should be taken into account.
Temperature
It is best to place a thuja pot in partial shade, in a place in the room that does not receive direct sunlight. A good position is on a raised platform (for example, a flower stand) near an east or west window, provided that the glass is shaded on sunny days.
The optimal indoor air temperature is +20…+25°C. In the warm season, the plant can be taken out into the fresh air in the shade. In winter, it is advisable to provide a slightly lower temperature (+14...+16°C), for example, place the pot on a glazed balcony.
Humidity
The humidity level in the apartment should not fall below 40%.
If the air is dry, you need to spray the plant with warm water.
Watering
Water the thuja several times a week with settled water at room temperature, avoiding drying out or excessively moistening the soil.
Top dressing
Fertilizing the soil can be done in the warm season up to twice a month. You should choose complexes for coniferous trees, but apply only half the dose indicated on the package. Nitrogen fertilizers are used for fertilizing in the spring, and potassium fertilizers in the summer.
Landing at a permanent place
The sprout must be planted in a permanent place in the spring or autumn in the 3rd year of life, when it reaches about 50 cm in height. The place for this should be sunny and spacious, without wind or drafts. It is recommended to choose an area where the sun will not shine all day to protect the thuja from burns. A tree that grows in the shade may lose its decorative properties and shape, and the crown will turn yellow and fall off.
Video: planting thuja
Soil preparation
Thuja grows well in light turf soil with the addition of peat and sand in a ratio of 2:1:1. It is recommended to use mineral fertilizers. It is best to use nitroammophoska, based on the norm of 500 g per 1 adult tree.
Did you know? In 1954, Arctic lupine seeds were found that had spent about 10 thousand years in frozen silt. After 12 years, a Canadian botanist created successful conditions and grew healthy plants from these seeds.
When the soil is too waterlogged, heavy or clayey, before planting thujas in a hole, it is necessary to arrange a drainage system using broken bricks, stones, crushed stones or sand.
Staged planting
This process is quite simple if you follow certain rules:
- It is necessary to prepare a hole for planting. The size will depend on the clod of earth in which the thuja grows. It is recommended to make the depth about 70 cm, and the width - 2 times the soil. To ensure that the trees do not interfere with each other, it is recommended to plant the seedlings at a distance of about 2 m from each other or 1 m when the formation of a hedge is planned. If necessary, drainage should be placed at the bottom.
- The thuja with a lump of earth should be lowered into the prepared hole so that the root collar remains at ground level. This directly determines how the thuja will take root in a new place and how easily the adaptation period will pass.
- Water the plant and slightly compact the soil around the root.
Diseases and pests of thuja
Problems when growing indoor thuja are divided into care errors, fungal diseases and the appearance of pests.
Among the main problems is yellowing of the leaves. The cause usually lies in sunburn received from direct rays of the sun. You should also pay attention to the root collar. If it protrudes above the ground or is heavily sprinkled, then the thuja leaves also turn yellow.
Important! If the thuja turns yellow in winter, this is not dangerous and is a natural process. And you should pay attention to the yellowness of branches in spring and summer and take measures to eliminate the problem.
Among the diseases of indoor thuja, the most common are the fungal diseases cytosporosis and fusarium. Cytosporosis affects the bark of the plant, forming black areas on it. Gradually, the fungus affects the inner layers of wood, which leads to the death of the thuja without timely treatment.
Fusarium
Fusarium manifests itself in the reddish-red color of the needles, and its subsequent wilting. The roots and nutritional system of the plant are also affected, which often leads to its death. The plant is treated with Bordeaux mixture, carticide. Treatment is carried out every two weeks until the plant is completely cured.
Among the pests, thuja is attacked by aphids, scale insects, and bark beetles. Aphids settle on the needles, sucking out the sap, which leads to yellowing of the branches. The scale insect lives in the bark and seeds of the thuja. If holes are noticeable in the bark, this means that a bark beetle has settled in, destroying the plant from the inside. To control pests, use insecticides according to the attached instructions.
Further care
Thuja needs proper care, because the plant is quite susceptible to the influence of pests and aggressive environmental factors. To protect her from disease, stimulate rapid growth and make her attractive, you need to follow simple rules.
Learn about growing and caring for a thuja hedge.
So, immediately after planting, you should not place the container with the planted seeds in the open sun. It is better to place the box under the crown of a tree, where the rays will be diffused. It is also better to protect the seedlings from pets, if you have any at home.
Watering and fertilizing
The soil should be moderately moist. Excess moisture can lead to rotting of seeds and seedlings. However, the substrate should dry no more than 3 cm deep.
