Why replant?
Daylilies can live in their usual place for up to 15 years. But in the sixth year, flowering becomes sparse and the bush grows. Young shoots usually appear around the plant. This means the daylily needs to be transplanted. Otherwise, the main bush will die. Transplantation allows one bush to be propagated into several plants. All varietal qualities will be preserved.
Young shoots appear around the plant
How to transplant?
As already noted, the plant tolerates transplantation relatively easily, without much stress. But if you don’t meet the deadlines and replant, breaking the rules, this will definitely be a shock for the daylily. It is important to follow the instructions.
- Dig a hole taking into account the diameter of the root system of the bush. The bottom of the pit must be prepared - lay a mixture made of compost and soil in an even layer. You can also use rotted manure. If you don't have it, use an all-purpose fertilizer.
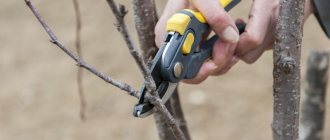
- Use a shovel to take soil along the outside of the bush's rhizome, but so as not to injure the roots. To avoid having to tear apart the rhizome by force, you can bring a hose to the plant, turn on a lot of pressure, direct the stream directly at the root and wait until it gets wet. Then you need to pull the bush a little to the sides. If the bush is old, such division is unsuccessful, but a relatively young bush can definitely be divided with water. The old bush needs to be divided with a knife, not forgetting to treat the cut areas with a fungicidal composition.
- Hold the flower by the main stem and carefully move it to the new hole prepared for transplantation. Place a small mound of soil (in the shape of a cone) at the bottom; try to pour this soil so that it ends up inside the rhizome. When filling the hole with soil, the bush should be vertical. Make sure that the daylily does not “go” to the side and does not fall over. Overlook this moment, and the plant will not be able to develop normally.
- After the hole surface is level with the rest of the soil, try to thoroughly compact the area. The flowerbed should be watered abundantly. And for the first 3-4 weeks, actively water the “migrants”. If you forget, the soil in the new place will dry out and the plant will be left without normal nutrition.
Daylily transplantation is usually combined with its propagation . The latter can also be done through proliferation. On the plant you need to find a rosette of leaves that forms in the leaf axil. The rosette needs to be cut closer to the stem. The replanting of the rosette itself will take 6-8 minutes; in addition, the soil will be fertilized. The grown bush will be similar to the mother bush, which means that the gardener will retain the daylily variety.
An easier way to propagate daylilies is to cut the main stem to the very base, leaving no more than 2 cm from the root neck. This will stimulate the growth of new shoots, and in order for them to grow and develop, the soil from the rhizome should be moved slightly to the side.
Another important point is that you need to cut the stem strictly horizontally, and not at an angle, as some gardeners mistakenly do . Ash sprinkling will protect young wounds from infection.
It is known that if you propagate daylilies in this way, you can get a dozen new shoots in just one month. But after dividing the bush, you can replant it in a couple of years, after dividing it into several local bushes.
Selection and preparation of a site
When to replant peonies in spring, summer and autumn
To quickly adapt after transplanting, you need to take care of the temperature and soil composition. There should be a lot of sunlight; daylilies hardly bloom in shaded areas. An open place is chosen for the flower bed.
It is important to know! If the flowers are dark, then the shadow will only benefit and preserve the rich color. A plant with light petals needs more sun.
The bed should not be too low, otherwise the roots will rot. If there is no choice, use drainage. The soil should be saturated with organic matter. The best soil for daylilies is loam. If the soil is sandier, then organic fertilizers are applied. It is recommended to loosen dense soil with sand. And too loose soil is compacted with manure.
Preparation of the bush
To avoid damaging the roots, you need to dig around the bush at a sufficient distance. Next, carefully remove the bush along with the soil. You may need help for this, as the bush is heavy. Then the roots are placed in a solution of a growth stimulator (epin, kornevin, zircon) for 4 hours. Then the plant will take root well.
If there are rotten or dried roots, cut them off. Next, they are placed in a saturated solution of potassium permanganate to disinfect. The next step is dividing the bush. Every new plant must have at least one root. Damaged areas are sprinkled with coal. Then the leaves are cut off.
Dividing a bush - a method of propagation
Note! After adaptation, the daylily will quickly restore its leaves.
How to plant daylilies in the fall
The flower bed for the plant must be carefully dug up to the depth of a spade bayonet. The procedure should be carried out in dry and warm weather.
How to properly plant daylilies in the fall step by step:
- Dig a hole. It should be spacious, up to 25-30 cm deep and up to 40-50 cm in diameter. If you want to plant several daylilies in the fall, then it is important to ensure a distance of 0.7-1 m between each plant.
- Place a drainage layer of 3-4 cm at the bottom of the hole. To do this, use available materials: fine crushed stone, gravel or coarse sand.
- Make a nutritious soil mixture from the excavated soil. To do this, you need to add 30-35 g of superphosphate, 15-20 g of potassium sulfate and 70 g of wood ash to 5-6 kg of garden compost.
- Build an earthen hill at the bottom of the hole. Place a daylily on top of it, carefully straighten its roots.
- Fill the hole with soil mixture, compact the soil around the trunk so that there are no air cavities left. The root collar should not be lowered below the ground level by more than 2-3 cm. Excessive deepening will lead to the death of the bush.
- Mulch the flowerbed with straw, peat, pine needles or sawdust to a height of 5-6 cm.
Read more Hybrid daylily Stella de Oro (Stella de Oro): planting and care
After planting the daylily in the fall, the bush should be watered generously with warm, settled water.
Every 5-7 years the culture must be transferred to a new place. This procedure is combined with dividing the rhizome. And although the transplantation process is no different from that described above, it has the following nuances:
- A bush that is to be replanted in the fall needs to be dug up and inspected. Clear the roots from the soil, cut off damaged and diseased parts.
- Using a sharp shovel, divide the daylily so that each section contains a stem and a root.
- Before autumn planting, soak the seedling first in a fungicide solution and then in a growth stimulator.
Before planting in the fall, you should not divide the daylily too finely: a weakened plant may not withstand winter frosts and die
Transplantation process
When to replant the hosta
First, dig up the soil and form a hole. Its diameter is approximately twice the volume of the root. Depth 35 cm. The bottom of the hole is lined with drainage. Next, it is filled with soil with superphosphate and ash in a ratio of 0.5:1. Then the bush is placed, the roots are straightened, sprinkled with the same nutrient soil and compacted. Then the daylily is watered and sprinkled with mulch. This will protect the soil from drying out.
Daylily needs watering and mulching
Additional Information! The root neck should not be buried; 2 cm is left above the ground.
Care
We will learn further how to care for daylilies after transplantation.
After the procedure, it is important to provide the plant with the most favorable conditions for rapid rooting. The daylily needs to be watered daily over the next two weeks. High soil moisture promotes rapid adaptation. In the future, watering is carried out less frequently - only as the top layer of the substrate dries.
After watering, loosen the soil to provide air access to the roots.
A month after transplantation, mineral fertilizers containing nitrogen dissolved in water are applied. Feeding will help the flowers turn green faster and grow lush foliage.
Features of seasonal transplantation
There are several options for dividing and planting daylilies.
Transplantation in autumn
When to replant tulips
When choosing an autumn transplant, you need to take into account all the nuances. You should not focus on the second half of autumn; plants may not take root before the onset of frost. Then in winter the flowers may die. September and early October are the most favorable times. If you still cannot invest on time, you can plant frost-resistant varieties. If you follow all the recommendations, the transplantation of daylilies will go well, the plant will take root remarkably well in the spring and will begin to grow actively.
Note! Daylilies need at least one and a half months to take root. Don't delay the transfer.
Transplant in summer
Sometimes daylilies are replanted in the summer, but this is rather an exception to the rule, since they bloom all summer. The procedure severely injures the roots and makes the plant weak. Then how to replant daylilies in the summer?
It will not be possible to propagate the bush during the daytime, because... it cannot be divided. Work can only be done when there is no sun. It is necessary to preserve the earthen lump, otherwise the plant will not take root.
Bloom
Spring transplantation of bushes
Dividing the bushes in the spring gives them the opportunity to bloom this year. This applies to strong plants with powerful roots. When transplanting weak bushes, you should not expect rapid flowering. Working in spring has a huge advantage, because the flower has a lot of time ahead to take root. There will be lush blooms in summer.
Important! In spring and summer, it is not recommended to plant daylilies during the day.
If it is difficult to decide which season to choose for transplanting daylilies, when it is better in spring or autumn, then it is better to choose spring. This is an excellent time for minimal intervention in the life of the flower.
Recommendations and common mistakes
And although there are detailed videos and articles on planting daylilies in open ground in the fall, there is always a risk of destroying the plant if you make mistakes in care:
- The most common reason for the death of a crop is failure to meet the deadlines for transferring a flower to a new location. If the daylily does not have time to take root after the procedure, it will die from frost. If you plant a bush that is not strong enough after flowering, it will take a long time to recover and get sick after being transplanted to a new place.
- The daylily will not take root if the ground part is cut low. The length of the stump should be 10-25 cm. Damaged leaves and stems can be removed, but complete pruning will deprive the bush of the ability to provide itself with nutrients.
- If, after planting a daylily in the fall, you cover the crop early, it will dry out. The procedure should be carried out before the onset of frost, taking into account the weather.
- Do not remove leaves in a timely manner. In a healthy plant, it should dry out on its own, giving all the nutrients to the root system.
- When planting daylilies in the fall, use nitrogen-containing fertilizers. They provoke the growth of foliage, forcing the bush to spend energy not on rooting, but on gaining green mass.
Read more Feeding and caring for daylilies in spring, summer, autumn
Enemies of daylilies
Diseases or pests are rare on daylilies, but unpleasant cases do occur. The most terrible enemy is the lily mosquito. The adult insect itself cannot cause any harm, but numerous larvae love to feed on the tasty juice of the buds, after which you will not see full flowering. Try to completely remove damaged flowers and sprinkle the bushes with fresh wood ash.
Often your pets become a tasty morsel for thrips. The fight against them is merciless - remove infected plants and immediately burn them. Prevention with insecticides and deep digging before frost will help here; most pests will die from the cold.
You can often find slugs on daylilies, the enemies of every summer resident. Collect them by hand every morning and evening, not neglecting the flowers and shrubs growing nearby.
Diseases on daylilies include root rot, rust or fusarium. If in the spring the plant stubbornly refuses to grow, and the leaves dry out and turn yellow, then you can rest assured that it is root rot. Carefully remove the bush from the soil, remove all affected areas and treat with a fungicide. Daylily can be planted only after a few days, after it has dried thoroughly. Be sure to change your place, returning to your original place only after 3 years.
If you are an avid gardener, then you are familiar with fusarium firsthand. The yellowed leaves of the daylily and the leaves that have turned to dust indicate that the disease has not neglected this plant. If the disease is noticed in time, it will recede after spraying with fungicides, but if the infection has spread throughout the entire bush, you will have to dig it up and burn it.
Fungicides will also protect daylilies from rust. Carry out preventive treatment in the spring, and diseases will not cause you trouble throughout the entire season.
The optimal time for autumn planting daylilies
The optimal time for autumn planting of daylilies is the end of August, beginning of September . The planting procedure coincides with the period when the bush can reproduce without digging, by cutting off sections from the mother bushes (this is the advantage of autumn planting):
- Using a well-sharpened shovel, cut off a section of the required size, being careful not to shake off the soil around the roots.
- Fill the hole formed near the mother bush with dry soil, compact it and do not water it.
- Transplant the removed part of the roots into the prepared hole and water.
The deadline for autumn planting is the first ten days of October , since daylily takes root well in warm weather. A well-rooted plant will have an easier time surviving the winter.
Daylilies do not have any special requirements for the composition of the soil, but they would prefer loamy, well-fertilized, slightly acidic soil, without stagnation of spring groundwater. Flowers love to be watered, but only during certain periods of the growing season (growth of foliage, budding, flowering).