Botanical features of hot pepper
A perennial plant native to the tropics of America. For this reason, it is most often grown as an annual. In warm regions, as well as at home, it can grow and bear fruit for several years.
It has an erect branched shoot, which over time becomes woody in the lower part. The leaves are petiolate, green, small and narrow. Arranged singly or growing in a rosette.
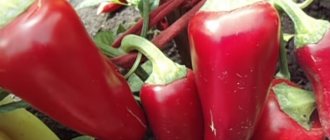
The flowers are located in the axils of the leaves. Petals are white or purple. The fruits are small - multi-seeded berry. There are yellow, orange, red, brown. The seeds are round and flat. The taste is sharp and bitter.
The root system is fibrous.
For reference! The name of this variety of peppers in Russian is consonant with the name of the Latin American country: Chile. However, in fact, the name comes from the word “chilli” from the half-forgotten ancient language of Nahuatl (the speakers lived in the territory of modern Mexico) and is translated as “red”.
Features of further care for hot peppers in the apartment
After the pepper sprouts appear, it is recommended to move the container with the seeds to the windowsill and lower the temperature to +20-22 degrees. The glass or film should be removed completely and be sure to begin illuminating it up to 12-16 hours of daylight with the help of lamps.
To exclude warm air from heating devices, cover the pepper sprouts with a layer of polystyrene foam or a blanket.
Pepper cuttings take root within 2-3 weeks.
Picking
When 2-3 true leaves appear, it is necessary to plant (pick) the peppers in separate containers.
During transplantation, it is not recommended to pinch the main root, as the plant is painful for this procedure and significantly slows down its growth.
The first planting should be done in pots (it’s best to take cups) with a diameter of no more than 5 cm and a height of up to 10 cm.
Adviсe!
- Before diving, water the container with the seedlings so that you can transfer the seedlings with a clod of earth.
- The new soil should be even more airy and fertile, so prepare a substrate based on peat, humus and river sand (perlite), taking the components in approximately equal parts.
- After picking, water the transplanted seedlings with water (preferably with the addition of root for better rooting).
In the future, it is necessary to replant young seedlings as they grow. As soon as the roots begin to crowd into the pot, it is recommended to replant the plant, increasing the diameter of the pot. A container for an adult plant should be about 10-15 cm high and about 20-30 cm in diameter.
By the way! The website has a separate detailed article on picking pepper seedlings.
Watering
Hot peppers are very demanding when it comes to soil moisture and cannot tolerate watering with cold water. It is necessary to water the plant moderately, with water at room temperature, as the top layer in the pot dries, but allowing it to absorb moisture from the pan. If there is still water in the pan 30 minutes after watering, it should be completely poured out.
Important! The higher the air temperature, the more often the soil should be moistened.
In conditions of low air humidity, it is worthwhile to additionally spray the foliage using a spray bottle.
Top dressing
For full growth of hot peppers on the windowsill, regular feeding is required. During the period of active growing season (gain of green mass), preference should be given to mineral fertilizers with a high nitrogen content or organic fertilizers. And when forming buds and fruits, it is worth using fertilizers with a large amount of potassium. It’s even better if you use complex mineral supplements, which also contain phosphorus. The plant needs to be fed once every 7-14 days.
Forming (stepping) and pinching
As a rule, indoor hot peppers grown on a windowsill are not planted.
To make the bush branch better, you can pinch its top.
Main diseases and pests
Peppers, including indoor ones, are susceptible to fungal diseases and various pests. Therefore, you should know in advance what problems may arise and how to deal with them.
- Aphid. This pest loves to feast on young shoots of pepper, so it is on them that a large accumulation of pests forms. To combat them, it is necessary to treat the plant with the biological preparation Fitoverm or bitoxybacillin.
By the way! A folk remedy for combating aphids is ammonia. You need to prepare a solution (dissolve 5-10 ml of ammonia in 1 liter of water) and simply pour it under the root.
- Spider mite. It is characterized by stunting of plant growth and curling of young leaves, on which a small cobweb later appears. To combat the pest, it is necessary to spray with Actellik, although at home it is still better to use biological products (Fitoverm, bitoxibacillin).
Advice! Another popular method of pest control is tobacco. You just need to sprinkle the tobacco from the cigarette on top of the soil in the pot.
- Blackleg. It affects pepper seedlings during the initial period of germination. The stem at the base of the seedlings becomes thin and turns black. Appears as a result of overwatering a plant, which leads to its death. It will no longer be possible to save the plant. To prevent the disease, it is recommended to spill the soil with the biological product Fitosporin .
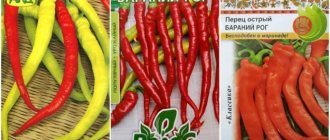
Pepper varieties for growing on a windowsill
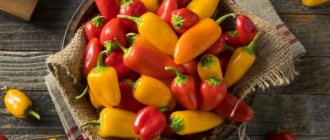
The names of hot peppers often speak for themselves. For example, Ogonyok, Tabasco. But there are also such as: Fireworks, Salute, Black Prince. The varieties differ not only in taste, but also in size, color, and ripening time.
- Light. Fruiting after 4 months. Small peppers are colored differently during ripening: green, orange, red.
- Tabasco. Fruits in 90 - 110 days. Despite their modest size, the fruits are very hot.
- Fireworks. Mid-season variety. It is distinguished by its decorativeness and fertility. Recommended for cultivation on windows, balconies and in containers. Not picky about light. Feeding is recommended.
- Firework. The ripening period is average. Miniature bush up to 30 cm. Small-fruited, hot, very fragrant.
- Black Prince. Dwarf variety. Attracts attention with the purple, almost black color of the leaves. Popular in the Caucasus as a seasoning. Successfully grown indoors.
Aphid on pepper
The best varieties of hot peppers for planting in an apartment
Indoor hybrids of hot peppers have high decorative qualities. The most popular of them are Ogonyok, Ryabinushka, Aladdin, Confetti and Salute.
Ogonyok
Ogonyok belongs to the mid-season hybrids. Its technical ripeness occurs on the 120th day, and the harvest can be harvested already on the 140th day. The fruits have a classic pod shape with a curved tip. The color of the peppers is deep red. The fruits are small in size, have a sharp, burning taste and a pronounced peppery aroma.
Ogonyok
Rowanushka
Rowanushka is an early ripening ornamental hybrid, the fruiting of which begins 90 days after planting. The variety is characterized by high productivity. The fruits are spherical in shape, red in color, and outwardly resemble rowan bunches. They are distinguished by their pungent taste and strong aroma.
Rowanushka
Aladdin
Aladdin is a compact pepper bush that bears small fruits, weighing up to 5 g. The peppers have an unusual shape and color - bright conical fruits are directed upward. Lettuce, green, raspberry, cream, red and purple peppers can grow on one bush at the same time. The fruits have a pungent taste and are suitable for canning.
Aladdin
Confetti
Confetti is a dwarf ornamental plant that grows up to 35 cm. The hybrid is characterized by high fertility. Ripe peppers reach from 3 to 7 cm in length and have a classic cone shape. The color of the fruit is varied and during the ripening process the color changes according to the following pattern: green - yellow - purple - red. Ripe peppers have a pungent taste and a pleasant peppery aroma.
Confetti
Firework
Salut is an early-ripening variety of ornamental pepper, the fruits of which reach full maturity already 95 days after planting. The height of the bush is small - up to 20 cm, but the plant is characterized by strong branching, so the pepper grows spreading. The cone-shaped fruits are distinguished by variable colors: at the stage of technical maturity they are bright green, and biologically mature peppers have a rich orange color. The fruits are used fresh and for canning.
Firework
Features of growing hot peppers on the windowsill
Pepper is an unpretentious plant. However, for proper growth and abundant fruiting at home, the following is required:
- bright diffused light, ideally a western or eastern window;
- loosening to supply oxygen to the soil;
- timely transplanting into a larger pot (about 2 cm in diameter);
- bush formation;
- By winter, when daylight hours are shortened, additional lighting is recommended. Another option is to pick off the flowers so that they do not take away the strength of the bush.
When cultivating this variety, cross-pollination is encouraged to produce more fruit. To do this, take a brush and brush it over the flowers.
Note! Plants should be periodically inspected for diseases and pests. They can attack spider mites, aphids, and scale insects. Due to improper care, sometimes gray rot develops - waterlogging in cold air.
Growing and care
After purchasing everything you need, neutralizing and preparing the seeds, you can begin planting. It is best to carry it out in early spring, so that the development of shoots occurs on the warmest days.
Actions:
- Take a pot, place it in 3 cm of drainage, then place the obtained or purchased soil and moisten it well.
- Dig a small hole of 1 cm and plant several seeds there.
- Cover the top with 0.5 mm of soil and lightly compact it.
- Wet the surface, preferably with a spray bottle.
- Cover with film to create a “greenhouse effect” until shoots appear.
The sprouts appear after 1-2 weeks, then they should be transplanted into a larger container. The first pepper can be seen after 1 month. The harvest will be ready in almost 110 days.
Transplantation should be carried out after the formation of the first leaves, in separate pots. Prepare new soil according to all the rules described above, place it in a container and make a hole in the center. Heavily moisten the soil around the sprout, carefully remove and lightly shake off the dirt, shorten the root by 1/3, place in a hole, compact the soil and water with warm water. Transplantation must be carried out very carefully and carefully.
A few care tips to increase the duration of fruiting:
- Observe the heat and light conditions, protect the plant from sudden changes in temperature and drafts.
- You can use various fertilizers, for example, nitrogen fertilizers, but the simplest one can be prepared by mixing 2 tbsp. l. with 3 liters of clean water. This mixture must be infused and used once every 2 weeks.
- By watering the soil with purified warm water twice a week, you must first loosen the soil. In winter, this procedure should be reduced.
- It is best to spray at least once a day in the evenings.
- If the room is dry, increase the humidity with a spray bottle.
- It is better to keep different varieties at a distance, because they can pollinate each other, and you will get a completely different look.
- Regularly care for the bush, turn the plant towards the sun so that strong bends do not appear.
- During the flowering period, shake lightly for pollination.
Advice!
To maintain the appearance, periodically trim additional stems, but the main one should not be touched.
Secrets for growing chili peppers
In addition to standard care for hot peppers, there are some nuances due to which the plant develops and bears fruit better:
- Chilies can be grown at any time of the year. If this happens in winter, then supplementary lighting with a phytolamp is desirable.
- In summer, if possible, the plant is taken out onto the balcony or terrace. Natural light is always better.
- The number of fruits increases by 2-3 years.
- In 4-5 years the yield drops.
- Hot peppers can cross-pollinate with sweet ones.
Caring for peppers on the windowsill
Now all that’s left to do is to provide the plantings with simple but essential care.
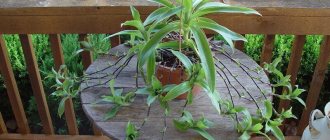
pepper seedlings grown on a windowsill
Watering and humidity
For peppers, I always leave the water to room temperature (25-30 C). I never water them with tap water - only filtered water. If you have the opportunity, use dechlorinated water - well, melt, rain.
I would not call pepper a moisture-loving plant - these plantings require watering only as the upper layers of the soil dry out. For water procedures I use a regular small watering can for indoor plants with a narrow “spout”.
If you grow peppers in winter, do not forget to maintain the optimal air humidity for the crop - periodically spray the seedlings with warm water from a spray bottle. Another option is to run an automatic humidifier. I remember to combat the dry air by covering the hot steam radiators with moistened cloth.
Like garden peppers, homemade peppers need loosening to allow air access to the roots. I use an unnecessary fork for this procedure - I loosen only the surface layer, trying not to bury the tool.
Pollination
For growing at home, I recommend choosing only self-pollinating varieties. Bee-pollinated ones will not bring you a harvest - there will be no one in the apartment to pollinate them.
I recommend a little trick: when the peppers bloom, I lightly shake the cups with plants in my hands. This promotes better self-pollination.
Lighting
Lack of ultraviolet radiation is harmful for peppers - for proper development, illumination is needed at least 10-12 hours a day. If you plan to grow crops in winter, consider artificial lighting. I use a simple option - phytolamps, which simultaneously emit UV rays and heat the plantings. But I don’t recommend installing them in a room where you often visit. The lilac glow irritates the eyes and can cause headaches.
If you grow homemade peppers in the warm season, there is no need for artificial light - natural sunlight is sufficient. To ensure that the peppers are evenly illuminated, turn them to the sun, first one side, then the other.
Gardeners often replace phytolamps with conventional fluorescent ones - here it is better to choose full-spectrum, cold light ones. For 1 m2 of home garden, lighting with a total power of 100-150 watts is sufficient. Some people use “blue lamps”, popular in the USSR; I used them before. You can try to make the most of sunlight - build reflectors from foil or special film.
I do not recommend using ordinary fluorescent lamps - they provide little useful light, but a lot of heat, often burning young plantings. Their spectrum is orange, red, but not ultraviolet, necessary for photosynthesis. More useful are gas-discharge sodium lamps, simulating illumination by the setting sun. Their light is very pleasant to the human eye.
Temperature
Peppers can withstand cold temperatures down to 10-12 C, which allows them to “sleep” on insulated balconies and loggias. But I still recommend keeping both bitter and colored peppers in a room with a temperature of at least 20-24 C. Do not forget to also protect the plantings from sudden temperature changes and drafts.
It is best if you can provide the plants with natural temperature fluctuations:
- during the day – 25-27 C;
- at night – 10-15 C.
I was able to achieve this by moving the peppers to an insulated balcony overnight and returning them to the room early in the morning.
Top dressing
I try to fertilize my homemade pepper every 2 weeks. The first feeding is after the formation of real leaves. Before each feeding, I water the plants thoroughly so as not to burn the roots. I add nutritional mixtures using regular root watering. I use fairly simple fertilizers:
- Ash solution. For 1 liter of water – 2 tbsp. spoons of ash.
- Herbal decoctions. Peppers respond well to fertilizers from nettle, clover, and plantain. For 1 liter of water – 2-3 handfuls of dry or green mass. I boil the mixture, cool it, strain it, dilute the concentrate with water 1:3 and pour the liquid over the peppers. An excess of nitrogen in pepper is not dangerous, but I still do not recommend abusing such organic nutrition.
- Mineral fertilizer. For 1 liter of water – 10 g of superphosphate, 2 g of potassium salt, 1 g of urea. I recommend avoiding potassium chloride - pepper responds painfully to an excess of chlorine.
Beginners can replace this with ready-made complex fertilizers from the store - just buy a composition marked “for peppers” and dilute it with water according to the instructions.
mineral fertilizers for peppers on the windowsill
Advantages and disadvantages of home growing
The advantage of growing indoors is that the harvest is at hand, at any time of the year, and has a decorative appearance. The growth and development of the plant can be observed with children.
The disadvantage is the creation of the necessary conditions for growing. That is, it is necessary to think about lighting, humidity, and watering. And also protection from pests, which have their own natural enemies in the open ground.
Indoor pepper Ogonyok
Secrets and technology of growing at home
Growing peppers indoors is practically no different from garden methods, and every housewife can cope with it. The plant is planted using one of the available methods: seedlings or seeds. In the first case, an already formed seedling is purchased and rooted in a permanent place. In the second option, seedlings are grown from planting material, and then the grown plant is transferred to a pot. Seed cultivation of vegetables is preferable, because it can be carried out at any time; seedlings, as a rule, are sold only in the spring.
Soil and pot
The soil for planting indoor peppers should contain several nutritional components. Of course, it is better to purchase a special mixture for planting vegetables, but you can make it yourself. To do this, combine humus, turf soil, peat and sand in a ratio of 5:2:2:1. All components are disinfected using a solution of potassium permanganate, steaming or treatment with boiling water. It is recommended to add a glass of wood ash to a bucket of prepared soil. You can also saturate it with vermiculite or agroperlite. These components help the soil retain moisture well.
For growing seedlings at home, small plastic containers, paper cups, special cassettes or peat pots are suitable. The latter are good because seedlings can be transplanted to a permanent place directly into them without damaging the root system of the young plant.
Growing seedlings from seeds
If seedlings are grown from purchased planting material, then it is recommended to purchase it only from trusted sellers. When properly stored, seeds can retain their properties for almost 5 years, but then their germination rate becomes lower every year. Therefore, buying on the market or from hand may turn out to be unjustified and the seeds will simply turn out to be “dummy”.
The ideal option would be seeds collected from the previous harvest. They will definitely give good shoots and harvest. High-quality ones are distinguished by a pale yellow, almost white color.
Seeds must first be awakened to grow. To do this, they are soaked in warm water and wrapped in a wet cloth overnight. Also prepare a container with soil. The first layer is expanded clay drainage, the second is already moistened soil.
The soaked seeds are placed in the ground to a depth of about 1 cm. The distance between them should be at least 7-10 cm so that future bushes do not become intertwined and it is more convenient to replant them. The top soil is watered well again, and the container is covered with film or a lid to speed up the growth of hot peppers.
Transplanting young plants to a permanent place
You can understand that it is time to move the seedlings to a permanent place by the first leaves that appear. For each young bush, prepare a separate pot with a volume of about 300-350 ml. If you take a larger container, the root system of the bush will begin to oxidize when watering.
Drainage is distributed in an even layer at the bottom of the pot. The sprout is placed at the same depth at which it was during the germination period, but not too deep, so that the roots of the decorative pepper do not rot. If you pinch the main root, this will help strengthen the remaining roots and better develop its lateral processes. The area of soil around the sprout is lightly pressed and watered abundantly. While the bush is taking root, there is no need to water it. This is about a week after the transplant.
Growing errors
Improper care of the plant can lead to a poor harvest or leave the owner of the bush completely without it. Some of the most common errors:
- Pot too big. The root grows, the aerial part does not develop.
- Abundant watering. It is better not to add a little peppers than to overfill them. Otherwise the plant will rot.
- In aggressive sun conditions, the leaves may become burned. If there is not enough lighting, the plant is frail and does not bloom.
- Strong drafts contribute to the shedding of leaves.
- Using soil without disinfection, there is a possibility of introducing a fungal or bacterial infection.
As a result of all of the above, we can conclude that hot peppers on the windowsill are successfully grown from seeds, are diverse in variety and are not difficult to care for. So even beginners can handle this simple task.
How to grow hot peppers at home on the window
Once you’ve chosen the seeds, it’s time to move on to planting and growing. To be honest, hot peppers are very easy to grow at home. But still, in order to regularly get a rich harvest, you will have to try a little. I'll tell you about all the nuances.
If you haven’t chosen any of the varieties above, then I suggest you find out how to grow chili peppers in a window. This option will be a win-win.
How to choose a pot for planting
So, let's start with the containers in which we will plant the seeds. I recommend the following options:
- Plastic cups, yogurt cups and other suitable shapes. In this case, make drainage holes in the bottom and use them to sow pepper seeds.
- Plastic cells. The size varies here. I chose 6 by 6. This is convenient for our pepper. There is no need to prepare anything in advance: everything they need is already provided.
- Wooden boxes. The option is not as convenient as the previous one, since the seeds are sown in bulk and not in separate containers. As a result, when replanting, it is difficult to remove plants in such a way as to minimize damage to the root system.
- Peat tablets. Very convenient: you don’t have to think about the composition of the soil. I stuck the seed in and moistened it with water, and that’s it, cultivation started. And it’s convenient to replant later. There is only one minus - it is not always possible to find high-quality tablets; today there are a lot of fakes. I fell for them a couple of times, unfortunately.
- Peat cups. Here the soil will have to be prepared and placed in them. But during transplantation, the effort is reduced to a minimum. The pot is placed in the ground along with the pepper, so the root system is not injured.
When the seedlings get stronger, transplant the pepper to a permanent place. The material of the pot does not matter, the main thing is the size. The capacity should not be less than 300 ml. For example, I like to use clay pots. They absorb excess moisture, if any, and also give it back if necessary.
If you plant seeds in separate containers, the roots will not be damaged during transplantation
What kind of soil is needed?
Let's move on to the ground. I cook from the following ingredients:
- Turf soil (this is the soil that you collect in the garden).
- Leaf soil (you can get it in the forest. If there is no forest, buy it in the store).
- Sand (river).
- Brick chips, crushed stone or pebbles (for the drainage layer, it should be 1-2 cm).
I mixed the ingredients in one container. The proportions are as follows: 1 part turf soil, 1 part leaf soil, 1 part sand. Add 1 cup of wood ash to this entire mixture. Such an additive will partially disinfect the soil, and on the other hand, protect the seedlings from diseases. I poured a drainage layer on the bottom of the pot.
To kill germs and harmful bacteria in the soil, disinfect the soil. To do this, place the prepared soil in a colander and steam over the pan for 7-8 minutes. Thanks to this, all the infection will be killed, and the land will be saturated with moisture.
If you don’t want to bother with preparing the soil, buy it at the store. I like options such as “Travena” and “ExtraFlor”. I tried them out and was pleased with the results.
The harvest you get in the end depends on the quality of the soil.
Seed preparation
Seed preparation includes the following steps:
- Sort out the seeds. Select medium and large seeds, leave those that are medium in size. Thanks to this, the seedlings will appear evenly and will not differ from each other in growth rate.
- Get rid of hollow seeds. To do this, dilute 30 g of salt in 1 liter of water. Then place the planting material in this solution. Wait 5-7 minutes. Seeds that float are not suitable for planting and are considered hollow. Remove them. Drain the rest and dry.
- Then disinfect. To do this, dilute a weak solution of potassium permanganate (1 g per 100 ml of water). Place the planting material for 10-15 minutes. Then take it out and put it in a damp cotton wool, gauze, sponge or cloth for germination.
- In this state, let it sit until germination. The temperature is at least 25 degrees Celsius. That's all, the preparation is over.
If you want to increase the germination percentage, water the soil after planting the seeds with Epin. Diluted in the following proportion: 0.25 ml per 5 liters of water.
See below for interesting points about germinating seeds:
Sowing seeds
Now let's move on to sowing. Follow this sequence:
- Fill the selected containers with soil. Make indentations (1-1.5 cm).
- Place one seed in each hole. If there is a lot of planting material, put 2-3 pieces for reliability. But in this case, remove weak specimens after germination.
- Sprinkle soil on top. Moisten the soil with water from a spray bottle. Cover with film or glass on top to create a greenhouse effect.
That's all. Now all that remains is to ventilate the seedlings periodically. I opened the greenhouses every day for 20-30 minutes. As soon as they have sprouted, remove the glass or film.
If you don't want to grow hot peppers, read how to grow peppercorns at home. It will be a good alternative.
The first shoots will appear in 7-10 days