Share with friends
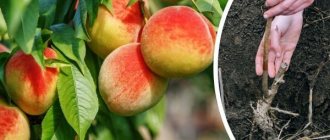
Grape grafting is an asexual technique for propagating or replacing shoots of one grape variety with the root system of another variety. It is very helpful if you decide to replace a boring variety with a newer one or there is a need to update an old bush.
This procedure allows you to save time by at least 2-3 years, since the shoots require only one year to grow, and the scion begins to bear fruit the very next year. Also, grafting is indispensable if you want to propagate grapes on phylloxera-resistant or frost-resistant rootstock.
Why is grape grafting necessary - advantages
Grafting of grapes is necessary in order to speed up the fruiting period by two or even three times than if we planted new seedlings. To the advantages described above, we can safely add that grafting helps to significantly save space on the site. So on one rootstock you can grow several varieties of grapes at once. These varieties may have different ripening periods and even differ in the color of the berries.
New plants obtained in this way are more resistant to unfavorable conditions than the mother plants. Inhibition of one variety by another on the same bush has not yet been observed. You need to graft grapes if:
- The new variety chosen is not resistant to phylloxera, but the rootstock (the root system to which the scion is grafted) is;
- The root system of the rootstock is more frost-resistant than that of the variety you are grafting;
- There is very little space on your plot, but you want to diversify the range of grapes by growing 2 or 3 varieties on one bush at once;
- Do you want to preserve the best hereditary qualities of the scion and rootstock;
- Do you want to improve the taste of the berries, while getting the harvest in the shortest possible time;
- Increase grape resistance to diseases.
Rationale for the need to graft grapes
At gardening fairs, nurseries and stores there are now many proprietary root varieties with excellent characteristics, cuttings take root well: so why use grafting then? Let's say that in Europe it was possible to stop the invasion of grape aphids - phylloxera, imported from America, by grafting local varieties onto American rootstocks that are resistant to this pest. Our latitudes are not afraid of such a misfortune, so what benefit can be derived from it?
Vaccination helps the winegrower win on the following points:
- avoid uprooting a bush that has completely lost its shoots (due to frost, damping off, damage by mice, etc.), and restore the crown within a couple of seasons;
- quickly propagate hard-to-find, rare or expensive varieties;
- replace a boring or disappointing variety with a new one, using an already developed root system;
- reduce exposure to disease;
- increase the winter hardiness of the vineyard by using cold-resistant rootstocks;
- increase the tolerance of some varieties to unsuitable soils - excessively acidic, calcareous, arid or, on the contrary, with a high groundwater level;
- get earlier harvests by grafting early and early ripening varieties onto rootstocks - this is especially important in the northern regions;
- create family bushes that combine shoots of different varieties on one root - this not only saves space, but also looks very decorative;
- to some extent improve the commercial characteristics of the berries: certain combinations of rootstock and scion can affect the taste and size of the grapes.
Grape aphid, which led to the need for grafting of vineyards in Europe
After reading such an impressive list of benefits, many winegrowers will probably be excited to start grafting immediately, but in reality, grafting grapes is a little more complicated than fruit trees. First of all, do not forget about such an important concept as affinity, or compatibility of rootstock and scion:
- The rootstock is the basis of the fruit tree, what is grafted onto. The type of root system, plant resistance to diseases and adaptability to external factors (cold, drought, unfavorable soils), as well as some qualities of the fruit (size, speed of ripening, etc.) depend on its characteristics. The rootstock organizes nutrition and growth.
- A scion is a cutting or bud that is grafted onto a rootstock that determines the varietal qualities of fruits and yield.
In the latitudes not so long ago covered by viticulture, the topic of affinity regarding local varieties has been little studied; unambiguous recommendations are given for certain groups of varieties, but for the majority there are a lot of doubts and disputes. Therefore, you should be prepared for experiments that involve both failures and joyful discoveries.
Types of grape grafting
Grape grafting is divided into three types according to the timing: spring, summer and autumn.
Spring grafting is done underground:
- into the cleft,
- end to end
- butt (with a wedge),
- to a separate root,
- by copulation method,
- when transplanting roots.
Summer vaccination is done using combined methods:
- A woody cutting on a green shoot in a cleft,
- Layering on seedlings,
- By simple copulation method,
- Green to green.
Autumn grafting is done by budding with a shield and an eye in the butt.
How to care for a grafted grape bush
Gardeners advise adhering to the following care rules:
- constant monitoring of the bush - after 14 days new shoots should appear on the shrubs; if they are absent, then all procedures are repeated;
- young roots that do not come from the rootstock are regularly excised - otherwise it will not be grafting, but standard planting of grapes;
- when the junction is pinched, juice flows out of the plant abundantly - the bandage should be loosened, otherwise the shoot will not take root;
- to avoid weakness of the bushes around them, weeds must be periodically removed;
- if the process took place in autumn days, then the vineyard is covered with straw, creating additional protection from the cold.
After a certain period of time and after the two parts of the vine have completely established themselves, the plants need regular treatment against fungal infections. Infection can negatively affect the health of the bushes and the future harvest. Beginners can easily cope with grafting grapes, provided they follow the work plan.
Timing of grape grafting - when to plant in spring
The timing of grafting grapes in the spring falls around the end of April or May - it is at this time that the growth of the grapevine accelerates. The main thing is that the buds on the rootstock have already swollen or blossomed, but active sap flow has not yet begun, which causes the grapes to cry, or wait until this movement of sap has passed. On the scion, the eyes should be at rest.
The daytime air temperature should already be stable and not fall below +15 degrees. The soil temperature near the root system should warm up to +10 degrees. The weather should be warm and calm, and the procedure is best done in the morning or evening. If the weather is cloudy, then you can plant grapes during the day.
Preparation of grafting material
For most types of grape grafting, which will be described below, cuttings cut from annual woody shoots are required. Preparation of the so-called Chubuki are carried out in the fall. Choose golden-brown, strong, clean shoots with a diameter of 6–12 mm. For the chibouk, take the middle part of the shoot, making cuts along the internodes a few centimeters from the eyes. The optimal length is within 35–55 cm. The cuttings are cleared of leaves and tendrils, preserving the buds. Sections can be paraffinized to prevent drying. The preparations are stored until grafting in a pit with sand 60 cm deep on the site, covering it with the onset of frost, or in a cellar or refrigerator - in a box with sand or a cut plastic bottle. The best temperature is about 0°C.
An interesting and simple way to store cuttings in the refrigerator - in a plastic bottle
A few days before grafting, the cuttings are taken out of storage, sorted, soaked in water for 2 days, gradually raising the temperature from 10–15°C to 25–28°C. Honey (1 tablespoon per 10 liters of water) or heteroauxin (0.2–0.5 g per 10 liters) is often added to water; disinfection can be carried out in a solution of potassium permanganate (0.15–0.2 g/l). Then they cut into two-three-eyed scions, making the upper cuts 1–2 cm from the bud, the lower ones 4–5 cm at the internodes.
Preparing grapes for grafting
In order for the grape grafting procedure to be successful, both the scion and the rootstock must be properly prepared. For clarity, let me explain that the scion is the cuttings that are planned to be grafted, and the rootstock is the lower part of the bush with the root system.
Preparation of the rootstock
The bush that will serve as a rootstock is cut down when it is dormant - in early spring or late autumn. The cut is made below the soil level by 5 cm, and then treated with resin, covered with straw and film so that the soil warms up faster and new shoots grow faster. The bush will be ready for grafting when the shoots are strong and their length is 25 cm.
Preparation of scion (cuttings)
For most types of grafting, scion cuttings are taken in a dormant state, but sometimes actively growing ones can be used. Three days before grafting, the cuttings must be soaked in a growth stimulant (fumar, humate, heteroauxin) for 24 hours. If you don’t have a growth stimulator, then you can replace it with this solution - 1 tablespoon of honey per 10 liters of water. During this day, moisture should appear on the cut of the cutting; if this does not happen, we continue to soak.
If even after repeated soaking the cut remains dry and no moisture has appeared, this material is not suitable for us; it must be thrown away and replaced with a new one. Then, after soaking, we wrap the cuttings in damp burlap and carry them to the bush in this form. Cuttings can be cut to the desired length no earlier than 30 minutes before grafting, otherwise nutrients will be lost.
If you plan to graft grapes in the fall, pre-wax your cuttings. To do this, melt the paraffin: pour water into a container, put the paraffin and put it on the fire. As soon as the paraffin melts, remove the container from the heat. Dip the cuttings into this water with paraffin (under the lower bud) and immediately dip them in cold, clean water, let them dry.
Attention: before waxing, make sure that the scions are dry - this way the paraffin will adhere better and cover the cuttings with a thin layer.
Rootstock selection and preparation
It is better not to take very old bushes as a rootstock. The best option is plants between 3 and 5 years old. Scions take root better on such bushes.
Characteristics of a good rootstock:
- high frost resistance;
- vigorous bushes;
- disease resistance;
- well developed underground trunk.
The rootstock is also prepared for grafting - from spring to autumn. A few days before the procedure, the bush is fed. Use foliar fertilizers. Preference is given to drugs containing potassium and phosphorus. Many gardeners feed the vine with honey - it is spread on the branches a few days before cutting.
A week before vaccination you also need to:
- Cut off the young shoots, tendrils and leaves growing from the bottom to the site of future grafting on the rootstock.
- Water the bush abundantly, which will serve as a rootstock.
Methods of grafting grapes into an underground trunk (at the root)
From the chapter “Types of Grape Grafting” you already understood that there are many methods - above-ground, underground (at the root), and the methods of carrying out the procedure are very diverse.
Grafting into cleft
The grafting of grapes is done in an underground perennial trunk; first, all branches are cut from the bush with pruning shears. Next, we dig a hole under the bush to a depth of 30 cm. At a distance of 20 cm from the surface, we cut off the upper part of the bush. We clean the sawn surface of the rootstock with a sharp knife from nicks and irregularities. It is better to remove the old bark with the blunt side of a knife, then wipe the cut with a clean damp cloth (you can soak it in a weak solution of potassium permanganate).
Next, we take a sharp, clean knife or ax treated with manganese, and using a hammer or chisel, we make a split in the trunk by about 3 cm. The split is made in the center in the direction of the larger diameter of the hemp. To prevent it from closing while we prepare the cuttings, insert a large screwdriver (also clean and disinfected) into it.
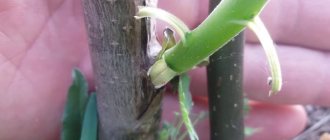
Depending on the diameter of the rootstock, you can graft 1, 2 or even 4 (peripheral grafting) cuttings into one stump. We leave 1-2 buds on the scion, cut off the excess part up to 4 cm under the lowest eye. We make even cuts on both sides with a sharp knife, leaving about 0.5 mm under the bud (see as in the photo), while the eye itself should be with side.
Grafting grapes into a split trunk
Attention: try not to touch the cut with your fingers!
Dip the cut part of the scion into a weak solution of humate for 5-8 seconds and immediately insert it into the split 0.5 cm from the thick cambial layer (bark). Carefully “drown” the grape cutting deeper into the rootstock for maximum contact between the cleft and the cut. Do the same operation with the second scion. Insert the cuttings so that the lower eyes “look” outward. If they cross at the top, it’s okay, don’t try to align them.
Now you can take out the screwdriver, and cover the split area on the grape trunk with wet toilet paper to close the gap from dirt and germs. Wrap the grafting site with twine, cotton cloth or braid. Do not use electrical tape or tape. To better preserve moisture and temperature, cover the grafting site with liquid clay, especially if you carry out the procedure in the fall.
Cut the bottom of a 5 liter polyethylene bottle, place it at the bottom of the hole so that the stem and grafting of the grapes are in the center. Next, fill the hole with earth mixed with sawdust, ash and humus. Fill it well with water so that the plant does not dry out. The temperature can be adjusted by unscrewing and tightening the bottle cap.
Grafting grapes into a standard in spring - video
If you don’t like to read a lot or want a visual step-by-step description of grafting grapes into a standard, I suggest watching the video.
Grafting grapes into a standard in the fall - video
The second video is a little longer, but here you will see the grafting procedure, waxing the cuttings and some tips.
Half-split grafting of grapes
This grafting is done almost similarly to the first option in full split. But in this case, the split on the trunk is made from one side to the middle of the trunk - this is what gives this procedure its name. All stages of preparing the rootstock are similar, and on the scion the bark is removed from the inside of the cut. The lower eye on the handle should be located on the outside, and towards the inner part, which will be deepened into the half-split, we make the cut thinner.
At the end of the process, when the scion and rootstock are connected, we “seal” the gap on the trunk with wet toilet paper, wrap the grafted part with cloth, water it well (you can also cover it with clay on top) and cover it with earth. How it looks - look at the photo.
Half-split grafting of grapes
Peripheral grafting
The peripheral method of grafting grapes is suitable for a perennial old bush with a thick trunk. It is performed similarly to a full split, with the only difference being that we make two splits on the rootstock, and use 4 scions – two per split on each side. The process is described above, but you can see what it looks like in the photo below (enlarges when you click on it) - No. 2 on the right.
Peripheral grafting of grapes into half-splits and splits
You can also graft grapes into 4 cuttings into half-splits, but the stump trunk must be thick and the splits precise. I don't recommend this method to you without experience. You can see this method in the picture above - No. 1 on the left.
Wedge grafting (butt)
Grapes are grafted with a wedge when the thickness of the rootstock does not allow for splitting, but exceeds the thickness of the scion several times. I do not recommend this method for beginners, since the wedge cuts must be perfect, and this comes with experience. On the rootstock, a triangular cut is made on the side, and exactly the same cut is made on the scion - the joints should perfectly coincide and touch each other (see in the picture).
Grafting grapes with a wedge (in the butt)
Then the grafting site needs to be wrapped with cloth or twine so that fusion occurs better. It is also recommended to treat this part with a thin layer of garden varnish (garden putty for damaged areas of the plant). You can buy it or prepare it yourself.
Recipe for making garden varnish - video
I’ll tell you one secret - some gardeners and winegrowers use regular PVA glue to putty the grafts. A simple recipe - for half a liter of PVA glue, take 2 bottles of brilliant green and a strip of aspirin (10 tablets). Grind aspirin into powder and dissolve in 50 ml of warm water, then add brilliant green, mix, and pour into glue.
End-to-end grafting of grapes
To carry out this grafting, both the rootstock and the scion must be the same diameter. You will also need a wooden pin blade 4-5 cm, which will connect both parts. We dig the stem to a depth of 10 cm, saw off the top, the cuts on both connecting parts should be parallel, clean and even (without notches).
We insert the pin into the trunk of the rootstock strictly in the center, place the scion on it clearly in the middle (2-.5 cm below the bud) - the joints should be ideal. Next, we wrap the graft with cotton wool moistened with a solution of potassium permanganate, then wrap it with wet toilet paper. Or, instead, wrap it with a clean rag and cover it with garden varnish.
Grafting the grapes end-to-end
Next, all that remains is to sprinkle the stump with sawdust mixed with soil, ash and humus, and cover with film. Caring for the plant after grafting is exactly the same as with other methods. I won’t add a video, since the method is quite simple and clear, everything can be seen in the photo above.
Vaccination at different times of the year
The time of year affects not only the survival rate of the scion, but also the choice of grafting method. Grapes can be grafted in any season, even in winter. In this case, different methods are used.
Spring
Grape growers prefer to graft grapes in the spring. The vaccination period is April-early May. They focus not so much on numbers, but on the temperature and condition of the bushes. Vaccinations begin after the start of sap flow - at this time the highest survival rate.
Features of vaccination in spring:
- it is protected from the sun and frost if the scion begins to grow earlier than the rootstock;
- To activate sap flow, the bushes are watered abundantly several days before grafting.
In the spring, a procedure called “black to black” is carried out. Both parts - the scion and the rootstock - are in the initial stage of bud break.
The grafting is carried out with cuttings prepared in the fall. Using this method, individual shoots of the bush and grown rootstocks are grafted.
How grapes are grafted in spring is described and shown in the following video:
Summer
In summer, grapes are grafted in June or July. The advantage of summer grafting is the possibility of cutting cuttings right before the procedure. You can graft using any of the methods – “green to green” or “black to green”.
Conditions for vaccination:
- overcast weather;
- temperature up to +25°C;
- lack of precipitation;
- before 10 am and after 6 pm.
Green to green grafting is used in the summer. It does not require the preparation of material in advance. Cuttings are immediately grafted onto the rootstock. Most often, by copulation.
In summer you can also plant cuttings prepared in the fall. A new cut is made on them, which should go lower than the lower bud. The cuttings slept for a long time, so they are activated by immersing them in Epin’s solution for 15 minutes.
The rootstock is prepared by making one cut on the shoot, the second - in the middle of the first. The scion is inserted into the socket so that the eyes of the scion and rootstock look in different directions. The vaccine is secured. Using a similar technology, they graft “green onto green” - only in this case there is no need to soak the scion.
Autumn
In the fall, grapes are usually grafted onto old roots using one of two methods - in a split or in a standard. This approach allows you to revive old bushes, increase productivity and get a harvest within a year.
Conditions for vaccination and features of its implementation in the fall:
- Temperature not less than +15°C. The vaccination period is October-November.
- The clusters are completely harvested, the leaves should turn yellow.
- The cuttings are kept in a growth stimulator 2 days before the procedure, and then grafted using any suitable method.
Winter
Tabletop vaccination is carried out in January-March. One- to two-year-old bushes are used. Scion cuttings are prepared in the fall in the usual way. Winter vaccination procedure:
- Late in the fall, when all the foliage has fallen from the bush, dig up the bush completely. Trim the bush, leaving a 10 cm trunk.
- Disinfect the cut in a weak solution of potassium permanganate.
- Place the rootstock in a box with wet sand. Sprinkle with sawdust and store in a cellar at zero temperature.
- The day before the procedure, remove the rootstock from the cellar. Clean, check the roots, cut off the damaged ones completely, and cut off the healthy ones to 15 cm. Move the bush to a room with a temperature of 18-20°C for several hours.
- When the bush warms up, immerse the roots in water at a temperature of 15°C for a day.
- Dry the roots with a cloth, and then graft the cutting using any of the methods described above.
- Place the grafted bush in some container and cover with plastic wrap. Let it sit for several weeks in a warm place.
- After 2-3 weeks, move the bush to the cellar - let it wait for spring.
- In the spring, after the temperature reaches 15°C, take the bush outside for hardening. Start it with several hours, gradually increasing the intervals. After 2-3 days, plant the bush in the ground.
In this video, the gardener shows in detail how he does home, desktop, winter grafting of grapes:
Grafting of grapes - above-ground methods
The methods of grafting grapes into an underground trunk were described above, but some of them can also be used in an above-ground rootstock.
Budding grapes with a bud (eye) quickly and easily - video
Use this grafting method only in the warm season, starting from the end of July, in the morning or evening, so that the spliced areas do not dry out. You can do budding in cloudy weather during the day, but water the plant itself thoroughly the day before. After the procedure, you can make a putty from garden varnish so that moisture does not escape from the incisions. The film needs to be removed after a month.
Multivarietal regrafting of grapes - video
I suggest watching this video, because it’s easier to see it once than to describe all the actions on several pages. This video will be useful for those who want to make a bush bouquet from different varieties. The grafting method used is split (with shoulders on the scion and rootstock) - it is quite simple, fast and reliable.
This method is also suitable if your old grape bush is weak-growing, and you want to grow more crops on it, while saving space and time. In the same way, you can rejuvenate an old vineyard using a well-rooted trunk. So you will begin to harvest the first harvest next year, and not after 4-5 years, as if you were planting new young seedlings.
Grafting grapes black to black
Why is this vaccination called black to black? Because both the scion and the rootstock are woody (that is, “old”). This copulation is done into a cleft (it was written about above) or by drilling. To drill, take a hand (or electric) drill with the same diameter as the scion (the nozzle must be disinfected with alcohol or manganese).
grapes by drilling
You can drill a hole either in the side above-ground part of the trunk or in the upper cut (joint to joint). In the first case, we drill a hole 1.5-2 cm deep in the side of the rootstock trunk, and on the scion we also cut off the bark by 1.5 -2 cm. We insert the cutting into the trunk (something like a chopper), deepening it by lightly tapping it (for example, with a pruning shears). Lubricate the fastening area with garden varnish.
If we drill a joint into a joint (we use a drill instead of a split), then the diameter of the drill bit and the scion is taken 1 mm less than the diameter of the rootstock. We make a recess of about 1.5 cm with a drill, and remove the bark on the scion to the same length as the hole. We insert the cutting into the hole, deepening it, and wrap the joint or cover it with varnish.
Garden var
I will not add a separate video about grafting grapes “black to black” using the splitting method, so as not to waste your time by showing repetitions. You can watch this method in the video above, entitled “Multi-varietal regrafting of grapes.”
Grafting grapes from green to green
It is done using the wedge-to-split method, grafting pruners or simple copulation; only the young rootstock and scion are used for this grafting. I recommend seeing it once rather than reading a thousand words, a step-by-step and very detailed video guide (see below).
Grafting grapes from green to green
Green grafting of grapes (green to green) – video
In this video you will see three methods of grafting: into a split, with a grafting pruner and the simple copulation method. Enjoy watching.
For convenience, use a special grafting pruner, which allows you to make grooves on the rootstock and scion with one click.
Grafting pruner
Grafting black grapes into green
Grafting from black to green is no different from the methods of grafting from green to green or black to black. In this case, the rootstock will be young, and the scion of the cutting will already be woody from last year. An important condition is that it must be stored properly throughout the winter (in a cool, dark and humid place - for example, in a bag on the bottom shelf of the refrigerator).
We prepare the grafting material as described in the section on preparing the scion for grafting, namely: paraffin it and soak it in a growth stimulator. Both parts (cutting and rootstock) can be spliced into a split, by simple copulation, into a side cut of a corner (a split is made in the trunk, the scion is cut with a wedge - look at the video).
Grafting grapes into a side cut
Grafting grapes into a side cut - how to do it - video
Grafting methods
For grafting grapes, the same technologies are used as for other fruit trees:
- into a split / into a half-split,
- simple copulation,
- improved copulation,
- budding by eye,
- to the omega-shaped spike and others.
These are the methods by which parts of the rootstock and scion are cut and applied to each other. Many gardeners constantly use the easiest ones - copulation and splitting, and are satisfied with the result: it is with these methods that one should start learning grafting. So, simple copulation is accessible to anyone who knows how to handle a sharp knife:
Everything is extremely simple: cut, connect, fix
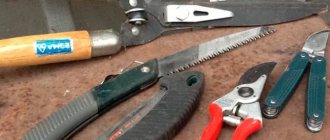
There are three secrets to success:
- equal diameter of scion and rootstock;
- a sharp and clean (even sterile) knife - all grafting instruments must be clean in order to avoid contamination of the sections with bacteria or fungi;
- coincidence of cambial layers at the junction of the graft.
The last point needs clarification. Let's look at the structure of the cutting:
Cambium - a thin transparent layer under the bark of a tree
The cambium, also known as the cambium layer, is a thin, slippery-feeling structure that we can find when we remove the bark from a tree. It is he who is responsible for the growth of shoots in thickness and the formation of vessels that nourish the plant. The cambium is especially active in the spring, during the period of sap flow, which explains the greatest popularity of spring grafting. When they come into contact, the cambial layers of the rootstock and scion grow together into a single whole (forming a commissure), and the formation of common vessels begins: nutrition is established in the grafted plant, the buds begin to grow. Therefore, contact of the cambium on at least one side of the joint is a prerequisite.
Improved copulation is a method that provides more reliable fixation of cuttings. An additional so-called cut is made on the cut. a tongue that keeps the scion from slipping off at the slightest movement of the joint:
A little more effort - and the scion is fixed much more securely
The junction of any graft is always fixed with film (sometimes also with electrical tape), and the upper cut of the scion is covered with garden pitch or waxed.
The cleft grafting method is also popular. In this case, one, and if the diameter of the rootstock allows, two two-three-eyed (i.e. with two or three buds) cuttings, sharpened with a wedge, are inserted into a rootstock split to a depth of 3–5 cm. The cambial layers here should touch along the edge of the fissure. The splitting is tied with twine, wrapped in film, waxed or coated with clay:
If the diameter of the rootstock allows, two cuttings are grafted at once.
This is the method most often used to regraft grapes - this is the grafting of an adult plant for the purpose of rejuvenation or a complete change of variety. Its main advantages are the accelerated production of a new crop and the absence of the need to spend effort on uprooting the old root, in the place of which, moreover, it is undesirable to plant the same crop for several years later (so-called soil fatigue). In this case, they are grafted into the trunk or into the root.
It is impossible not to mention such a method as eye budding - also popular, but more painstaking and requiring skill. In this case, a bud with part of the bark and cambium is cut from the scion and placed in a T-shaped cut in the bark of the rootstock. After the scion begins to grow, the rootstock above the grafted bud is cut off:
You need to carefully cut off the scion bud and place it under the bark on the rootstock.
Having gained experience in successful grafting using these methods, you can begin to master more complex ones, which experienced winegrowers readily describe on forums.
However, the advertising of grafting pruners, which allow you to graft cuttings onto the so-called, also promises simplicity and good results. omega-shaped spike. However, negative opinions prevail about them:
This device is a toy for hobbyists who, for some reason, need to make several hundred “factory” vaccinations - on absolutely identical rootstock and scion.
If you concern yourself with grafting cuttings, then they are all different... And the density, and the thickness, and the humpbackedness.... Sharpening such pruners is a problem. Those cutting edges that are straight can still be sharpened, but bent iron is impossible in principle, not to mention finishing straightening a leather belt with GOI paste. Nikolaj vse-o-vinogradnoy-loze—koroleve-sada-3987.html
... and the strength of the graft is also apparently low.
We even have normal grafts with a long cut and a tongue, either the wind will break it or a nasty bird will perch, but here there is no need to talk about breakage strength at all. IMHO, this is self-indulgence. Although it is of course the business of the owner. I won’t tell https://dacha.wcb.ru/index.php?showtopic=16379
On the right is a sample of cuttings treated with pruning shears
Thus, classical methods still seem to be more reliable and effective.
Winter grafting of grapes on the table
This grafting is carried out by connecting two cuttings (rootstock and scion) of different varieties. Why is this being done? There may be several reasons, for example, the grape scion variety is not resistant to phylloxera and has poor frost resistance. The rootstock cutting, on the contrary, has good phylloxera resistance, and its variety is frost-resistant. For step-by-step detailed instructions, watch the video.
Tabletop grafting of grapes - video
The video shows grafting using a special pruner. If you don’t have one (or have just placed an order, but it’s time to do the procedure now), then you can consider the split method, simple copulation or with a tongue. What's wrong with the tongue - an oblique cut is made on both cuttings, after which one more longitudinal cut is connected, as in the picture below.
Copulation of grapes with tongue
Why do they do it?
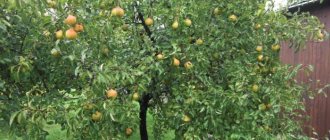
Grafted grape bush
Some grape varieties are not resistant to low temperatures. They are susceptible to attack by insect pests, often get sick and die. To save grapes, a capricious variety can be combined with unpretentious grapes , then you will be able to reap a bountiful harvest and save the plant.
You can also replace one grape variety with another without planting the plants from scratch. With grafting, you don't have to wait for the grapes to grow enough to bear fruit. Grafted varieties have a long lifespan, are resistant to fungal diseases and bear fruit for a long time.
Also with the help of grafting, wine producers are looking for new grape flavors to add interest to the taste of the wine. It was discovered that a grapevine grafted onto a different root produced a characteristic aroma that was different from the two original vines. The mixture of vines produces new and exotic aromas.
How to vaccinate grapes is described below.
Caring for grapes after grafting
So, we grafted the grapes using any of the methods described above, but the care will still be the same for everyone:
- Once a week, remove all shoots so that all the nutrition and juices go into the grafting;
- Tie up new growth so that it is not broken by the wind;
- After a month, loosen the winding at the junction, and after another week, completely remove it;
- Do not allow the soil to dry out or be exposed to direct sunlight (cover the grapes with gauze or net);
- Since grafting is a kind of operation, make sure that it is not exposed to various diseases; periodically treat the plants with preparations for oidium and mildew.
Preparation of cuttings for scion
Scion cuttings are harvested in the autumn months, from October to November, before the onset of frost. To obtain high-quality cuttings (chubuks), choose a healthy, productive bush that bears fruit for at least 3 years. Use a sharp knife to cut off the branches, leaving 2-3 eyes on each. Chubuki should be on average 9-12 cm long, with a diameter of at least 8 mm.
Next, the cuttings are disinfected using copper sulfate. After 30 seconds of soaking, they are laid out on a flat surface and dried. Then they are wrapped in polyethylene or a damp cloth and placed in a cool place.
Important! The cuttings are stored in the refrigerator or cellar, where the air temperature is not higher than 5°C.
Crooked or too thin cuttings should not be used for the scion. Also, damaged or fattening stems on the bush will not be able to take root. The tip of the shoot, approximately 30 cm long, is not used for the scion.
Why graft grapes?
If the vineyard has suffered over the winter, grafting can restore the entire above-ground part of the bush within one or two seasons
Grapes are grafted for the following purposes:
- obtaining new grapes in a short time for partial replacement of plantings;
- complete change of variety;
- increase in yield;
- propagation of the variety you like.
Grafting black to green
Preparation of bushes for grafting with mature cuttings onto green shoots begins in the spring. On an annual vine located at the base of the bush, only two well-formed eyes are left during pruning. At the first green debris, all green shoots are removed, except for two highly developed ones, growing from the very bottom of the bush. A stake is installed on the shoots, to which the shoots are tied vertically as they grow. New green shoots that appear are systematically broken off.
Grafting begins when the green shoot begins to harden from below. 3-6 days before the operation, leaves, eyes, tendrils and inflorescences are removed from the lower part of the grown shoots to the height of the future grafting (50-60 cm). When the cuts in the places where the debris has dried out and the sap will not ooze through them, you can begin grafting.
Scion cuttings are harvested, stored and prepared similarly to spring underground grafting on site. Just before grafting, they are cut into single-eyed ones and grafted by simple copulation.
Before propagating grapes, it is also necessary to prepare tying material. The best material for this is polyethylene film 60 microns thick, cut into strips 20 cm long and 1 cm wide. The folded side of the strip can be cut 7-10 cm to make it more convenient to tie the grafting site.
The vaccination is carried out as follows. On a green shoot at the height of the future grafting, remove the upper leafy part and make an oblique cut 2-3 cm long. At the same time, the same cut is made on the cutting 2 cm below the eye. The cuts on the rootstock and scion should be smooth, even, clean and aligned.
The junction of the graft is tied tightly, but not too tightly, with a plastic strip. A correctly tied graft is completely visible through the film.
It is best to graft grapes in the morning and evening hours, when the plant has good turgor. The operation should be carried out quickly, without allowing the sections to dry out. When the grafting is done well, a drop of juice appears at the top of the cutting. Sometimes it forms only in the evening and morning hours, which indicates weak sap flow. If the juice only appears through the film at the junction of the graft, the graft must be re-grafted.
The shoot with the grafted cuttings is securely tied to the stake. After 7-10 days, the buds on the cuttings begin to bloom, and as the shoots grow, they are tied to a support. If 15-20 days after vaccination the eye has not begun to develop, then the vaccination must be repeated.
For better fusion of the scion with the rootstock, loosen and remove the binding in a timely manner and systematically remove the shoots appearing on the rootstock. If the grafting is not accepted and there is nothing to repeat it with, two or three green shoots are left on the rootstock or at its base.
A successfully carried out green graft gives growth of up to 1 m or more in the same year, ripens well and begins to bear fruit the following year.
Caring for grafted grapes in the garden
After grafting the grapes, the gardener’s attention is directed to several steps:
| Method of care | Description, stages |
| Seedling protection | Coat the grafting site generously with liquid clay, forming a cone. Add soil in a layer of about 10 cm, without covering the edges of the cuttings. Place a greenhouse over the graft (5 liter plastic bottle or spunbond tent). In spring, the shelter is periodically removed during warm weather to acclimate the seedlings to the surrounding temperature. Remove the greenhouse at an air temperature of +15 ºС. |
| Good development of seedlings is ensured by fertilizing. | Organics and complex mineral compositions are used. Prepare an infusion of mullein (1:10). Dilute with water (0.5 liters of infusion per bucket of water). A bucket of fertilizer is poured onto one bush. Mineral fertilizers are prepared according to the instructions. |
| Watering | Regularity – once every 7 days, taking into account weather conditions. Water for irrigation is heated to 24 ºС -28 ºС. Water the bush around the perimeter of the hole, protecting the grafting from water. Dose – 20 liters per bush in spring; after a month, watering is carried out after 2 weeks, then after 20 days. It is optimal to carry out drip irrigation for grafted grapes. |
| Autumn moisture-charging irrigation. | A necessary operation for grafted grapes to protect the ground from freezing. |
| Bush formation | In the spring, after grafting into the cleft, with strong plant growth, accelerated formation is carried out: Pinch the sprout after the 4th leaf. Shoots from the stepsons continue to form for 2 years, restoring the above-ground part of the grape bush. Spray young shoots that appear above the soil surface with Bordeaux mixture, first 0.5%, second time 1%. Spraying is done after rain. Regularity should not exceed 12 days. |
Start caring for grapes as soon as you see signs of successful grafting.
Timing of spring vaccination: which month is best to do it?
It is difficult to name the exact timing for vaccination; it depends on the climatic conditions of the area. The best option would be the spring, when the threat of night frosts has passed and the air temperature has settled at 15-16 °C. Most often this happens in late April - early May.
The junction of the cutting and the rootstock must be well fixed and protected from unwanted infection.
Useful tips
To ensure a successful grafting process, we recommend considering the following points:
- The cutting should not be too long; two buds on its surface are enough.
- Before grafting the plant, we fertilize the soil around the bush.
- If the rootstock is thick enough, you can try grafting several cuttings. This will increase the chances of success.
Grafting grapes in the autumn is an excellent opportunity to improve its variety, as well as renew an old plant. To properly graft grapes, follow the basic rules for successful grafting and our recommendations for this procedure.
Features of choosing a scion and rootstock
Grafting schemes with cuttings: improved copulation (1), behind the bark (2), into a split (3)
For beginners, it would be useful to repeat that a scion is a cutting of a grapevine that is grafted, and a rootstock is what is grafted onto; most often it is an existing old bush. Ideally, it is recommended to plant young wild grapes for the rootstock, which will be resistant to most fungal diseases.
Into the cleft
For grafting into a cleft, it is necessary to use cuttings with a diameter of at least 1 cm, the diameter of the rootstock must be the same or larger
Grafting into a cleft can be done even by beginners; a woody cutting is used as a scion, and a green vegetative bush is used as a rootstock. The ideal solution is to use a scion and rootstock of the same size. This method of grafting is recommended for the early spring months (March, April).
Half-split
Grafting into the cleft: a - in the center; b - peripheral; c - peripheral half-split; d — preparation of cuttings is usual; e - stripping of the cutting for ordinary grafting and its position on the rootstock; e - stripping the cutting according to Garner and its position on the rootstock
Half-split grafting is usually done on thick rootstocks, grafting a scion cutting on one side of the cut. Basically, the technique is no different and is performed in the same way as full split grafting. The method is suitable mainly for the first spring months.
Butt
Grafting grapes into the butt is the best way in spring, it ensures a high survival rate
For butt grafting, a mature shoot of the scion is used, from which a bud is cut off along with the nearest tissue and applied to a similar cut on the rootstock. The grafting site is securely secured with cling film or bandage. The method is suitable for the end of May - beginning of June.
Back to back
End-to-end grafting is simple and convenient, since the cuttings are grafted onto a top, a grape branch that grew from the trunk last year. The graft must be wrapped in a cloth soaked in a solution of potassium permanganate and covered with earth. Usually held in early May.
In standard
Grafting grapes onto a standard involves the complete removal of the above-ground part of the bush
Throughout the spring until the beginning of summer, grafting is carried out into a standard using prepared cuttings, which must have at least three eyes. To do this, several slits are made in a bush excavated 10 cm deep. It is possible to install several scions at once to a depth of 3–5 cm. The sections are treated with potassium permanganate and covered with plasticine, after which they are covered with earth. For successful rooting, drying out or lack of moisture is unacceptable.
Drilling
The place for drilling should be on the thicker side of the vine, since it is on this side that the cambium functions most powerfully, which means fusion will occur faster
During the period of active sap movement in April, grafting can be done by drilling, which is considered the least traumatic and safe. Holes of the appropriate diameter are made in the trunk; the tighter the scion sits in the rootstock, the higher the survival rate will be. For better results, you can do several vaccinations at once.
Benefits of propagating grapes in autumn
Each vineyard owner decides for himself when to graft this or that bush. The main thing is to take into account the advantages that the procedure gives him. The most common reasons for carrying out an agrotechnical operation are a person’s dissatisfaction with the characteristics of the planted crop (yield, frost resistance, etc.) or the desire to restore a weak bush that has mechanical damage.
Advantages of grafting grapes in autumn:
- Increasing productivity, external and taste characteristics of fruits.
- Increasing the plant's immunity to garden diseases.
- Changes in the timing of fruit ripening. With the right choice of propagation materials, the ripening period will be reduced.
- Rejuvenation of an old bush. That is, increasing its lifespan and fruiting.
Grafting grapes in the fall is required for every winegrower, both beginners and experienced specialists. Working in the garden will allow you to get a plant that will meet all the desires of a person. It is only important to understand how such a procedure is carried out.