Traditional way of growing potatoes
In addition to the conservative, traditional method of cultivating root crops, new methods of growing potatoes are used.
But many gardeners believe that the usual option has been worked out and brings a good harvest. However, this method has two significant drawbacks:
- When hilling between rows, part of the rhizomes are broken and cut down.
- Sunlight does not penetrate between the rows. Therefore, diseases develop, bushes become weak, fruits are small, and pests appear.
Therefore, for high-quality cultivation of potatoes, it is better to resort to new scientific approaches to cultivating this vegetable.
What are purple potatoes?
Violet or magenta potatoes have such an exotic appearance that they look like “food from another planet.” But in fact, he has quite earthly origins. This culture has ancient roots and originated in South America thousands of years ago. To this day, these potatoes remain a staple food for the local population, but today many varieties of purple potatoes are grown throughout the world.
In general, purple potatoes are not the fruit of genetic engineering, but a plant obtained by crossing light varieties of potatoes with South American wild plants, which naturally have purple nodules. Currently, more than 20 varieties of purple potatoes are known.
These potatoes are, in principle, very similar to their white counterparts, except that they have a beautiful purple skin and purple flesh. Varietal and hybrid varieties of purple potatoes range from a solid burgundy flesh color to patches of purple on a light background of varying intensities. The taste of such potatoes is described as “soft, earthy, slightly nutty.”
Advantages of purple potatoes compared to traditional ones:
- has high resistance to diseases;
- an ideal plant for an ornamental garden;
- increased vitamin C content.
Flaws:
- high cost of planting material;
- not available for sale everywhere;
- relatively low yield.
Potato "Chudesnik" has a powerful spreading bush. © Lyudmila Svetlitskaya
Growing potatoes from seeds
Despite the selection of planting material, the tubers degenerate and viruses, bacteria, fungi and diseases accumulate in them. They also deteriorate in taste. The situation can be corrected by planting the plant with seeds. This approach has a number of advantages:
- More economical and reliable than using tubers, since they can “slip” simple, low-quality material.
- It is easy and simple to store seeds , since seed bags take up little space.
- grown in this way are not infected with diseases and fungi . It tolerates unfavorable environmental conditions better.
- High yield.
We have all seen such “berries” on potatoes.
When planting potatoes with seeds, it is important to consider the following nuances:
- The root system of the seedlings is underdeveloped and delicate , so it should be grown in loose soil, preferably on sawdust.
- Sprouts can become very elongated when there is a lack of light.
- To prevent diseases, it is imperative to use special biological products .
- You need to be very careful when planting seedlings in the ground..
You need to cultivate potatoes with seeds as follows:
- Seeds can be bought ready-made or prepared yourself in the fall from the formed berries.
- Grow seedlings in a greenhouse.
- Pre-soak the seeds for a couple of days. Sowing begins at the end of March. It is better to plant more seeds, since germination is low.
- Shoots appear a couple of weeks after sowing. Boxes with seedlings should be in a warm, dark place.
- After a couple of leaves appear, the seedlings are transplanted into separate pots with peat.
- You can plant it in open ground at the end of May or beginning of June, when the weather is warm. It is advisable to supplement each hole with fertilizer. Plants are planted at a distance of 10-15 cm from each other.
As a result of cultivating the root crop, up to 1 kg of crop can be harvested from one bush.
Pests and diseases
What's wrong with potatoes? Sometimes it is affected by late blight, rhizoctonia, macrosporiosis, scab, cancer, stem rot, phomosis, brown spot and bronzing of leaves. We offer you a description of the first signs of these diseases so that you can diagnose them in a timely manner:
Rhizoctonia damages the vascular system of potato stems and roots, which is why tubers begin to form in the axils on the tops. The seedlings weaken, thin out and acquire a reddish color.
With phytosporosis, brown spots of various shapes with a light green border appear on the stems and leaves of potatoes; a light coating with spores of the fungus that causes the disease forms on the underside of the plate.
Stem rot can be identified by the wilting of potato leaves and shoots, dark spots appear on the lower part of the stem, and with the further development of the disease, necrotic spots with a yellow rim form on the above-ground parts.
When brown spot disease occurs, concentric dark spots appear on the lower leaves, which over time become covered with a black coating containing fungal spores. The disease develops more actively on rainy, hot days.
Scab affects the underground part of the potato; on the surface of the tubers, ulcers that grow and become corky with the development of the disease are formed.
Macrosporiasis is identified by brown concentric spots on the leaves and putrefactive formations with a black coating on the tubers.
With Phoma, vague elongated spots with pycnidia appear on the stems, which become discolored over time. After harvesting, dry rot forms on the tubers, covering the surface with spots from 2 to 5 cm in diameter. Sometimes voids with gray mycelium form in the tubers.
Potato cancer affects all parts of the plant except the roots, and is manifested by tissue growth and the formation of cauliflower-like growths.
Bronzing of leaves is caused by potassium starvation. Its symptoms are too dark green leaves, which subsequently become covered with necrotic spots and acquire a bronze tint. Most often, the disease affects potatoes growing on sandy and peaty soils.
The development of leaf bronzeness can be stopped by feeding the potatoes with potassium fertilizers, and the rest of the diseases we described are caused by various fungi, the easiest way to combat which is to use fungicides Maxim, Skor, Topaz, copper oxychloride and other drugs sold in specialized stores. However, before treating potatoes with a chemical preparation, think about the fact that this trouble could have been avoided if you had correctly and conscientiously carried out pre-sowing treatment of planting material, met agrotechnical conditions, observed crop rotation, and carried out care measures on time and conscientiously.
- Cucumbers: varieties for open ground
Among the pests, in addition to the notorious Colorado potato beetle, wireworms, the larvae of click beetles that live in the soil for several years, are dangerous for potatoes. In order to get rid of them, dig several holes in the area up to 50 cm deep, leave sweet root vegetables (chopped carrots or beets) in them and cover them with sheets of metal, wooden or plywood boards. After a couple of days, check the traps, and if you find a cluster of wireworms there, destroy them.
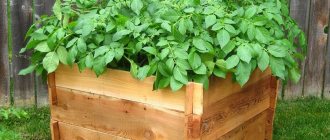
Growing potatoes in bags
This technology for growing potatoes is suitable for those gardeners who have a small plot and no space to plant vegetables. The method is very simple. A nutrient mixture is poured into large plastic bags: humus, soil, manure and compost. They are hung in a warm, ventilated place. Then cuts are made along the perimeter of the entire bag into which the sprouted root crops are planted. Harvesting is easy - just shake out the tubers.
Potatoes grown in bags take up very little space on the plot.
How to prepare the soil?
This vegetable loves loose, well-drained soil that is rich in nutrients. The soil is prepared in two stages - autumn and spring. When digging, mineral or organic fertilizers are used.
You cannot use fresh manure in the spring; it is best to make humus out of it. During spring soil preparation, it must be enriched with nitrogen.
Planting potatoes according to Mittleider
An agronomist from the USA, Mittleider, developed his planting system over many years. He tried to take into account all the nuances: if you place the vegetable too close, due to a lack of sun, the tubers will turn out small. If rare, then very large.
He calculated the ideal parameters: make beds 45 cm wide and 9 m long. The row spacing should be from 0.9 to 1 m. The holes are dug in a checkerboard pattern at a distance of 30 cm. It is important to water and fertilize only the holes, and nothing between the rows should not hit.
The advantages of this technology include:
- high productivity and product quality;
- no need to hill up;
- absence of weeds in the paths between the rows;
- It’s convenient to care for bushes while sitting between the beds.
But, if the site is located in the shade or lowland, then this technology will not work.
Video on how to plant potatoes using the Mittleider method
Types and varieties of potatoes
All varieties of potatoes according to economic purposes are divided into:
- technical - they contain more than 16 percent starch;
- universal - potatoes contain from 16 to 18 percent starch;
- fodder - root crops are relatively large in size and contain a large amount of protein;
- Tables - contain a large amount of protein and vitamin C, and starch at least 18 percent.
And all table varieties are divided into 4 types:
- type A - the pulp of the tubers is dense and not mushy;
- type B - mealy dense pulp is boiled only a little;
- type C - potatoes of medium mealiness, the flesh is soft and boils heavily;
- type D - potatoes are completely boiled.
Type A is suitable for preparing a variety of salads, type B and C are suitable for mashed potatoes, French fries and chips, and type D is only for preparing mashed potatoes. In different varieties, root vegetables can be colored in different colors: red, pink, purple, white or yellow.
Potato varieties are also divided into 6 groups according to ripening time:
Extra early varieties
Harvesting takes place 34–40 days after planting. Varieties:
- Ariel - this table variety is distinguished by its high yield, the tubers are light yellow, the flesh is creamy and has a pleasant taste, the average weight of potatoes is about 170 grams, cooked potatoes are not subject to darkening;
- Riviera - the variety is characterized by high productivity; it can bear fruit twice during one season; large, brownish, smooth, oval-shaped potatoes have very tasty yellow flesh;
- Minevra - this variety is characterized by high yield, and is also resistant to cancer and scab, it is suitable for long-term storage, the roots are white, and the pulp is yellow and very tasty, it contains about 17.5 percent starch;
- Bellarosa - the variety is unpretentious, drought-resistant and high-yielding; light red potatoes have an oval shape and very tasty yellowish flesh.
Early ripening varieties
Harvesting takes place 50–65 days after planting. Popular varieties:
- Impala - the variety has a high yield, so one bush grows up to 13 smooth yellow root vegetables, oval in shape, they rapidly increase in mass, their flesh is yellowish and dense;
- Red Scarlett - this variety was bred by Dutch breeders, the bush is low and semi-spreading, large red root vegetables weigh about 140 grams and have yellowish flesh;
- Dniepryanka - this Ukrainian variety is distinguished by its productivity, it can produce 2 harvests in 1 season, it is suitable for long-term storage, the oval root vegetables are colored yellow, they have creamy flesh and a small number of eyes, after cooking the potatoes are not subject to blackening;
- Rosalind - the variety has a high yield, the flesh of the pale red root crops is yellow, and the eyes are shallow; on average, a potato weighs about 100 grams, and it contains 17 percent starch.
Mid-early varieties
Harvesting is carried out 65–80 days after planting. The following varieties are popular:
- Sineglazka - this variety is distinguished by its unpretentiousness and high yield; gray root vegetables have lilac eyes and tasty white pulp;
- Zabava is a Ukrainian variety characterized by productivity, has medium-sized pink root vegetables (average weight 120 grams), their white pulp has high taste and low starch content;
- Mriya - this variety is characterized by resistance to diseases (for example, cancer and rot) and high yield, potatoes taste similar to Sineglazka, pink root vegetables have yellowish and tasty pulp, which contains a large amount of starch;
- Nevsky - white tubers weigh on average about 130 grams, they have a blunt top and pale red eyes, the white flesh does not turn dark when cut, and contains only 11 percent starch.
Mid-season varieties
Harvesting is carried out 80–95 days after planting. Varieties:
- Picasso - this productive Dutch variety does not need frequent watering; one bush can grow up to 17 white root vegetables, they have red spots on their surface, and their flesh is creamy;
- Sante - a table variety is distinguished by its unpretentiousness and productivity, the yellow large and smooth tubers are oval in shape, and there are small eyes on the surface, the creamy, tasty pulp contains a small amount of starch;
- Peter's Riddle - this prolific variety is suitable for long-term storage; pink root vegetables have pinkish-cream, very tasty pulp.
Mid-late varieties for winter
Harvesting is carried out 95–110 days after planting. The best varieties:
- Desiree - this variety, suitable for long-term storage, is characterized by high yield and resistance to drought, red root vegetables have tasty yellow pulp, which contains 21.5 percent starch;
- Kuroda - a Dutch variety that is resistant to diseases, cooked potatoes do not darken, pale red root vegetables have an oval shape and yellow flesh, which contains a large amount of starch (about 21 percent);
- Zdabytak - this Belarusian variety is one of the best in this group; the yellow oblong root vegetables have yellow flesh, which contains about 25 percent starch; one plant can grow up to 22 potatoes.
Late ripening varieties
The harvest is harvested when 110 or more days have passed since planting. Varieties:
- Orbita - the variety is resistant to viral diseases and scab; yellow, round-shaped root vegetables have tasty white pulp, which contains 19 percent starch;
- Zarnitsa - the variety is resistant to late blight, scab and viral diseases, the pulp of the purple-red root vegetables is yellow with a low starch content;
- Cardial - a variety suitable for long-term storage, it is resistant to drought and diseases, as well as high yield, elongated root crops are red in color, the eyes are superficial, the pulp is very tasty yellowish in color.
Popular potato varieties. Description of varieties. Garden and vegetable garden issue 151
Method of growing potatoes under straw
Planting potatoes under straw was developed by agronomist Rytov. The whole concept is that the tubers are not buried in the ground, but placed in a dug hole and covered with straw. The depth of the hole should be 20 cm. It is advisable to use slightly damp straw, this will promote rapid growth. This method requires less effort when planting plants. The straw is sprinkled with earth on top. This method is similar to growing potatoes using the Kartelev method, we will talk about it below.
The result is a large and clean harvest. The technology has its advantages:
- Easy to clean.
- If planted on heavy soil, you do not need to dig up the soil first.
- The embedded straw after harvesting improves the structure of the soil and loosens it.
- Prevents the appearance of weeds.
Potato harvest grown under straw
Harvesting and storing potatoes
What time to harvest
As a rule, you can start harvesting potatoes after the tops on the bushes turn yellow and dry. As a rule, harvesting is carried out 70–100 days after planting the tubers in open ground. To be sure that it is time to dig the potatoes, you should remove several bushes from the ground; if the root crops are ripe, you can start harvesting. Remember that harvesting root crops should not be postponed until later, since if the tops dry out completely, and the tubers then remain in the ground for a long time, their weight will decrease significantly, and this will also negatively affect their ability to be stored.
Experienced gardeners advise, if possible, 15 days before harvesting, to shorten the potato tops to 10 centimeters by mowing them. Then it should be collected and destroyed, since harmful insects, as well as pathogens, can accumulate in it over the course of a season. Harvesting should be done on a sunny, dry day. To dig up bushes, you can use a walk-behind tractor, a pitchfork with blunt arrows, or a shovel. It is recommended to leave the dug up root crops on the surface of the site for a while so that they can dry out. After this, they need to be collected and poured into bags, which are put in a shaded place (for example, a dry barn), where they will stay for 15 days. At the end of the allotted period, the skin on the tubers will become stronger and denser, and the infected root crops will have time to show signs of the disease. It should be taken into account that all this time the potatoes can be in bags, but if possible they are poured out of them onto the floor (the thickness of the layer should not be more than 0.5 m). When half a month has passed, you can start sorting the potatoes, and you need to remove all disease-damaged and injured tubers, and you should also select potatoes that belong to those varieties that cannot be stored for a long time. Then the potatoes can be stored in storage. Do not forget to select planting material for the next season; it must be kept in a well-lit place until the tubers have a green tint. Then the seed potatoes are also placed in storage.
To store such root vegetables, it is recommended to use a cellar or basement, the main thing is that the storage is cool, dry, dark and has good ventilation. It must also be protected from rain and frost. It is very convenient to use lattice trays for storing potato tubers. It is recommended to make quite spacious bins out of them, into which the root crops must be poured in a layer no thicker than half a meter. The bottom and walls of such a bin will be lattice, air will be able to flow freely to the potatoes. For storage, you can also use small wooden boxes designed for apples, which should be placed one on top of the other. To keep root crops better, it is recommended to cover them with rowan leaves. The best storage conditions for root vegetables: air humidity is from 85 to 90 percent, and temperature is from 2 to 3 degrees. If it is warmer in the storage, the sprouts will grow very early, and solanine, which is dangerous to the human body, will begin to accumulate in the tubers, but if it is colder there, the tubers will freeze, as a result of which they will acquire a very sweet taste. In the absence of a utility room or if there are no conditions for storing this vegetable, then potatoes can be placed in fabric bags on the balcony, but they should first be placed in wooden containers that have holes for ventilation. The container should not be placed on the floor or placed near a wall. There should be a gap of 15 centimeters on each side, as well as on the bottom of the container, this is necessary for good ventilation. With the onset of frost, the container with potatoes must be covered with an unnecessary blanket or carpet, in which case the tubers will be able to withstand temperatures dropping to minus 15 degrees. If the root crops are placed in the corridor, living room or pantry, then they can remain there for no more than 12 weeks.
All about growing potatoes. HARVESTING AND STORING POTATOES. Part 6
Growing potatoes using the Kizima method
Agrotechnologist Galina Kizima suggests planting the root crops not in holes, but leaving them in the garden bed, simply covering them with straw and weeds picked in the summer. At the same time, you should not touch the sprouts. There is no need to water either.
An important feature is the preparation of tubers. They should be washed in potassium permanganate or Fitosporin, dried and germinated in a cardboard box in a warm place. To protect the tubers from mice and other pests, they need to be kept in the light for a couple of weeks until a greenish color appears.
Plant vegetables as follows:
- Tubers with sprouts of 4-5 cm are considered ready for planting.
- First, prepare the soil. To do this, weeds and straw are laid, holes are made in it and darkening is made for future plants.
- The distance between rows should be half a meter. The gap between the holes is 25-30 cm. The width of the bed will be up to 1 m.
- Small tubers are planted several at a time to get a bountiful harvest. And the big ones are cut. Treat the cut with ash to prevent infection by bacteria and fungus.
You need to hill up the beds with the help of weeds and fallen leaves, that is, add them instead of loosening the soil. You can insulate the rake's crops with newspapers, hay or plain paper.
Leave it in the garden bed, covering it with straw and weeds.
Video: Galina Kizima – Planting under straw
Preferred predecessors
How to grow potatoes and why is it so important to choose a place to plant any vegetable in advance? Each crop has a certain weakness to soil diseases and infections carried by insects. Potatoes belong to the nightshade family. That is, if tomatoes were previously planted on the site, then the root crop is no longer planted in this place. Bacteria that remain in the soil from tomatoes will negatively affect the growth of the new potato crop.
On a note! According to the rules of crop rotation, several years must pass to return the plant to its original planting site. This minimizes the likelihood that the crop will get sick.
Reasons why it is important to follow the sowing sequence:
- the development of diseases is prevented;
- the soil is saturated with useful substances released by plants;
- the harvest increases.
It has been noted that during the growth period, the potato bush takes the maximum amount of beneficial soil bacteria from the soil. Therefore, it will not be superfluous to enrich the quality of the soil in advance. Many plant crops can help with this.
Carrots and beets are suitable predecessors to potatoes
The tables show predecessors that are recommended to be planted before potatoes in order to get a good harvest.
| Recommended | Advantages |
| Leafy crops (green lettuce, spinach, parsley, basil, marjoram, nettle, celery) | Enrich microflora. Reduces the number of weeds and fungi. Spicy smell repels some insects |
| Legumes (beans, peas, soybeans) | Their roots help loosen the soil, improving air permeability. They enrich the soil with potassium, nitrogen, and phosphorus |
| Beetroot, carrots, cucumbers, garlic, radish, radish | Minimally deplete the soil, saturate the soil with microorganisms |
| Pumpkin (zucchini, pumpkin, watermelon, melon) | Almost no harmful insect larvae are left behind |
| Cabbages (white cabbage, mid-season, late, cauliflower) | Acceptable crops have opposite diseases compared to potatoes |
Planting potatoes and beans together
But there are plants after which it is not recommended to plant potatoes. A similar nutritional composition of the soil promotes the growth of bacteria, and the sweetness of such plants attracts harmful insects and slugs.
- Tomatoes,
- Potato,
- Bulgarian pepper,
- Eggplants,
- Strawberry,
- Raspberries.
There are also a number of flower plants that will help you grow a good potato crop. They can be planted around the perimeter of the garden or in rows close to the furrows:
- marigold;
- tansy;
- chamomile;
- petunia;
- calendula;
- carnations.
The aroma of flowers repels the Colorado potato beetle, weevil, nematode, whitefly, and whitefly. Tansy works best against ants, but rodents do not like chamomile.
Chinese way of planting potatoes
According to the Chinese method, you need to dig holes 0.5 m deep and about 0.7 m in diameter. First, 5 cm of manure is poured, then the same amount of dug earth mixed with humus is poured. Only after this are three sprouted tubers planted in one hole. As soon as the sprouts appear, they are covered with soil and watered abundantly. As the plant grows, add more soil, do this 3-4 times.
As a result, it turns out that root crops are formed along the entire length of the sprinkled stem.
Dutch method of growing potatoes
Many famous potato varieties are grown in Holland. They have developed their own method of cultivating vegetables. It consists of the following nuances:
- For planting, choose only high-quality and healthy tubers.
- Root crops can be planted in the same place only once every three years. At other times, crops are grown there.
- The soil must be fertilized.
- Control weeds and pests with special chemicals.
The land is prepared at the end of autumn. During plowing, manure, potassium salts, superphosphates are added to it, and phosphate fertilizers are also added to heavy soil. And in the spring, additional urea is added.
Planting is planned in such a way that the ridges are in a straight north-south direction. This will ensure uniform illumination of the potatoes throughout the daylight hours.
- A furrow 5-7 cm deep is formed on the treated soil.
- Potatoes are placed in the recess at intervals of about 30 cm.
- After this, the soil surface is leveled and the potatoes are covered with soil.
- The distance between the rows is left at 50-70 cm.
- 10-15 days after the appearance of the first shoots, they hill up. In this case, a ridge is formed in the form of a trapezoid (a triangle with a cut off top). The upper base of the trapezoid should be 15-20 cm, and the lower one from 50 to 70.
- During the entire growth of potatoes, weeds are removed.
Water the plants three times a season: before flowering, during and 10 days after flowering. It is also important to spray against weeds and the Colorado potato beetle. Before harvesting, the tops are mowed and the tubers are left in the ground for a couple of weeks. This makes the potato skin coarser and less susceptible to damage when digging it up.
Potato processing - the basis of the Dutch method of growing potatoes
Potato care
Growing conditions
Growing potatoes in open ground requires careful care of the crop, and it begins even before germination. In order for the tubers growing in the ground to be sufficiently supplied with air, the area must be loosened and cleared of weeds. Until the shoots appear, this can be done with a rake, then, when the potatoes sprout, the rows are loosened after watering or rain, preventing the formation of a crust on the surface. In addition to loosening, watering and weeding, the list of measures for caring for potatoes includes their hilling, fertilizing and treatment against diseases and pests.
Watering
Before bud formation begins, potatoes are not watered, but from the beginning of the budding phase the soil must be kept moist at all times. Before watering the potatoes, make sure that the soil in the area has dried to a depth of 6-8 cm. Moisten the potato field in the evening by pouring 2-3 liters of water under each bush. In dry summers, you have to water potatoes 3 to 5 times during the growing season. After watering, loosen the soil
Hilling up potatoes
As the potatoes grow, they need to be hilled up, raking soil from the rows under the base of the bushes. As a result, even with a smooth planting method, the potato field looks ridged. Hilling up prevents the bush from falling apart and promotes the formation of stolons by the plant, which form the harvest. Hilling is carried out at least twice a season: the first time when the bushes grow to 14-16 cm in height, the next time - after 2-3 weeks, before flowering begins. It is more convenient to carry out this procedure after rain or watering.
- Nettle: properties and contraindications, cultivation, use
Top dressing
Feed the potatoes with slurry or a solution of chicken manure. If necessary, mineral fertilizers are also added in the form of a solution. However, before fertilizing potatoes, analyze the composition of the soil, calculate the amount of fertilizers you have already applied to the soil before planting potatoes, and try not to upset the nutritional balance by maintaining moderation in fertilizing, since excess fertilizer will almost certainly worsen the quality of the crop.
How and with what to treat potatoes before planting
Treatment
When growing potatoes, be prepared for the fact that you will have to face a problem such as the Colorado potato beetle on potatoes, and you should know how to treat the potatoes in this case. Among the folk remedies for combating an uninvited American guest, the most reliable measures are treating the area with sifted wood ash or growing potatoes mixed with calendula. Potatoes are protected from beetles by beans or beans planted around the perimeter of the potato field.
There is such an ingenious way to deceive the Colorado potato beetle: several tubers are planted in the field a couple of weeks after planting potatoes, and by the time the first potato shoots appear, the previously planted tubers have already formed bushes, onto which the beetles will flock as bait. These bushes are removed from the site along with the Colorado potato beetles. If all these measures fail to prevent the pest invasion, treat the potatoes with Prestige, Aktara or Confidor.
Potatoes under agrofibre
In this case, you will be able to harvest the harvest earlier than usual.
The essence of the method is that the plantings and potatoes are covered with white agrofibre. In this way, the sprouted sprouts are protected from frost, the soil retains heat longer and all this leads to faster development of the bush. To prevent the agrofibre from blowing away, the edges of the fiber are either buried. or pressed down with stones or water bottles.
In the second option, black, non-woven material is used. It is spread on fertilized and plowed soil, cuts and small depressions are made. Tubers are planted in them and sprinkled with soil.
The advantages of the method of planting potatoes under agrofibre are as follows:
- The harvest will not freeze.
- The number of weeds is reduced.
- Potatoes grow a month earlier than usual.
What are green manures and what are they for?
If in the fall it is not possible to dig up the garden, then you can plant green manure in it. These are plants that change the composition and acidity of the earth, contain a lot of nitrogen and phosphorus, improve aeration, and create favorable conditions for the growth of subsequent plants.
Green manure for potatoes
It is optimal to plant green manure in early autumn so that the rains moisten the soil. Then the plants grow several times faster. But it is also possible in the spring, around the end of March, so that the seedlings have time to grow before sowing the seeds.
Green manure crops that potato harvest legumes (peas, beans, sweet clover, clover, vetch, lupine, alfalfa), flax.
Before potatoes, you should not plant cereals (rye, barley, millet, oats, white mustard), sunflowers. They have a low content of phosphorus and nitrogen, so they will not bring significant benefits to potato tubers.
How to use:
- Plant seeds in rows in prepared soil to a depth of 5-7 cm.
- Their growth continues from 1.5 to 2 months.
- When allied plants have reached a height of 25-30 cm, they are cut off.
You can dig up the soil along with the roots, or mow only the leafy part and lightly sprinkle it with soil as mulch, leaving the vegetation to rot.
Attention! You can’t wait for seeds to appear on plants. Excess greenery leads to acidification of the soil, and they are difficult to remove.
An effective method to increase the benefits of green manure is to make a mixture of different crops. For example, you can mix peas with barley. This combination completely replaces purchased mineral fertilizer and it will be easier to grow potatoes on such soil.
Rye as green manure
Green manures are good companions for many crops. They have deep roots that displace common weeds, maintain moisture, and the phytoncides in their composition eliminate pests. Their rotted remains feed soil bacteria, which brings visible results to vegetables.
Planting potatoes using the Kartelev method
The main feature of the method is fertilization, mulching and soil protection, which increases productivity.
In late autumn, mown grass is poured onto the ground and allowed to rest for a couple of days, then collected in stacks and left to overwinter in a dark and dry place. This will be an excellent fertilizer for next year. Mown grass is replaced with straw, hay, and fallen leaves. Organic fertilizer can contain dandelions, sedge, clover and others.
One type of mulch is straw
The agronomist claims that there is no need to care for the crops, since they take moisture from rainwater, and the use of the Baikal E1 growth agent protects the plants from diseases.
The technology offers several options:
- Zero. There is no need to fertilize, mulch or dig. The beds are marked with a stretched rope. Simply use a hoe to make a small depression and lay down the planting material. Then the ground is leveled with a rake, and then regular hilling is carried out.
- With manure and trenches. Also in the previous version, a rope is pulled, along the length of which holes are dug. Before planting, manure is poured into them.
- With mulch. The area is mulched and divided into even beds. Potatoes are planted in this layer, and manure is sprinkled on top.
- With fertilization. During the preparation of the holes, fertilizers are added to them.
- With mulch and trenches. When preparing the site, the soil is formed from layers of soil, mulch and manure.
Video: Theory of beds using the Kartelev method
When to Harvest
Harvest time depends on the potato . Some varieties are ready for harvest as early as July, while others are ready only in August or September.
Potatoes are dug up not with shovels, but with pitchforks . This way the tubers will receive less damage. Harvesting is possible only in dry weather.
The harvested crop is sorted . All affected and infected tubers are removed. Whole specimens are placed in boxes and sent to a basement previously fumigated with sulfur.
For reference. Potato tubers grown from seeds in the first year are small (10-30 g). They are used as planting material for the next year, then the potatoes will be large and the harvest will be high.
Growing potatoes using the Zamyatkin method
Planting material is germinated in bags in which sugar was stored. Under these conditions, the sprouts are strong and the tubers retain moisture.
Planting is carried out in the spring, as soon as the temperature becomes stable. The beds are made wide with a distance between them of up to 1.5 m. Tubers should be planted in a checkerboard pattern.
After the sprouts emerge, earth and manure are poured into the middle of the bush. The bush turns out to be voluminous and covers the entire garden bed. Plus, during flowering, all the buds break off, this allows you to increase the yield by a quarter.
Storing potato tubers
Potatoes grown from seeds have a two-year growing season. In the first year, they receive planting material - small potatoes. In the second year, potatoes are planted as usual.
If you have sown several different varieties, then it is important to take into account the fact that different varieties have different ripening times and, therefore, different storage periods. Therefore, we place different varieties for storage separately from each other, avoiding mismatch.
Different varieties of potato planting material are stored separately
X
Planting potatoes according to Gordeev
According to the Gordeevs’ method, you need to prepare the land in late autumn - dig it up with manure or compost. You can also leave hay and grass in the summer and plow everything up before winter. And in the spring, nitroammophoska is added to the soil and loosened a little with a rake.
The location for planting potatoes must be changed every year. It is advisable to grow it after grains.
You need to prepare the material in early spring, germinating sprouts on tubers. To disinfect them from diseases and fungi, you need to soak them in special preparations.
It is advisable to water the soil before planting. The beds are made with an interval of 70-80 cm. For planting, trenches are dug into which the vegetables are lowered. The distance between them should be up to 40-50 cm. They are covered on top with earth mixed with ash and compost. After the first hilling, the beds are mulched with hay.
How to grow potatoes correctly in different ways
Potato bushes can be grown using various methods, in fields, in private gardens or greenhouses. If you need to get an early harvest, choose greenhouses. When there is no desire or time to dig up the soil, the technique of growing under straw is suitable. With a small plot area, choose the method of breeding in barrels or bags.
Traditional method
Potatoes have been grown in this way since ancient times on private plots or industrial plantations; it is being modernized, but the principle remains the same. The technique consists of planting, germination, appearance of leaves, bud setting, pollen, fruit ripening and tops drying. Material for planting is selected during the autumn harvest. Seed tubers are taken from the strongest bushes and sorted by size. Medium-sized specimens are optimal. Seed potatoes are not removed from the ground; they are left in the sun until they turn green.
In the fall, preparations begin for future potato plantings. It is fed so that by spring the nutritional compositions will rot, in order to increase productivity. Tubers are germinated in a cool place with good lighting. For rooting, peat and sawdust are used, and seedlings are sprinkled with them. When the seedlings have sprouted 1 cm, they can be planted in the garden. Planting work is usually carried out at the end of April or beginning of May. There should be a distance of 30-40 cm between the depressions; a handful of stove ash is poured into each hole. Maintain a distance of about 70 cm between the beds to make it convenient to do hilling in the future.
Before the potatoes sprout, loosen the soil using a rake. Weeds are destroyed, the earth is saturated with oxygen. Hilling is done 2 times during the growing season. You can even cover the bushes with soil so that there is good protection from frost. The first manipulation is carried out when the green sprouts reach 15 cm in height. Repeat the process before flowering the bush.
The planting method is chosen based on the soil composition. On heavy soil, it is advisable to plant vegetables in ridges; on light soils, resort to the hole method.
Growing potatoes using the Gülich method
This method of growing potatoes has existed for more than 100 years. The main feature is the large space for each bush. But this is not very suitable for ordinary gardeners. Although one bush can produce about 15-16 kg.
The growing order is as follows:
- The entire plot is divided into equal parts measuring 1 by 1 m.
- A small trench is made from manure in the center.
- Soil is poured inside it, into which the tuber is planted upside down.
- The sprouts are sprinkled as they grow.
For a bountiful harvest, you need to regularly water the bush and fertilize it. Ash, manure, compost or water mixed with bird droppings will do.
Variety selection
The choice of variety depends on its purpose. Some summer residents only grow potatoes that are suitable for summer food. Early varieties, although not susceptible to most nightshade diseases, are not stored for a long time due to their low starch content.
Root crops for storage are grown from late-ripening and late varieties. Such potatoes will require more care, as they are susceptible to diseases, but they produce abundant yields and are shelf-stable.
Experts recommend selecting several varieties with different ripening periods for one plot, especially in cases where a particular variety has never grown on the plot.
Zoned varieties are usually planted, that is, those potatoes that grow best and are most common in your region. Famous Dutch and German varieties can seriously fail in the climatic conditions of your region and should be tested with repeated plantings.
Let's consider the classification of potatoes according to ripening time:
- Early – ripening period 50 – 60 days.
- Mid-early - ripening period 60 - 80 days.
- Mid-season - ripening period 80 - 100 days.
- Late ripening - ripening period 100 - 120 days.
- Late - ripening period of 120 days or more.
When choosing a variety, you should pay attention to yield, care requirements and soil type, resistance to adverse factors and diseases, taste, and presentation.
Early varieties
- Zhukovsky early - tuber 100 g, ripening up to 50 days.
- Duckling – tuber up to 240 g, ripening no more than 65 days.
- White spring – tuber 90 g – 140 g, ripening up to 45 days.
Mid-early varieties
- Ilyinsky – tuber 110 g – 130 g, ripening up to 80 days.
- Red Scarlett – tuber 80 g – 120 g, ripening up to 75 days.
- Rowan - tuber 90 g - 120 g, ripening up to 80 days.
Mid-season varieties
- Darenka – tuber 90 g – 110 g, ripening up to 90 days.
- Adretta – tuber 120 g – 140 g, ripening 90 – 110 days.
- Aurora – tuber 90 g – 130 g, ripening 90 – 100 days.
Late ripening varieties
- Rocco – tuber up to 125 g, ripening 100 – 120 days.
- Ragneda – tuber 90 g – 120 g, ripening 110 – 120 days.
- Crane - tuber up to 120 g, ripening 100 - 110 days.
Late varieties
- Slavyanka – tuber 130 g – 180 g, ripening 125 – 145 days.
- Lorch – tuber up to 120 g, ripening 120 – 140 days.
- Chaika – tuber 75 g – 120 g, ripening no more than 125 days.
Basic rules for growing potatoes
Gardeners often do not pay attention to the agricultural technology of growing potatoes. As a result, they have a meager, cracked potato harvest (we discussed why potatoes crack in the ground here).
Any innovative methods of growing potatoes are based on several basic rules. These include:
- Careful selection of planting material . It all starts with quality tubers. For planting, it is necessary to select large, healthy seeds. They should not be affected by fungi or have a strange color or smell.
- Crop rotation accounting . It is not advisable to plant potatoes in the same soil. It is necessary to swap it with cucumbers, tomatoes, carrots, and peas.
- Special soil preparation for planting . The soil is prepared in the fall by adding fertilizers. But you can feed already planted bushes with ash, manure or chicken droppings.
- Compliance with agricultural planting techniques . You should not plant tubers too often. Mature bushes will simply cling to each other. Cover the tubers with 5-8 cm of soil, make holes at a distance of 10-15 cm, and leave 50-70 cm between rows.
- Proper care of root crops during the growing period . It is important to water potatoes on time, especially when they bloom. Periodically hill up and loosen the soil. In order for the soil to retain moisture longer, it is advisable to mulch it with straw. And spray against aphids, moths and other pests.
Following these simple rules will help you get a much better and more abundant harvest than usual.
Growing without seedlings in open ground
Potatoes from planting to harvest
Most summer residents and gardeners use this method when planting potatoes, despite its disadvantages:
- high cost of planting material;
- rush hour and lack of time;
- The accumulation of bacterial and fungal diseases in the soil and tubers, even super-elite purchased on the market can be infected.
Landing
The soil for planting is prepared in the fall by adding the necessary fertilizers. In the spring, add ash or dust the tubers with it. To avoid fungal epidemics, it is recommended to do without fresh manure at this time.
The planting method is chosen depending on the soil and climate. The vegetable is planted in holes and trenches on light soils in areas with dry summers; ridges are cut on heavy, waterlogged soil.
Planting in rows under a shovel is the most popular method. The disadvantage of this method is that with heavy rainfall the tubers suffocate.
Late potato planting scheme
The trenches are prepared in the fall, filled with organic matter that settles during the winter. With this planting, soil fertility improves and you can do without chemical fertilizers. The labor intensity of arranging trenches and the presence of a large number of grasses for mulch are among the disadvantages of this method.
In regions with large amounts of summer precipitation, ridges are used, in which the soil warms up faster, maintenance is easier, and with high hilling, many tubers develop. On sandy soil, ridges dry out quickly.
When groundwater is high, planting in ridges will help
General conditions for these methods:
- for uniform illumination, planting in the direction from north to south;
- maintaining distances between rows of 60–70 cm, between plants 25–30 if the potatoes are early and do not bush much, and 30–35 cm when planting late potatoes with thick tops.
Alternative planting methods
It cannot be said that these methods have become widespread, however, with their help a number of problems are solved:
- reduce physical stress on the body;
- reduce water consumption to a minimum;
- get rid of weeds without weeding and loosening.
These methods include the following plantings:
- for hay or straw;
- under black film or non-woven material;
- planting in boxes;
- planting in bags and barrels.
Design of a plot with a potato bush
I would like to talk about one more method. We are talking about winter planting. Before you reject this method, remember that once upon a time they said a categorical “no” to potatoes.
They are planted in the usual way, only the varieties chosen are not very early, but early and even mid-early, characterized by frost resistance: Nevsky, Lugovskoy. Mulch with a thick layer (15–20 cm) of straw or reeds, creating the effect of a thermos.
Tubers do not germinate.
Growing conditions and care
Potatoes belong to temperate climate plants; they need cool summers with daytime temperatures up to 25° and night temperatures not higher than 15°.
Caring for the crop involves:
- watering;
- loosening;
- weeding;
- hilling;
- feeding;
- pest and disease control.
Watering
The vegetable does not tolerate drought well, so watering is necessary in the hot summer. If the plant is not watered, late rains will cause the formation of ugly fruits.
A special need for watering arises:
- when the plant reaches a height of 5–10 cm (growth of the aboveground part is ensured);
- during budding (the number of tubers increases);
- when tubers gain weight.
The best time for watering is in the evening, but so that by night the bushes are dry and do not catch late blight. You can determine whether the plant is thirsty by dipping your fingers into the soil: if they remain dry, this is a sign of dehydration.
As the bush develops, the amount of water consumed also increases. When the tubers ripen, it reaches 20 liters.
Loosening, weeding, hilling
Loosening and weeding are carried out after rains, when the soil is compacted, or in the morning after evening watering.
Hilling (adding soil to the base of the bush) is necessary to form additional underground stems on which the crop is formed. Hill up at least 2 times per season: when the shoots reach 15 cm and before flowering. The procedure is performed on moist soil.
I would like to note that if you plant potatoes using an alternative method, then these three physically difficult components of plant care will not be required.
Top dressing
Potatoes are a big glutton. From one hundred square meters of land per season it consumes:
- nitrogen - up to 3 kg;
- potassium - 4.8 kg;
- phosphorus - 0.8 kg.
Even if the soil is well fertilized in the fall, summer plantings (root and foliar) cannot be avoided. Root feeding is combined with watering.
- After the first watering, add mullein (0.5 kg per 10 liters of warm water) at the rate of 0.5 liters per bush.
- The second watering is combined with the addition of potassium and phosphorus needed at the moment (15 g of potassium sulfate and 15 g of double superphosphate are dissolved in 10 liters of water).
- The third time the crop is fertilized with manure (0.25 kg per 10 liters of water).
For foliar feeding take:
- urea (0.2 kg of urea and 10 g of boric acid per 10 liters of water) - 2 weeks after emergence;
- humates - when the 4th leaf appears and throughout the entire growing season;
- phosphorus is used to improve taste a month before harvest (0.1 kg per 10 l)
Followers of natural farming replace mineral fertilizers with organic matter.
Pest and disease control
The plant is harmed by viral, fungal, bacterial and non-parasitic (disturbances associated with temperature, nutrition, humidity during the growing season) diseases. Each disease has its own “medicines”, and only against viral “illnesses” there are no chemical means of control.
The Colorado potato beetle, wireworm, and potato nematode love root vegetables just as much as we do. They cope with them both with the help of chemistry and folk remedies.
Problems when growing potatoes
| problem | cause | solution |
| leaving in the tops | excess nitrogen | application of phosphorus fertilizers |
| waterlogging | bending the tops to the ground | |
| fruit cracking | lack of moisture | irrigation regulation |
| scab, fomoz, nematode | compliance with crop rotation, use of nematode-resistant varieties | |
| mold smell | fungal diseases | use of healthy planting material |
Mulching
Mulching is an agrotechnical technique that creates a protective layer on the soil by covering it with organic (hay, straw, peat, sawdust, humus) or artificial material (agrofibre), which retains moisture, prevents soil washout, accelerates crop development and prevents the growth of weeds.
Mulch allows you to save on watering and extend its duration.
Harvesting and storage
The timing of fruit ripening depends on the variety.
- 45–60 days - ultra-early (Ariel, Caprice).
- 60–70 days - early (Zhukovsky early, Bryansk early).
- 70–80 days - medium early (Red Scarlett, Reserve).
- 80–100 days - mid-season (Altair, Talisman).
- 120 days - late ripening (Atlant, Temp).
The main sign of potato maturity is the drying and lodging of the tops, from which tubers with dense skins are easily separated.
They dig up the crop in dry weather, sort it out, removing cut and diseased tubers, and dry it in the shade.
Store in a cool, dry room in disinfected “breathable” containers (wooden and plastic boxes, cotton bags), which will prevent the appearance of rot in vegetables. For better preservation, the tubers are layered with garlic cloves, and the boxes with mint and horseradish.