If you plant onions in the spring, you can get a good harvest of vegetables in the fall, but for this you need to correctly determine the timing of sowing work and organize proper care for planting. This process is not labor-intensive, but requires compliance with certain agricultural techniques and rules for growing vegetables. Read about all this below.
When to plant?
In order to determine the optimal timing for planting in the spring, you need to take into account both specific weather conditions and suitable dates according to the Lunar calendar.
Climatic conditions
Onions can be planted only after the frosts have subsided and stable warm weather has established. In this case, the soil must warm up to a depth of 5-8 cm to +12...14°C, otherwise the onion will sprout into the arrow, and the greenery will grow more than the turnip itself.
As a rule, suitable weather sets in at the end of April - early May. The exact timing depends on the specific region:
- southern regions - second ten days of April;
- regions of central Russia and the Moscow region - the third ten days of April;
- Siberia and the Urals - the first ten days of May;
- Altai Territory - from early to mid-May.
Residents of central Russia are starting to grow the bird cherry flowering vegetable.
If onions are grown in a greenhouse, planting can be done 2-3 weeks earlier than indicated.
Regardless of the region of residence, you should not delay planting onions, otherwise, due to high temperatures and lack of natural moisture, the onion will develop slowly, which can lead to a decrease in the intended yield.
According to the Lunar calendar
To accurately determine the dates of planting, many gardeners rely on the Lunar calendar, according to which the following favorable periods for planting onions in the spring are:
- April 25 and 26;
- from May 10 to May 20;
- May, 23rd.
Onions planted these days produce large bulbs and juicy greens.
How to grow a head from seeds in one season?
Growing onions for turnips in the Non-Black Earth Region, the Far East and Siberia occurs in a two-year culture, i.e., first a set is obtained from seeds, from which turnips are grown the next year. In the southern regions and central Russia, some sweet and semi-sharp varieties and hybrids can form a marketable bulb from seeds in one season. To get a turnip directly from seeds, you need to sow in early spring and winter or use seedlings.
If weather conditions permit, onions can be sown at the end of April directly into open ground. To speed up seed germination, they must be placed in warm water or a solution of growth stimulants for 1-2 days.
It is better to sow on high ridges. The seeds are sown to a depth of about 2 cm, in a tape method with a distance between tapes of 20 cm. Thus, if the ridge is 1 meter wide, then 4-5 rows can be placed on it. The seedlings need regular watering and thinning twice. The first time is thinned out a few days after mass germination, leaving an interval of 2 cm between plants, and the second time - in the phase of 2-3 true leaves with an interval of 6 cm.
In winter, seeds are sown from late October to mid-November. Pre-winter sowing is characterized by an increased seeding rate (3 times) and mulching of crops with peat. Shoots appear earlier, so the bulb ripens earlier.
Mostly sweet salad varieties are grown through seedlings. Sowing of seedlings in a heated greenhouse is carried out in early March. It is possible to grow seedlings at home, but only with sufficient lighting. When sown in nutrient soil, seedlings only require regular watering. Plants are planted in open ground at the age of 55 days (they should already have 3-4 true leaves). To do this, choose a cloudy day or evening. They are planted with a row spacing of 25 cm, with 6–8 cm between plants in a row.
What varieties can be planted?
For spring planting, a medium-fraction onion with a diameter of 14-21 mm is preferable, since this shape does not produce shooters and takes root more easily. As for specific varieties, suitable ones are:
- Centurion F1 . An early-ripening hybrid that bears fruits that are aligned and slightly elongated in shape, weighing up to 175-180 g. Their taste can be sharp or semi-sharp. The variety is highly resistant to disease and has good shelf life.
- Stuttgarter Riesen . A mid-season variety that is characterized by high yield - from 1 sq. m produces up to 5 kg of large bulbs of round and slightly flattened shape. Their average weight is about 150 g, but there are specimens weighing 200-250 g. The taste of the fruit is bright and distinctly pungent.
- Red Baron . An early variety with a yield of up to 3 kg per 1 sq. m. It bears round fruits of red-violet color and weighing up to 150 g. Their taste is pleasant and semi-sharp.
- Sturon . An early ripening variety Sturon with stable and high yields, which produces medium and large sized bulbs. They have a mild semi-sharp taste.
- Hercules . A mid-early hybrid with high productivity, bearing fruit with bulbs weighing 155-160 g. They have a wide elliptical shape and a spicy, islandy taste.
- Stardust . A mid-early variety that has good germination and high yields. The fruits are large in size, smooth and round in shape, with a pleasant and slightly semi-sharp taste.
Bow Centurion F1
Bow Stuttgarter Riesen
Bow Red Baron
Bow Sturon
Bow Hercules
Bow Stardust
Experienced vegetable growers choose these varieties for their quality characteristics and ease of cultivation.
What types of onions can be planted as sets?
Today, many varieties of onion are grown with sets, differing in taste and organoleptic qualities, size, and length of the growing season.
According to their taste properties, three varieties are distinguished:
- Spicy varieties. Consumed fresh, used for canning and cooking. Due to the content of phytoncides, they are very fragrant and have good shelf life. There are many types of hot onions, which are bred with sets (Arzamas local, Pogar, Rostov, Stuttgarter Riesen).
- Peninsular varieties. Very productive. They are most often used in canned and processed form. Sevkom is bred by Danilovsky, Vishensky, Kaba, Myachkovsky, Sturon.
- Sweet varieties. They are not stored for a long time and are famous for their abundant harvest. They are bred for fresh consumption. Sevkom grows well Globo, Black Prince, Retro and others.
Onion sets
Onion varieties are classified according to ripening time as follows:
- Early ripening with a growing season of 85-100 days. Sevcom is grown by Carmen, Globus, and Bogatyrskaya sila.
- Mid-season varieties have a longer growing season (up to 125 days). By planting sets, the species Bessonovsky, Hercules, and Chalcedony are obtained.
- Late-ripening varieties ripen more than 125 days from the date of planting (Bamberger, Red Baron, Exhibition).
Important! It is necessary to take into account the location of the region for which one or another onion variety is zoned, giving preference only to local crops.
The packaging with planting material must indicate the name of the variety, species characteristics, and expiration date. Over time, planting material loses its germination rates, which negatively affects onion yields.
A very important factor is the influence of environmental conditions (air temperature, humidity, level of solar activity). The more whimsical a given variety, the more difficult it will be to care for. The vegetable will respond to any deterioration in weather conditions by decreasing growth activity.
The world-famous Stuttgarter Riesen onion has excellent germination
When choosing seedlings, pay attention to the characteristics of the variety and the quality of the seed. The size of the resulting bulb is a varietal characteristic and is achieved with proper care.
Additional Information! Some varieties of onions, such as leeks, are grown exclusively by seed or seedlings.
Mixed fit on the pen and head at the same time
In conditions of limited space on the site, mixed planting of the crop using both feather and turnip seedlings is used. This technique is applicable to high-keeping onion varieties with small and medium heads not exceeding 21 mm.
For mixed planting, a slightly modified onion breeding scheme is used. When planting seedlings in permanent soil, place them in the planting grooves more densely (every 7-8 cm) and in a checkerboard pattern. Under these conditions, half of the seedlings are left for turnips, and from the other half, intended for feathers, the aromatic greens are removed as they grow.
Processing of planting material
What preparation to carry out depends on what is used as planting material - seeds or sets. We will consider each option separately.
Seeds
To grow onions for feathers, you need to plant them with seeds. You can start processing them 25-28 days before sowing. It is produced in this order:
- To check onion seeds (nigella) for germination, they need to be placed in a gauze bag and immersed in hot (+45...+55°C) water for 12-16 minutes. Discard unsuitable specimens.
- For hardening purposes, after the first stage, immediately dip the seeds in cold water for 1.5-2 minutes.
- In order for the seeds to swell and free themselves from substances inhibiting germination, wrap them in damp natural fabric and keep them in this form for 22-26 hours, while regularly moistening the package. After this procedure, soak the seeds in water at room temperature and keep for 2-3 days in the lower compartment of the refrigerator or in another cool place. Change the water every day.
- After soaking, drain the water, dry the nigella on a paper towel and mix with sand or sawdust.
After this treatment, you can get strong, small onion seeds that will be suitable for uniform sowing.
Onion sets
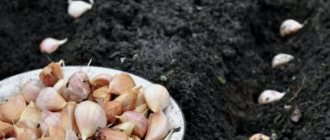
When growing onions per head, planting should be done in sets. They can be purchased at a garden store or grown independently from nigella, giving preference to zoned varieties. In any case, bulbs with the following characteristics are suitable for spring planting:
- have dimensions of 14-21 mm;
- are dry and elastic;
- have good density and a pleasant onion smell.
Bulbs that have the following characteristics are not suitable for planting:
- wet;
- covered with mechanical damage and rot;
- smells musty;
- have white roots or green sprouts that have hatched.
In order for self-grown seedlings to be suitable for planting in the spring, they must be properly stored in winter - at a temperature of 15°C and a humidity of 70%.
Direct processing of the sets should begin a month before planting. It consists of carrying out the following manipulations:
- Throw away dry and rotten onions, and sort the remaining ones by size - large, medium and small. Planting should begin with small and medium-sized bulbs so that by autumn they produce a harvest of heads. Large sets should be planted with a break of at least 2 weeks so that they do not go to seed early. At your discretion, you can use them green or leave them for nigella.
- If the seedlings were stored in a cellar or other cold place, you need to warm them up and dry them 2-3 weeks before planting, otherwise they will rot in the soil or go to waste. The sorted sets should be spread in a thin layer and kept in direct sunlight, for example, on a windowsill on the south side. An alternative option is to keep the seeds for 3-4 days near a heating source at a temperature of +35..+42°C.
- After drying and warming up, immerse the seeds in hot (70°C) water for 4-5 minutes, and then in cold water for the same time.
- To quickly germinate, soak the seedlings for 8-10 hours in a weak solution of complex fertilizers or nitroammophosphate (15-20 g per 10 liters of water).
- After a mineral bath, in order to disinfect and protect the planting from fungal diseases, soak the seedlings for 10-15 minutes in a solution of potassium permanganate (1 tsp per 10 liters of water) or copper sulfate (10-15 g per 10 liters of water). If, when growing seedlings in the garden, diseases were observed or pests multiplied, the planting material should also be kept in an ash solution (1 tablespoon per 1 liter of water).
- Rinse the seedlings under running, non-cold water, dry and plant in the ground.
If you plan to grow feathers, then before planting you need to cut off the tops of the bulbs.
The main stages of planting seedlings in open ground
When performing any gardening task, you need to know the features and rules of the event. And planting onion sets in open ground in the spring is no exception. The procedure method is quite simple, but you should know all the preparation steps.
Selection of location and soil
Choosing the right site is very important for successful cultivation. Therefore, for spring planting onion sets, choose a place and soil in the garden, taking into account the following recommendations:
- The place should be warm, well lit by the sun.
- Groundwater should be no higher than 0.5 m from the surface of the earth.
- The soil for cultivation must be fertile, loose, neutral (pH - 6.5-7), and have good air and moisture permeability.
- It is recommended to avoid areas with acidic soils or deoxidize them, but this will be discussed a little below. When growing crops in such land, there is a high probability of developing downy mildew.
- The optimal soil for growing the crop is sandy loam or loamy soil.
Important! You can plant onion sets in the previous place of cultivation in open ground only after three years, and preferably after five years.
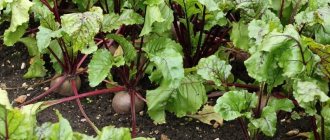
- When choosing a location, it is important to consider compatibility with other cultures. Good neighbors for this crop are carrots, cabbage, radishes, and beets.
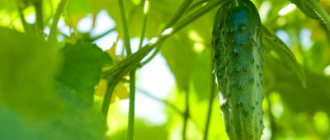
- Pay attention to your predecessors. It is recommended to plant after crops, during the cultivation of which the soil was regularly flavored with organic fertilizers, for example, cucumbers, tomatoes, legumes, cabbage, potatoes, melons.
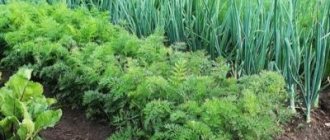
A little trick! The most useful neighbor for such a vegetable is carrots. The fact is that when grown together, they form a mutually beneficial tandem - they will protect each other from carrot and onion flies.
Preparing the site and soil
Proper preparation of the soil and space in the garden for planting onion sets in open ground is very important. It will help create optimal conditions for growing and obtaining a good harvest. It is recommended to prepare the area in the garden in the fall or at least in the spring 1-1.5 months before planting the turnip . You need to act according to the following scheme:
- The future garden bed should be thoroughly cleaned of debris, stones, and weed roots.
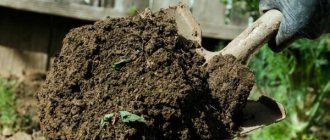
- Then you should fertilize the soil (because you can only get a good harvest on fertile, nutritious soil!). To do this, you need to put compost or humus on the site (five kilograms per square meter), and then dig up to 35-40 centimeters.
- It is also recommended to scatter wood ash (1 cup per sq. m.). It will serve not only as a good fertilizer, but also as an excellent deoxidizer (and the crop does not like acidic soils!).
- If your site has acidic soil, you must deoxidize it. You can add dolomite flour to the area (a glass of the substance per square meter).
- Regardless of what season you did the preparation, in the spring you need to additionally fertilize the soil in the garden with mineral fertilizers. You can apply a complex fertilizer that immediately contains nitrogen, potassium and phosphorus in equal parts, for example, Nitroammofoska. Or add several fertilizers: ammonium nitrate (20 grams per square meter), double superphosphate (25 g per square meter), potassium sulfate (30 g per square meter).
- After the above preparation, you should thoroughly loosen and level the ground with a rake.
Selection of planting material
The quality of planting material always plays a vital role in growing a good harvest. They should be purchased in the spring. You should carefully select onion sets for planting in open ground in the spring:
- Planting material should be dry to the touch. But if you find specimens that are slightly moistened, then they can also be planted, but they should be dried at home immediately after purchase.
- They should be dense (you can check this by lightly pressing on them) and have a uniform color.
- There must be no signs of damage, mold, rot, or stains.
Note! It is not recommended to buy planting material at street sales points if the temperature is below freezing, because it can freeze, which means that there is no point in planting such sets.
Storage Features
Very often a situation arises when a gardener purchased planting material a little earlier than planned. There is no need to panic or worry in such a situation. In order to get a normal harvest without surprises, it is necessary to store the purchased onion sets correctly in an apartment or private house. Before storing, it is worth drying it for 2-3 days.
Optimal maintenance conditions before planting in open ground are temperature within 15 degrees (without sharp fluctuations in temperature), and humidity within 70-75 percent. Should be kept in a dry place with good ventilation.
It is optimal to store seedlings at home in plastic or wooden boxes or hanging nets.
Advice! If, while storing in an apartment, a specimen has sprouted or sprouted, you can put it in the refrigerator to slow down the processes.
Preparation of planting material
Sets can have different sizes; shortly before the gardening event, it is recommended to sort them by size so as not to waste time at the event itself:
- 8-14 millimeters - the smallest specimens are not recommended to be planted in the spring, since the ripening of the crop will be later. It is better to plant it before winter in the fall.
- 15-21 mm is the normal size, which can be safely planted in the spring and are not prone to bolting.
- 22-24 mm - optimally used for obtaining onions for feathers (for greens), because they ripen early.
- 25-30 millimeters - it is recommended to plant sets only for onions per feather (for greens).
By the way! First, you can plant onion sets in open ground, which have a diameter of less than 1 centimeter (you don’t have to be afraid that when growing due to cold weather, bolting will begin), and after about one or two weeks, larger specimens.
To avoid problems in the future, planting material should be prepared. The most important preparation of onion sets before planting in the spring is warming up , which will help prevent bolting. To do this, you need to put the material in a place with a temperature of 40-45 degrees Celsius (for example, on a battery) and warm it up for 8-10 hours.
After warming up, it is recommended as a treatment before planting on turnips to soak the onion sets in a fungicide solution to eliminate pathogens from its surface. You can soak, for example, in a solution of the drug “Fitosporin-M”, “Planriz”, “Gamair”. Disinfection takes approximately 1-2 hours, but it must be processed according to the instructions for the drug. You can also etch in a dark solution of potassium permanganate (hold for 30 minutes), in a solution of birch tar (a tablespoon per liter of water, soak for 1 hour). Planting material can be soaked in a solution of a growth stimulant drug , for example, the drug “Bud”.
If you see that some of your specimens have dried out and you feel sorry for discarding them, then you can soak them for two days in a solution of wood ash.
Important! After any soaking of the onion, before planting it on the head, you must first dry the planting material and then plant it.
If you want to plant seedlings on greens , it is recommended to cut off the top dry neck of the material before planting.
Note ! This material describes in detail how to prepare onions for planting.
Planting scheme
The scheme and rules for planting onion sets in open ground are very simple. But despite their simplicity, you need to carefully follow the recommended technology and perform each step carefully. Let's look at the simplest and most convenient way to plant onions on turnips in the spring:
- Make rows 20 centimeters apart. The depth of the grooves should be 5-7 centimeters.
- Water the grooves thoroughly.
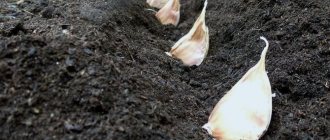
- Place the bulbs in rows with the bottom down, deepened to the shoulders (neck). The distance between the sets is 10 centimeters (if they are very small, then you can keep a gap of 6-7 cm).
- And then you should fill the grooves with earth so that there is a 2-3 cm layer above the onion.
Important! In the spring, you should not plant the seedlings at great depths or too close to the surface of the earth. When planted deeply, the bulb will develop more slowly and have an elongated shape when ripe. And if planted too shallowly, the roots will not be able to receive adequate nutrition.
Selecting a site and preparing beds
You need to choose a place to plant onions in the fall. This should be a well-lit area, as bulbous plants grow hard in the shade and need plenty of direct sunlight. If the onion grows without them, the heads will turn out to be very small.
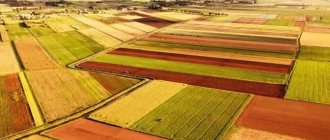
It is equally important when choosing a site to take into account the rules of crop rotation:
- The best predecessors of onions are those crops that loosen the soil with their roots and enrich it with nutrients. These are: rye;
- pumpkin;
- peas;
- beans;
- peppers;
- eggplant;
- zucchini;
- cabbage;
- tomatoes;
- potato.
As for the soil, it should be loose and low acidity. Onions grow well on chernozems or loams that allow air and moisture to pass through well.
The selected area with suitable parameters must be properly prepared. This procedure can be divided into two stages:
- in autumn. Dig up the bed using a spade, without breaking the clods. This is a good treatment for pests and diseases - the ground will freeze deeper, so fewer larvae will survive until spring. In addition, when snow melts, moisture will remain in the soil longer. When digging, the soil needs to be fertilized - add it per 1 square meter. m 5 kg of rotted manure or compost. From mineral fertilizers per 1 sq. m it is worth adding 30 g of superphosphate and 15 g of potassium chloride.
By spring, all applied fertilizers will dissolve and soil fertility will be restored.
- In the spring . A week before planting, evenly distribute ammonium nitrate over the surface of the bed at the rate of 20 g per 1 square meter. m and carry out shallow loosening followed by harrowing. Immediately before planting, for the purpose of disinfection, water the dug up beds with a dark pink solution of potassium permanganate.
Predecessors and compatibility
The onion almost doesn’t care what grew in the garden before it, as long as the soil remains fertile. The best precursor vegetables for onions are cucumbers, tomatoes, cabbage or potatoes: these are the crops for which fairly large amounts of fertilizer are used. For various reasons, it is not advisable to plant onions after carrots, radishes and sunflowers. Well, following the rule of alternating crops, after any types of onions, as well as garlic.
Onions also have almost no unwanted neighbors. Only legumes (peas and beans) are considered such, and onions themselves are not the best neighbor for any type of cabbage. But not only the best, but also an obligatory neighbor for onions is carrots. They mutually protect each other from pests: primarily from onion and carrot flies. Potatoes, cucumbers, tomatoes, and beets are also excellent neighbors for all types of onions.
Onions and carrots - classic neighbors in the garden
Summer residents who do not keep a plot to provide themselves with vegetables plant a small amount of onions: they make supplies for the winter at the market in the fall. But even a small bed, which is a must for any garden, must be planted on time and correctly. This is not at all difficult to do, but in the summer you will have greens and several bulbs on hand at any time.
Planting onions in the ground
The planting scheme depends on the planting material through which the vegetable crop is cultivated.
Sowing seeds
It is produced according to the following scheme:
- width between holes – 1.5-2 cm;
If you keep less than 1 cm between holes, you will be able to get a good feather - the greenery will grow larger than a turnip.
- distance between rows – 12-18 cm;
- embedment depth – up to 1.8-2 cm.
After sowing, the soil must be watered and mulched using sawdust or straw. The planting itself must be covered with a dark film to prevent it from drying out.
Planting sets
Before planting, you need to prepare the beds at a distance of 25-30 cm. The distance between the grooves depends on the size of the heads:
- large – 10-12 cm;
- medium – 8-10 cm;
- small – 6-8 cm.
Sevok should not be immersed too deeply in the ground. With the appearance of roots, it will be drawn even deeper into the soil, so you will have to wait even longer for seedlings, and the harvest will be small and weakened. The optimal depth for planting bulbs is 4.5-5 cm, so that a layer of soil of 2.5-3.5 cm remains above the onion hangers.
After planting, the bed should be watered and mulched with straw or sawdust so that moisture remains in the soil longer before the bulbs germinate.
The intricacies of sowing onion sets throughout May are described in the video below:
How to plant onion sets before winter
To avoid mistakes, you should first understand how to plant winter onions correctly. Autumn planting of vegetables begins no later than a month before the onset of frost: this time is enough for rooting. Bulbs of small and medium fractions (no more than 20 mm in size) are suitable for winter planting.
Planting onion sets before winter
To prevent the sets from growing before frost, you should not cut off the neck of the bulbs. This is done only during spring planting, when it is necessary to stimulate rapid feather growth. Pre-soaking of seed material is also not used. This is done only in dry autumn without rain to speed up the rooting of seedlings.
Then disinfection is carried out, for which the seeds are soaked in a solution of salt and manganese for 3 hours, air-dried for a week. After this, the bulbs are considered ready for growing.
Sowing before winter is done as follows:
- At a distance of 30-35 cm, make grooves approximately 5-7 cm deep.
- The sets are planted evenly in strips at a distance of 3-10 cm (depending on the size of the adult bulb), thoroughly burying it in the ground.
- Sprinkle with wood ash, thus protecting against diseases and fertilizing.
- Sprinkle with soil.
In winter, the beds are covered with mulch made from pine needles, leaves, and sawdust to protect them from freezing.
Caring for spring planting
To get a good harvest, you need to follow the rules for planting care. They consist in the timely implementation of a number of agrotechnical measures.
Watering
Lack of moisture in the spring will cause the feathers to acquire a bluish or white tint, and the tips will dry out and bend. At the same time, excess moisture should not be allowed, otherwise the feather will turn out pale and thin, and the quality of the grown onion will deteriorate. So, it is extremely important to organize moderate watering of the crop, adhering to the following scheme:
- In May-June, water the beds no more than 1-2 times a week at the rate of 7-11 liters of water per 1 square meter. m.
- During the ripening period of the bulb heads, reduce watering to once every 1.5-2.5 weeks. However, in dry weather, onions should be watered more often, while reducing water consumption.
- By the time the turnips begin to ripen, reduce watering to a minimum, just to keep the soil moist. Excess moisture will stimulate leaf growth and delay the ripening of large onions.
- At the stage of cutting the bulbs, do not water. However, in case of severe drought, the planting can be slightly moistened, otherwise the onion feathers will lose color, bend and turn white at the tips.
Loosening
At least once every 2-2.5 weeks after watering or rain, you need to loosen the soil. This is an important procedure that should not be neglected for the following reasons:
- gives the onion turnip a lot of air and light, and therefore strength to “get out” to the surface;
- improves air-moisture conditions, preventing the soil from becoming excessively compacted;
If you allow an impenetrable crust to form on the surface of the soil, the onion will begin to suffocate and lag behind in development, and the feather will turn pale and even turn yellow.
- helps keep the planting clean - fights weeds that grow rapidly as the roots and leaves of the bulb slowly grow.
Top dressing
If the pre-sowing soil fertilization was done correctly, then only poor soil needs to be additionally fertilized. However, even with proper preparation, onion growth can be sluggish. In this case, summer feeding of the planting will help to stimulate feather growth. It is produced using a solution prepared from the following substances (in a bucket of water):
- 15-20 g of urea;
- 250-280 g of organic matter (mullein or bird droppings).
This composition must be applied at the root of plants at the rate of 3-3.5 liters per 1 square meter. m. After 12-16 days, fertilizing can be repeated.
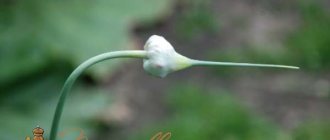
If after fertilizing the greens begin to actively grow and shoot out, they will need to be removed immediately.
Protection from diseases and pests
In order to prevent the development of fungal diseases, when the onion reaches a height of 12-16 cm, it is necessary to carry out preventive treatment - sprinkle the beds with a solution of 5-8 g of liquid laundry soap and 15-20 g of copper sulfate per 10 liters of water.
If the vegetable crop is not treated, it can be affected by the following pathogenic fungi:
- Downy mildew . It is carried by wind, insects and even humans. Appears as light spots on feathers. If such signs are found, the plant should be sprayed with a Polycarbacin suspension or 1% Bordeaux mixture. This treatment should be carried out 3 times with a break of 10 days. The last of them should be carried out 20 days before harvest.
- Rust disease . Leaves swollen orange round spots on the stems. To prevent the development of this pathological process, you need to regularly weed the bed. When growing massively, onions should be sprayed with a solution of copper oxychloride at the rate of 30 g per 10 liters of water. You can add a little liquid soap to it. Spray the planting with the composition twice with a break of 7 days.
- Fusarium rot . Manifested by rotting of feathers and turnips. To prevent the development of the disease, it is advisable to treat the soil with Iprodione before planting, and soak the seed in a solution of potassium permanganate. In addition, you cannot plant onions in the same area for 2 seasons in a row.
As for pests, the most dangerous among them are:
- Wire beetles . To scare them away, you need to follow proper agricultural practices.
- Onion fly . Creolin will help in the fight against it.
- Onion weevil (secretive proboscis) . Against it, onions can be sprayed with insecticides that contain nicotine sulfate.
To protect the onion bed from attacks of any pests, you need to thoroughly clean the garden of plant debris and other debris.
How to plant onion sets in spring
Planting onion sets in spring is more preferable; it ensures high yields. It is very important to ensure that young plants do not die during late frosts and to protect them from diseases and pests.
The soil for spring planting onions is fertilized in the fall. It is well loosened and furrows are made. The seeds are disinfected in a solution of potassium permanganate and soaked in a growth stimulator (Epin, Zircon). Sow the heads in furrows, leaving a distance of about 10 cm between them (adjust depending on the size of the bulbs), without deepening them too much. In a heated layer, rooting will occur faster. The top is sprinkled with earth, after which watering is carried out.
When planting onion sets in the spring, do not bury them too deeply in the ground.
It is not enough to just plant onions. The successful growth of vegetables and the quality of the harvest depend on proper and timely care of the beds.
Harvest and storage
You can start harvesting onions from 2-3 weeks of August to early September. The following signs will indicate the ripeness of the crop:
- the greenery stopped growing;
- the feather died;
- new feathers stopped forming;
- the leaves have turned yellow and dry;
- heads with a characteristic color and ripe-looking scales were formed.
Harvesting cannot be delayed, otherwise the heads will begin to grow again and the onions will become unsuitable for storage.
You need to start harvesting on a sunny day or cloudy but dry weather. If you cannot tear off the stems, you can pull out the onions and sets by hand. To avoid damaging the onion turnips, you should carefully dig them up with a pitchfork.
The harvested onion and sets need to be dried. In sunny weather it can be spread directly on the beds. An adult turnip will dry out in natural conditions in 7 days, and a set will dry out in 3-4 days. If the weather is cloudy, the harvested crop will have to be dried under a canopy with good air circulation.
After drying, the bulbs need to be cut off, leaving necks 3-4 cm long. Next, they need to be sorted correctly so that large specimens can be eaten, and small ones (up to 3 cm in diameter) can be saved as seeds for green feathers.
Planting process step by step: diagram
The gardener can choose the onion planting scheme himself, based on the geometric dimensions of the bed, but, in principle, everything is very simple here. The most commonly used is the tape scheme. A distance of about 20 cm is maintained between the rows, and between the bulbs in the rows - depending on their size. It is customary to plant the smallest onion (about a centimeter in size) every 5–6 cm, the largest one – up to 10 cm.
There are many schemes for planting onions, but in any case they are placed quite tightly
The sets are planted at a depth of 3–4 cm. Tentatively, it looks like the very tip of the bulb neck is barely visible above the soil surface. If some of them are not visible at all, it’s not a big deal, but the bulbs shouldn’t stick out too much from the ground. If planted too shallowly, the growing bulbs will be almost completely out of the ground, which will stunt their growth when the weather becomes too dry and very hot. If the seeding is too deep, growth will also slow down, and at the end of the gardening season the bulbs may not have time to ripen properly, which will lead to poor preservation of the crop.
The technology for planting seedlings in a pre-prepared bed is as follows:
- Using any suitable tool (you can use the corner of a hoe), shallow furrows are made according to the desired pattern, usually every 20 cm and better if in a west-east direction.
- If the soil is heavy, river sand is placed in the furrows in a layer of about 1 cm, and wood ash is lightly sprinkled on top of it. Some gardeners who did not treat the bulbs before planting also water the furrows with a weak solution of Fitosporin.
- The seedlings are planted at optimal distances in the prepared grooves, slightly pressing them into the soil (try not to damage the emerging roots). The planting depth is chosen such that, after filling with soil, the tops of the bulbs only rise slightly above the ground.
- The planted seedlings are covered with soil, after which the soil in the bed is leveled, for which it is convenient to use a regular rake.
- The plantings are carefully and abundantly watered with water from a watering can with a strainer.
There is no need to do anything with the plantings until the greenery grows, unless the weeds start to run rampant. They must be carefully pulled out by hand; The hoe starts working after the rows are marked.
When to plant onions for seedlings in 2021
In order for onions to grow healthy, it is necessary to determine the days favorable for sowing them, and for this you need to refer to the lunar sowing calendar.
- Radish: growing from seeds in the garden, varieties
Sowing onions for seedlings in January 2021
| Mon | VT | SR | Thu | PT | SB | Sun |
| 1 | 2 | 3 | ||||
| 4 | 5 | 6 | 7 | 8 | 9 | 10 |
| 11 | 12 | NL | 14 | 15 | 16 | 17 |
| 18 | 19 | 20 | 21 | 22 | 23 | 24 |
| 25 | 26 | 27 | PL | 29 | 30 | 31 |
Dates for sowing onions for seedlings in February 2021
| Mon | VT | SR | Thu | PT | SB | Sun |
| 1 | 2 | 3 | 4 | 5 | 6 | 7 |
| 8 | 9 | 10 | NL | 12 | 13 | 14 |
| 15 | 16 | 17 | 18 | 19 | 20 | 21 |
| 22 | 10 | 24 | 25 | 26 | PL | 28 |
Sowing onions in March 2021 for seedlings
| Mon | VT | SR | Thu | PT | SB | Sun |
| 1 | 2 | 3 | 4 | 5 | 6 | 7 |
| 8 | 9 | 10 | 11 | 12 | NL | 14 |
| 15 | 16 | 17 | 18 | 19 | 20 | 21 |
| 22 | 23 | 24 | 25 | 26 | 27 | PL |
| 29 | 30 | 31 |
Sowing onions for seedlings in April 2021
| Mon | VT | SR | Thu | PT | SB | Sun |
| 1 | 2 | 3 | 4 | |||
| 5 | 6 | 7 | 8 | 9 | 10 | 11 |
| NL | 13 | 14 | 15 | 16 | 17 | 18 |
| 19 | 20 | 21 | 22 | 23 | 24 | 25 |
| 26 | PL | 28 | 29 | 30 |
Growing onion seedlings in May 2021
| Mon | VT | SR | Thu | PT | SB | Sun |
| 1 | 2 | |||||
| 3 | 4 | 5 | 6 | 7 | 8 | 9 |
| 10 | NL | 12 | 13 | 14 | 15 | 16 |
| 17 | 18 | 19 | 20 | 21 | 22 | 23 |
| 24 | 25 | PL | 27 | 28 | 29 | 30 |
| 31 |
The color in the table indicates what day it is for sowing:
| Great | Good | Normal |
| Bad | Horrible |
Landing dates
Onions are not very demanding of heat, and adult plants can tolerate frosts down to -8 ° C. Long daylight hours promote the growth and maturation of bulbs, and the timely transition of plants into the dormant phase, so you need to plant the seedlings early so that they develop under long summer day conditions. However, by this time the soil should have already warmed up to at least 10 ° C, otherwise the risk that the onion will shoot increases greatly.
Unlike heat-loving crops, for which you have to be very careful when planting and where it is difficult to give clear advice, with onions everything is extremely simple. In the southern regions, the seedlings are planted in the third ten days of April, in the middle zone and more northern regions - in the first ten days of May.
You can plant onions before winter, if you do not make a mistake with the timing and rely on snow cover: it protects the crops well from freezing. With such planting, onions are not affected by the onion fly, and it is easier to do this in the fall: there is more time. Planting is carried out 3–4 weeks before stable frosts, that is, when the average daily air temperature becomes no more than 5° C.
Winter onions - varieties and advantages
In winter, seedlings of winter-hardy varieties are planted. Growing winter onions has many advantages:
- he is not afraid of the onion fly, which often damages spring plantings;
- a plot where an early harvest has already been harvested can be used to grow other crops;
- the question of preserving the seedlings during the cold period does not arise, and this is a rather complicated process.
Cold-resistant varieties such as Danilovsky, Stuttgarten, Shakespeare and some others are perfect for growing in winter. Planting is done throughout October, in still warm soil before the onset of frost.
The winter variety Shakespeare is the most popular and beloved among gardeners. It belongs to the early ripening vegetable crops, has excellent storage properties, does not produce shoots, and is resistant to most diseases to which other varieties are susceptible. Its taste is semi-sharp, the shape of the bulbs is round, the scales are dry and tight-fitting.
Before planting, the seed material is carefully sorted by size, while removing damaged and spoiled specimens. The head should be planted in the created grooves about 6 cm deep, with the same interval from each other. Between the rows a distance of 15-18 centimeters is usually maintained.
When choosing a site for creating an onion bed, it is important to take into account that this crop will tolerate stagnation of melt water and begin to rot. It is best to pay attention to elevated areas where the snow melts earlier.
How to choose the right onions for planting
For planting, 1-2 year old seedlings are used. It is necessary to pay attention to the quality of planting material:
- the bulbs should be dry and dense,
- Do not use material with hatched sprouts;
- onions with mechanical damage are not suitable for planting;
- There should be no traces of rot and mold on the sets, or white coating on the roots.
It is also necessary to choose a variety intended specifically for growing per head. The quality of the future harvest and its shelf life directly depend on the quality of planting material.