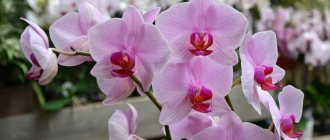
There is an opinion that growing an orchid on your own is quite difficult. In fact, you just need to know the features. Compliance with them will allow you to propagate this tropical beauty at home.
The most popular method is propagation using a flower stem: several young shoots can be obtained from one.
Propagation of orchids using a peduncle
This method is called vegetative and involves dividing and rooting the stem as a whole and its parts. The method is most often used for propagating phalaenopsis, but the method is also suitable for other varieties.
How to choose the right time
To grow an orchid from a peduncle, you will need to wait until the tropical beauty fades. This period is optimal for starting the procedure. Coincidence with the arrival of spring on the calendar doubles the chances of success.
Preparation
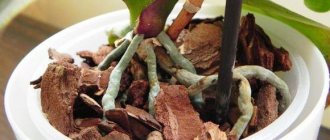
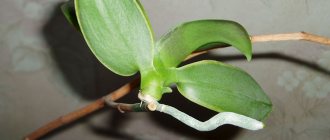
The stem is cut and divided into parts.
Each fragment of the peduncle must contain a living bud.
The necessary conditions
There are often cases when an orchid does not produce new shoots for a long time, and the peduncle does not produce children. The explanation is simple: favorable conditions are not created for the plant. In order for an orchid to have lateral shoots, it is necessary, first of all, for it to be healthy. Before breeding, visually inspect the tropical beauty: there should be no yellow or black spots on it.
Among the mandatory conditions for breeding are also:
- the humidity level is within 50-80%, for which the container with the peduncle is placed in a tray with expanded clay and water. Another way is to spray with warm water.
- temperature regime (+28..+30), which can be exceeded, but not reduced;
- diffuse lighting should be less intense;
- feeding the plant with nitrogen fertilizer.
When is the best time to propagate orchids?
There is no specific time of year when it would be better to propagate phalaenopsis. The orchid does not have a pronounced dormant period. Under optimal conditions, it can produce a new leaf or flower arrow at any time. Readiness for reproduction depends on what stage of the growing season the plant is at.
On a note! Sometimes a flower releases a baby without any stimulation. This often happens in extreme conditions, when phalaenopsis is on the verge of death. For example, if water got into the growth point and caused rotting.
Awakening a sleeping bud
The process occurs in the active phase of flower growth. There are several ways to push a sleeping kidney to awaken.
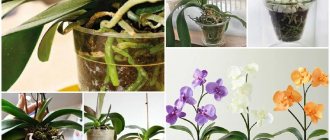
Since the main factor is a high level of humidity, so that babies sprout from the buds faster, the flower stalk is placed in a mini-greenhouse. It is made from an ordinary plastic bottle. About half of it is cut horizontally, leaving about 2 cm to hold the parts together. Water is poured into the lower half and a peduncle is placed. Then it is closed with the top of the bottle and secured with tape. To allow air to enter the “greenhouse”, the lid is not screwed on.
To grow an orchid from a peduncle, you can plant it in a plastic container to awaken the buds. Sphagnum moss is placed at the bottom of it, on which parts of the stem with one living bud are placed. The container needs a lid: it will create the desired level of humidity.
In a bottle
Another option for propagating an orchid using a plastic container. Only the neck of the bottle is cut off. Then water is poured into it to a level of 6 cm and the peduncle is lowered. The kidney should be on the surface.
The greenhouse is placed in a place well illuminated by diffused sunlight, but so that the future plant is not touched by the direct rays of the heavenly body. Protect against rotting of the bottom of the peduncle by adding activated carbon to the water. Periodically you need to feed with fertilizer containing nitrogen.
Transplantation to a permanent place
The reason for transplantation is the appearance of roots on the peduncle. The future orchid is ready for transplantation when they reach a length of 50 mm. The pot in which the plant will grow further must be filled with a suitable substrate. The ratio of its composition:
- 1 part – charcoal;
- 1 part – sphagnum moss;
- 5 parts – evaporated pine bark, the diameter of the fractions is 1 cm.
And expanded clay is placed at the very bottom of the pot.
If you have doubts about the ability to prepare the substrate in the correct ratio, it is better to buy a ready-made mixture in the store. This will increase the likelihood of successfully growing an orchid from a peduncle stem at home.
Step by step instructions
Most often, at home, phalaenopsis reproduces vegetatively. The plant has only one growth point, but you can slightly “tweak” the nature.
Planting the “babies” formed on the peduncle
Planting “babies” is the most common method of propagating phalaenopsis. The “offspring” is separated from the mother plant 1.5–2 months after flowering. The procedure most often occurs in the spring. Growth buds are formed in the leaf axils or on the peduncles of orchids over two years old that have at least 4 healthy leaves. Sometimes they form on faded peduncles no older than one and a half years.
Phalaenopsis often forms “babies” at home without additional stimulation
The appearance of “babies” can be stimulated in several ways:
- The difference between daytime (28–30ºС) and night (18–20ºС) temperature. In this case, high air humidity (70% or more) and daylight hours of at least 12 hours must be ensured.
- "Sunbathing" The orchid is left in direct sunlight for an hour a day in early spring. When a slight purple “tan” appears on the leaves, this is not a problem, but if it changes color to inky purple and there are still no “babies”, stop the procedure.
- Artificial "drought". The plant is not watered for 12–14 days, protecting the orchid from direct sunlight. Moisturizing the substrate is resumed 2-3 days after the roots acquire a silver-gray tint. In this way, the flower is made to believe that its death has come, in the face of which its instinct to procreate is activated.
- Use of fertilizers with a high nitrogen content. The method is quite risky. Orchids are not very fond of this macronutrient, so there is a real risk of destroying the mother specimen. Even if it gives birth to a “baby”, you definitely won’t have to wait for it to bloom this year.
Phalaenopsis “babies” are planted in a substrate based on pine bark, but with a finer fraction than for adult plants
There is no consensus among flower growers regarding when exactly it is necessary to separate the “baby” from the mother plant. Most people think that you need to wait for at least one root to appear. Others are of the opinion that this greatly depletes the “parent”, so they cut off the “offspring” when the first pair of leaves appears.
- Separate the “baby” from the mother plant. Process the cuts. Dry overnight in the open air.
- Fill transparent cups with a mixture of finely chopped sphagnum moss with pine bark and fern rhizomes (1:3:1). The more homogeneous the soil, the better. You need to make 3-4 drainage holes in the containers.
- Moisten the substrate. Plant young orchids in the ground and place the containers in a home mini-greenhouse, florarium or homemade greenhouse. Provide a constant temperature of 23–25ºС and bright, diffused light.
- As it dries, moisten the substrate with a solution of a root formation stimulator - Kornevin, Heteroauxin, Zircon, Epin (3-5 ml per liter of water). Ventilate the plantings daily for 5–7 minutes.
- If the bottom pair of leaves turn yellow, this is normal. You cannot cut them - the developing roots receive nutrition from them. When the time comes, they will dry out and fall off on their own.
- Wait until the roots are 4-5 cm long, then transplant the phalaenopsis into mature potting soil. The procedure is not quick and usually takes about a year.
Alternative way:
- Pour water into a glass, heated to a temperature slightly above room temperature. You can add a tablet of succinic acid to it.
- In the morning, place the cut and dried “baby” so that the bottom is located at a distance of 1–2 mm from the water. You can, for example, take a piece of foam plastic, cut a hole of the appropriate diameter and place it on a glass.
- After 6 hours, remove the “baby” from the water. The rest of the time, dry it in the open air.
- Continue manipulation daily until roots appear. The water should be fresh every day. Then proceed as described above.
The “offspring” of phalaenopsis can be rooted above water; orchids that have lost their roots can be reanimated in much the same way.
Video: is it worth cutting off and rooting suckers?
Video: stimulating root growth in an orchid offspring
Propagation by cuttings
The method is considered the simplest and least labor-intensive. It is used to propagate orchids that bloomed 2-3 months ago. Orchid cuttings - pieces of peduncle. If the plant has flowered more than a year ago, it will not be possible to use it as planting material.
Orchid cuttings - parts of a recently faded peduncle
- Cut the flower stalk as close to the base as possible. Treat the “wounds” on it and on the mother plant.
- Using a sharp scalpel or razor blade, cut it into pieces 5–7 cm long at a slight angle. Each of them should have at least one “dormant” bud, preferably approximately in the middle of the cutting. It is believed that the lower the growing point, the stronger the bud. Accordingly, it is more likely that it will develop into a viable plant in a short time.
- Fill shallow, wide containers with finely chopped sphagnum moss. Spray it with a biostimulator solution. Place the parts of the peduncle horizontally on a moistened substrate.
- Cover the plantings with glass or plastic film. Provide a constant temperature of 25–28ºС, bright diffused light, and humidity of at least 70%. Ventilate the plantings, spray the dried substrate with a root formation stimulator solution.
- Wait until roots 3–5 cm long and two pairs of leaves appear. In fact, the same “babies” are formed on the cuttings. If part of the peduncle dries out, this is normal; it feeds the young plant. Before transplantation, separate dead tissue from the “offspring”, trying to minimally injure it.
- Replant the phalaenopsis in adult orchid soil.
Phalaenopsis cuttings are laid out horizontally on the substrate
There is another option:
- Place the cut, faded peduncle in soft, warm water. Add activated carbon (one tablet per 0.2 l) or potassium permanganate crystals (to a pale pink color) and succinic acid (0.5 l tablet) or a biostimulant (3-5 drops per liter) to it.
- Place the container in direct sunlight, covered with a plastic bag or glass cap. Spray daily with a solution of any biostimulant (Epin, Zircon, Kornevin, Heteroauxin) or a specialized fertilizer for orchids. Reduce the concentration by 2–2.5 times compared to that recommended by the manufacturer. Change the water every 3-4 days.
- Under the influence of drugs, high humidity, heat and light, the growth buds on the peduncle “wake up”, forming “babies”. They are cut from the cuttings and rooted as described above.
The cutting can produce the same “babies” as the phalaenopsis itself
Video: orchid cuttings
Plant division
This method is rarely used by amateur flower growers. There is a high probability of rot developing. Accordingly, you can lose the plant. The selected phalaenopsis should be large and completely healthy. Other requirements are age (minimum 4–5 years) and number of leaves (6–8 pieces or more).
Dividing an orchid is a rather risky way to propagate a plant.
- Using a sharp, disinfected knife or pruning shears, cut off the top of the plant, dividing it roughly in half. Leaves and aerial roots must be present on both parts. Process both cuts.
- Plant the separated shoot in a mixture of finely chopped sphagnum moss and pine bark (1:2). The substrate must be dry. Provide the conditions that phalaenopsis requires for normal growth and development (temperature, lighting, air humidity). As the soil dries, do not water it, but spray it with a biostimulator solution. As soon as two pairs of new leaves appear, replant the flower in soil suitable for mature orchids.
- Provide the old plant with long daylight hours, warmth and regular feeding with special preparations for orchids. After 2–3 months, lateral buds will appear at the cutting site, which will develop into “offshoots” or new shoots. The orchid will acquire a normal appearance in about 1.5–2 years.
The trimmed phalaenopsis returns to its previous appearance in about one and a half to two years.
Video: propagation of phalaenopsis by dividing the rosette
Germination of seeds
Growing orchids from seeds at home is a complex procedure that requires the grower to strictly follow all instructions, attentiveness, accuracy and patience. Until recently, it was believed that this was impossible in principle.
Dust-like orchid seeds are impossible to see with the naked eye.
The specificity of the procedure is determined by the structure of the seeds. Firstly, they are very small (they can only be seen through a microscope). Therefore, collecting them yourself is very problematic. Secondly, they lack endosperm - the tissue surrounding the embryo, where amino acids, vegetable oils, starch and other substances necessary for its nutrition are stored. The future orchid cannot feed on its own, absorbing them from the soil. In addition, due to the absence of the same endosperm, the seeds are very vulnerable. Any interaction with pathogenic fungi, bacteria, or negative environmental factors leads to their death.
Agar-agar is the basis for the nutrient mixture in which orchid seeds are germinated.
You can germinate seeds at home if you prepare a special nutrient substrate and maintain complete and absolute sterility throughout the entire process. Green “balls” will appear in the container in 5–6 months. You will have to wait at least 4–5 years for the orchid to bloom.
Orchid seeds are germinated in special flasks or in containers for chemical reagents
- Prepare a nutrient substrate based on agar-agar. It is a mixture of polysaccharides produced from certain types of ocean brown and red algae. For 10–15 g you will need 200 ml of distilled water, 10 g each of glucose and fructose (can be replaced with sugar), calcium carbonate solution and phosphoric acid.
- Fill the agar-agar with water and let it swell. Pour jelly into boiling water, add glucose and fructose. Stir until all the crystals dissolve and the mass becomes homogeneous. Acid and alkali are used to provide the necessary acidity (pH - 4.8–5.2). The indicator is easy to determine using litmus tests.
- Sterilize clear glass test tubes or flasks for chemical reagents. Vessels must have tight-fitting plugs. If there is no alternative, small jars with screw-on lids will also work.
- Pour 30–40 ml of nutritional mixture into each container. Sterilize them in a water bath for 20 minutes.
- Let the “jelly” harden and wait 4-5 days. If mold does not appear in the flasks during this time, the disinfection was successful.
- Pour the seeds with a 1% bleach solution for a quarter of an hour. During this time, periodically shake the container vigorously.
- Cover the pan with boiling water with a wire rack or mesh. The cells must be such that the flask with the “substrate” can be secured. The lid should lie right there so that the steam gets to it.
- Using a sterile syringe, gradually extract the seeds from the disinfection solution and transfer them to the container without touching the “jelly”. Seal the containers hermetically and place them in a greenhouse or florarium. The conditions are similar to those created for cuttings.
- After six months, remove the seedlings from the vessel. To do this, you need to pour about 50 ml of warm water into it and shake the contents in a circular motion. Then the mass is poured into a wide bowl, a few drops of a 1% Fundazol solution are added and left for 10–15 minutes.
- After this time, use a soft thin brush to remove the plants one by one and plant them in a substrate of moss, pine bark and fern rhizomes (equal parts) with the addition of 2-3 tablets of activated carbon, crushed into powder.
- After another 5–6 months, phalaenopsis can be transplanted into a substrate for adult plants.
You can germinate phalaenopsis seeds at home only if you maintain complete and absolute sterility
Video: propagation of orchids by seeds at home
Caring for a plant to produce babies
When the orchid fades and falls off, shoots may appear on the flower stalk. Babies, as flower growers affectionately call them, are easily separated and rooted from the mother orchid, as they are a miniature but fully formed plant. The shoot has a stem, leaves and roots.
Proper care will help stimulate the appearance of babies on the stem of the peduncle to make it easier to grow an orchid at home. The following recommendations will help you not to ruin a young plant:
- water after replanting as the moss dries;
- ventilate the greenhouse every day;
- replant only after an adaptation period, which should take place gradually;
- Use only soil for orchids.
Further care
After several new leaves appear on the young plant, the greenhouse can be removed. This means that the plant has successfully taken root and become independent. The rules for caring for it do not differ from the rules for caring for an adult plant:
- preferred temperature +18-24 degrees;
- air humidity 60-80%;
- the duration of daylight should be at least 10 hours; if necessary, natural lighting is supplemented with artificial lighting;
- watering is carried out by immersion as the substrate dries 2-3 times a week, in winter the intensity is reduced to 2-3 times a month;
For vegetative propagation of an orchid, including dendrobium, many of its parts are suitable. Read our articles about how to get a new plant from orchid babies, cuttings or roots.
The process of propagating an orchid using a peduncle does not present any particular difficulties ; it is enough to carry it out for the first time, following all the rules and instructions, and in the future it will no longer cause concern, and in the place of one tropical favorite, a whole flower garden will soon appear.
If you find an error, please select a piece of text and press Ctrl+Enter.
Stimulation: use of cytokinin paste
The maximum benefit for using the drug, created on the basis of the phytohormone of the same name, is achieved with proper application. To do this, a dense scale is cut on the uppermost or lower dormant bud. You can use a knife, needle, scalpel (pre-disinfect). Remove the cut off scale and apply a ball of paste with a diameter of 2 mm to the opened green dot (this is the bud). Spread over the surface of the kidney.
With the correct process, the result will be noticeable after 7-10 days.
Recommendations and contraindications
Cytokinin paste is an effective stimulant that can awaken dormant buds, activate growth and normalize metabolism, and it also helps restore the normal functioning of the plant after experiencing stress.
However, before using it, you should carefully read the instructions for use and be sure to take into account possible contraindications.
Recommendations for use:
- the paste must be warmed to room temperature;
- select several healthy buds on the peduncle (no more than 3!);
- Use a scalpel or tweezers to separate the upper semicircular scale;
- treat the opened area with water, and then apply cytokinin paste in an even layer.
Main contraindications:
- the orchid was recently transplanted and adaptation to the new soil has not yet been completed;
- flowering period;
- the plant has been exposed to hypothermia, weakened or damaged by harmful organisms;
- too young, underdeveloped plant.
If all the necessary recommendations are followed, the result will not be long in coming; the first changes will be noticeable within a week .
We invite you to watch a video about cytokinin paste and its use to awaken the kidney:
Baby separation technology
In order not to sigh sadly about why you can’t grow an orchid from a peduncle at home, you should follow simple rules:
- the flowering stem is cut off at the base;
- Each part when divided must have a bud;
- the length of one cutting is 4-5 cm;
- the bud should be located in the center of the piece.
When and how to separate the baby
After the baby has formed on the plant, you need to properly separate the shoot so as not to injure either it or the mother’s body. For the success of this operation, the timing must be correct. A baby that can take root must meet the following requirements:
- have developed roots. They should reach several centimeters in length;
- have a pair of formed true leaves;
- Externally the process should be healthy.
The ready-for-use plant should be carefully cut from the peduncle to minimize injury to both organisms. You need to cut off the shoot with a gap of 1.5 cm. After disconnecting the baby, you need to give it 30 minutes to dry thoroughly. Then we treat the sections with activated carbon. If it is not available, cinnamon can be used.
Pros and cons of this propagation method
Growing an orchid from a peduncle at home is the most reliable and safe method of propagation. Among the advantages, flower growers note:
- safety of the mother orchid;
- a fairly large percentage of plants take root;
- the ability to stimulate the awakening of the kidneys;
- Even an inexperienced lover of tropical plants can master it.
But difficulties may also arise. Due to inexperience, a weak plant will be used for propagation: a young plant instead of an adult one, without a healthy root system, or an unsuitable peduncle. In addition, the breeding period was chosen incorrectly. All these nuances must be taken into account.
Breeding conditions
To obtain positive results in the propagation of orchids, a number of rules must be followed. Choose the right time for planting, observe the temperature, humidity and choose the right plant from which we will take planting material.
Time
It is best to propagate the phalaenopsis orchid when the plant is approaching the end of the flowering phase - then the resources of the flower will be directed to reproduction.
Humidity
The ideal humidity for a phalaenopsis orchid is 50-80%. Humidity of 25-85% is possible, but optimal humidity is important for healthy reproduction.
Temperature
Temperatures from 28 to 30 degrees are excellent for propagation of phalaenopsis ; temperatures higher than normal are acceptable, but lower temperatures are not recommended.
General condition of the orchid
individuals without diseases are suitable for reproduction . A diseased plant may have black, mucus-covered or yellowish leaves of an unnatural color; if you see any of the signs, postpone propagation until the plant recovers.
Main problems
When propagating and growing orchids, gardeners are faced with situations related to growth and reproduction. Let's look at the most common problems.
Does not produce a peduncle
The reason is regular watering. To eliminate, it is necessary to create arid conditions:
- increase the break between watering;
- leave for another 4-7 days without water;
- ensure the air temperature does not exceed +30 degrees;
- do not spray;
- do not feed.
Children are not educated
A shoot appears when the plant is exposed to unfavorable conditions. What to do? Water less when temperatures and humidity are high. Or use a stimulating agent - cytokinin paste.
The emerging shoot has dried up
Delete. There are other dormant buds that create the necessary conditions for development. You can stimulate as described above.
The roots of a young plant died
Don't rush to throw it away. The following procedure will contribute to the appearance of new roots:
- Place sphagnum moss in water and let it swell;
- form it into a ball and fasten it with thread;
- attach the resulting lump to the base of the process;
- Spray the moss daily with water with the addition of Kornevin.
How to further care for young orchids
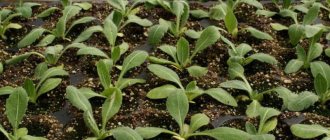
Young phalaenopsis should be planted in transparent pots with many holes, the same as for adult orchids, but smaller. Fine pine bark is used as a substrate. To create the correct microbiological environment, you should add part of the substrate taken from the mother plant to the container for planting the babies.
For successful adaptation of the babies, at first they are raised under a transparent bag in greenhouse conditions. Watering must be very careful. When the plants finally get stronger and begin to produce new roots and leaves, they are planted in a larger substrate and grown according to the same rules as adult phalaenopsis.
Orchids should not be placed in a draft or in poor or excessively bright light. The light should be diffused. The optimal temperature for growing phalaenopsis is 18-26° C. Water the flowers when their roots become silver and the pot is light. The frequency of watering depends on the room temperature. Orchids love to have a warm shower every now and then.
In summer, phalaenopsis is fed twice a month with orchid fertilizers. In winter, fertilizing is carried out 2 times less often. Flowers are regularly inspected to detect signs of disease, rot or the presence of parasites in time. It should be noted that with good care, orchids rarely get sick. If necessary, biological preparations are used to control pests and diseases. In a year and a half, phalaenopsis will be able to please you with its first flowering.
How to propagate phalaenopsis at home
In their natural habitat, phalaenopsis reproduces by seeds. At home, pollination does not occur and independent propagation by seeds is impossible. Growing a flower from a seed artificially is an extremely painstaking and lengthy task; the process will take at least 5-6 years. Therefore, the most optimal method of reproduction is to raise children on the mother plant or a cut flower stalk.
Peduncle selection
For propagation, you should choose peduncles of mature plants that have at least 5-7 healthy, strong leaves. If the cutting method is chosen, then you should cut the peduncle immediately after flowering, without waiting until it begins to dry out. It’s good if there are at least a dozen dormant buds on the layer.
Peculiarity! With proper care, new shoots will produce 7-8 cuttings, and in the worst case there will be 1-2.
Flower stalks of plants recently brought from the store should not be used for propagation. The tissues of these flowers may contain a high concentration of chemical fertilizers, which will interfere with the natural growth and survival of the shoots.
How to make the kidney wake up?
In addition to creating a mild stressful situation for an orchid that does not want to reproduce, awakening a dormant bud can stimulate the use of a special hormonal agent. Cytokinin paste, created on the basis of the phytohormone cytokinin, activates cell division, which in turn provokes the appearance of new shoots.
When using the paste, you need to consider the following recommendations and contraindications:
- use is permissible in homeopathic doses, otherwise the kidney will dry out;
- Do not use on dormant plants;
- do not treat sick or weakened plants;
- apply to no more than three buds of one flower;
- create appropriate conditions of detention after stimulation.
Kidney treatment is carried out in a warm room. Before application, carefully remove the protective scale from the bud. It is better to process the buds that are located closer to the ends of the peduncle.
Children's department
When the baby grows and develops properly on the mother plant, it will need to be separated. In order not to harm any of the plants, you need to act extremely carefully:
- Prepare the necessary tools and materials.
- Disinfect the tool that will be used for cutting with alcohol or chlorhexidine.
- Carefully cut the shoot from the peduncle, leaving approximately 1.5 cm of stem on each side.
- Dry the cut areas and treat them with crushed coal.
Before you begin to separate the baby from the adult flower, you should prepare in advance the pot into which the sprout will be transplanted. The selection of a suitable substrate is also important.
Preparing the pot and substrate
The pot for replanting a new flower should be made of transparent plastic. The bottom and walls of the container must have perforations to allow excess moisture to drain away. The size of the pot should be very small; in large flowerpots, orchids begin to grow leaf mass to the detriment of the rest of the flower.
The substrate for the shoot should consist of large and medium-sized fragments of pine tree bark or coconut shells. In addition, drainage is necessary, for which expanded clay is ideal. For the top layer you will need sphagnum moss, which prevents the substrate from drying out.
Planting a shoot
After the sprout is separated from the mother flower, and all cut points are properly processed, you can begin planting it. The planting process is carried out as follows:
- the plant is placed in the center of the pot, at the bottom of which there is drainage;
- the flower is held, and the container is filled with a damp substrate;
- Sphagnum is laid on top.
Attention! There is no need to compact the substrate so that the fragments take their places; you need to tap the walls of the pot while filling it.
The first watering can be done approximately 4 days after transplantation. Before this, the bush can be sprayed with a spray bottle. The temperature and humidity of the atmosphere should be maintained high.