How to properly harvest grape cuttings in the fall
The period of harvesting lignified cuttings (chubuks) begins with autumn leaf fall and continues until the first frost, until the bushes cover . The overwintered vine weakens and is often damaged by frost. Therefore, the survival rate of cuttings harvested in autumn is higher than those harvested in spring.
Selection
For cuttings, tall, middle-aged, high-yielding bushes are used . Harvesting is done from well-ripened shoots during autumn preliminary pruning.
Advice. If a cracking sound is heard when lightly pressing on the internode, it means the shoot has matured.
You can't prepare chibouks:
- from plants damaged by insects or diseases;
- from the vine, where shedding of flowers and strong “peas” of berries were observed;
- from fattening shoots with a large core and loose wood;
- from shoots with elongated internodes.
Shoots suitable for cuttings are located on the fruit shoot or on replacement knots . Cuttings are taken from the lower or middle part of the shoot, where carbohydrate accumulation occurs to a greater extent.
Signs of a well-ripened shoot suitable for harvesting chibouks:
- The bright color of the bast, characteristic of the variety.
- Brown coloration at the places where leaves are attached.
- Stem diameter – 7-12 mm.
- The ratio of the core diameter to the total diameter of the shank is less than 50%.
- High content of carbohydrates, which are involved in the formation of auxins (growth hormones).
At home, the degree of ripening is determined by a starch test - the cut is dipped for 1-1.5 minutes in an iodine solution (1%). The more intensely the cut is colored, the higher the degree of sugar accumulation - the shoot is ready for cutting.
Important! Planting material cannot be harvested from pre-cut vines, which begin to wither - after three days it loses 5% of moisture, after five days - 10%.
Slice
The chubuk is cut with a sharp knife or razor under the lower eye . The location of the upper oblique cut is 1.5-2 cm above the eye. The direction of the bevel is the side opposite to the eye.
Chibuki “with a crutch” - a piece of a two-year-old vine at the base - take root well. A powerful root system is built up by cuttings from two-year-old wood with a one-year-old knot in the upper part.
Chubuki are freed from antennae, stepsons and immature areas.
Disinfection
Chubuki are treated with drugs that protect against fungal and bacterial diseases .
Treat with 2% iron or copper sulfate , soaking them for 30 minutes.
If cuttings are harvested in a dry year , they are soaked in a quinosol solution:
- at a water temperature above 15ºC – soak for 2 hours;
- at a water temperature of 10ºC – for 3 hours;
- at a water temperature of 5ºC – for 5 hours.
Chubuki are dried in the shade and sent for storage.
Formaldehyde treatment:
- 200 ml of 40% formalin is dissolved in 10 liters of water.
- Then the bunches of cuttings are dipped in the solution.
The treated chibouks are placed in the shade, covered with film and left for 12 hours . Then ventilate for 3 hours and send for storage.
Interesting things on the site:
When and how to replant grapes in the fall
How and when to open grapes after wintering
Planting seedlings and caring for them
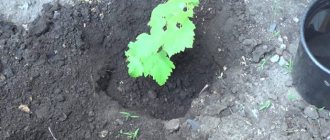
After the roots grow, you need to carefully plant the vines in any containers up to one liter in volume. Care consists of abundant watering and pinching the top for proper development of the crown. It is recommended to plant plants in early spring, preferably in holes or trenches. A hole measuring 50x50 must be filled with loose soil with the addition of sand and gravel. A sprouted cutting with a lump of earth can be planted in the soil, but do not forget to water it abundantly. It is advisable to immediately insert pegs for tying so that the bush grows evenly. With this planting, the root system is protected from winter freezing, and it is convenient to cover the vine in the trench.
If summer heat is not enough due to climatic conditions, it is better to arrange raised ridges for planting, on which the roots of the cuttings will warm up better and the plant itself will receive more heat. In this case, the vineyard is also well protected from flooding. Seedlings require care and attention from the first days of planting. She needs regular watering, loosening and weeding. In addition, you should engage in disease prevention and pest protection. The grapes are unpretentious to the soil; just do not plant bushes in the northern zone of the site, in the lowlands, near a pond or under trees.
How to prepare cuttings for storage
They are stored for storage on the day of cutting - in the open air, the chibouks lose 2% moisture every day. They cannot be stored next to fruits - ethylene released by ripening fruits suppresses the development of buds, callus (wound tissue), and roots. The cuttings are arranged in bunches of 50-100 pieces.
Optimal conditions
The best storage conditions are temperature 0…+4ºC , relative air humidity – 75-80%.
Mistakes to Avoid
During storage, the main thing is to minimize the loss of plastic substances , moisture and prevent damage to fungal diseases.
Storage at the optimal temperature accelerates the formation of callus and roots and inhibits the growth of shoots.
Increasing the storage temperature to 10ºC leads to increased respiration of the cuttings, dehydration and excessive consumption of sugars. The supply of nutrients will only last for 3.5 months. Such chibouks lose their ability to take root.
The degree of rooting depends on the varietal or hybrid characteristics . In a warm and humid environment, Moldovan grapes have a good survival rate of 70-80%: Kesha, Kesha-1, Arcadia, Glory of Moldova, Crystal, Kishmish Zaporozhye, Kishmish 342, Augustin, Pleven Eurostandard, Codryanka, Moldova.
Storage methods
In the cellar, bunches of cuttings are buried in slightly damp sand or covered with sawdust.
They dig a trench taking into account the length of the pipes and add 25-30 cm to the free space above them. The walls and bottom are moistened with water. A 3-4 cm layer of sand is poured onto the bottom and the bundles are installed vertically. The cuttings are covered with a layer of sand 5 cm high on top. Then they are covered with earth to the edge of the hole. With the onset of frost, a mound of earth 30-40 cm high is poured over the trench. During the winter, the pit is constantly covered with snow. A groove is dug along the edge of the trench to drain water.
Bulgarian storage method:
- Chubuki prepare two more eyes than needed.
- In the basement they are installed vertically, immersing the lower ends in water or wet sand.
- Before planting, remove the lower part and the dried upper part with one eye.
In the refrigerator, the bunches are stacked and wrapped on all sides in plastic wrap. Periodically remove the film for ventilation.
Carbon dioxide accumulates under the film, which partially preserves harmful microflora and inhibits the consumption of carbohydrates for respiration.
How to preserve grape cuttings until spring?
Spring check
Before planting, it is important to inspect all seedlings. Those ready for further growth will have an elastic and rigid structure, rather than flaccid and soft. A green living layer remains under the thin bark. It takes quite a long time to store grape cuttings in winter, but despite this, strong plants can produce their first leaves within a couple of days after immersion in water in a warm room. Using this method, you can check a couple of seedlings, determining the quality of the entire batch. Planting chibouks sprouted at home is also acceptable.
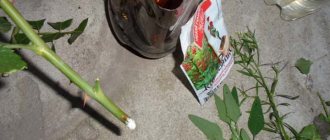
This is interesting: Propagation of roses by cuttings in spring and autumn at home - how to propagate a flower yourself
Strong cuttings can develop existing buds during storage. They literally “pour” within a couple of days after the planting material is removed from the refrigeration chamber or cellar. Such chibouks do not require any further awakening and are completely ready for planting.
Properly storing grape cuttings over the long winter is not a difficult task. Seedlings can be placed in the refrigerator, in the cellar, and even in ordinary trenches. However, the heat-loving crop does not tolerate frost and too high humidity, so control over these parameters is mandatory. Propagating grapes by cuttings is the fastest way to get a fruit-bearing vine or to graft a new variety, so storing seedlings in the fall is a must.
When is it time to sprout
20 days before planting, the stems are removed from storage and the cuts are renewed - the lower one is made under the node perpendicular to the axis of the cutting, the upper one is 2 cm above the eye, obliquely in the direction opposite to the eye.
Furrowing the bottom of the shank will allow the roots to hatch faster . Longitudinal damage to the bark is caused by running one or two internodes along the teeth of a garden saw. If the stalk is full size, then the lower end with two eyes is furrowed; if it is two-eye, the lower third is furrowed.
How to do it right
Cuttings with updated sections are soaked - immersed two-thirds of the length in water at room temperature for 1-6 days . After a day, check the moisture content of the chibouks - make a fresh cut in the upper part with a sharp knife. If it is wet, then stop soaking; if not, continue for another three days. Then they check again. If the cut is dry, change the water and continue soaking for another three days.
In large nurseries, after soaking, the cuttings are kilched in special greenhouses to start the process of formation of root primordia before buds open. This is achieved by cooling the upper part of the segments and heating the lower part. If the cuttings are planted without staking, the buds will bloom before the roots form. Such specimens may dry out in insufficiently moist soil.
At home, kilching is replaced by stratification:
- Sprout in a box equal in height to the length of the cutting.
- Steamed earth or sawdust is poured onto the bottom in a layer of 1-2 cm. The bundles are installed vertically.
- The bases are sprinkled with earth to a depth of 5-7 cm, covered with wet sawdust to the top, leaving one upper eye open.
- The box is installed in a room with a temperature of +20...+25°C for 14-20 days.
In apartment conditions, they are stratified in long plastic bags with the top edges loosely tied. The packages are placed on a cabinet for 16-20 days at a temperature of +22...+25°C, in daylight. The package is opened 3-4 times for ventilation. If the surface of the cutting dries noticeably, it is slightly moistened.
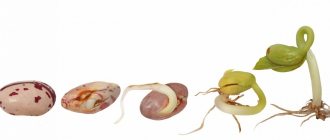
At the lower ends of the cuttings, a gray-white influx (callus) with pinpoint tubercles is formed - the rudiments of the roots. Roots often grow from 2 to 7 cm long. Green shoots 2-5 cm long appear from the upper two buds.
Root regrowth is accelerated when treated with growth stimulants for 12-16 hours:
- heteroauxin – 1-2 tablets per 1 liter of water;
- bee honey – 1 tsp. for 1 liter of water;
- hyperauxin – 1-2 tablets per 1 liter of water.
The temperature of the solution should be no higher than 17°C ambient air, and during treatment with stimulants – no higher than +22…+23°C.
Double spraying with gibberellin at a concentration of 25 mg/l increases shoot growth by 15-17%.
Kilching and methods of germinating cuttings
Germination of young chibouks begins in February or March. First they need to be moved to a warm room. The twigs are disinfected for half an hour in a slightly pink solution of potassium permanganate and washed under running water. Then a straight cut is made from the lower tip, 2-3 centimeters below the outer bud. The upper part is refreshed with an oblique cut.
To stimulate the growth of the vine at home, it is soaked in stimulants. This could be honey, aloe juice, sodium humate (a tablespoon per bucket of water). In the lower part, near the kidney, longitudinal shallow cuts are made. This manipulation improves the formation of roots. After some time, a callus or root callus forms in the area of the grooves, from which real roots will grow.
Kilchevanie
Buds on cuttings often bloom faster than the roots have time to grow. This exhausts the chibouks and they may soon die. Therefore, it is recommended to carry out their keeling. The lower part of the vine should be placed in a warm environment, and the upper part in a cool environment. They do this in different ways. The simplest one is to place the cutting in water and the container on the radiator near the window. Then the water will be constantly heated, and the upper part of the branch will be cooled from the window.
Heating devices are used for this purpose to maintain the temperature in the root area. You can put the cuttings in a box, wrap the lower part with a rag soaked in warm water. The top one is simply wrapped in film. Place a bottle with ice on top, and warm water on the bottom (about 30 degrees). Constantly maintain the set temperature. Kilching is continued until a root callus appears in the lower part.
Germination of cuttings
How to germinate grape cuttings correctly? There are several ways, you can choose the most convenient one. The following methods are used to root cuttings:
- In the water, according to Radchensky
- “On the closet” - Puzenko’s technique
- In peat tablets
- In sawdust or other filler
- In aquarium
- In the pit (Moldavian way)
After the roots appear, the cuttings are transferred to containers with soil. You can plant a vine without germinating grape cuttings. This is done no earlier than the beginning of June. He resorts to this method in cases where the shanks were received in April or May and there is no time for rooting at home. But the technique is not very reliable, especially for temperate climate zones and cold summers.
Germination methods
Under favorable conditions - temperature, humidity, the presence of stimulants and nutrients, the process of regeneration of cuttings begins. Healing tissue (callus) is formed, then roots.
According to Radchevsky
Pre-treated cuttings are lowered into a jar , at the bottom of which a layer of cotton wool or polystyrene foam is laid. The top of the cuttings is waxed to protect it from drying out. Water is poured into the jar so that the top of the cotton wool or foam plastic is covered by 2 cm. The neck of the jar is covered with film, holes are made and pipes are inserted. The temperature below is maintained at +23...+25°C, at the top – as low as possible.
The roots are formed at the water-air interface , the “heels” lightly touch the water. The advantage of the method is that the cuttings do not rot without changing the water.
According to Pusenko
The lower eye is cut from the cutting and several cuts are made along the bast on the lower part - this technique stimulates root formation. A piece of fabric is moistened with water and the chibouks are placed on it in a row so that the ends are in the middle of the fabric.
The second half of the canvas is covered with cuttings, closed at the edges and the structure is rolled into a tube. Then the cuttings packed in fabric are wrapped in plastic wrap and stored in a warm place until rooting. Periodically open for inspection and moisten if necessary.
In filler
Wet porous materials are used as filler - a layer of sand, expanded clay chips, old sawdust from which the resinous smell has disappeared. The filler is poured into a container, moistened and pipes are installed on it.
They are also grown in containers in substrate , which should be at least 0.5 liters. Plastic bottles or paper milk or juice bags are used for containers.
The filler consists of sand, sawdust and peat , taken equally. Add a little loose soil. It is better to replace sand with expanded clay screenings, perlite or vermiculite. The moisture content of the filler is determined by squeezing it in a fist - single drops should be released from the substrate. The bottom of the boxes is pierced and a handful of crushed stone is poured in to avoid stagnation of water. Before planting, the substrate is steamed in a water bath and cooled to room temperature.
How to care and store?
To ensure good and rapid development of the grape plant, you will need to take care of the planting material even before planting it. Sliced chibouks are prepared as follows:
- First of all, the stepsons and tendrils are removed from each cutting.
- Tied in bundles. For convenience, it is recommended to attach a label to each bunch, indicating the crop variety on it.
- As a preventive measure, the bunches are sprayed with a fungicidal solution. A 3-5% solution of copper and iron sulfate or Azophos is suitable.
Important! After the measures taken, it is necessary to provide the cuttings with the most optimal conditions for storage until the time comes for planting them in open ground.
We will consider below how to care for seedlings and cuttings in different conditions.
In a refrigerator
To store in the refrigerator, you will need to place the prepared cuttings in an opaque (preferably) plastic bag, or a cut-off 5-liter water bottle and carefully place it in the refrigerator.
This is interesting: Okra: what it is, beneficial properties of the plant and recipes
The suitable temperature for storage in this way is from +2 to +4 degrees.
Experienced gardeners also advise putting a slightly damp cloth in a plastic bag or first wrapping the cuttings in cloth and then putting the bag on. This storage option is good if you don’t have a lot of cuttings.
You can store cuttings in this way in winter - until about the end of February. Then, usually, the buds still begin to grow, even in the refrigerator. Therefore, it is worth thinking about germinating them and preparing them for planting in open ground.
In the cellar
From personal experience I can say that I cannot store cuttings in the cellar, since it is very warm and they simply germinate there in advance. But, if you have a cellar with the same year-round temperature plus 2 - 5 degrees, then it is perfectly suitable for these purposes in this article. After all, you won’t constantly hear from your wife that you’re taking up space in a small refrigerator.
In principle, everything is simple here, you need to do the following:
- Purchase plastic bags and soil for seedlings.
- The soil is steamed in advance, mixed and cooled.
- The root system of young grapes is placed in a bag and soil is gradually poured in, carefully distributing the roots of the plant. At this stage, it is important to fill all the space between the roots, leaving no air gaps or bubbles.
- Make several holes in the bag to ensure air circulation.
- Moisten the substrate with a small amount of water and tie the bag to maintain the desired level of humidity.
- For storage in the cellar, you will need to tie a bag directly above the root collar of the seedling.
Under the moss
Moss is an excellent soil replacement. The advantage of this method is that the cuttings practically do not germinate even if your room temperature is a little higher than necessary. To store grape cuttings using this method, you will need to do the following:
- First you will need to prepare a box 20 cm higher than the length of the cuttings.
- Pour 15 cm of wet moss onto the bottom of the container (can be replaced with sand or sawdust).
- The next layer is to lay out tied bunches of grapes in one row, leaving a distance of 5-7 cm from the walls of the box.
- Place another layer of moss on the cuttings. Repeat this manipulation several times.
- The last (top) layer of moss must be at least 15 cm, after which the box is covered with a lid and sent for storage in the basement or cellar.
Reference! Instead of moss, you can use sand or sawdust, as well as combine the components with each other.
Storage in pots with soil
The method is reminiscent of storage in trenches, only in this case in winter the cuttings are kept indoors under supervision and control. The cut vines prepared for wintering are placed in containers (large pots, buckets, etc.) and covered as much as possible with damp, crumbly soil.
The advantage of this method is that if the storage temperature exceeds the optimal one (+1...+4 °C), and the cuttings begin to grow, they will have the opportunity to take root without additional transplantation.
In the trench
The method of storing grape seedlings in winter in a trench or in a trench is considered one of the most common among gardeners, especially if it is necessary to preserve a fairly large number of them. I myself use this method. In order to store seedlings in the right conditions, you will need to take into account the following nuances:
- You need to choose a sunny, dry place protected from strong winds for storage.
- The length of the trench is calculated based on the number of seedlings. Each plant requires 20 cm and 20 cm between plants.
- The trench width is at least 50 cm, depth is 55-60 cm.
- You cannot dig a trench in an area where groundwater lies close to the surface, since high humidity will provoke rotting, and there is also a risk of freezing of the roots of the crop.
- If the site has heavy soils, then spring digging and adding sand and peat are required.
- I first lay sawdust at the bottom of the dug trench, maintaining a layer thickness of 15 cm.
- Before sending for storage, I remove excess leaves directly from the seedlings and place the root system in water for 6 hours, after which I inspect the root system and remove injured and weak roots.
- After the seedlings are prepared, they can be placed in a trench. The roots should face north and the tops should face south. This technique provides maximum illumination to young grapes.
- I sprinkle the plants with soil (layer thickness 20 cm) and water them abundantly.
- Before the onset of frost, the trench must be completely covered with soil and a small mound must be made above the surface of the earth.
- You can get grape seedlings only after the soil has completely thawed, approximately in April (depending on the climate).
What to do with germinated cuttings
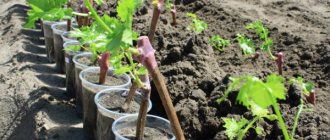
Chubuki, which have entered the initial stage of vegetation and have formed roots, are planted in any containers made of cardboard or film up to 30 cm high, 8-10 cm in diameter in an apartment or winter greenhouse. Homemade vessels are installed in small boxes 15-20 cm high with 3-5 mm slots or holes in the bottom. The bottom of the box is lined with one layer of soft paper.
The cylinders are filled with a 4-5 cm layer of soil mixture , compacted slightly, a grape cutting or seedling is carefully introduced to the soil level, covered with the same mixture and watered with warm water.
Soil composition:
- turf or forest land;
- humus or peat;
- coarse sand.
The components are taken in equal parts.
The seedlings are fed with bird droppings and microelements and provided with sufficient lighting.
Water the seedlings in cardboard or film containers as needed - once every 7-10 days in January, February and March and once every 5-7 days in April and May until planting in a permanent place.
On one plant grown from a cutting, 1-2 shoots are left , the excess ones are removed as they appear.
Fertilizers for cuttings
You need to know that cuttings, like grapes, lack nutrition. This is very important during the period of root formation. Then you will root the grape cuttings correctly, because... they will have enough food. However, fertilizers are applied in a dissolved composition.
Correctly use mineral complexes, which include nitrogen (2g), potassium (2g) and phosphate (2.5g). Dissolve the complex in 5 liters of water. We fertilize grape cuttings every 14 days.
To make the process of callus appearing on cuttings faster, use mineral complexes. Suitable for this purpose are complexes that consist of nitrogen - 2g, phosphate - 2.5g, potassium - 2g.
Dilute this in 5 liters of water. After 14 days, it is advisable to repeat feeding.
Growing grapes from cuttings at home
Two-eyed chibouks are taken out of the refrigerator and cut into pieces 20 cm long . The upper oblique cut is made 2 cm above the upper eye, the lower straight cut is 0.5 cm below the eye. Completely immerse in water and soak for two days.
The next step is kilching on the battery using one of the methods:
- The lower part of the shoot is wrapped in damp moss and placed in a bag.
- Pre-scalded sawdust is poured into a plastic glass and a chibouk is placed there. Place a plastic bag on top to prevent moisture from evaporating.
The cuttings are placed on a radiator at a temperature of 30ºC . The upper part should be kept cool. In 2-3 weeks, root primordia and leaves are formed. Cuttings can be planted in a container.
Plants are planted in open ground when the threat of return frosts has passed . Choose a bright place, protected from the prevailing winds. For the first two weeks, the seedlings are shaded from the hot sun.
Grape propagation by grafting
Grapes can be propagated by grafting, like many fruit trees. For grapes, common grafting methods include splitting, budding, and others. Grafting can be done with cuttings from the previous year, or cuttings from the current year. Hence the names “black to black”, “black to green”. In the spring, before the sap begins to flow, the “black to black” method is often performed. To do this, they use chibouks that were cut in the fall and overwintered in a cool place.
You can study vaccination methods in more detail in the following material. We learned how to properly grow grapes from cuttings, as well as the most commonly used methods of grape propagation.
The key to success depends only on your careful care of all grape germination processes. Choose the most suitable option for you for germinating grapes from cuttings at home and good luck to you!
