Author: Tamara Altova. October 03, 2017
Category: Garden plants.
Fritillary flower (lat. Fritillaria) is a genus of herbaceous perennials of the Liliaceae family, which includes more than one hundred and seventy species that grow wild in the temperate climate of the Northern Hemisphere. Some species of hazel grouse are found in the forests of East Asia, but there are many more of them in the west of this part of the world. The scientific name of the genus comes from the Latin word meaning dice cup, which is roughly the shape of the fritillaria's rim. And the Russian name was given to the plant because of the variegated color of the most common species in Russia - the Russian hazel grouse, which resembles the feathers of a bird of the Grouse family. Today, fritillaries are the most popular bulbous flowers.
Fritillary flower - description
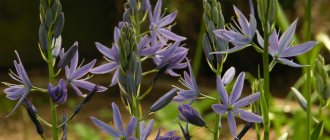
Fritillary flowers are perennial plants that reproduce by underground bulbs consisting of several fleshy scales. Some species have completely fused scales, some only half, there are species with unfused scales, and there are those that have buds in the axil that give life to a new plant. Grouse bulbs are renewed annually. They consist of lower scales, and they usually do not have integumentary scales. A stem rises from the hazel grouse bulb with narrow-linear or oblong-lanceolate leaves, whorled or scattered. Bracts erect or spirally twisted. Large pendulous bell-shaped or cubare-shaped flowers, solitary or forming an umbellate or paniculate inflorescence at the top of the stem, can be colored yellow, red, white, purple, or can be spotted. At the base of each perianth leaf there is a triangular, round or oval depression - a nectary. The fruit of the hazel grouse is a hexagonal, three-lobed capsule with numerous seeds.
Many types of hazel grouse are poisonous because they contain alkaloids, but the bulbs of a species such as the Kamchatka hazel grouse are edible: the North American Indians and Kamchadals called them “northwest rice.” Tubers of some other species were eaten instead of bread. In addition, in Tibetan and Chinese folk medicine, many types of hazel grouse are used as a healing potion.
Description of the plant
In appearance, hazel grouse resemble a miniature palm tree. Its scientific name is fritillaria. People call these flowers the “royal crown.” The leaf rosette and buds are formed on a towering, strong stem-peduncle. The bell-shaped flowers face downwards, their petals can be of very different colors: white, red, orange, yellow, purple. There are also variegated varieties.
Grouse are perennial bulbous plants. Their flowering period begins in mid-spring and lasts about 3 weeks. The culture has a specific aroma.
Planting hazel grouse in open ground
When to plant hazel grouse
Hazel grouse are planted in open ground in the fall, at the end of August or in September. It is advisable to choose a site for them that is well lit by the sun, although this crop also grows well in partial shade. Before planting, hazel grouse bulbs should be kept for half an hour in a solution of potassium permanganate, dried and dusted with charcoal.
Soil for hazel grouse
Fritillaria prefers soil that is well-drained, moderately moist, fertile, but light. Hazel grouse have no special requirements for the composition of the soil, although they grow best in sandy loam soil fertilized with humus. Before planting, the site needs to be prepared: dig up, adding humus or peat, wood ash or lime, and if the soil on the site is heavy, then you also need to add sand.
How to plant hazel grouse
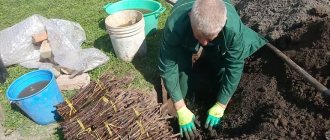
Hazel grouse bulbs are immersed in the soil to the same depth as the bulbs of lilies, tulips and other bulbous flowers: after planting, a layer of soil should lie above the bulb, equal in thickness to twice its diameter. That is, small bulbs of low-growing varieties are immersed by 12-15, and tall ones by 20-25 cm. The distance between the bulbs also depends on the size of the planting material: a gap of 10-15 cm is left between small bulbs, and 25-30 cm between large bulbs. At the bottom of the hole you need to place a layer of coarse sand (fine sand will not work), and if planting is carried out in heavy soil, then it is better to put a layer of peat. The bulb is laid on its side, spreading the roots, but without pressing it in order not to damage it. Then the bulb is completely covered with calcined sand, and the remaining space in the hole is filled with soil.
Planting process
The process of planting hazel grouse is simple. If you bought fritillaria bulbs in the summer, then until the end of August or beginning of September they should be stored in sawdust or peat. But you can plant them in July, since hazel grouse bulbs are not stored very well.
- Rhododendron (Rhododendron) – care, photos, types
If you are going to plant the bulbs of hazel grouse growing in your area, then dig them up after the ground part has dried out, sort the planting material and store it (again in peat or sawdust).
The bulbs are planted in the first ten days of September. The fritillaria bulbs already grow roots by this time.
They dig spacious holes into which you can easily place the bulb and straighten its roots: the fact is that during storage the fritillaria bulb often grows overgrown with impressive roots. To create the cushion necessary for the roots of the bulb, you can pour soft river sand or completely rotted humus into the hole.
It is best to first moisten the soil by watering and then place the bulb: it is very undesirable for moisture to get on the growing points and peduncle, so the bulb is placed in the hole, slightly turned on its side.
After laying the bulbs, cover them with soil and mulch the area.
Caring for hazel grouse in the garden
How to care for hazel grouse
Caring for hazel grouse is similar to caring for lilies. Before the onset of frost, the area with planted hazel grouse bulbs is mulched with humus, well-decomposed peat or rotted compost: this covering should be enough for the plants to survive the winter, but if weather forecasters predict severe frosts without snow, then it is better to play it safe by covering the area with spruce branches or mulch. hay. The thickness of the shelter should be 20-30 cm.
As soon as sunny spring days arrive, the shelter is carefully removed, and in early May you will already see the blooming hazel grouse. Caring for flowers is simple: you need to water them, loosen the soil around them, remove weeds, apply fertilizers and protect them from pests and diseases.
Watering hazel grouse
To call hazel grouse moisture-loving flowers would be an exaggeration. Water them moderately, and only during dry periods. Usually the plant has enough natural precipitation. When the flowering of hazel grouse comes to an end, the bulbs are not immediately dug up, allowing them to gain strength and nutrients from the soil, and the area is watered once or twice a month so that the bulbs do not lie in dry soil.
Feeding hazel grouse
The need for fertilizer for hazel grouse is also small: it is advisable to feed them the first time in the third ten days of April, and the second time after flowering. For fertilizing, dry complex fertilizers are used, for example, a tablespoon of potassium sulfate and superphosphate is distributed over 1 m² of land and then the soil is watered abundantly. The hazel grouse also responds well to this feeding: add a tablespoon of Nitrophoska and Agricola for flowering plants to a bucket of humus, mix and spread the humus over the area with the hazel grouse in a layer of 4-5 cm.
Protecting hazel grouse from frost
How to preserve hazel grouse in winter? Although hazel grouse is considered a frost-resistant plant, it is better to cover the planting site with hay or spruce branches for the winter. In today's frosty, and most importantly, snowless winters, the bulb may freeze or even rot.
The thickness of the covering layer should be 20-30cm.
- How to properly plant hydrangea in open ground
On the very first sunny days of spring, the shelter must be removed, trying not to damage the emerging sprouts of hazel grouse. And already in early May you will be able to see the beautiful flowering of fritillaria.
Hazel grouse transplant
Hazel grouse can be grown in one place for no more than four years, and after that they need to be replanted. Ideally, hazel grouse need to be replanted once every two years, and in an area where bulbous crops have not been grown before, otherwise the risk of flower damage by diseases and pests increases. Preparation of a new site and transplantation of bulbs is carried out in the same time frame and in the same order as the initial planting.
Selecting and preparing a site for hazel grouse
Before planting hazel grouse in the fall, you need to prepare the place. This is necessary for the flower to be healthy and develop properly.
The plants in question love a little shade, but they can also grow well in full sun. In this regard, a flowerbed can be chosen in an open area, especially since for the conditions of the middle zone such a place will be a priority. In the spring, the bulbs germinate faster and ripen by the winter. In southern areas, the bulb can be planted in partial shade.
The soil for hazel grouse should be loose and fertile. The plant bulb can be grown in the same place for more than five years.
How to prepare a place
The soil is prepared as follows:
- Sand is added to the soil, which will make it looser. For one sq. m. you need two buckets of sand.
- In addition, the soil is enriched with organic fertilizers. It is recommended to add humus, leaf soil, and compost.
If the bed is well prepared, then in the future you will not have to add additional organic or mineral fertilizer to the soil next to the plant.
Important! The most important thing is that in the place where the hazel grouse will grow, moisture and melt water should not stagnate.
Hazel grouse breeding
Hazel grouse from seeds
Hazel grouse reproduce by dividing bulbs and seeds, although the generative method is not very popular: you will have to wait seven or even ten years for the first flowering. The seed propagation method is justified only for the industrial cultivation of hazel grouse, when you need to obtain a lot of planting material, and for the sake of obtaining new varieties. Pre-soaked seeds are sown in December to a depth of 1.5-2 cm in boxes at least 15 cm deep, filled with loose soil that does not contain mineral fertilizers or manure. The crops are placed in the basement, where the temperature is kept between 1-2 ºC. In early spring, the boxes are moved to a sunny place in the garden and care is taken throughout the season so that the soil in them does not dry out. When the above-ground part of the seedlings dies off in the summer, the bulbs formed in the soil are selected and stored in dry sand at a temperature of 20 ºC, and in September they are planted in open ground to a depth of 6-10 cm, after which the area must be covered for the winter.
Reproduction of hazel grouse by dividing bulbs
For vegetative propagation, dividing the bulbs is used: every year, each bulb is divided into two parts, since hazel grouse form daughter bulbs infrequently and their number is always small. An onion consisting of two scales is simply broken into two parts, the broken area is treated with crushed coal, the sections are dried so that the wound heals, and parts of the onion are planted in the soil a little earlier than whole bulbs - three weeks after removal from the soil, since during storage they dry out.
Reproduction of hazel grouse by children
Grouse bulbs can be forced to form daughter shoots, since these plants, like hyacinths, have the ability to form children on the wound surface. How to do it? After you remove the bulbs from the soil, use a sharp, sterile instrument to make one or two cone-shaped holes with a diameter of 1.5-2.5 cm on the thickest part of the outer scales of a healthy large bulb. Dry the wounds for several days, place them in storage in dry sand and keep in a well-ventilated, warm area. As soon as the roots grow on the bulb, it is planted in open ground in the order we described. Your task is to prevent the hazel grouse that has grown from the bulb from blooming in the first year by removing the developing buds. When digging up bulbs at the end of the season, be careful: the children formed at the site of the wounds may be small.
How to plant hazel grouse in the fall
Autumn planting of fritillaria differs little from planting other bulbous plants and is accessible even to an inexperienced gardener.
Landing dates
The timing of planting hazel grouse depends on the characteristics of the region and the specific weather, but in general they are very short. Rooting of the bulbs requires 3-4 weeks of relatively warm weather. Therefore, it is worth focusing on when the first serious frosts usually occur, and counting about a month from this date. Late planting can result in the death of flowers due to incomplete rooting.
If night temperatures begin to steadily drop to +4...+6 o C, you should hurry with disembarkation. Approximate dates by region are as follows:
- middle zone, including the Moscow region and the south of the Leningrad region - from the end of August to September 10;
- Ural, Siberia - August 5–20;
- southern Russia (Kuban, Lower Volga region, etc.) – September 5–30.
If the weather is still warm at this time, you can wait a little, but delaying planting too much is dangerous.
Site preparation and planting
The site for hazel grouse is chosen in an open place, but they also tolerate partial shade. Therefore, if you want to get earlier flowering, they try to plant them in the sun, but in southern areas you can do this near trees. It is important that there is no stagnation of melt water in the chosen location.
Preparing the flowerbed
The soil for hazel grouse should be fertile, loose, and breathable. Flower growers are not unanimous regarding the need for annual digging of bulbs: in principle, a flower can grow for several years in one place, so the soil must be well fertilized. Adding sand and peat to clay soils is mandatory: this increases their permeability to moisture and air. The flower bed is prepared 2-3 weeks before planting the bulbs.
The hazel grouse is a rather large and beautiful flower, and it should be given a place that is not the most conspicuous
They try to use humus, compost, and leaf soil as fertilizers. The norm is about 2 buckets per 1 m2. It is advisable to add a couple of handfuls of wood ash. From mineral fertilizers, you can add 30–40 g of superphosphate.
Preparing the bulbs
The bulbs of hazel grouse are much larger than those of tulips and hyacinths, and can weigh up to 500 g. They should be hard, without damage, and may have pronounced roots. The bulbs are dug up soon after flowering has ended and should be stored properly until autumn. Usually - in warm rooms in boxes with sand.
Hazel grouse rarely get sick, but it is better to disinfect the bulbs before planting. Bathing in a pink solution of potassium permanganate for 15–20 minutes is sufficient. A couple of days before this, they need to be carefully examined, cleaned of any remaining soil and sand, and if there are small ulcers, cut them out and sprinkle with crushed coal (can be treated with “green paint”). If the roots are too long (more than 5 cm), they should be shortened.
If the bulb has roots, you need to take into account that they are quite fragile, and try not to break them off, but you can shorten them a little
Landing
When planting, a simple rule works: the depth of the hole is three times the height of the bulb (i.e., up to 25–30 cm). The distance between the holes is 20–35 cm: hazel grouse is a rather large plant. The landing itself includes the following operations.
- They dig spacious holes of the required depth and width, but it is easier to dig a common trench. Drainage is placed at the bottom - coarse sand in a layer of 8-10 cm.
Sometimes hazel grouse bulbs are so large that the planting holes can be compared to planting holes
There are different opinions regarding planting hazel grouse: from vertical to horizontal position of the bulbs, but more often they are placed obliquely
Hazel grouse after flowering
When to dig up hazel grouse
After the hazel grouse have flowered, they do not immediately lose their attractiveness, but by the beginning of July their greenery begins to turn yellow and die, and then you can start digging up the bulbs without waiting for the ground part to wilt. The bulbs are removed, cleaned of soil and dead scales, washed in warm water, kept for half an hour in a pink solution of potassium permanganate, rot spots, gnaws and other damage are cut out from them, the wounds are treated with a fungicide, sprinkled with wood ash and left in the shade to dry.
How to store hazel grouse bulbs
Dried hazel grouse bulbs are stored in a dry, well-ventilated room at a temperature not exceeding 30 ºC until the end of August or beginning of September. During this time, the roots will grow on the bulbs and they can be planted. During storage, planting material is regularly inspected, damaged or rotten areas are identified and removed, and the cuts are treated with crushed coal.
How to choose good hazel grouse bulbs
When planting any crops, you need to remember that the success of the entire event largely depends on the quality of the planting material. For this reason, you need to plant high-quality onions.
The following tips will help you choose high-quality and good hazel grouse bulbs for autumn planting:
- The main feature of the fritillaria bulb is that it must have a hole left over from last year’s peduncle. In the autumn, buds form in the hole, and in the spring flower stalks appear from them.
- The normal shape is a slightly flattened ball.
- The diameter must be at least 6 centimeters . The optimal size of the imperial hazel grouse bulb is 8-10 centimeters in diameter (if you plant specimens of this size, you can see flowering the very next year). If the size is less than 6 cm, then you will not see flowering next year.
- A good and healthy fritillaria bulb should not show signs of mechanical damage, cracks, stains, ulcers, traces of mold or a musty odor, and it should not be limp. You should refuse to purchase such planting material.
- But don’t refuse the purchase if you notice scales and dry roots, this is completely normal.
- Also, you should not be scared by the specific smell. An unpleasant and pungent aroma is normal for fritillaria ; in the soil it repels pests, mole crickets, and moles.
Advice! Due to the specific smell, it is not recommended to store hazel grouse bulbs next to bulbs of other plants. They will adversely affect their health.
Diseases and pests of hazel grouse
Diseases of hazel grouse
Hazel grouse are resistant to fungal and viral diseases, including the scourge of all bulbous plants - botrytis. Problems with flowers can arise if the rules of care are regularly violated, for example, if the bulbs are constantly waterlogged, the plants can rot. In this case, you need to cut out the rotten areas to healthy tissue, and treat the wounds with ash or crushed coal. Freezing of the bulbs during storage is also fraught with problems: next season, plants from such planting material will develop weakly and may even die. The same fate can await hazel grouse if they were overfed with fertilizers during the past season or if they were dug up at the wrong time.
Pests of hazel grouse
As for pests, the specific aroma of the juice of hazel grouse bulbs repels not only insects, but also rodents - moles and mice. Infection of hazel grouse with pests can only occur if its immunity is weakened as a result of prolonged cultivation in one area. Danger for weakened hazel grouse is represented by the lily beetle - an insect with a red body and a black head, as well as the onion rattle, or onion daylily, the larvae of which can be found on the underside of the leaves. It is the larvae that pose the greatest danger to flowers. Do not miss the moment of their appearance and treat the plant with an insecticide 2 or 3 times with an interval of 7-10 days. The proximity of hazel grouse to lilies of the valley contributes to infection by rattlers.
Landing dates
For beginning gardeners and gardeners, a problem arises when to plant hazel grouse, because the flowers begin to bloom in the spring. The answer to this question is that the bulbs need to be planted in early autumn.
When to land
The timing will vary for different areas, as the landing depends on the weather. The best option is early September, a month before the first frost occurs.
It takes three to four weeks for the onion to take root. If you delay planting a flower, it will not be able to adapt and will die in the winter.
For reference! There are late-flowering varieties that can be planted in the spring. But novice gardeners are better off choosing traditional varieties.
PROS AND DISADVANTAGES OF PLANTING HILL GRUSES IN AUTUMN
Planting hazel grouse in the climatic conditions of our country is carried out exclusively in the fall (including the end of August). This is due to the developmental characteristics of the flower and its bulb, in particular:
- if a hazel grouse bulb, planted at the wrong time, does not have time to take root well before the arrival of frost, it may die in winter;
- only under conditions of relative rest and at sufficiently low soil and air temperatures is the hazel grouse able to form good flower buds;
- It would be necessary to plant hazel grouse in the spring very early, immediately after the snow melts, which is extremely difficult to do.
If you plant hazel grouse bulbs in the spring, they may not have time to gain enough nutrients during the spring-summer period and become stronger. Before the onset of serious autumn frosts, such bulbs, as a rule, do not fully ripen, which is fraught with their death in winter or, at best, poor flowering next year.
The only case for spring planting is appropriate if the bulbs were purchased in winter: in this case, already in February-March they should be planted in pots, where they will begin the growing season. Then, with the arrival of relatively warm weather, the plants from the pots are carefully transplanted into open ground.
Obviously, this path is much more difficult than planting bulbs in the fall, so the latter has only advantages. The disadvantages of planting in the fall may be that sometimes frosts unexpectedly come too early: in this case, the bulbs, which were not covered in time for the winter, may freeze.
In order for hazel grouse to bloom well, the timing of planting the bulbs should not be violated.
Application in landscape design
Hazel grouse is used mainly as a group planting against the background of a lawn. The plant also looks very advantageous near bodies of water.
In mixed plantings they are planted next to other bulbous plants - tulips and daffodils.
If you don’t want a drying plant to spoil the appearance of the flowerbed, you can place irises around the imperial hazel grouse planting, which bloom a little later and will cover up the unsightly appearance of faded hazel grouse.
Simple care and maintenance of fritillaria allow even inexperienced gardeners to grow on their plot a worthy “king” of the flowerbed - the imperial hazel grouse.
Methods of propagation of fritillaria: seeds and children
Unfortunately, it is not so easy to propagate the imperial hazel grouse, and all because its bulbs are very reluctant to produce children: you can dig up bulbs for several years in a row after flowering and not find any cuttings.
However, there is a certain way to stimulate the reproduction of hazel grouse bulbs: after you dig them up and dry them, you need to inflict mechanical damage, that is, lightly cut their bottom with a knife, into which you can additionally insert a coal so that the crack does not close. After you plant such a bulb in the fall, the likelihood of producing children will increase significantly.
By the way! In order for the baby bulbs to bloom, they need to be grown for about 3-4 years.
Of course, you can try to propagate and grow hazel grouse from seeds, but you will have to wait a long time, at least 5 years, and more often they bloom only in 6-7 years. To do this, after flowering you need to leave a couple of inflorescences so that they form seed pods and the seeds ripen in them.
Next, you need to immediately sow more seeds into the soil, because their germination rate is very low. Next year a plant will appear that looks like grass and has only one leaf. In another year (when a small bulb forms), the plant can be dug up (kept warm and dry for a couple of months) and replanted.
Video: how to propagate hazel grouse
Description of the species
Imperial hazel grouse or fritillaria (Fritillaria imperialis) is a bulbous plant from the daylily family. The homeland of hazel grouse is the Himalayas, from where the plant came to Europe in the 16th century.
The imperial hazel grouse is a peduncle up to 1.5 meters high, on top of which there are large bell-shaped flowers. The stem is crowned with a lush bunch of green foliage. At the base of the peduncle, pointed leaves are arranged in several layers. The flowers of the imperial fritillary can be yellow, orange, terracotta or red.
Planting a flower
It is the correct planting of the bulb that determines whether the hazel grouse will bloom next year. To avoid mistakes when planting a plant, you need to adhere to the following recommendations:
- The optimal planting time is the end of August and the beginning of September. Later planting has a negative impact on the development of the plant; it does not have time to take root and may die in winter.
- The flower should be placed on sunny areas, well protected from drafts.
- Before planting the bulbs, the area in which they will grow must be dug up and fertilized. To improve the drainage characteristics of the soil, you can add a small amount of river sand to it.
- It is better to prepare the holes in advance. It’s a good idea to sprinkle a little sand, humus or compost at the bottom of the hole. The depth of the hole should be at least 30-40 cm.
- The general rule to use when planting bulbs is that the depth of the hole should be equal to 3 times the height of the bulb. Thus, for large flowering bulbs with a diameter and height of about 10 cm, the planting hole should be at least 30-40 cm deep, and smaller specimens can be planted to a depth of about 15-20 cm.
- The holes should be spaced at a distance of 35-45 cm from each other.
- It is better to place the onion in the hole slightly inclined (so that moisture does not accumulate in the scales) and sprinkle sand on top. The top of the hole can be mulched.
It is necessary to water the planted flower all autumn, until the first frost, so that the root system has time to develop sufficiently.
