How to determine that a transplant is necessary?
You can determine whether a plant needs replanting by looking at the state of the root system, especially since the pots for them are often transparent. If the roots of the flower have white, light gray, or rich green shades, the plant is healthy and does not need to be replanted.
Signs that an orchid needs to be replanted:
- the soil in the pot was compacted in clumps and sank greatly;
- the roots of the plant have grown very large and do not fit well in the pot;
- an unpleasant odor characteristic of mold or rot appears;
- the appearance of the flower has deteriorated, looks depressed, lethargic;
- the color of the roots in the pot changed and became grayish-brown;
- 1-1.5 years have passed since purchasing the plant, or 2-3 years have passed since the last transplant.
Important. Orchids should only be replanted in a completely healthy and non-flowering state. To avoid the death of the flower, you should try to cure it or let it bloom before replanting.
Standard terms
A healthy flower must be replanted every two to three years due to compaction and oxidation of the substrate. In such cases, it is better to replant the orchid after it blooms, during the new growing season, when young shoots begin to appear.
After the purchase
After purchasing an orchid in a store, it is recommended to replant it, because the substrate very often contains mold and spores of fungal diseases due to improper care of the plant in store conditions. It is better to temporarily isolate a new flower from other indoor plants for a period of up to one month.
If you are confident in the good condition of the soil and the plant itself, replanting can be done 1-1.5 years after purchase.
Depending on the time of year
- It is usually recommended to replant an orchid in the spring, when it begins its period of active growth, because... at this time, it quickly adapts to the new substrate.
- In summer it is also possible to replant the flower in new soil.
- But in autumn and winter it is not recommended to replant phalaenopsis, since during these periods the biological metabolic processes of the plant slow down greatly.
Further flower care
How to prune an orchid after flowering: options at home
To acclimatize, the orchid is kept away from sunlight for 7–10 days. Windows with enough light are best for placing orchids, but direct rays are dangerous for them. Orchid leaves get burned when directly exposed to ultraviolet light.
Phalaenopsis orchid
Watering and soil
After planting, the plant can be watered within 4–5 days. Water for irrigation is settled or boiled. The container with the plant is immersed in prepared water for 30–40 minutes. This way the plant receives the right amount of moisture every two weeks.
Temperature and humidity
The room where the orchid lives should not be dry or hot; the optimal temperature for these flowers is 20–23 °C. Orchid leaves are carefully wiped with a damp cloth or sprayed with a spray bottle. The main thing is not to allow liquid to accumulate in the outlet.
Step-by-step instruction
The process of transplanting an orchid is not complicated, but it still requires following all the recommendations.
Preparatory stage
Before transplanting a flower, you need to prepare the necessary tools and materials:
- a transparent flower pot, previously disinfected with boiling water or a solution of potassium permanganate;
- prepared substrate (specialized or independently composed);
- expanded clay or small crushed stone for drainage;
- sharp knife, scissors or pruning shears;
- special sticks for support and fastening made of natural materials;
- crushed activated carbon for processing root sections;
- insecticides for possible cases of treating disease-affected roots.
Choosing a pot
The most suitable pot for replanting orchids is a transparent one with pre-made drainage holes. Currently, several types of phalaenopsis pots are offered:
- Regular plastic transparent pots of all sizes.
- Flowerpots or carriages made of transparent material, acting as a second pot to collect excess moisture and at the same time increasing the aesthetics of the arrangement of flowers in the interior.
- Glass vases, jars, flasks.
- Special pots made of transparent plastic, made in the form of a fence surrounding the orchid roots and substrate.
Reference. The size of the pot should exceed the volume of the plant’s root club by no more than 1-2 cm.
Soil selection
There are several options for traditional soils that are well suited for orchids:
- Pine bark is considered the best component in the composition of the orchid substrate, used in the form of medium and small pieces.
- Coconut fiber is a ready-made substrate made from the outer crushed parts of coconut shells, which has good moisture holding capacity, aeration, environmental friendliness and an affordable price.
- Compressed coconut substrate , very similar in properties to the previous type, but here the crushed particles of coconut shells are pressed into briquettes.
- Peat is a substance characterized by easy drying and excessive moisture holding capacity, used as an additive to the soil mixture.
- Sphagnum moss is a substrate that is used in the top layer of soil or as a soil base.
- Expanded clay, vermiculite, pumice, sand, gravel are types of soil used as a drainage layer.
- Artificial fiber (dolomite, mineral wool) - substances used as an additive to reduce soil acidity.
- Charcoal is an additional (no more than 10-20% of the volume of the mixture) adsorbent component of the soil.
The ideal substrate for an exotic orchid is a mixture of pine bark, charcoal and sphagnum moss. In stores you can purchase a specialized, ready-to-use substrate for orchids. It is also possible to prepare the necessary soil mixture yourself.
Attention. It is quite difficult to correctly prepare the required substrate mixture; therefore, novice gardeners are advised to purchase specialized soil in the store.
How to remove it from the pot without damaging it?
Removing the orchid roots from the pot is the most crucial moment of the entire transplantation process. Every effort must be made to prevent damage to the roots. To do this, you should turn the orchid over, fixing its base in your hand, and slowly tighten the pot, removing the entire substrate lump with the root system.
Very often, even when the substrate is soaked, the roots are not removed. In such cases, it is better to sacrifice the pot by cutting it and save the orchid roots.
Plant processing in progress
- After removing the roots along with the soil ball, you need to place them in a container with warm water to soak. Then the remaining substrate can be washed off the roots under a warm stream of water or using a shower head.
- The root system of the flower is carefully examined to detect symptoms of disease, damage or decay. All old and dead roots are removed, rotten and damaged areas are cut out, and the sections are treated with activated carbon powder.
- If traces of parasites are found on the roots of a flower, they must be placed in an insecticide solution for half an hour.
- After this, the plant is left to dry, placed on paper napkins or a towel. When the drops of water on the roots disappear, you can begin planting the flower in new soil.
Removing rotten roots and yellow leaves
- When removing an orchid from a pot, the roots are carefully examined.
- Detected rotten, dry and hollow, as well as damaged areas are removed with sharp alcohol or fire disinfected tool-knife, scissors or pruning shears.
- All cut areas are treated with crushed activated carbon or alcohol-free antiseptics.
- Sometimes an orchid develops yellow leaves or leaves that need to be removed.
- To do this, they are cut along the lobar vein and pulled by the ends in opposite directions, as if removing a leaf from the stem.
- All cut areas are also disinfected, but using brilliant green, iodine or alcohol.
How to plant correctly in the substrate?
- First of all, it is necessary to create a drainage layer at the bottom of the pot with a thickness of at least 3-5 cm. For this, expanded clay, crushed stone or clay shards are usually used. A layer of substrate is poured on top of the drainage layer so that the base of the installed plant is 1-1.5 cm from the edge of the pot.
- Then the orchid is placed in the pot along with a support for gartering the stems, and the entire container is filled with substrate. At the same time, you can shake the pot slightly, helping to fill it more densely.
- The pot with planted orchids is placed in a container with water (for watering). When the substrate is completely saturated with water, the pot is removed and the water drains completely.
For such watering, be sure to use only boiled or distilled water to avoid possible bacteria getting into fresh root wounds.
Reference. If after the watering procedure the soil in the pot sags a lot, you need to top it up.
The orchid is not stable in the pot after transplantation. It is better to use additional external support until the flower is completely rooted in the new soil.
Transfer procedure
Novice gardeners are interested in how best to replant an orchid so that it continues to bloom. To do this, you need to strictly follow the rules and be sure to use disinfected equipment. Before the procedure, prepare a larger flower pot than was previously available. Next they act according to the algorithm:
- With a gentle movement, take out the culture along with the substrate and place it in a basin of water. The old container is pressed on the sides to separate the root system.
- After an hour, the roots are washed with warm water, and pieces of the substrate are separated.
- The plant is dried and rotten or damaged roots and leaves are separated with pruning shears. The sections are treated with antiseptics, cinnamon or powder.
- The root system is treated for parasites. For this purpose, fungicides or insecticides are used according to the instructions.
- The plant is left to dry for 8 hours. It is best to prepare the orchid in the evening and place it in renewed soil in the morning.
- The new flower pot is washed with running water, the bark is steamed and poured with boiling water. Drainage is placed at the bottom, the pot in the middle is filled with substrate.
- The plant is placed in a container so that the outlet remains outside. The remaining space is filled with substrate.
Related article:
How to revive an orchid
Watering the transplanted orchid is done every other day.
Peculiarities
In some cases, there are features of orchid transplantation.
- In a glass vase. Sometimes orchids are planted in glass vases. In these cases, the plant can only be watered from above due to the lack of drainage holes at the bottom of the glass container. This must be done with great care to prevent excess moisture.
- Old orchid. The process of replanting an old orchid is basically the same as a regular phalaenopsis. Here, sometimes it is necessary to remove a large part of the root system due to the many dried and dead parts of it. It is also often necessary to trim yellowed or severely damaged plant leaves.
- Mini orchids. Dwarf orchids are replanted at the same frequency as ordinary phalaenopsis. The transplant procedure is similar for all varieties of this plant.
- During flowering. In cases where more than 50% of the orchid's roots are affected by rot, an urgent replanting of the plant is required, despite the flowering period. The peduncle and all unhealthy roots are removed from the orchid. Then the plant is washed and treated with a fungicide. Afterwards, all sections are also treated with activated carbon powder. Within 2-3 hours, the flower is dried and transplanted into a clean, disinfected substrate.
Which pot and soil to choose
How to transplant a ficus at home to a new place
When choosing a new pot for an orchid, you must first take into account the needs of the root system of the flower. You can find different pots in stores.
Transparent pots are considered the best. They can be of any color. In such a container, the roots are clearly visible, they have enough light, and they do not grow to the walls of the pot.
Translucent pots or planters are ideal for windowsills that receive direct sunlight.
Stick-shaped or grid-shaped pots are not suitable for indoor growing. The substrate in them will dry out from lack of moisture. They may be suitable for growing in a greenhouse with high humidity.
Stick-shaped pots can be used as a design element
When choosing a pot, you should be guided by the following tips:
- The pot should have drainage holes through which excess moisture can escape and air can enter. If there are few of them, you need to make additional ones yourself.
- When transferring a flower, the diameter of the new pot should be 1-2 cm larger.
- Too large pots are not needed, because after inspection and removal of unsuitable roots, the old pot may be suitable. In addition, a large amount of substrate takes longer to dry.
Note! An orchid in a transparent pot should not be exposed to direct sunlight. Otherwise, a greenhouse effect is created, the soil warms up, the roots die off, and algae appear.
An orchid, especially phalaenopsis, cannot survive in plain soil; it needs a special substrate. Ready-made ones can be purchased at a flower shop. It comes in two types:
- For epiphytic orchids. It contains pieces of fern root, pine bark, wine cork cut into pieces, moss, oak or birch charcoal.
- You can prepare the mixture for planting orchids yourself. This process is quite troublesome and requires step-by-step execution of all actions in accordance with the instructions.
Soil disinfection
When preparing the soil yourself, you should remember that it needs to undergo a disinfection procedure. To do this you can use:
- Oven. Place the mixture in a preheated oven at 200 degrees for 20 minutes.
- Freezer. The soil mixture must be kept in the freezer for 24 hours.
Follow-up care at home
After transplantation, the orchid needs favorable conditions that must be created for its successful establishment in the new soil. It is very important to maintain suitable temperature, humidity and light conditions.
Watering
The process of watering orchids occurs when a flower pot is placed in a container with warm water for 15 minutes. When the substrate is completely saturated with moisture, the water must be drained. It is better to use boiled or purified water.
This video talks about how to water phalaenopsis:
Fertilizer
After transplanting the orchid, it is recommended to start fertilizing only after three to four weeks.
- To feed phalaenopsis, it is better to use specialized liquid fertilizers containing nitrogen, phosphorus and potassium (Kemira Lux, Cameleon, BonaForte). Fertilize after watering twice a month, diluting the fertilizer with double the volume of water compared to that specified in the instructions , or an even less concentrated solution after each watering, once a week.
- You can use stimulants and adapters to improve the growth of phalaenopsis (Epin, Zircon).
Standard feeding of orchids is carried out in spring and summer, before the first bud appears. During the flowering period, root fertilizers are replaced with foliar fertilizers, and in winter the plant is not fertilized.
Important. It is not recommended to use folk remedies or universal fertilizers for indoor plants to feed orchids.
Care after replanting a plant
After transplantation, you need to take good care of the weakened flower, following all the rules and recommendations.
It is best to place the orchid in a room with a temperature of 20-23 ° C without drafts and direct sunlight. It is not recommended to move the flowerpot from place to place. In a shaded place, the orchid should stand for about 10 days.
Orchids are planted exclusively in moist soil, so you should not water the plant for the first 3-4 days. Spraying of moss is allowed.
If the growth of the orchid has stopped, it is necessary to create a more humid environment. To do this, you can create a small greenhouse. The orchid pot should be placed in a bag and periodically sprayed inside so that the drops do not fall on the flower. It is also necessary to ventilate regularly.
The flower remains in such conditions until growth resumes again. A month after relocation, the orchid should be fed with fertilizer.
Important! An orchid in a greenhouse should not be exposed to the sun.
Important questions
Is it possible to manipulate a flowering plant?
It is highly not recommended to replant a flowering orchid. An exception may be cases of plant disease, when it simply has to be saved.
What to do if the flower withers?
In some cases, after transplantation, the orchid looks sluggish, depressed and does not begin to bloom for a long time. This is due to the fact that the flower is accustomed to the biological and microchemical composition of the old soil, and it takes time to adapt to the new one. Sometimes it is possible to add a few pinches of the old substrate (only if it has not been infected) to the new one to shorten the adaptation period of the orchid.
What frequency should be observed?
The frequency of orchid transplants is no more than once every 2-3 years. A newly purchased flower in a store is replanted either immediately after purchase at the end of flowering, or after 1-1.5 years, depending on the condition of the soil and the plant.
How to seat children correctly?
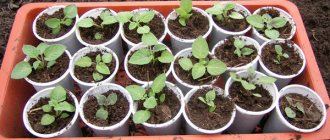
From time to time, babies appear on the orchid - paired leaves with rudiments of roots. Such shoots are ready for separation and need to be transplanted. You can trim the children when their roots reach a length of 3-4 cm.
- They are taken together with part of the mother plant - 1 cm is cut off from it on each side of the shoot.
- The cut areas are immediately treated with crushed activated carbon.
- Then the babies are soaked for 15 minutes in warm water and transplanted into a pre-disinfected substrate in a manner similar to transplanting adult plants.
Important. Only one sprout is planted in one pot.
An orchid is propagated in this way, using it only after the plant has finished flowering.
This video talks about how to plant orchid babies:
What to do if pests or diseases are detected?
In cases where pests and diseases are detected during phalaenopsis transplantation, it is necessary:
- remove all damaged areas of roots;
- rinse with water;
- dry;
- treat with special antifungal agents;
- Sprinkle the sections with activated carbon powder.
The procedure for transplanting an orchid requires careful attention to following all recommendations and careful handling of this exotic flower. Correct actions will keep the plant healthy, and it will delight with its beauty for a long time.
How often to replant orchids?
Epiphytes, which include the orchid, quickly deplete the soil. It's not just the supply of nutrients that is lost. At the same time, acidity and breathability decrease, and the balance of mineral salts is disrupted. Therefore, the substrate must be replaced every 1–2 years.
A transplant may be required in the middle of the period. You need to think about a new pot and replacing the soil in the following cases:
- roots displace the substrate and are visible through the holes;
- the plant develops poorly;
- the bark on the surface of the substrate dries quickly;
- many aerial roots are formed;
- spots have appeared on the leaves, which may indicate depletion of the soil, incorrect acidity levels, or rotting of the root system;
- pests appeared;
- the smell of rot is heard from the pot;
- excessive mass of leaves, and the pot turns over;
- babies appeared, taking juices from the mother plant;
- The orchid does not bloom for more than six months.
Sometimes novice gardeners replace only the top layer of soil, thinking that this is an alternative to replanting. But it's not right. The soil gets lost throughout its entire volume, which eventually leads to damage to the roots.
Reference. Many people consider the orchid to be a parasite. But that's not true. It does not feed on the juices of the plants on which it lives. The flower only consumes substances and water that are on the bark of the support plant (phorophyte). Therefore, it belongs to the epiphytes.
Substrate selection
When studying step by step how to transplant a phalaenopsis orchid at home, it is worth noting that it is important to choose the right soil. This is a substrate that is based on bark. If you are a beginner gardener, it is best to purchase soil from a specialized store. But here, too, some nuances need to be taken into account. Three types of substrate are available for sale. It can have a fine, coarse or medium fraction. The last option is the most preferable for this plant.
You can also make it yourself. For this you will need pine bark (3 parts), peat or sphagnum (1 part) and expanded clay (1 part). 2 g of lime are added per liter of such soil. The bark is collected in dry weather. It is located around pine trees. This material contains less resin, which has a positive effect on the development of the orchid.
The bark must be removed with a knife. If the tree shows signs of rot, this material will not be suitable. This bark crumbles easily and shows signs of parasitic damage. Since the bark is collected naturally, it requires pre-processing. You need to grind it, breaking it into pieces to approximately 2 cm in size. After this, the bark is boiled for half an hour. It is laid out on a clean, dry cloth and dried thoroughly.
Sphagnum is needed to retain moisture in the substrate. Also thanks to this ingredient it becomes loose. Sphagnum moss provides the orchid with essential nutrients. It can be dry or live. The moss needs to be crushed, cutting it into pieces about 5 cm in size. It is immersed in boiling water for 5 minutes. The moss is then removed from the water and dried. Disinfection of the material before transplantation is a mandatory procedure. Otherwise, the plant will get sick.
Considering the step-by-step process of replanting an orchid at home, it should also be noted that peat can be used instead of sphagnum. It absorbs moisture well. For this plant, it is better to choose a material that is characterized by a coarse-fiber structure. Do not use crushed peat. It will not allow air to reach the roots.
What substrate is suitable for orchids?
Almost all decorative orchids need access to air and light to the root system. Industrial substrates are well suited for the successful cultivation of epiphytes and lithophytes:
- Durpeta is a fortified soil containing bark, agroperlite, peat moss and charcoal.
- Compo Sana is a substrate based on pine bark and peat.
- Orchid - soil containing steam-treated pine bark, sphagnum moss and vitamin supplements.
You can prepare the substrate yourself. To do this, pine bark is boiled and dried. The procedure is repeated for complete disinfection. Next, the bark is cut into 2x2 cm pieces and mixed with dried crushed peat moss.
Is it possible to plant a flower in the ground?
Ordinary soil, even the lightest and most granular, is not suitable for epiphytic and lithophytic varieties. These orchids receive nutrients through the roots, which are covered with a special sponge-like hygroscopic layer - velamen. By accumulating moisture inside the root, velamen must remain dry. In ordinary soil there is no air for the necessary aeration of the root, then it rots and the flower dies.
Terrestrial orchids are equipped with underground roots and tubers. These include:
- Anectochilus;
- Makodes;
- Gemaria;
- Goodyer;
- Ludisia.
Ready-made mixtures for terrestrial orchids are almost never produced, so they are prepared independently from:
- leaf, turf or coniferous soil;
- leavening agents in the form of rotted leaves, moss, coal or bark;
- organics in the form of dry mullein with clay.
Earth is sometimes found in industrial soils. It can be added to substrates for varieties that prefer high humidity. It should not be black soil, but leaf soil, and no more than 40% of the composition.
Interesting! Representatives of wild terrestrial orchids growing in the temperate climate of Russia, Belarus and Ukraine are Anakamptis, Limodorum, Ophrys, Lady's slipper and several other species.
Planting a plant in a new pot
The process of planting an orchid prepared in this way into a new container takes place in several steps.
- A drainage layer of 2–2.5 cm (expanded clay or crushed stone) is poured into the disinfected pot.
- A little new substrate is added on top of the drainage.
- An orchid is placed in a pot, its roots are distributed evenly throughout the entire volume of the container. The base of the plant should be 1–1.5 cm below the edge of the pot .
- The support for the peduncle should be installed at this stage, before the substrate is poured, so as not to accidentally injure the roots later. It should be located in close proximity to the base of the flower.
The support is installed before the new substrate is poured
- The substrate should be added little by little, gently shaking the pot so that the bark particles fill the space between the roots.
The substrate is poured tightly, but not compacted
It is important that the orchid is fixed with the substrate on all sides and does not fall to one side. It is advisable to leave some roots on the surface to improve the process of photosynthesis.