How to propagate sea buckthorn
Self-propagation of sea buckthorn is an affordable and quick option to get your own sea buckthorn from your favorite varieties and without extra costs. Sea buckthorn planting material has a high level of rooting and survival rate. Even a novice gardener can cope with its transplantation.
Self-cultivation of plants helps solve the following problems:
- grow your favorite variety from cuttings taken from friends;
- rejuvenate plants growing in the garden;
- grow strong and high-yielding sea buckthorn bushes instead of weak and poorly fruiting ones;
- grow your own sea buckthorn garden;
- improve the characteristics of existing bushes, increase resistance to frost, drought, and pests.
There are five ways to propagate sea buckthorn. These include:
- By layering . The side stems are bent and dug in.
- Young - daughter shoots that grew on adventitious root buds. When the plant takes root, it is separated.
- By cuttings . The stems are cut into several pieces and rooted using special technology.
- Dividing the bush . An adult and healthy sea buckthorn is transplanted, and it is cut into 2-3 parts.
- Seeds . They are grown in containers and planted in open ground.
The right time for planting sea buckthorn is spring, when the buds have not yet opened. The plant has a better chance of taking root and developing normally.
Remember that it is necessary to breed both female and male bushes in a ratio of 4 to 1.
The last two methods do not allow preserving all the qualities of adult sea buckthorn. Moreover, during the first years of propagation by seeds, it is generally unknown which plant has grown: male or female. Therefore, to develop your favorite varieties, use the first three options.
Useful tips for planting and care
There are rules and useful tips for working with sea buckthorn. Be aware that spring and autumn work with sea buckthorn has significant differences.
For spring planting, the following rules are used:
- When planting only in the spring, monitor the temperature.
- Sea buckthorn should be planted before the heat appears and before frost begins.
- Use manure, peat, and straw as fertilizer.
- The use of growth activators is not prohibited, as they will accelerate the growth of the plant and shoots.
- The plant needs the most careful care the first time after planting - watering, fertilizing, and protection from the sun.
In autumn, as in spring, there are rules that gardeners adhere to:
- Pay special attention to the rhizomes of the seedlings, as weak roots will not be able to take root.
- If you missed the sowing time and the cold weather has set in, dig in the seedlings before spring.
- To help a young tree survive the winter, cover it with available materials (paper, blankets, snow, film).
- Manure is not suitable for fertilizing the plant. In this case, it will damage the roots.
- Tie the plant to a stake - this will help protect it from the wind and provide a good support.
How to care for sea buckthorn in the autumn - read here.
Before planting a seedling in the soil, the planting site needs proper care. And there are some tips for this too:
- If planting in the fall, remove all foliage from the garden bed.
- Dipping the roots of the seedling in a clay mash before planting is an excellent fertilizing method.
- To moisturize the roots after they dry, dip them in a bucket of water and leave them there for 2-3 hours.
We recommend that you additionally read the article on how to plant and grow sea buckthorn.
There are several pests that can be found on sea buckthorn. These include parasites such as: copperhead, aphids, bedbugs, leaf rollers, moths and flies. Measures are used against each of the pests to rid the plant of them:
- If there is a large population of aphids, the plant is sprayed with certain preparations. Actellik and fufanon are perfect.
- The same methods work against other pests, only varying the time of action. So, drugs work against honey worms in the spring and summer, and against bedbugs in the spring.
- You can spray the plant immediately after flowering, in the spring. This will act as a preventative.
Pruning is the removal of some parts of the shoot. Through this process, important life changes and processes occur that benefit the plant. It promotes longevity, abundant fruiting, maintaining the health and beauty of the plant.
In spring, pruning is required to clear the plant of old and broken branches after winter. This cleaning is called sanitary, and is carried out quite early - before the start of sap flow in the plant. Around the same time, formative pruning is also done, but only for young trees.
There is also anti-aging pruning, which is used for plants aged 5-6 years. In this case, 1-3 large branches are cut out on the plant. In return, the plant grows new and young shoots.
Remember that more than 3 branches cannot be cut off during anti-aging pruning. This will negatively affect the life of sea buckthorn.
In the fall, the work is similar. Before the onset of frost, broken and dry branches are cut down, and along with them diseased branches, which only cause harm to the plant. Burn the branches that have been affected by the fungus. Work carefully and leave the cut area smooth and level.
In this video, the expert talks about sea buckthorn, its features and principles of caring for it:
How to distinguish a male sea buckthorn tree from a female one
Remember that sea buckthorn is a dioecious plant, so it has male and female plants. The former do not bear fruit, but serve for pollination. Therefore, place the male part of the sea buckthorn next to the female part, preferably in the middle, since they are pollinated by the wind. For every 4-5 female plants there should be 1 male plant. Without them, you won’t get a harvest.
It is difficult to distinguish males from females, but there are a number of signs:
- On the branches of female sea buckthorn there are double buds, while on male ones they are large and covered with scales.
- Male plants are larger.
- Female sea buckthorn has green leaves, while male sea buckthorn has a bluish tint and a strong bloom.
Seeds
Propagation by seeds is the easiest way. With this type of propagation, the properties of the variety are not transferred to the seedlings; moreover, more than half of the seedlings are male.
Propagation by seeds in stages:
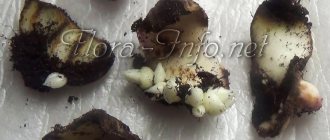
- Collecting seeds from high-quality and healthy sea buckthorn bushes. The seeds are obtained using the following method: the fruits are crushed, the juice and pulp are separated and washed several times with water through calico, after which they are left to dry in the shade. After drying, the seeds are separated from the pulp and skin.
- After collection, it is necessary to ensure safe storage . Seeds placed in a paper bag should be kept in a dry and warm room.
- Sowing . Under suitable conditions, sea buckthorn seeds can retain their properties for 3 years. You can sow seeds in the spring, as well as in the fall. From many tree species, sea buckthorn seeds are distinguished by the fact that they do not have a dormant period; they germinate after collection and during dry storage. Sea buckthorn seeds are sown before frost, in early November. It is not recommended to sow earlier, as the seeds germinate very quickly, which can lead to freezing of the seedlings. When sowing in spring, the seeds usually undergo stratification.
Reproduction by root shoots
Reproduction by root suckers is considered the simplest and safest. Sea buckthorn has such a feature as the generation of daughter shoots or basal shoots after 4-5 years of cultivation.
It is possible to independently achieve the appearance of daughter bushes. To do this, make cuts on the main, skeletal root and leave them. After some time, shoots will appear.
In the spring, separate the young seedling and cover it with soil. In the summer it will develop a root system and get stronger. Constantly loosen the soil, sprinkle the roots and water abundantly, especially in the heat. The soil around should not dry out. In the fall, when it reaches a height of about 1 m, transplant it to a permanent place. Do this together with the “native” lump of earth so that the plant quickly adapts to the new place of growth.
This method of reproduction has the following number of advantages:
- labor-intensive and fast;
- no special knowledge or experience required;
- The maternal qualities of sea buckthorn are preserved.
But there are a number of disadvantages:
- It is not used for propagating bushes obtained by grafting, as it does not retain the quality of the mother sea buckthorn.
- Such a young plant lives much shorter.
Overgrowth
For those gardeners who want to quickly propagate sea buckthorn bushes, the method of propagation by shoots should be taken into account.
The planting material is shoots, obtained by injuring the roots of sea buckthorn with a shovel. Damage can also happen unintentionally because sea buckthorn roots span long distances.
When the offspring appears, it is necessary to provide it with the necessary care in the form of hilling and keeping it moist.
Articles that may be of interest to you:
- How to store and process sea buckthorn at home.
- Useful properties and contraindications of sea buckthorn berries and leaves.
Then spread the mound (in the spring of next year), this must be done carefully, with your hands, then with a horizontal movement of the knife, separate the shoot from the root, by which time it will have grown over with its own roots.
After which it needs to be replanted (the place is prepared in the fall). In the future, it is necessary to regularly feed the plant and systematically water it.
If you need to quickly propagate a sea buckthorn bush, take into account the method of propagation by shoots
It is best to take shoots that grow not under the mother tree, but at a distance of more than 1.5 meters. Then it had already acquired, albeit small, its own root system. Along the way, the area will be cleared of many shoots growing at a distance from mature trees, clogging the flower garden, vegetable garden and even the greenhouse.
Some young and mature varietal trees have little growth. Its growth is also hampered by the specific conditions of the site. If there is a shortage of planting material, you have to nurse each shoot, hilling it and regularly watering it. This increases the chances of obtaining sea buckthorn seedlings with well-developed root lobes.
Propagation of sea buckthorn by cuttings
Propagating sea buckthorn by cuttings is not difficult, even for novice gardeners. The cuttings take root well, just like black currants (we wrote about this in the article - Propagation of currants by cuttings). They are cut from 5-year-old plants. The branches should be healthy, strong, 5-8 mm thick.
Cuttings are prepared in late autumn, early winter, but not in frosty weather. Or you can do this in early spring, the main thing is to do it before the sap flows. The cuttings can be stored dormant under the snow or in a cold place, such as the basement of a house.
Harvest cuttings from the middle of the shoot, 17-20 cm long. Work only with disinfected and sharp tools. Soak the branches in growth stimulator Kornevin or Heteroauxin for 24 hours.
Before planting sea buckthorn cuttings in the spring, prepare the soil. Dig up the area and remove all weeds. The place should not be in the shade or in the sun all day. Mix the soil with peat and sand in a ratio of 1:1:1. Sprinkle everything on top again with a couple of centimeters of sand. Before planting, water the hole thoroughly.
Lignified cuttings
Propagation by lignified cuttings is also not difficult. Cut cuttings from 3-4 year old sea buckthorn. Choose strong annual shoots.
Plant the prepared cuttings in a temporary area at a distance of 15 cm from each other. Deepen them so that only 2 buds remain on top. The rest will take root. Plant cuttings strictly vertically. To prevent the soil from drying out, mulch it with non-woven material, straw or peat.
The advantages of growing using this method include:
- an uncomplicated and simple method that does not require gardening experience;
- all the properties of the mother sea buckthorn are preserved.
The main disadvantage is the poor survival rate of seedlings at low temperatures and air humidity.
Green cuttings
Sea buckthorn can be propagated from green cuttings. This method is considered more successful and has a 100% survival rate. Start preparing planting material in mid-summer, when plant growth reaches a length of 20-25 cm. At the same time, the lower part of the sea buckthorn is already lignified. For planting material, cut new shoots from the top of branches 10-15 cm long with several leaves.
Before planting, place the cuttings in a growth stimulator solution for 12-24 hours.
Root the seedlings in the greenhouse. Loosen the soil thoroughly and water it. Drive pegs around the perimeter of the selected location and stretch the film. Spray the seedlings several times a day. During the sun, shade the greenhouse and ventilate it. As a rule, completely young shoots take root within a month. Get them accustomed to the open air gradually.
In late autumn, prepare them for wintering by covering them with leaves, straw or non-woven material and mineral wool.
Next spring, transplant the seedlings to a permanent place of growth.
The advantage of this method is that the cuttings take root completely. But the process is labor-intensive and long. This requires experience and knowledge of gardening.
Spread by shoots
For those who want to spread this beautiful plant as quickly as possible, we recommend taking a closer look at this method. The shoots are used as planting material. It is necessary to injure the root system of sea buckthorn with all known tools - a shovel. But we note that you may not have injured the roots on purpose, since the root system of sea buckthorn is widely spread in the soil. Then the hill needs to be erected next spring. These actions must be performed with extreme care. Next, you need to separate the roots and shoots using a knife. The planting site must be prepared in advance in the fall, and then our material must be planted. Next, it will be necessary to feed the plant with additives and, of course, water it regularly. Propagation using lignified cuttings The preparation of such cuttings must be done in advance - usually the last autumn month is chosen. The thickness of the cuttings should not be less than five millimeters, then they must be placed in a snowball. When spring finally comes, you need to take cuttings. The length should be about twenty centimeters. Then, after this procedure, the cuttings must be immersed in water for a long period of time - about two weeks. During this time, the first buds appear and even bloom on the cuttings, and small rudiments of the root system can be seen. It is necessary to prepare the place where you will plant sea buckthorn in advance. During the period of digging up the soil in the fall, you need to add about eight to nine kilograms of humus to one meter into the ground. In the spring, you need to dig again, and then very carefully trim the area ready for planting. When the sun begins not only to shine, but also to warm the earth, you need to carefully monitor the temperature. When the ground temperature is about five degrees above zero, you can start planting cuttings. But before planting, you will need to soak the cuttings in water for a while. Do not forget to leave a certain number of buds on the surface and regularly and timely water the planted cuttings. It is also a good idea to create mulch with fertilizer. After planting sea buckthorn cuttings, you are the parent, the cuttings are your children, they need to be given special care and constantly monitor their current condition, check the soil and moisture level. Long cuttings need to be watered once every four days, while short cuttings need to be watered every day. By the end of the season, usually, the cuttings grow to normal size. This means that next year in the spring it will be possible to safely begin replanting sea buckthorn to a permanent site. How to understand that seedlings are ready for transplanting? The root system has formed and is about 18 centimeters long, the part of the seedling that is above the surface has grown to 45 centimeters, the root collar is about 10 mm. What are the advantages of this method? You are not required to have any skills that require honing and serious preparation. Even a novice gardener can propagate using this method. What are the disadvantages? If the level of air humidity is low, then the likelihood that the cuttings will be able to take root well is small.
Sea buckthorn propagation by layering
Another option for propagating sea buckthorn is layering. This method is good for bush-shaped plants.
In March-April spring, tilt several annual branches to the ground. To do this, dig a trench 7-10 cm deep in advance. Pin the branches and cover them with wet manure. After the shoots appear, fill them again. By autumn they grow, but they can only be separated from the mother plant next spring. Choose the strongest shoots. Grow the rest in the nursery. They will also make good sea buckthorn.
Transplant rooted shoots onto prepared soil to a permanent place of growth. Remember to propagate both male and female plants.
The advantage of this propagation method is that the shoots take root well, and the sex and qualities of the variety are preserved.
But the problem is that sea buckthorn produces few annual shoots, which are located close to the ground.
Green cuttings
This type of sea buckthorn propagation is carried out from June to July . First of all, cut the cuttings (10 cm), for this you need a sharp knife. Then they make a lower cut and an upper one.
For good rooting, the cuttings must be treated with a growth substance ; you can use heteroauxin in the following proportions: 1 tablet per 1 liter of water.
After 16 hours, the cuttings need to be rinsed and planted in the soil, then covered with film or a jar. It is best if the soil is light; the most suitable type of soil is peat . The cuttings must be buried 4 cm.
To protect the cuttings from a disease called blackleg , it is necessary to water them with a solution containing potassium permanganate.
The film or jar is removed from the cuttings after they have taken root . The cuttings are transferred to a permanent place a year after they have taken root.
Advantages: 100% survival rate.
Disadvantages: a rather labor-intensive process, more suitable for experienced gardeners.
Propagation of sea buckthorn by green cuttings has a significant advantage - 100% survival rate, but the process is labor-intensive and suitable for experienced gardeners
How to propagate by dividing a bush
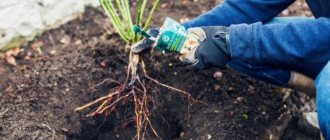
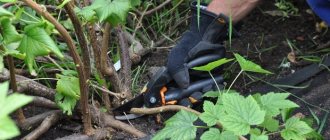
This method is used when replanting an existing plant. It is possible to get several from one. The process is simple and fast. No special preparation or medications are required. After digging up the plant, clean the roots from excess soil and divide them into several parts with pruning shears. Make sure that each new plant retains part of the main root system. Try not to damage the roots.
After dividing, transplant the sea buckthorn into previously prepared soil. Compact the soil and water it abundantly. To prevent the soil under the bush from drying out, mulch it with non-woven material, manure or straw. Early spring or late autumn is suitable for the procedure.
When dividing the roots, it is important to shorten the shoots of the above-ground part so that the sea buckthorn devotes strength to the development of roots. Subsequently, it will grow strong and bear fruit abundantly.
Collection of sea buckthorn
The berries on the thorny branches begin to turn yellow quite early, and a logical question arises - when to harvest sea buckthorn. It depends on the variety and the region of your residence. As a rule, from August to September the berries are already juicy, but still quite hard and suitable only for jam or freezing. And from the end of September to October they become more mature, with soft skin and are suitable for making butter, jam or marmalade.
Hand picking berries
Disputes about how to properly collect sea buckthorn have not subsided for decades. On the one hand, hand picking is more humane to the plant, because it does not harm the branches and buds. But the man himself is forced to suffer a lot while collecting sea buckthorn. In addition to the thorns, which can pierce even thick gloves, the juice of this berry corrodes the skin. Therefore, you need to go out for “prey” in long sleeves, an apron and rubberized gloves. This will protect you, but will reduce maneuverability and will not allow you to quickly collect sea buckthorn from the tree.
Mechanical berry picking
Fortunately, there are more humane ways to collect this berry, carried out using numerous devices. For example, you can wait until the first frost, then spread a cloth or oilcloth under the tree, knock on the trunk, and the berries will fall off on their own. Unfortunately, most of them will be overripe or damaged, so you will spend a lot of time sorting through the harvest.
The most convenient way to collect sea buckthorn is with special tools:
- comb - a wide metal comb used to “comb” berries from the branches into a container or onto a cloth spread below;
- cobra - a wooden handle with a wire loop, which is used to tear off the stems of berries;
- tube - a tube with a diameter slightly larger than the berry, one end attached to a bag or container. The picker runs the free edge of the tube along the branch, tearing off the stalks, and the berries roll into the container.
As you can see, sea buckthorn does not require much trouble. For minimal care, she will reward you with berries with a unique set of vitamins, decorate your area with bright colors and attract beneficial birds.
How to plant sea buckthorn seeds
Propagation by seeds is practically not used by amateur gardeners. The main disadvantage is that male and female sea buckthorn plants are produced in equal proportions. It is impossible to predict exactly what will grow. In addition, the resulting bushes do not retain the properties of the mother plants. But you can grow a rootstock.
Plant seeds in prepared beds in late fall, immediately after the first frost. Mix the soil at the future germination site with sand and manure and other fertilizers. Dig a trench 2-3 cm deep and plant the seeds at a distance of 1.5-2 cm from each other. Sprinkle the seeds with loose humus 1 cm thick.
If planted in spring, the seeds must be stratified by cold. First germinate them at room temperature, then place them in the cold at a temperature of -1-2 degrees for 14 days. Seedlings are grown until 2 years of age, then transplanted to a permanent location.
Lignified cuttings
Preparation of lignified cuttings is carried out in November , choosing suitable cuttings at least 5 mm thick; they must be hidden in the snow. When spring comes, the cuttings are cut; the main length of the cutting after cutting is 20 cm.
Then they need to be soaked in water . The cuttings can be left in water for two weeks, during which time the buds have time to bloom and small rudiments of roots appear.
The site for planting is prepared in advance. During autumn digging, up to 9 kg of humus per 1 m is added to the soil. In the spring, repeated digging is carried out and the planting area is carefully leveled.
The bed should be at least 1 meter wide , it should not be too high, some even trample paths on the sides so that the bed protrudes slightly above the territory.
When the soil temperature reaches 5 degrees, cuttings are planted . Leaving a few buds on the surface, water the cuttings abundantly, after which the soil is mulched with fertilizer.
Before planting, lignified cuttings are soaked in water and planted in the soil, leaving a few buds above the surface
After the cuttings are planted, it is necessary to monitor the condition of the soil and its moisture almost daily; watering long cuttings is carried out once every 4 days, short cuttings - every day .
Some seedlings reach standard sizes by the end of the season, and already next year in the spring they can be transplanted to a permanent place.
Advantages of this method:
- the method does not require special skills and is suitable for amateur gardeners;
- the result in the form of a clone of the mother plant can also be considered an advantage.
Disadvantages: cuttings do not take root well in low air humidity.
Rules for caring for seedlings
In order for the plant to take root better and subsequently produce a rich harvest, it requires special care. Recommendations for caring for sea buckthorn seedlings include:
- lack of fertilizers during the first 2-3 years, since the plants have enough of those applied during planting;
- regular watering and preventing the top layers of soil from drying out;
- no moisture stagnation;
- in spring and autumn, regularly treat sea buckthorn from pests and diseases, preferably with bio-preparations and folk remedies;
- regular sanitary pruning of old, weak branches, as well as those that grow to the side. This helps shape the crown. It is carried out after wintering.
Another feature is its superficial, developed root system. Therefore, allocate a special space for sea buckthorn.
Do not dig deep or loosen the soil.
Ways and methods of propagating sea buckthorn at home
Every gardener who grows shrubs is interested in propagating sea buckthorn. Seedlings of different varieties are available for sale. But sometimes it is necessary to repeat a plant of a rare or folk species. In this case, you will have to do the reproduction yourself.
Several methods of reproduction are known. But not all of them retain the parental qualities of the plant. In this case, the gardener will receive sea buckthorn with the most unexpected characteristics.
Timing for procurement of planting material
The timing of preparation of planting material depends on the chosen method of propagation. In the fall, seeds and fully lignified cuttings are prepared for spring planting. In the summer, green twigs are prepared for June cuttings.
Methods and technology for propagating sea buckthorn
To grow sea buckthorn that completely replicates the parental characteristics, you should study all possible methods of propagation.
Bush divisions
This method is used when replacing an old plant with a new one. It is traumatic, and often new plants do not take root. In addition, the delenka completely inherits the diseases of the maternal sea buckthorn.
How to proceed:
- Carefully dig up the mother plant. Free the root system from excess soil.
- Chop the root with an axe. Trim damaged and diseased roots.
- Reduce the above-ground part of the plant accordingly.
- Plant the delenka in a pre-prepared planting hole and water well.
This propagation method is recommended for use in the fall.
We prepare the seed material
Seeds are taken only from fully ripened berries. The fruits should be mashed, washed in plenty of cold water, and freed from pulp and films. Then place on a napkin and dry. The shelf life of seed material is up to 3 years.
How to plant seeds
Seeds require stratification for germination. The dried seeds are placed in a cloth bag and buried in the snow. The burial site is marked so that the seeds can be quickly dug up in the spring. The material is kept in this state until the snow melts. As soon as the soil warms up to 5-7 degrees, the hatched seeds are placed in a pre-prepared school.
After germination, the seedlings are thinned out twice: the first time in the phase of 2 true leaves, the second time in the 8 phase. Sea buckthorn is ready for planting in a permanent place 2 years after sowing.
Germinating sea buckthorn from seeds at home
It can be done at home. To do this, the seeds are soaked for 2-3 hours, and then dried on a napkin and wrapped in cloth. The tissue with the seeds is placed in the fruit box of the refrigerator and kept there for a month.
The fabric is periodically checked and, if necessary, moistened. This germination method should be carried out in the first ten days of March in order to sow the seeds in the school in early April.
But you can carry out stratification in January, and in February sow the hatched seeds in a greenhouse. It is recommended to place the greenhouse in a warm place, and after germination - on the windowsill. For the normal development of seedlings, it is recommended to illuminate them with an agricultural lamp.
Timing and rules for transplanting sea buckthorn seedlings into open ground
It is recommended to transplant young sea buckthorns from an indoor greenhouse into open ground only after the soil has warmed to 15 degrees. And it is necessary to take into account the absence of return frosts: they will destroy the sea buckthorn.
Usually the optimal time for placing seedlings in a schoolhouse in open ground is: late April - early May. It is recommended to first expose the greenhouse to the open air for 2 weeks to harden the sea buckthorn.
Health Hazards of Sea Buckthorn
Harvesting insects, which pose a serious danger to sea buckthorn bushes and trees, can interfere with harvesting. One of the main pests is the sea buckthorn moth. At the beginning of life, this insect is a caterpillar that devours the buds during their swelling, then makes a home for itself from a web, pulling together the upper leaves of the branches. In the top layer of soil, the caterpillars develop into butterflies, which later lay larvae in the lower part of the tree trunk. Entobacterin or Chlorophos are means of combating these crop eaters. During the swelling of the buds, you need to spray the tree to avoid attacks by uninvited guests.
Another problem is the sea buckthorn fly. During the summer, she can lay eggs under the skin of the berries, then larvae hatch from them and destroy all the pulp of the fruit. Having eaten their fill, after three weeks they go underground to spend the winter. Chlorophos can also help get rid of this problem.
The sea buckthorn aphid poses a danger to the leaves. Unlike previous pests, which are not found in all regions, it is widespread everywhere. At the end of summer, this insect lays eggs near the buds on the branches so that in the spring they hatch into wingless females. They draw juice from sea buckthorn leaves and engage in further reproduction. More and more colonies of aphids appear, already with winged females, which continue to deprive the trees of life by devouring their leaves. You can fight this infection with the help of Karbofos. Spraying is carried out with a 0.3% solution, which leads to the death of insects.
Among the diseases of sea buckthorn, the most common are endomycosis and fusarium wilt. The first is white spots on the berries, which subsequently lead to the destruction of the fruit. The method of combating the disease is spraying with Bordeaux mixture. The situation is worse with Fusarium wilt. The disease cannot yet be treated and means the death of the plant the next year, after the leaves begin to turn yellow and fall off.
Sea buckthorn is a storehouse of vitamins
Sea buckthorn is a very useful and valuable plant. If you have a fruit-bearing tree in your garden, then you are guaranteed a supply of vitamins and a reliable protector against diseases. The berries contain a large amount of vitamins, acetylsalicylic and stearic acids, fat-soluble alpha and beta carotenes and a large percentage of healthy oils.
At the same time, the berries taste very good, and even for children, combining business with pleasure will be an easy task.
Sea buckthorn berries are healthy and tasty
Therefore, for every person who has a personal plot, the question of how garden sea buckthorn reproduces is very relevant. Let's take a closer look at it.
Hurry up to plant sea buckthorn!
So, after purchasing a couple of seedlings in a safe place, you can go to your plot and dreamily imagine in which place you will be able to admire the gold clinging to the branches of the bush in the autumn. Sea buckthorn is planted in the spring (autumn plantings are fraught with the death of seedlings during the first frost). For planting, it is recommended to choose an open sunny area where the plant will receive a lot of heat and light. In this case, you should be careful when digging the soil, that is, you need to plant the tree so that its roots are not touched when digging. Typically, seedlings have two root-like shoots that go 50 cm deep into the ground. When a tree or bush gains strength and becomes an adult plant, the roots take on the appearance of a rope and penetrate the soil to a distance of about 2 m.
The planting hole is dug 40 * 40 cm in size, a hill is poured into its center, on which the seedling is installed. Nothing unusual, planting is carried out in the same way as with most trees. You can add organic fertilizers, double superphosphate and a handful of wood ash to the pit; the tree will be happy with such a gift. The soil is poured into the hole, compacted, and watered into the hole around the trunk. Sprinkle the top with a small layer of earth. The root collar is usually left at soil level.
