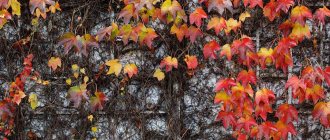
How to propagate thuja
Buying a ready-made thuja seedling is the easiest, fastest and most reliable way to propagate an evergreen shrub (tree). The cost of evergreens is not small, so gardeners prefer to grow seedlings for hedges and garden compositions on their own, propagating them:
- seeds;
- cuttings.
The first method takes a lot of time. The result is that a full-fledged thuja seedling can be obtained from seed propagation only after 5-6 years. And although such a plant practically does not get sick when transplanted into the garden and quickly adapts, gardeners prefer to propagate by cuttings.
Advantages of propagation by cuttings
Although the method of propagating thuja by cuttings produces less hardy plants than the seed method, this technique has a number of significant advantages:
- When breeding varietal thuja using the cutting method, there is a guarantee that the resulting young plants will retain all maternal characteristics, including appearance, and this is not always possible when propagating from seeds.
- Cuttings allow you to obtain full-fledged healthy seedlings suitable for planting in a permanent place after three years.
When propagating thuja by seeds, taking into account natural stratification, it will take as long as 5-6 years to obtain full-fledged ready-made seedlings.
The vegetative method also has a significant drawback. Even if all the rules for cuttings are followed, the survival rate of seedlings, as a rule, is no more than 75%, and if the technology for growing coniferous plants is violated, the amount of healthy planting material is sharply reduced.
It is preferable to carry out cuttings of conifers in the autumn. In this case, there will be a greater chance of rooting the maximum number of branches, because sap flow slows down in the fall, which means fewer cuttings will die from lack of moisture . True, it will take more time for rooting than when harvesting in the spring, when intensive plant growth occurs.
What are the advantages of cuttings
The main advantage of this technology is obtaining a fully formed plant in 3 years. If you plant cuttings in the fall, you can decorate the garden with conifers almost 2 times faster than when propagating by seeds. Preservation of varietal characteristics is another important advantage of the method.
Important! Thuja seedlings grown from seeds may lack a parental decorative form.
Having mastered the method of propagation by cuttings, the gardener receives two advantages:
- preserves the decorative shape of the parent plant;
- receives a thuja seedling in a short time.
What time of year is best to start cuttings?
Thuja propagates by cuttings in autumn (October). In spring, sap flow begins and young shoots grow. Taking this into account, rooting of thuja cuttings also occurs much faster. However, it is during this period that you need to be more careful. The process of active growth requires a lot of moisture, so if you skip even one watering, the cutting will dry out and disappear.
For your information! However, cuttings of thuja in the summer cannot be ruled out. In the second ten days of June, when another period of growth of this tree begins, cuttings can be prepared, but they will not take root immediately in the summer. You shouldn’t even plant cut shoots in August or autumn, as they will sleep until next year.
Read also: What snack goes well with beer?
How to choose branches for cuttings?
It is necessary to select healthy trees to propagate thuja from cuttings. Inspect the branches and trunk. External signs indicate fungal diseases of the plant:
- browned shoots;
- brown, dark, gray needles on shoots;
- crumbling needles;
- growths on the trunk.
In a healthy tree (bush) of a pyramidal shape, lateral branches are suitable for propagation; in other varieties of conifers, apical shoots are suitable for cuttings.
Important!
Conifers aged from 4 to 9 years are suitable for propagation by cuttings. Material taken from an old tree takes less root.
Description of the plant
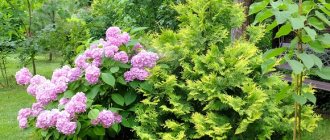
Thuja is an ornamental plant of the cypress family, which can be seen everywhere in the form of trees or shrubs. This genus includes 6 species, which, in turn, are divided into 120 varieties, all of which are frost-resistant and undemanding to the soil composition. The plant has a pleasant aroma, its lifespan varies from 150 to 200 years.
description of thuja
Under natural conditions, the height of these trees can reach 70 meters, and the diameter of the trunk is 6 meters. In gardening, thuja has a height of no more than 11 meters. Young specimens are characterized by a light green color; with age, their needles darken. Plants can be cone or ball shaped. The most popular representatives of cone-shaped ones are:
- Brabant;
- Emerald.
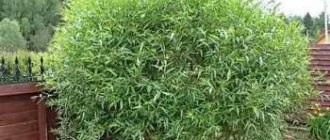
Of the spherical ones, Woodwardy and Danica stand out the most. Also common among gardeners is the western thuja and its creeping form. To breed these plants, it does not require much effort; you just need to follow a few rules and follow the sequence of this process.
When to cut thuja: optimal timing
Experienced gardeners prefer to take thuja cuttings in the fall. At this time, sap flow slows down. The survival rate of planting material is high. In the middle zone, shoots are harvested in October; November is more suitable for the southern regions.
Harvesting can be done in the spring. Time limits are limited. Cuttings cut from the end of March to the end of April are viable. If high-quality material is selected, then the time of cutting (autumn, spring) has little effect on the result. The cuttings must be lignified, the optimal age of the shoot is 2 years, in extreme cases, these can be 3-year-old branches.
Timing for thuja cuttings
Perhaps the most difficult thing in cutting conifers is to correctly determine the timing of this procedure. Experts have several opinions on this issue. Some advocate winter cuttings of conifers in February. Others are sure that it is best to cut thuja in April. Still others argue that the optimal time for taking cuttings is summer.
The main criterion that should be followed in this matter is whether the plant has stopped growing shoots. If the answer to this question is positive, then you can safely begin cuttings.
Summer cuttings of thuja are preferable because they allow the cuttings to gain strength and take root well for the next season.
How to properly cut thuja cuttings
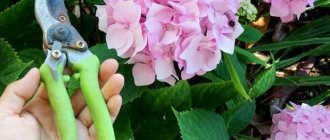
A shoot 30-50 cm long is cut from the tree. 10 or 15 cm branches growing on it are suitable for cuttings. You can get several of them from one 2-3 year old branch at once. They work with their hands. Secateurs are used to shorten the heel.
The heel is a piece of last year's wood. It is formed when a branch is torn off (from top to bottom) from the main shoot. The presence of wood in the lower part of the cutting is mandatory. It contains nutrients that the plant will use to form roots.
Reproduction of Thuja by cuttings in summer
Most experts call the most favorable period for cuttings the end of May - mid-June. But, the main criterion for a suitable period is the cessation of shoot growth.
To do this, use a plant of the required shape and color. There are columnar, spreading, ornate trees and bushes, but you should definitely check the plant for parasites and diseases in order to prevent possible problems with conifers from spreading to other inhabitants of the garden and eliminating all efforts due to the death of the cutting.
Preparation of Thuja cuttings
Thuja cuttings must have a heel.
The material from the mother plant is extracted in the same way, regardless of the season:
- We select the future cutting from the top of the bush. This is where the skeletal branches are located, among which they make a choice for optimal development and appearance. Ideal would be 2-3 year old and already lignified growths of 10-15 cm.
- We tear it off from top to bottom with a sharp movement, grabbing the “heel” - the wood with the bark. The size of the heel is not so important, but if the bark peels off from it, then this part is trimmed a little, since it will only rot and will not allow activation of root formation. A normal “heel” contains substances accumulated by the mother plant that are useful for the sprout.
- It is recommended to trim the branches along the edges of the cuttings, but more important is to remove the branches from the lower part so that they do not rot when they get into the ground or water.
- Before planting in a container, the cuttings are dipped in a root system growth stimulator (for example, Kornevin) for several hours.
The advantage of summer cuttings is the ability to provide optimal (22-25°C) temperature conditions due to warm weather. It is not recommended to save cuttings without planting them in a suitable substrate. But if it is not possible to plant immediately (for example, when collecting cuttings far from your home), their lower part is wrapped in a cloth previously moistened with water.
Preparing containers for Thuja cuttings
Next, select a container for the stalk. It can be standard containers for seedlings, a cut-off plastic bottle (the bottom is filled with soil and the top is covered), and a plastic cup (the second one is used as a shelter).
Those who perceive the cultivation of Thuja as a business idea install special greenhouses with a metal or wooden frame and two-layer film. But stationary nurseries should be placed with caution. The fact is that accumulated evaporation is detrimental to sprouts, as are direct sunlight. The best location is in partial shade.
But to accommodate 4-6 cuttings, a trimmed 5 liter water bottle is also suitable, since sprouts can be planted after 5 cm. It is convenient to water and ventilate in such a container by simply unscrewing the lid.
Soil preparation
It is important to select the required composition of the mixture for growing. Don’t forget that conifers need acidic, loose soil.
It can be either river sand or a composition of 3 components in equal quantities - sand, high-moor peat and forest soil. The latter is collected not from the dried top layer, but deeper. It contains mushrooms that help conifers grow. You can also add perlite.
Within a month, with proper care, you can observe the appearance of new branches, which indicates successful rooting. Picking is carried out only during group planting (if all the cuttings have taken root and their rhizomes can intertwine). Further care consists of permanent watering when the top layer dries for about 2 years.
An important point when planting cuttings in a container for rooting is correct planting depending on the direction of the world. The needles, like an ordinary leaf, have a front side (facing the sun) and a back side. If the sun exposes the back side of the needles of a cutting and not the front, then the cutting will simply burn. Remember that cuttings must be planted so that the front side always faces south.
You can learn more about propagating Thuja by cuttings from this video
How to prepare thuja cuttings for rooting
Before planting cuttings for rooting, the following manipulations are carried out on them:
- cut off the lower branches;
- shorten the remaining needles;
- the heel is densely powdered with root.
If you want to plant the next day, then instead of dusting the workpieces, they are kept for 12 hours in a stimulant solution (Kornevin, Epin).
How to properly prepare planting material
Cuttings from thuja begin to be harvested from the moment when leaves fall off on deciduous trees. In the temperate climate zone, this period begins in mid-October. The external temperature drops, the days become shorter, and the sun's rays rarely peek out from behind the clouds.
An adult, rooted tree is selected for harvesting shoots. The top branches up to 0.5 m long are cut off so that the crown of the new tree has the correct shape. Lignified branches that have been growing on the tree for at least 3 years are suitable for this.
What does a prepared cutting look like?
- On each harvested shoot, when torn from the tree, a lignified part with bark remains, which is called the heel;
- Places where the bark has peeled off are cut off;
- Green scales are removed, leaving 3 mm to the heel.
When the cuttings are prepared, the next stage of growing thuja seedlings begins.
Methods for rooting thuja cuttings
After cutting out the blanks, the rooting stage begins. There are several proven methods:
- Soaking heels in water. The leaves remain above the water. The container is placed where there is access to light. The downside is that the branches do not receive the required amount of microelements from the water and their survival rate is quite low.
- It is much safer to root thuja in a special substrate . A suitable container is filled with drainage at the bottom. Sand is added to the peat-leaf mixture and disinfected with a solution of potassium permanganate. The branches are kept for 12 hours. in a solution of a special drug Kornevin, intended to stimulate growth. The container is filled with the substrate and the workpieces are placed with their heels in the recesses one and a half centimeters at an angle. The surface of the container is covered with river sand and lightly compacted.
- The swaddling method is considered successful and reliable for rooting thuja . The branches are first soaked in a growth stimulator for twelve hours.
Swaddling stage:
- sphagnum soaked in boiled cold water is laid out on a spread diaper;
- the cuttings are laid out one after another on the moss;
- The diaper is folded over the heels and rolled into a roll. Only the heels remain in it, and the upper part of the branches looks out from above;
- such a “doll” is placed in a plastic bag and hung on the window, closer to the light.
In this case, moisture evaporation is excluded. Sphagnum moss retains moisture for a long time and exhibits bactericidal properties. Thanks to this, moisture enters the heels and they do not rot.
Direct rooting process
The soil mixture in the container is leveled. Holes 3-4 cm deep are made at intervals of 5 cm; they should not be vertical. They are made at an angle of 45 °. The prepared cutting is stuck into the soil and pressed tightly.
The earth is watered in 2 passes. After the first one it settles, after the second it is well moisturized. A mini-greenhouse made of film is created above the container to create a suitable microclimate. The container is placed on the north window. Lighting is necessary for cuttings, but direct sunlight can be harmful.
Cutting process
Experienced gardeners successfully propagate thujas, like other conifers, on their own. To increase the number of these representatives of the cypress family, there are plant propagation methods such as seed and cuttings. In the second case, the harvesting of shoots can be carried out in spring or autumn. To decorate, for example, a hedge, you will need a lot of thuja seedlings. Propagation by cuttings in autumn is the most popular way to increase the number of conifers.
Preparation of shoots
You should not prepare planting material for breeding evergreen thuja immediately with the onset of autumn. It is better to choose a cloudy October day for this event when active leaf fall has already begun. First of all, you should take a responsible approach to the selection of shoots. Cuttings should be made from branches that are 3-4 years old. It is better to choose the apical shoots of an adult tree, then future seedlings will form a beautiful, lush crown of the correct shape.
You should select absolutely healthy shoots, making sure that there are no peelings of bark from the wood. It is important to ensure that the cuttings have lignified bark, otherwise the rooting process is unlikely to be effective. The optimal length of the prepared shoot should be 25-40 cm. It is better not to cut the branch, but to break it off so that wood and lignified bark remain at its end - the so-called heel. A piece 3 cm long from the heel should be freed from scaly foliage.
Rooting methods
After completing the procedure for preparing cuttings for plant propagation, you can begin to choose a method for rooting them. You can root thuja both in water and in a substrate or diaper.
The easiest method for rooting woody branches is in water. Pour water into the prepared container. Place only the heel in it, avoiding the leaves touching the surface of the liquid. Up to three cuttings should be placed in each jar. All that remains is to place the containers in a cool place with natural light.
The disadvantage of this method is that plain water contains practically no nutrients necessary for the normal development of plants; the cuttings root poorly and then take root poorly.
The method of propagating thuja in a substrate does not have this drawback, although it is more labor-intensive. The procedure in this case will be as follows:
- You should prepare containers for filling with the substrate, having previously made holes in them to aerate the soil.
- At the bottom it is necessary to build a drainage layer using crushed expanded clay, gravel or other similar material.
- Prepare a mixture of peat, leaf soil and sand in equal proportions. Calcine the resulting substrate and pour it with a dark solution of potassium permanganate.
- Place the cuttings for 12 hours in a solution of root, a root growth stimulator.
- Fill the containers with the prepared substrate and make holes in them for the cuttings.
- Place the branches in the recesses at an angle of 45 degrees to a depth of 1.5 cm.
- Sprinkle river sand on top of the substrate and compact it.
You can root cuttings in another simple way. For this you will need: peat moss, a plastic bag, a baby diaper and a root growth stimulator. The sequence of actions will be as follows:
- The twigs prepared in the fall to obtain seedlings must be placed in a root solution for 12 hours.
- Spread the diaper so that the absorbent layer is on top.
- Soak peat moss (sphagnum) in cooled boiled water and place it in the center of the diaper.
- Place the cuttings on top of the moss, leaving free space between them.
- Bend the diaper so that its layers are between the heels.
- Roll the roll so that the heels are on one side and the tops of the shoots peek out from the other.
- Place the resulting roll in a plastic bag and hang it on the window or place it between the frames.
This method is good because the peat moss and the absorbent layer of the diaper do not allow the moisture to evaporate and the heels of the cuttings are constantly in a wet state. In addition, sphagnum has a bactericidal property, preventing rot from appearing on the branches. This method is a highly effective and simple way to root thuja, which does not require special care.
Care during the rooting period
In the first case, when only water is used to root autumn thuja cuttings, care consists only of timely replacement of the liquid. To do this, you need to remove the cuttings by wrapping their heels with a damp cloth. Wash the container and fill it with water again to the previous level. You can add a little potassium permanganate to the liquid. Return the branches to their place.
The second method, using a substrate, requires timely and regular watering, and this should be done with a spray bottle so as not to wash off the soil from the plants and expose the heels. It is important to prevent the soil from drying out and forming lumps, but excess moisture can lead to rotting of the resulting roots.
The simplest, in terms of care, is the third method of propagating thuja - using sphagnum. Peat moss and the retaining layer of the diaper retain moisture very well, so additional moisture is rarely required. It is enough to periodically visually check the bag with cuttings and, based on the presence or absence of condensation inside the bag, decide on additional wetting of the sphagnum and diaper.
It is not very difficult to propagate thuja by cuttings in the fall, as in the spring. But it is necessary to imagine that in order to obtain full-fledged seedlings, it will be necessary to carry out a long process of growing the resulting planting material.
Growing cuttings
After waiting for the harvested shoots to acquire a root system, they should be transplanted into a special bed (school) for growing. The young plants will spend 2-3 years there. Cuttings harvested in the fall can be planted in the school next year . To do this you should:
- Select an area in partial shade to form a bed.
- Carefully dig up the ground, adding peat to it at the rate of 1 bucket per 1 square meter.
- When rooting thuja in the substrate, water the container with the plants generously so that when removing the cuttings you do not damage their delicate root system.
- Plant young plants in prepared holes in the garden bed, located at a distance of a quarter meter from each other.
- Water the soil well.
At this stage, the likelihood of plant death with proper soil moisture and weeding is minimal. Within two years, young thujas should get stronger and grow, then they can be planted in a permanent place. Decorative coniferous plants are used in landscape design to decorate hedges, alleys, as well as living figures and sculptures in personal plots and parks.
Non-standard method: rooting cuttings in potatoes
Potato tubers contain many nutrients. They will be useful to the cutting at the initial stage of formation of the root system. Healthy potatoes with dense, fresh flesh are suitable for rooting. The rooting process is carried out as follows:
- tubers are washed;
- all eyes are carefully cut out;
- using a long, thick nail, make indentations about 4 cm long;
- Thuja cuttings are inserted into the resulting holes.
The potatoes are placed in a container and sprinkled with a layer of fertile substrate. Each cutting is covered with a transparent plastic bottle. The bottom is cut off and the tire is screwed on.
You may be interested in:
Propagation of roses by cuttings at home Why exactly the rose was chosen as the titled person among the many equally beautiful flowers, no one will probably say...Read more...
When and how to properly carry out thuja cuttings in the fall
Cutting planting material is carried out only from branches that have reached two years of age and are well developed. When cutting, you need to remember that the length of the shoot should be about a quarter of a meter. The best option is not to cut the cuttings with a pruner or knife, but to break them off from a branch of the mother plant, which will allow you to obtain planting material with a characteristic “heel” of bark.
All prepared ephedra cuttings must be placed for several hours in a container filled with water with the addition of a growth stimulant and bio-rooting agent. It is advisable to carry out the main process of germinating cuttings inside a special greenhouse, which must first be filled with clean river sand, peat chips and turf soil mixed in equal proportions.
Is it possible to grow cuttings in water?
Gardeners do not recommend germinating branches in jars of water. The method is easy to implement, but the seedlings are frail. This is because there are few nutrients in the water. Rules that must be followed when growing thuja cuttings in water:
- Place 1, maximum 3 branches in one container;
- pour water so that it only covers the “heels”;
- Add water, but do not change.
The needles must be dry; if moisture gets on them, they may rot and the cutting will die.
What you need to know about planting thuja cuttings in open ground in the fall
Thuja is a light-loving plant, and in shady areas such a conifer can quickly lose its natural splendor and all its decorative appeal. The site should be represented by fertile and well-permeable soils with a sufficient amount of moisture. Before you start planting a coniferous plant, you need to prepare a good planting hole, the size of which depends on the development parameters of the roots of the crop. A drainage layer in the form of broken bricks or expanded clay is poured into the bottom of the planting hole. A nutrient substrate based on sand, peat and garden soil is poured on top.
The ideal time for planting is September and early October, but always before sufficiently strong and stable frosts appear. The roots of the plant must have time to take root before the onset of winter. When planting, the root collar of a coniferous plant should be placed at the same level with the ground.
The ideal time for planting thuja cuttings is September and early October.
After planting, watering is carried out, and timely and proper fertilizing will allow the plant to take root well and easily withstand the stress caused by planting. Potassium and phosphorus fertilizers can be used as autumn feeding. After planting, you need to provide the decorative crop with daily irrigation and regular sprinkling with a hose.
If you follow the planting regime and care rules, you can count on getting a beautiful and strong coniferous plant.
Growing cuttings in substrate
The substrate must be fertile and loose so that there is enough nutrients and oxygen for the formation of roots. Low capacity required. It is necessary to drill holes at the bottom to drain excess water.
The first layer is drainage. Small pebbles, crushed stone, and expanded clay are suitable for this purpose. The second layer is a fertile mixture. It is prepared a week before planting from garden soil (1 part) and peat (1 part). The soil must be disinfected with a manganese solution.
Important!
Regularly ventilate the greenhouse with thuja cuttings. Water the soil using a spray bottle.
The ends of the cuttings (heels) are dipped into Kornevin’s solution for 12 hours. They are stuck into the ground to a depth of 3-4 cm at an angle of 45 °. The soil is watered. The entire surface is sprinkled with a thin layer of sand, which is wetted from a sprayer.
The container is covered with film and placed in a room where the temperature is maintained at 18-22 °C. Lighting is provided for long periods of time, but not too bright. In the substrate, propagation of thuja by cuttings is carried out in winter.
You may be interested in:
Is it necessary and how to cover a thuja for the winter? A striking representative of the cypress tree family is the beauty - the thuja. It is considered unpretentious in care,...Read more...
Cuttings
Propagation of thuja by cuttings begins with harvesting shoots and ends with planting them in a prepared soil mixture.
Blank
The technology includes several stages.
In spring or autumn, lignified branches (10-15 cm each) are cut from healthy trees 2-3 years old. The cuttings should have a bright green color.
Material from the spherical thuja is taken from the upper part (those cut from the lower tier are formed curved, not erect). In the pyramidal variety, branches are cut off from the side shoots.
When collecting shoots in the fall, harvesting activities are planned for October, immediately after the end of leaf fall on deciduous trees.
It is recommended to cut off the branches with part of last year's bark - the heel, in which nutrients accumulate.
From the collected green cuttings, twigs and needles are removed at a distance of 3-4 cm from below, because excess vegetation can become a source of rot.
Preparations for propagation are usually not stored, but immediately begin to prepare them for planting and rooting. The survival rate of branches left in a cool place for storage decreases.
Planting material is placed in a growth stimulator diluted in water, for example, Epin or Kornevin, for 12 hours.
Preparing the soil mixture
The soil must be prepared for planting
The soil mixture for rooting is prepared from washed and disinfected sand with peat.
Disinfection against pathogenic microflora and pest larvae is carried out:
- potassium permanganate or phytosporin diluted in water;
- boiling water;
- roasting in the oven.
When planting cuttings, choose containers with drainage holes to drain excess moisture.
Rooting
When grown in a single container, shoots are planted at a distance of 3 cm or more from each other, leaving an interval of 8-10 cm between rows and the same amount from the edges of the container.
Plastic cups and glass jars are suitable for individual fit.
For planting seedlings, make shallow holes, up to 1.5-2.0 cm, with an inclination of 45°. The soil is compacted, watered abundantly and covered with polyethylene or a jar (when planted in separate containers) to create a greenhouse effect.
When planted closely, the roots of the sprouts become intertwined during growth and are damaged during transplantation.
Growing cuttings in sphagnum
Sphagnum is peat moss. It is highly hygroscopic, so it is very convenient to root thuja cuttings in it. Moisture does not evaporate from it; it contains nutrients. In addition, it has bactericidal properties and stops the development of fungal infections.
Sphagnum moss is soaked in water for 3 hours, then it is laid out on a cloth. The canvas is taken wide enough, the moss is laid in a strip along the entire length. It should cover ½ of the width. The prepared cuttings are laid out and the heels are immersed in moss.
The second half of the fabric is placed on top of the sphagnum moss. The upper part of the cuttings with needles should be on top. The canvas is rolled up. The result is not a tight roll. It is placed in a transparent plastic bag. It is hung in a bright, moderately warm room and waiting for the roots to appear.
Rooting methods
There are several options for propagating thuja using cuttings. The most common of them include the use of ordinary water, as well as cultivation using a special substrate and film. Gardeners are often interested in what method will allow them to quickly propagate these evergreens. Each of them has its own specifics and requires a certain amount of time.
Vessel with water
The easiest way to propagate thuja is by rooting its shoots in water. To do this, you need to prepare planting material and an appropriate container. The twigs are immersed in a vessel filled with water in such a way that only the heel is in the moisture, while the leaves must be on the surface. Otherwise, the needles will begin to rot, which will lead to damage to the entire cutting. It is permissible to germinate no more than 3 branches in one container. The vessel must be placed in a cool place with good daylight.
The disadvantage of this method is the low survival rate of planting material. This is due to the lack of the required amount of microelements in the water required for seedlings. Weak cuttings do not take root well after planting in the ground and most often die.
Before placing the cutting in water, the long tail of its “heel” with the preserved bark is trimmed a little. Using pruning shears, remove needles from the lower sections of the shoot (approximately 3 to 5 cm), then lower them into water. Shoots should be installed so that the liquid covers their base by no more than 2 cm.
In the process of caring for seedlings, the most important thing is to change the water in a timely manner, in no case waiting for it to become cloudy. At this time, the roots removed from the water are wrapped in a damp cloth. The water will require preliminary disinfection, which can be done using two potassium permanganate crystals. Gradually adding fresh water to the jar instead of completely replacing it will be ideal for rooting. This method eliminates disruption of the root system, leading to slower growth or its cessation.
After the roots appear on the shoots, they are planted in previously prepared soil. To do this, holes are made in it, the depth of which usually varies from 30 to 40 cm. The number of such recesses and cuttings must correspond to each other. The distance between seedlings should be from 60 to 80 mm.
Substrate and film
Germinating cuttings using a substrate for this is considered the simplest, fastest and at the same time effective solution. Unlike water, this product contains a large amount of nutrients necessary for seedlings. To root thuja, you will need boxes in which the seedlings will be located; holes must be made in them to ventilate the soil and saturate it with oxygen (aeration).
The bottom should have a drainage hole and be covered with a layer of fine gravel. As a primer, you can use ready-made compounds purchased in the store. It is also possible to prepare a similar mixture with your own hands at home. To do this, you will need to mix the following components in equal parts:
- peat;
- leaf humus.
The resulting composition must be soaked in a saturated solution of potassium permanganate. It also needs to be disinfected; for this purpose, it is best to bake it in the oven.
Before being placed in the ground, the seedlings are left for 10-12 hours in water, to which Kornevin, which has biostimulating properties, is first added. Before rooting thuja cuttings in the fall, you need to fill spacious containers with substrate and make holes in it for seedlings. The branches are immersed approximately 1.5-2 cm and sprinkled with sand, also pre-calcined, on top.
Containers with cuttings are covered with plastic wrap on top and placed in a fairly bright place, but so that they are not exposed to direct sunlight. The air temperature in the room should vary from +18 to +22 °C. When condensation appears on the film, it is opened to ventilate the seedlings. Watering must be done very carefully; the soil should not be over-moistened or dry out. It is recommended to use a spray bottle for this procedure. When irrigating using another method, a more powerful jet can press the soil and thereby expose the “heel” of the seedling, which will negatively affect its development.
Use of sphagnum
You can grow thuja by cuttings using sphagnum (peat moss). This procedure is based on creating a kind of cocoon from damp moss and clean fabric, and this method is called reproduction in diapers. The initial stage of keeping seedlings in sphagnum is similar to the process of rooting in ordinary soil. In this case, when preparing planting material, you must follow certain rules. The cuttings are placed in water with a root stimulator diluted in it for about 12 hours.
The moss used will require additional processing . The sphagnum is left in boiled water for approximately 3 hours so that it is thoroughly saturated with moisture. A large piece of fabric is laid out on a spacious surface, its width is mentally divided into two parts, onto one of which moss soaked in moisture is laid out along the entire length. The second half of the fabric should remain free in order to cover the seedlings and moss.
Thuja branches are laid out from each other at a certain distance and placed in such a way that their “heels” are surrounded on all sides by moss. The planting material is then covered with a second piece of fabric so that its green tops remain open, after which the fabric and its contents are rolled up. The resulting bundle is placed in a plastic bag and hung in a room with good lighting. In this case, you need to avoid direct sunlight.
Growing thuja using cuttings in sphagnum is much easier than in ordinary soil; this process is easier and does not require much trouble. This is due to the ability of moss to maintain the required level of humidity for a long time. Moisture deficiency is easily determined by the condition of the internal walls of the plastic bag. In this case, you can observe the appearance of dryness and a complete absence of condensation. This situation can be corrected by moisturizing it using a spray bottle.
Caring for planted thuja cuttings before planting in a permanent place
To grow rooted cuttings, a ridge is prepared. They choose a suitable place for it. At noon, it should be in openwork partial shade and always behind the wind. Peat and sand are added to the soil. Approximate soil mixture ratio:
- garden soil - 2 parts;
- river sand – 1 part;
- peat – 1 part.
Cuttings planted in the fall have good roots by spring. In the spring, after the end of frost, they are planted in a school. In summer, the soil is regularly watered, weeds are removed, and loosened shallowly. With the onset of cold weather, the ridge is covered with spruce branches and several layers of covering material. Remove the shelter in the spring. Thujas are transplanted into the garden after 2-3 years.
You may be interested in:
Phalaenopsis orchid: propagation at home There is an opinion that propagation of phalaenopsis at home is considered a rather complex process. However,…Read more…
In landscape design, thuja is used to create hedges and design garden paths. The phytoncides released by the coniferous plant improve the microclimate in the garden. The original shape of the crown (ball, cube, prism), formed by the gardener, makes the landscape exquisite.
Rules for caring for cuttings
After you have rooted thuja cuttings in the fall, they need care before planting in open ground.
Cuttings in water
There is only one important factor when growing twigs in water. This is water care. There are two ways to look after cuttings. In one case, you can completely replace the water. To do this, you need to remove the cuttings and wrap them in a pre-moistened rag. Rinse the container well, pour fresh water into the bottom and immerse the cuttings back.
You can add a little weak solution of potassium permanganate. The second method is considered more reliable for growth. It consists of adding water as the cuttings absorb moisture. Thus, without disturbing the impregnation of the roots, the cuttings have a greater chance of germinating on the site.
Cuttings in film
The easiest way to care for cuttings that germinate in film. Sphagnum moss and fabric maintain the required moisture level very well. Pre-moistened moss can maintain moisture for a very long time. To understand what the cuttings need now, check the cellophane with which you covered the branches. If the film is dry, you need to moisten the fabric a little. This is best done using a spray bottle. And if excess condensation has collected on the film, lift it slightly and ventilate the sprouts.
Cuttings in substrate
Caring for cuttings in the substrate must be approached with all seriousness and responsibility. The most important task is to control the amount of moisture. Under no circumstances should you water cuttings from a watering can. Copious amounts of water can lower the soil slightly, exposing the heel. This will lead to rotting of the shoot or its roots. You need to use a spray bottle, as in the case of film.
You should not allow the soil to dry out too much, but you should not overdo it with watering. In case of early cooling or late rooting, you need to fill the container with cuttings with leaves. And if the temperature drops below 5 degrees, it is recommended to cover them with film, opening them slightly from time to time, giving a stream of fresh air.
What to do after rooting
After you have prepared cuttings using one of the methods, the question arises: what, how and when to do next. When rooting thuja branches in autumn, they can only be planted in a special front garden the next year. For planting, beds are formed, which are called shkolka. For the garden bed, choose a location with medium shade. After the soil on the site has been dug up, you can fertilize it a little with regular peat.
Before removing the cuttings from the container (in the case of a substrate), water them a little, this will make it easier to remove the branches. Young bushes need to be planted at a distance of 25 cm from each other. After planting, water the soil. Once the cuttings are in natural soil, the risk of losing the plant is minimal. Water the soil regularly and remove weeds. Under such conditions, in three, or maybe even two years, it will be possible to plant the thuja in its permanent place of residence.
Propagating thuja by cuttings in the fall is not particularly difficult.
All you need is a little attention and patience - and the evergreen shrub will decorate any part of your site.
Possible problems during rooting
Rooting thuja at home is quite simple, but even in such a simple process difficulties can arise. Before you start propagating conifers, it is important to familiarize yourself with possible problems and ways to eliminate them.
The appearance of white mold on thuja cuttings
The development of white mold on thuja cuttings is often encountered even by experienced gardeners when they are cutting conifers. There may be several reasons for its appearance on young shoots:
- The seedling was infected with a fungal disease during the growing season: most often, such an infection is oidium.
- Poor treatment with special fungicides or low quality preparations.
- Thuja cuttings were propagated without treatment with products that prevent the appearance of white mold.
- The place where cuttings are stored has a high level of air humidity or the temperature exceeds the permissible norm.
- The cause of mold can also be waterlogging of the soil.
If you find white mold on thuja cuttings, you should not rush to throw them away. First, the seedlings must be thoroughly washed with clean water, and then in a light pink solution of potassium permanganate. After washing off the mold, the cuttings should be placed for some time in a solution of iron sulfate in a ratio of 500 g per 10 liters of water. Iron sulfate can also be replaced with Fundazol or Quinozol: plants need to be placed in them for 2 - 3 hours at the concentration of the solution, according to the instructions for use. After processing the cuttings, they need to be dried well and left for further storage.
You can prevent the next occurrence of mold by using sand, but it is best to store plants in special plastic bags that have holes for air to enter. When placing a small number of cuttings in a plastic bag, they should first be tied into bundles and wrapped in a damp cloth or paper. Storing thuja cuttings in plastic allows you to check the safety of the plant at any time and provide additional ventilation if necessary.
What to do if thuja cuttings dry out
Drying out of thuja cuttings often occurs in the spring, when the air begins to actively warm up. It is necessary to immediately move the cuttings to the most shaded place and treat them with special stimulants: 2 times using the drug HB-101 or 3 - 4 times using Epin or Zircon in combination with Cytovit, with intervals of 7 - 14 days. Plants should also be sprayed with Fitosporin to prevent the development of fungal infections.
Another reason for the drying out of thuja cuttings may be the lack of space between the sprouts, when the seedlings do not receive the proper amount of nutrients. That is why it is extremely important to monitor the distance between plants and, if necessary, move the cuttings to a larger container.