Author: Natalya Category: Garden plants Published: April 25, 2016Republished: February 26, 2019Last edits: January 6, 2021
- Sowing dill
- Planting dill in the ground
- Dill diseases
- Early varieties of dill include:
- Useful properties of dill
Dill (lat. Anethum) is a monotypic genus of herbaceous annuals of the Apiaceae family, which is represented by the species aromatic dill, or dill. In the wild, the species is found in central and southwestern Asia, the Himalayas and northern Africa, and is cultivated throughout the world. Just like its relative parsley, dill has been known to mankind since the times of Ancient Egypt, but dill began to be used as a spice in Europe only in the 16th century. Today, this unpretentious cold-resistant plant is in demand in cooking and medicine.
Growing dill: how to properly grow dill at home on a windowsill in a greenhouse and open ground
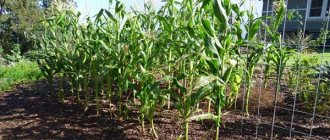
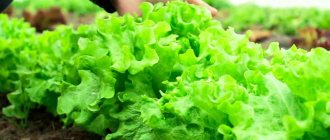
Along with parsley, dill is the most common green on the tables and in the gardens of our compatriots. Dill is wonderful both fresh and dried. It is equally good in salads, meat and vegetable dishes, and is indispensable for many recipes for pickles and marinades. Its original taste and ease of cultivation make this seasoning one of the most beloved garden crops. It is believed that grow dill . But what is the situation in reality?
How to properly grow dill at home on a windowsill in a greenhouse and open ground.
The best varieties for growing in the country
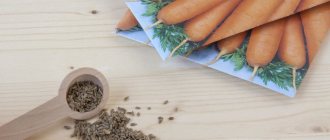
To grow seeds in a garden bed, you need to purchase varieties that are intended for open ground.
- The most popular early ripening species are “Gribovsky”, “Dalniy” and “Aurora”.
- Of the mid-season varieties, many gardeners give preference to “Lesnogorodsky”, “Obilnolistvenny” and “Bushy”.
- If you choose from late-ripening dill, it is better to choose varieties such as Buyan, Salyut, Alligator, Kibray or Dill.
Attention! Information about planting conditions should be found on the back of the package.
Selection and preparation of a place for planting dill in open ground
An unpretentious plant can grow even in shaded areas if it is impossible to select another place. But be prepared that in such conditions the plants will grow pale and weak, and their nutritional value will be much lower. For the abundance of sunshine, dill will thank you with strong shoots full of useful substances.
The most suitable for planting will be loose and fertile soils with a neutral reaction. Not every gardener can boast of such beds in their garden, so the area for the crop should be prepared in advance. In the fall, it needs to be dug deep with the simultaneous addition of organic matter (manure or compost), and on acidic soils, liming must also be carried out. In the spring, the treatment should be repeated, adding complex mineral fertilizers.
Dill seedlings are not afraid of frost, so it can be sown in early spring or before winter.
A variety of crops can be used as predecessors for dill. The only exception is celery, after which dill grows poorly. If you need to save space, it is quite possible to combine the spice in the same bed with cabbage, cucumbers, tomatoes or zucchini. It is possible to plant dill among other crops, making sure that it is not in close proximity to the plants and does not compete with them for moisture and nutrients.
Where should you sow to get a good harvest?
You need to choose a sunny place for planting dill seeds . A sufficient amount of light will ensure healthy development and juiciness of plants. Shaded bushes stretch out, have a pale color and lose some of their beneficial properties.
The soil should be neutral and loose. Dill growing in acidic soil acquires a reddish tint, and in alkaline soil it becomes yellow. In both cases, the plant develops slowly, delaying the ability to harvest herbs.
You cannot sow dill in areas where water often stagnates or where groundwater comes close to the surface.
When to sow dill in open ground
To plant dill in open ground, you can choose one of two options: winter or early spring sowing.
- When sowing before winter, seeds should be planted in the middle or end of October, depending on the weather. You need to have time to sow before the first frost. When planting in winter, seeds are planted to a depth of 4 cm.
- Spring sowing should be carried out when the soil has warmed to a minimum temperature of about +5° C, but optimal germination conditions will be at +16–18° C. Typically, such conditions are created in late April or early May. It is enough to simply sprinkle the seeds with a layer of sand or earth 0.5 cm thick.
Is it possible to sow dill before winter?
I indicated autumn as the planting date. Yes, you can plant dill before winter. This helps accelerate the appearance of green mass in the spring. Harvesting can be done 2 weeks earlier than with spring plantings. At the same time, the greens will be stronger and more lush.
The best time for winter sowing is with the establishment of stable autumn cold weather. In many regions, this period falls precisely at the end of October and beginning of November.
Although autumn sowings can be done later, until permanent snow cover appears. As a rule, at this time the top layer of the earth is already frozen. This is not at all scary for seeds, but it can significantly complicate the preparation of the soil in the garden for sowing. Therefore, try to make a seed bed or prepare furrows in a flower garden early (before the ground freezes). Also, stock up on the substrate in advance with which you will sprinkle the sown seeds.
Planting dill in open ground
To plant dill correctly, follow a few simple tips.
- For planting, purchase several varieties at once with different ripening periods. This little trick will allow you to get a fresh harvest longer.
- The high content of essential oils makes the process of seed germination quite long. To reduce it, you must first place the seed material in warm water for about three days, changing it periodically. Water can be replaced with ash solution. Then the soaking time will be reduced to two days.
- Before planting, the seeds can be placed in a solution of a growth stimulator for a day and then in potassium permanganate for half an hour (for disinfection). Then they should be dried thoroughly.
- If dill is sown in a separate bed, then transverse rows are placed at intervals of 10–15 cm. When sowing scattered, 1 m2 of bed should contain 1–1.5 grams of seeds. Winter sowing requires doubling this amount. This will give you a distance of about 6 cm between plants.
- To be able to weed the garden bed even before germination, you can add lettuce seeds to the dill seeds as beacons, which sprout much faster.
- Don't forget to water the garden bed regularly. Dill loves water, so for active vegetation it requires constant soil moisture in the range of 60% to 70%.
- The first seedlings appear 2–2.5 weeks after planting, if the seeds have not been pre-treated. Soaking can reduce this period by almost a week.
- To have young and fresh greens in the garden all summer, regularly (every one or two weeks) sow seeds in the vacant space.
Before planting dill, you need to add fertilizer to the soil: humus or complex mineral fertilizer.
Variety selection
When choosing a dill variety for planting, you need to carefully study its characteristics. The fact is that some varieties produce abundant greenery, while others form flower stalks and are intended for collecting seeds. The types of this crop are distinguished not only by purpose, bush height and flower shape, but also by ripening time.
Early ripening varieties
These include:
- Gribovsky (30-45 days pass from germination to the first harvesting of leaves). The culture is undemanding to weather conditions: even in cold summers the bushes produce a lot of high-quality greenery. You can plant seeds of this variety several times starting in April and ending in July. The height of the Gribovsky dill rosette reaches 25 cm. The leaf weight of one plant reaches 1 kg. The variety is resistant to many diseases and pests.
- Long-range (from germination to harvesting – 38-40 days). This is a productive variety: from 1 sq. m collect 2-2.5 kg of green mass. Dalniy dill is grown on an industrial scale for sale. The peculiarity of the variety is the presence of a waxy coating on the leaves. Far is resistant to pathogens, withstands heavy rains without dying.
- Redoubt (first harvest - 1.5 months after seed germination). During the season from 1st quarter. m, 1.3 kg of leaves are collected.
Early ripening varieties quickly form umbrella inflorescences: they form faster than the leaves ripen. That is why it is impossible to collect a large amount of greenery from them.
Mid-season varieties
Popular representatives of this group are:
- Amazon . It is recommended to sow the crop in late April-early May. The first harvest of greens is carried out approximately 1.5 months after the seeds germinate. During the season from 1st quarter. m you can collect 2.5 kg of leaves.
- Max . Seeds of this variety are planted in the soil after it warms up to 8 degrees or more. Leaves can be collected 1.5 months after seed germination. The total weight of deciduous mass is up to 4 kg per 1 sq. m.
- Umbrella . A hybrid variety that is distinguished by its rich green leaf color and heavily dissected blades. The crop reaches commercial maturity after 40-48 days from seed germination. From 1 sq. m during the season, about 2 kg of greenery is collected.
Mid-late varieties
These crops ripen slowly, the process takes about 45-57 days. Popular types include:
- Frost . The bush of this variety reaches a height of 1.7 m and has large convex umbrellas. From 1 sq. m during the season, about 2.7 kg of greenery is collected.
- Borey . Greens are cut 39-55 days after seed germination. The stem reaches 1.2-1.3 m in height. The advantage of the variety is resistance to disease. During the season from 1st quarter. m harvest up to 4.2 kg.
In total, about 70 varieties of dill are known. To provide yourself with juicy fresh herbs for the whole season, gardeners recommend planting several varieties of this crop with different ripening periods.
Caring for dill plantings in open ground
Dill is an unpretentious crop and does not require special agricultural techniques. It is quite enough for a bountiful harvest to choose and prepare the right place for the garden bed. During growth, plants require the following usual procedures:
- weekly watering, the frequency of which should be increased during the dry period;
- systematic loosening of the soil and removal of weeds;
- thinning out too dense seedlings;
- on poor soils, fertilizing plants with potassium fertilizers;
- Hilling up seedlings several times a season as needed.
If your plantings begin to turn yellow, this indicates errors in care. Most likely, the plants do not have enough moisture or nutrition. Maybe you forgot to thin out the seedlings or reduce the acidity of the soil. Sometimes the leaves of the plant acquire a reddish tint. This indicates a lack of nitrogen in the soil. Any of these mistakes can be easily corrected during the growing process if you pay enough attention and care to the dill. And then your greens will always be lush and juicy.
Dill uses the entire above-ground part of the plant - leaves, stems, inflorescences, seeds.
Care after landing
Despite its unpretentiousness, dill needs proper care. If you provide the plant with a comfortable environment, it will definitely delight you with a bountiful harvest.
Watering
Do not overdry the soil in the bed where dill grows; it should always be slightly moist. But do not turn the garden bed into a swamp, otherwise the plant will get sick and die. Drought is also harmful to the development of dill - the leaves will turn yellow, dry out and become unusable for food. It is best to water green spaces 2 times a week, 6-8 liters per square meter. m in dry weather.
Top dressing
For dill with a short ripening period, the soil does not need to be fertilized; the plant will have enough of what was added when preparing the bed. If dill grows slowly, it is fertilized with nitrophoska or urea (10-15 g/sq. m). The same fertilizers are applied during the first feeding of mid-ripening and late-ripening varieties, when they have 2-3 leaves.
After 20-25 days, feed with potassium salt and urea (urea) per 3-4 square meters. 15 g and 20 g of fertilizers, respectively. Be careful not to get fertilizer on the leaves, and water the beds thoroughly after fertilizing.
Weeding and loosening
So that the nutrients do not go to the weeds, but go to the healthy greens, the garden bed is weeded. In addition, the root system of weeds compacts the soil and retains excess moisture.
Harvesting dill
When harvesting, you should follow some rules.
- It is better to collect dill in the morning, after the dew has dried. During hot daylight hours, greenery tends to wilt somewhat.
- The optimal height for cutting dill for greens is 10 cm. Plants usually reach this size within a month and a half after sowing. Before harvesting, it is recommended to spray the greens with water and then carefully cut them with scissors.
- If you leave the roots with an above-ground part of about 2 cm in the ground, then after a while they will give new leaves.
- For subsequent use in preparations (pickles and marinades), some plants are left untouched until they reach dairy ripeness.
- If for quick use it is better to cut young greens, then plants that have already formed inflorescences and reached a height of 25–30 cm are well suited for drying and subsequent storage.
- Drying dill must be done in the shade, with good ventilation. Both seeds and the herbaceous part of the plant are suitable for storage. You can dry and then store whole plants by tying them into bunches and hanging “bouquets”.
- It is very convenient to store young greens in the freezer, laying them out in layers in plastic bags and simply breaking off the required amount as needed.
The earliest harvest is obtained from winter sowing, which is carried out with dry seeds at the very end of autumn.
How to prepare seeds
Due to the content of essential oils, dill seeds have low germination. To improve this indicator, planting material is poured into a container and filled with warm water (50 degrees) for two days. As it cools, the water is changed every 8 hours.
After two days, the seeds are removed from the water, laid out on gauze and covered with a damp cloth. The bookmark is placed on a plate and left at room temperature for 4 days. As soon as the seeds sprout, the planting material is slightly dried.
If dill seeds are not prepared properly, the first seedlings will appear in 2-3 weeks. Planting material that has been soaked germinates 4-6 days after planting. Moreover, such treatment disinfects planting material from diseases characteristic of the crop.
Dill pest control
Not a single garden crop is immune from pest attacks. And dill in this sense is no exception. Most often it is affected by aphids, which it is advisable to fight with folk remedies. Greens absorb various chemicals too well, and this does not add any benefits to them.
- The most harmless and affordable remedy is ordinary nettle, available to every gardener in unlimited quantities. Its fresh stems and leaves must be filled with water and left for several days. Water the dill plantings generously with the resulting solution. This method will not only drive away aphids, but will also serve as additional nutrition for the plants.
- A daily infusion of wood ash in hot water is remarkably helpful in controlling pests. Before treating plants, it must be filtered and laundry soap added to the solution. To make the soap dissolve faster, it is better to grate it.
- Insects do not like the smell of citrus fruits. If you prepare an infusion of orange or tangerine peels and spray the beds with it, then all insect pests will disappear very quickly.
- The disinfecting properties of onion peel infusion can also be used to combat aphids and other parasites. If you fill it with hot water, the magical remedy will be ready in a few days.
With peronosporosis, the leaves turn yellow and dry out.
Umbrella moth caterpillars hide in a spider's nest.
Table: diseases and pests of dill and ways to combat them
| Name | Description | How to fight |
| Umbrella moth | A very small butterfly whose caterpillars feed on dill flowers and seeds, making web nests from them. | Manual collection and destruction of the pest. |
| carrot fly | The carrot fly lays eggs at the very base of the stems of dill and other umbelliferous plants. Carrot fly larvae feed on their roots. Damaged plants wither and dry out. |
|
| Fusarium | Dill leaves suddenly turn brown starting from the lower leaves on the stem. Diseased plants die very quickly. |
|
| Downy mildew | The leaves gradually turn yellow and dry out starting from the tips of the leaves. |
When to harvest dill
The time for cutting dill depends on its timing and purpose. Early varieties are ready to produce the first greens from the garden in 33-35 days. After this they begin the flowering phase. Spicy umbrellas are left for seeds. They are indispensable for preserving cucumbers, zucchini and tomatoes. The seeds are collected for planting, as well as for use in cooking and medicinal purposes. The stems of the plant are pulled out by the roots; the annual crop will not sprout next year.
Advice. Ripe fruits fall off easily, so they are collected in advance and dried in the shade. To avoid losing the seeds, put paper bags on the umbrellas.
Mid-season varieties “Kibray”, “Richelieu”, “Abundant Leaved”, “Borey” are universal crops. The bush form of plants allows you to collect green leaves in large quantities and over a long period. Cutting begins a week later than early dill. By this time, the rosette has grown to 15-25 cm. The leaves are collected starting from the lower ones. It is better to cut off the lateral petioles without affecting the growth points from which new leaves will appear. It is recommended to choose cool weather for harvesting greens.
Advice. Leave a few plants for seed. During the season, do not pick off their leaves, then the fruits will be strong and healthy.
How to harvest dill correctly - uproot or cut off the leaves? Ordinary plants immediately give an umbrella, so they are pulled out. Late-ripening bush forms are distinguished by their ability to produce several harvests of leaves. They are carefully cut with sharp scissors. How to collect herbs for spices? It is pulled out of the ground, the roots are cut off, and the stems are tied into sheaves. In this form they dry for a week. Ripe seeds are threshed and stored in a closed container.
Growing dill on a windowsill: secrets of success
When growing dill at home, first of all you need to remember that this plant loves light. Place the crops on a bright windowsill, and in winter, provide the dill with additional illumination by installing fluorescent lamps at a height of 50 cm above the plants. On the windowsill, it is enough to turn on the lamps in the morning for five hours, but if the boxes with dill are in the back of the room, additional illumination should last at least fifteen hours.
Seedlings that are too dense will not have enough space and nutrition for further development.
Rules for caring for dill at home:
- dill must be watered regularly, especially paying attention to watering during seed germination and when young shoots appear;
- Once every two weeks it is recommended to feed the plantings with complex mineral fertilizer;
- It is best to grow dill at a temperature of +18 degrees, but even on a glazed balcony when the temperature drops to +8 degrees, the plants will feel quite comfortable;
- if the room temperature is above +20 degrees, you need to increase the illumination, otherwise the dill bushes will turn out elongated, lethargic and light;
- In the first week, when the shoots appear, it is advisable to lower the temperature in the room at night by opening the window, or take the crops out onto a glassed-in balcony so that the dill does not stretch out.
Depending on what time of year you plant your dill, growing it at home may require more or less hassle. It is easiest to grow dill on a window from March to August, since plantings even without additional lighting form lush greenery, provided there is fertile soil and a light windowsill. In the autumn-winter period, without additional lighting, the plants will stretch and fall, which means you will have to pay more attention to them, and growing costs will increase due to the electricity consumed.
How to grow dill at home: (read more)
When to plant dill: planting dates
The optimal time for planting depends on the purpose for which the aromatic greens are grown. So, in spring and autumn, dill is planted to produce greens, and in the summer - umbrellas.
The dill planting dates for each season are as follows:
- In spring, planting is carried out immediately after the temperature rises to +2-+5 C, and the soil in the selected location has completely thawed. Depending on the geographic location of the region, planting dates vary from mid-March to mid-May.
- In summer, you can plant greens at any time. To constantly have fresh greens, the plant is planted 3-4 times every 15-20 days.
- In autumn, the crop is sown in October-November. Before winter, the plant is sown in order to speed up the appearance of leaves in the spring: you can harvest the first harvest of winter dill 2 weeks earlier than spring.
How to grow dill on a windowsill in winter: step-by-step instructions
For the purpose of growing dill at home, the early ripening variety Gribovsky is most often chosen. This variety of dill does not require care, is resistant to temperature changes, is characterized by high yield and resistance to disease. Its greens have a strong aroma. In order for Gribovsky dill to produce a good harvest at home, it is enough to sow it in fertile soil and prevent the appearance of weeds.
The main trick to homemade dill is to have time to collect and eat it before the plants begin to wither.
The following varieties are also suitable for growing on a windowsill:
- early maturing Grenadier;
- mid-season Richelieu with bluish-green fragrant leaves;
- late-ripening Kibray with beautiful wide leaves.
Southern varieties are also cultivated at home, which have a more spicy taste, but are more finicky.
Note! Since there is no special variety of dill intended for growing on a windowsill, when choosing seed, the main attention should be paid to the ripening time.
It is important not to make a mistake here: although early varieties produce green mass in a very short time, they quickly stretch into peduncles and are less leafy than late-ripening varieties. And late bush varieties (Gurman, Salyut, Russian size) do not have time to ripen in the beds over the summer, but are perfect for growing at home. Such dill on the window forms dense, well-leafed bushes, from the axils of which new shoots are formed.
Table: comparative characteristics of the best varieties of dill
| Name | Ripening period | Period from germination to harvest (days) | Productivity (kilograms per square meter) | Originating company | ||
| on greens | for umbrellas | on greens | for umbrellas | |||
| Gribovsky | Early | 35–45 | 60–70 | 1,0–1,5 | 1,5–2,0 | VNIISSOK |
| Vologda lace | 40–45 | 65–75 | 2,0–3,5 | 4,0–5,2 | Aelita | |
| Magician | Average | 45–50 | 75–80 | 2,4–3,4 | 4,0–5,0 | KH "Volnoe" |
| Lesnogorodsky | 40–50 | 70–80 | 1,5–2,1 | 4,5–5,5 | VNIISSOK | |
| Amazon | Mid-late | 43–46 | 90–100 | 1,4–2,7 | 2,8–6,2 | Gavrish |
| Kibray | 40–55 | 70–85 | 1,3–3,0 | 2,7–6,4 | VNIISSOK | |
| Firework | Late | 50–65 | 95–110 | 2,8–4,5 | 4,6–6,0 | VNIISSOK |
| Alligator | 45–60 | 105–115 | 1,6–2,9 | 3,0–5,5 | Gavrish | |
In the garden, dill can grow in almost any soil, but successful cultivation of dill at home is only possible in a fertile soil mixture, which must be prepared in advance. To do this, you should prepare loose garden soil in the fall and mix it with purchased neutral soil for indoor plants before sowing. Select a container for sowing of a sufficient size so that the dill is not crowded, and do not forget about the drainage layer at the bottom of the container.
Dill seeds contain essential oils that slow down their germination, so seedlings will appear earlier from soaked and washed seeds.
Since dill seeds take a long time to germinate due to their high oil content, before sowing they need to be soaked for 20 hours in warm water through which oxygen continuously passes (for example, using a compressor from an aquarium). Another option is to simply place the seeds in warm water for two days and change it to fresh water every six hours.
You can sow seeds directly on the surface of moist soil, without grooves or holes, sprinkling peat mixed with humus on top. A sufficient seeding rate is 0.3 g per 1 square decimeter of soil. For the best result, you can make grooves a centimeter deep in the ground, fill them with water and place the prepared seeds on the bottom. From above, dill seeds are sprinkled with dry soil from the edges of the grooves, so that a dense crust does not form on the soil surface, preventing the emergence of seedlings. Cover the container with the crops with cellophane and put it in a dark place with a temperature of about +20 degrees for a week.
Note! The stems and leaves of dill do not grow back after cutting: to continuously cut fresh herbs, sow the seeds into the freed area of your micro-garden every three weeks.
Pests and diseases of dill
This culture is resistant to various diseases, but it can also have various problems.
Blackleg
It attacks the root collar of young individuals, which is why it turns black, becomes thinner and suffers from rotting. As a result, the dill dries out. Often, the disease occurs due to errors in care, and is aggravated by excessive watering or temperature changes, or lack of light. For treatment, a solution of Fundazol is used.
Powdery mildew
Localized on terrestrial parts of the crop. Looks like a whitish coating. Heat combined with high humidity provokes the formation of powdery mildew. Treatment occurs with colloidal sulfur.
Umbrella blind people
These are small bugs that suck the juices from plants. Productivity drops sharply, some individuals die, so the problem cannot be ignored. To get rid of the pest, use Fitoverm.
Downy mildew
Also noted on the ground part of dill. These are slowly browning spots; a specific coating appears on their underside. At the first manifestations of downy mildew, Bordeaux mixture (1%) or copper oxychloride (40 grams per 10 liters of water) should be used.
Fomoz
It manifests itself as brown spots on various parts of the plant and can attack the root. For prevention, the seeds are kept in hot water for 30 minutes before sowing, so they are transferred to cold water and dried thoroughly. Sick individuals are treated with Bordeaux mixture (1%). Systematic care is very important. The last spraying is carried out no later than a couple of weeks before harvesting. Before eating dill, it is recommended to rinse it well.
Rust
Appears in the first days of summer. It looks like yellow-brown cushions on the bottom of the petioles, foliage and stems. For prevention, seeds are placed in hot water, and then immediately transferred to cold water and allowed to dry. If the culture is affected by the fungus, it is treated with Bordeaux mixture (1%) every 10 days. Before eating dill, it is recommended to wash it.
Aphid
Like the blind, aphids feed on the juices of dill, which causes it to dry out. In addition, the pest carries various infections that cannot be cured. First, the aphids are washed off with water under high pressure, and then potassium-phosphorus fertilizers are applied. Then they are treated with the following solution: a daily infusion of 3 kilograms of wood ash + 10 liters of water + a tablespoon of liquid soap. All this is filtered before use. After a week, the solution is removed from the dill using water.
carrot fly
It attacks the ground part of dill, as a result of which it slows down in growth. For prevention, mix tobacco dust in half with sand and sprinkle the soil along the rows with this mixture. During the season, such manipulations are carried out a couple of times. If the carrot fly has already infected the plant, you can use Vantex or Arrivo. Treatment is carried out 2 weeks before harvesting.
Features of growing dill for sale
Some gardeners may have a question: how to grow dill suitable for sale, if even for your own needs you have to use thin, stubby bushes? How to achieve truly lush and fragrant greens that would have an attractive presentation? To do this, it is enough to follow several basic rules for cultivating dill, and it is advisable to grow dill for sale in a greenhouse - in such conditions the greens will be more beautiful, and it will be possible to harvest the harvest much longer. A thermos greenhouse will be especially effective, which, due to the solar collector and double coating, will save you from heating costs.
If you leave dill umbrellas after flowering, you can get your own seeds of this plant.
Detailed step-by-step instructions
- The place prepared for planting is marked. Using a wooden stick or plank, grooves are formed, two centimeters deep, at a distance of twenty centimeters from each other.
- The depressions are moderately shed with water and planting material is sown. An interval of 1-2 cm must be maintained between seeds.
- The sown rows are covered with slightly damp soil.
- If planting is carried out before winter, then the furrows are not watered before sowing.
In addition to the classic row planting scheme, you can use a carpet scheme . This method will not only allow you to harvest dill, but also decorate the area with a lush green blanket. To do this, the seeds are scattered evenly over the selected area and covered with a rake. After this, the soil is watered abundantly.
From our separate publications you can learn more about the nuances of growing dill in open ground:
- How to grow seedlings correctly?
- How quickly does dill sprout and what does it depend on?
- After what crops does the plant grow well in the soil?
- Is it necessary to soak the seeds?
Growing dill in a greenhouse
The presence of a greenhouse on the site opens up wide opportunities for the gardener: in the spring you can grow seedlings of flowers and vegetables, in the summer - cucumbers, peppers, tomatoes and eggplants, and growing dill, parsley or any other greens in a greenhouse is possible almost all year round.
Spring film greenhouses allow you to get an early harvest of high-quality dill.
Even in the harsh Siberian climate, the first fresh greens in the greenhouse can be obtained by the end of March, the main thing is to follow the basic rules:
- Maintain a sowing depth of up to one and a half centimeters;
- sow greens twice a month to ensure constant new shoots;
- do not forget to enrich the soil with essential microelements;
- Be sure to loosen and water the soil;
- Plant ready-made greenery seedlings in greenhouse soil, not seeds.
If the above rules are followed, it is also possible to successfully grow dill in a greenhouse in winter, if in addition you take care of additional lighting, since such a light-loving crop as dill necessarily requires long daylight hours.
Dill is a long-ripening plant, and it can take more than two months to grow it in greenhouse conditions, but as a result, you can get two kilograms of lush greenery from each square meter, and the taste of homemade dill will be much brighter than store-bought or dill, grown on a windowsill.
After 2–3 true leaves appear, dill crops must be thinned out.
Like any other greens, dill is not demanding on the soil - ordinary soil, sandy or clay, suits it. But, if it is important for you to receive greens in large quantities, it is worth fertilizing the soil with humus in the fall, as well as applying mineral fertilizers before sowing. It is advisable to choose a soil that is neutral in acidity, since dill can often get sick in alkaline soil.
Note! Dill can be planted directly in greenhouse soil in winter only if the soil does not freeze in the greenhouse. Most often, dill seeds are sown in deep boxes filled with soil. Just be sure to make sure that the drawers have holes for water drainage.
You may not even use the soil to sow the seeds, but rather choose to grow dill hydroponically .
This method involves cultivating vegetable (and any other) plants on a neutral substrate, into which a special solution is supplied with all the chemical elements necessary for the plant. Dill does not waste energy extracting nutrients from the ground and does not develop a large root system. As a result, foliage grows faster and better, while remaining environmentally friendly and healthy. To grow dill hydroponically, it is recommended to use perlite or vermiculite as a substrate and use the periodic flooding method.
In greenhouse conditions, growing dill in winter is possible at an air temperature of at least +15 degrees. The soil must always be kept moist and watered only with warm water. When there is a lack of moisture in the ground, dill begins to bloom, which reduces its bushiness.
And of course, dill plantings must be supplemented with light, providing the plants with twelve hours of daylight. This is the main secret of how to grow dill in winter green, lush and fragrant.
Properties of dill
Useful properties of dill
Dill is one of those plants that we eat all year round. A significant role in this recognition among humanity is played by the substances contained in its leaves that are necessary for the body, such as nicotinic and ascorbic acids, carotene, thiamine, riboflavin, pectins, flavonoids, vitamins A, B2, B6, C, PP, as well as potassium, iron , phosphorus and calcium. Dill fruits contain a high concentration of fatty oil, consisting of palmetic, oleic and linoleic acid. All parts of dill contain essential oil with a characteristic aroma of the plant.
The iron and magnesium salts contained in the leaves in an easily digestible form have the property of enhancing hematopoiesis, and dill essential oil stimulates the formation of bile and digestive enzymes, and also disinfects the human genitourinary and digestive system.
In the medical industry, a drug called Anetin is obtained from dill - it stimulates the heart, promotes the dilation of blood vessels in the heart muscles and brain, which greatly enhances their nutrition.
The benefits of dill for nursing mothers are obvious - it enhances lactation. It is also useful for respiratory problems, hypertension, and blurred vision. Preparations made from it act as a sedative, diuretic, analgesic for ulcers of the duodenum or stomach, and an antispasmodic.
An infusion is prepared from dill seeds that improves digestion and stimulates appetite, relieves kidney inflammation and helps cope with insomnia. Two teaspoons of dill seeds are poured into two glasses of boiling water, covered and left for 10 minutes, then filtered and drunk a glass a day. This infusion is effective as an antihemorrhoidal and antiallergenic agent, as well as an external wound healing agent.
Dill seed powder, used to enhance lactation, is also popular. It is consumed in the amount of 1 g three times a day, half an hour before meals.
An infusion of dill leaves is successfully used to eliminate bags under the eyes; you just need to soak cotton pads in it and apply it to your eyes for 10 minutes.
Dill oil is effective for pneumonia and bronchitis - it promotes the rapid separation of mucus from the walls of the bronchi.
Dill water eliminates gas formation in babies. To prepare dill water, you need to dissolve one part of dill oil in 1000 parts of water. In addition, dill water lowers blood pressure, slows down intestinal motility, increases diuresis and dilates blood vessels.
Dill - contraindications
Is there any harm from dill? Eating dill won't hurt anyone - how much dill can you eat in a salad or in soup? But drugs made from it that lower blood pressure can cause weakness, loss of strength, decreased vision and even fainting in hypotensive patients. Dill preparations should not be used by persons suffering from intolerance to the product. It is advisable for women to limit their consumption of dill during menstruation and pregnancy, but this healthy and tasty spice should not be completely excluded from the diet.
How to grow dill in a greenhouse: a step-by-step guide
The greenhouse for sowing dill will need to be prepared in February, clearing it of snow along the entire perimeter. Cover the space around the greenhouse, as well as the greenhouse beds, with roofing felt or black film to attract heat and quickly warm the soil. So, by the beginning of March, the ground inside the greenhouse will thaw to a depth of fifteen centimeters, which is quite enough for such a cold-resistant crop as dill.
It is better to choose early ripening varieties. To continuously obtain fresh herbs, do not forget to sow dill, focusing on the ripening time of each variety. So, if you plant dill in early March, the first greens can be obtained in mid-April, and if you sow seeds on April 20, the dill harvest will be ready by the end of May, etc.
The varieties of dill that grow best in a greenhouse are those that are sufficiently resistant to light deficiency: Kutuzovsky, Grenadier, Frost, Karusel, Anker, Sevastopolsky, Umbrella, Almaz. These domestic varieties are capable of producing a large amount of greenery and do not bloom for a long time.
Having chosen suitable varieties and prepared fertile soil, you can begin sowing dill. You shouldn't have any particular difficulties.
Helpful advice! Before sowing, soak the dill seeds for three days, but do not germinate them, otherwise there will be difficulties with planting them in the soil, and the young shoots may be damaged.
Scatter the soaked seeds in rows, sprinkling a little soil on top. When sowing seeds directly into greenhouse soil, you can simply distribute them over the surface of the ground, then covering them with a rake, but then thinning will be more of a hassle.
Spray the plantings with warm water from a spray bottle, not allowing the soil to dry out completely. Over the next two weeks, water the soil daily with warm water from a spray bottle until small shoots appear. In the future, you can water only as needed to prevent the soil from drying out. Regularly remove weeds and loosen the soil so that dill grows better.
Helpful advice! loosen the soil carefully to avoid the formation of a crust on the surface, through which it will be difficult for shoots to break through.
Under the film, dill sprouts much earlier than in open ground, and after sprouting, the plants develop much faster.
When the seedlings reach a height of ten centimeters, they need to be thinned out, pulling every second plant out of the ground, providing sufficient space for stronger dill seedlings. There is no need to throw them away - you can transplant the removed specimens into another container to achieve an even larger harvest.
When cultivating dill in a greenhouse, it should be fed once every two months with ammonium nitrate or peat, distributing it at the base of the bushes. You can easily tell that dill is lacking nitrogen by its yellowed leaves.
In the final stage of growth, dill bushes can reach one meter in height - this also needs to be taken into account when planning its cultivation in a greenhouse. Harvest greenery gradually, without pulling the plants entirely out of the ground, but simply tearing off their leaves.
Helpful advice! Do not try to sow the entire area of the greenhouse beds with a continuous carpet in order to get maximum profit. When planted in furrows, dill will receive more light and will grow more luxuriantly.
Harvest and storage
You need to collect greens from bushes that have not yet thrown out their umbrella inflorescences, that is, while the plant is young. In this case, the leaves are compactly collected and have a pleasant green color. After the appearance of the umbrella, they become coarser and lose both external and taste qualities.
Rules for collecting dill:
- first you need to thin out the beds with young seedlings;
- first they cut off the greens from the lower tier of the bush, then the side shoots, and then everything else;
- if seeds are needed, then the bush with formed umbrellas is cut with scissors at the root or pulled out from the soil.
Fresh dill leaves do not last long: they quickly lose their elasticity and turn yellow. Bunches of greens are stored in the refrigerator for no longer than a week, at room temperature - about 2 days.
If you plan to store dill for a long time, the harvested crop should be frozen by first washing, drying and finely chopping the greens. After that, put it into bags and place it in the freezer.
Dill can also be dried. It is recommended to do this in partial shade, spreading it out on a cloth. After the leaves have wilted, you need to finally dry them in the oven at a low temperature (40-50 degrees). Dried dill should be stored in glass jars, tightly closed with lids.
Dried and frozen greens can be stored for a year. Seeds collected from umbrellas are stored for up to 2-3 years.
Dill will produce a large amount of greenery if all measures to care for it are provided in the open ground. When choosing a variety, you need to pay attention to the ripening period. You also need to take into account that some types of dill quickly form inflorescences, and therefore are only suitable for collecting seeds.
0
0
Copy link
Harvesting and selling dill
When the dill greens are ready for sale, water the beds generously about five hours before harvesting. This will make it more convenient to dig up the plants with a shovel and clear the dill roots from the soil. Rinse the plant's root system and place the dill, leaves side up, in a waterproof container, tightly filling all available space. To keep the greens fresh longer, you can pour water with fertilizers dissolved in it into the container and put an aspirin tablet. In such conditions, at a storage temperature no higher than +10 degrees, the dill will remain fresh and will not lose its presentation within a week.
Note! When growing bush dill, the plants with their roots are not pulled out, but the required amount of greenery is carefully cut off so that a little later you can harvest the remaining bushes again.
Dill in the garden attracts beneficial insects and repels pests.
Dill greens can be sold by the kilogram or knitted into bunches from sprigs. The only disappointment is the low price of such a product; however, any produce from the garden is quite cheap. Therefore, to obtain a decent income, you need to look for wholesale buyers and buy in volume.
Secrets of sowing in the country and at home in the vegetable garden
Regardless of where you sow dill, in the garden or in a garden bed, the recommendations for growing will be the same. Let's consider at what depth dill seeds need to be sown and how to do it in the spring, what the distance should be for proper planting, and other recommendations that must be followed when sowing so that it sprouts quickly.
- The beds need to be prepared in advance by carefully digging the soil to a depth of 20-25 cm and applying organic fertilizers.
- In spring, seeds are planted in moist soil so as not to be watered afterwards. To do this, make grooves 2 cm deep, place seeds in them and sprinkle with damp soil. Planting is carried out in March, April and May.
- If there is a threat of return frosts, then the seedlings should be protected overnight with any covering material.
To prevent thickening of crops, the planting scheme should be as follows: 1 g of seeds are distributed per 1 sq.m during spring planting and 2 g per sq.m during autumn planting.
It is not necessary to organize a separate bed for dill. It can be sown next to other crops - in the inter-row spaces. Excellent neighbors for dill :
- cucumbers;
- tomatoes;
- cabbage.
In addition to saving space, this method of planting has another benefit. Dill is a plant with a large amount of essential oils in its composition. Thanks to this, it helps protect neighboring crops from attack by harmful insects.
But there are also plants that are incompatible with dill - carrots and celery.
Pros and cons of growing dill for sale
If you have been thinking about starting your own business for a long time, but do not have an impressive start-up capital for this purpose, growing dill for sale will be the best option for a small profitable business:
- this crop is unpretentious - to learn how to cultivate it, you do not need to be an experienced gardener; it is enough to follow the basic rules of planting and growing and provide the dill with suitable conditions for active growth;
- dill greens are in constant demand at any time of the year, and even in the summer months, because not everyone has the opportunity and desire to grow dill on their own for personal needs;
- investments in a dill cultivation business are minimal - the main expenses may be required to build a greenhouse of a suitable size (if you decide to grow dill in large volumes all year round), but the purchase of seeds, soil and fertilizers will cost a relatively small amount, and in the future you can use the seeds, collected from grown dill;
- the likelihood of losing the entire harvest is minimal, since dill is almost not susceptible to diseases and pests;
- This business option pays off quite quickly; the sale of dill brings especially good profits in early spring and before the New Year.
Of course, there are pitfalls here too. For example, cut greens have a short shelf life. But if you manage to establish constant sales of the grown dill, problems with selling wilted greens will not arise. Also, the disadvantages of the business include the difficulty of growing dill in winter - the plants require long daylight hours, which entails an increase in the cost of additional lighting.
How to care?
- Immediately after planting, you need to think about organizing watering. It is best if it is drip.
- Before seedlings emerge, the crops need to be moistened moderately so that the water does not carry the seeds with it to depth.
- Care should be taken to ensure that a crust does not form on the surface of the soil - this will complicate the germination of dill.
- In the phase of 2-3 true leaves, the plant is fed with urea.
You can find more information about proper care of dill here.
The popularity of dill among our gardeners is difficult to overestimate - it is a favorite seasoning and a constant source of aromatic herbs. To get the harvest right the first time, you need to pay special attention to the selection and preparation of seeds, as well as follow all recommendations on growing technology.
If you find an error, please select a piece of text and press Ctrl+Enter.
Compatibility of dill with other plants and its place in crop rotation
Dill does not combine well with other plants from the Umbelliferae family, especially carrots and fennel. Fennel is its closest relative, and there is an opinion that these crops are capable of cross-pollinating with each other, and this will inevitably deteriorate the quality of the resulting seeds.
Note! Ordinary garden dill should be distinguished from pharmaceutical dill (fennel): these plants have very similar leaves in appearance, but completely different taste, smell and scope of use in cooking.
Carrots with their smell attract a dangerous pest - the carrot fly, which can be repelled by planting onions close to the greens.
The close proximity of dill to green onions will help repel the carrot fly, a dangerous pest.
Particularly good precursors for dill are plants from the cabbage and pumpkin families, to which large doses of organic fertilizers are applied.
Due to its early ripening, dill is often grown as an additional crop before planting seedlings of heat-loving plants (nightshade and pumpkin). It is also widely practiced to re-sow dill in the second half of summer in areas freed up after harvesting early potatoes, onions and garlic.
This is interesting! Supporters of organic farming believe that proximity to dill helps repel harmful insects from other garden crops. In any case, individual specimens of flowering dill growing throughout the garden are useful for attracting insect predators and pollinators.
Fennel (dill) is very similar to ordinary dill in the appearance of its leaves, but differs sharply from it in taste and smell.
Preparing the bed
Dill cannot be classified as an extremely capricious crop. Sometimes it even grows by self-sowing. If you did not have time to collect the seeds and they scattered throughout the garden, rest assured that some of them will definitely sprout next year. But don’t be fooled by the seeming unpretentiousness of the culture. Dill still requires a certain approach.
Selecting a location
The plant prefers open, sunny areas. As a last resort, light partial shade, but even this is no longer desirable. Without sufficient lighting, dill grows frail and inconspicuous, often turning pale and yellow. Taste quality also decreases.
The second condition for good growth and development of dill is moderately moist soil, without stagnant water. For this reason, when choosing a place for planting, you should exclude places with high groundwater levels, and you should also take care that dill does not accidentally end up next to moisture-loving plants that need frequent and abundant watering.
Ideal “neighbors” for planting together
When sowing dill, you should follow the rules of crop rotation. The culture develops well in places where tomatoes, eggplants, potatoes, onions, cucumbers, peppers, strawberries, cabbage, garlic or green manure grew last year.
It is strongly not recommended to sow dill after celery, parsley, and carrots. The planting site should be changed every year.
Soil preparation
Pre-planting soil preparation begins in autumn. The area chosen for sowing dill should be fertilized, humus should be added for digging at the rate of ½ bucket per square meter of land, cowshed or diluted bird droppings. If the soil is heavy, you can also add vermiculite.
Sandy loam soil can be dug up in the fall and simply leveled with a rake in the spring. The loam will have to be dug up twice - before frost and with the onset of heat in the new season. Dill grows well in a nutritious substrate of garden soil, turf and sand.
Culture propagation
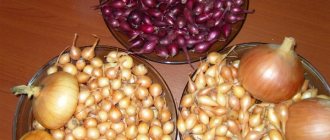
Dill propagates very well by seeds. The plant blooms in June and July. The color of the flowers is yellow. After flowering, seeds are formed. Seed ripening occurs in autumn. One seed reaches 5 mm in length.
Dill seeds
When to plant carrots in open ground in spring
To propagate the crop, it is enough to collect the seeds in August or early September and plant them in the ground in April. The collection of material for planting is carried out as soon as the umbrellas have acquired a brown tint. This means the seeds are ripe. After collection, they are baked in the sun and then placed in the oven for 5 minutes. The temperature there should be 80-110 degrees.
Important! How long can seeds be stored for planting? Experienced summer residents are sure that this period is two years. They overwinter best in tightly closed glass jars or paper envelopes.
Sowing dill seeds
Before planting dill, you should decide on the variety.
There are three varieties of varieties of this spicy green:
- Early (the plant can be eaten within a month after planting);
- Medium (ripening occurs after 45 days);
- Late (greens can be chopped into salads 2 months after planting).
The peculiarity of early varieties is that they are not too fluffy. But they are ideal for growing at home. Among the places where you can grow crops at home: windowsill, balcony. Famous early varieties: Gribovsky, Redut, Dalniy.
Medium varieties include Max, Alligator, Richelieu.
Late varieties ripen late, but this dill is lush and produces a lot of greenery. Spicy grass will decorate the garden with green fluffy thickets. Late varieties: Salute, Patterns, Frost. Planting these varieties of dill can be done not only with seeds, but also with seedlings. The seeds are placed in small containers with soil mixture. The container is left on the windowsill. An insulated balcony is suitable for seedlings. The seeds will germinate within a week and a half. After the bushes stretch up to 3-4 cm and become stronger, they can be transplanted to a permanent place in open ground or a greenhouse. It is fluffy dill that is most often grown for commercial purposes. Its sale brings in good income.
Additional Information. Dill contains vitamins B, PP, A, C, magnesium, potassium, phosphorus, calcium, essential oils, etc.
To speed up seed germination, you can carry out home procedures. For example, the seed is wrapped in damp gauze and left for several days. The gauze must be constantly moistened with water, not allowing it to dry out. It is best to soak in a place where it is warm. The optimal temperature for the procedure is about +22 degrees and above. Another way to speed up germination is to soak the seeds for 3 days in water poured into a glass jar.
Typically, dill is sowed in spring in April, but the crop can be planted at any time. Suitable for autumn, spring, summer. You can plant the spice in July, then in August or September there will be greens from the garden on the table. Planting before winter is allowed. In this case, the seeds do not need to be soaked. The lunar calendar will help you choose the right day for planting.
Before planting dill, you need to prepare a bed. The soil is dug up and weed roots are removed. If the soil has been fertilized since the fall, no additional fertilizers need to be applied before planting.
Sowing a crop
There are several tips on how to sow dill so that it sprouts quickly:
- The soil should be rich in organic fertilizers. The best option is to add humus to the soil in spring or autumn. Quantity – one bucket per 1 square meter of land;
- In spring and autumn, seeds are planted that have been previously soaked in water or damp gauze;
- The planting site should be on the sunny side of the garden;
- Before sowing dill, the bed is well moistened and left for several days so that the soil settles a little.
Dill planting process
in spring
Dill can be planted in any bed: simple, mobile, high. Planting dill in open ground with seeds in the spring takes place after prolonged frosts. The bed needs to be watered and loosened. Next, shallow holes are made on it. The most convenient way to do them is with a stick, which is placed on the bed and slightly pressed into the ground. The entire area of the bed should be lined with these furrows, the distance between them is 20 cm. The optimal width of one furrow is about 5-7 cm. If a late variety is planted, the distance between the holes increases to 25-30 cm.
Seeds are sown in the resulting furrows. They are planted to a depth of 1-2 cm. The distance between the seeds is 5-10 cm, for late varieties - 20 cm. There is no need to thicken the plantings. It is allowed to plant 1-1.5 grams of seed per square meter.
The seeds are sprinkled with soil, which is slightly compacted. There is no need to water immediately after planting so that the soil is moistened beforehand. Otherwise, the water may further deepen the seeds, which will have difficulty growing. No special care of the seedlings is required. The garden bed is not watered for several days. As soon as the first bushes appear, the planting needs to be thinned out.
In summer
How to plant dill in open ground with seeds in the summer? The planting process is exactly the same as in the spring months. In general, in summer the crop can be planted every two weeks. This is convenient to do if the dacha is located near the house. Then fresh herbs will be on the table all season long. It is permissible not to allocate a separate bed for greenery. Dill can be planted in the free area of areas where onions, cucumbers, cabbage or other vegetable crops grow.
Experienced gardeners know that dill should not be planted in a greenhouse in the summer, only in open ground. Otherwise, the spice may lose some of its aroma.
Another condition concerns soaking the seeds. Before sowing dill, the seed must be soaked. This will help speed up germination significantly. The seeds will sprout within 4-6 days. It would take more than two weeks for dry seeds to sprout.
Soaking the seeds
in autumn
How to sow dill before winter? The procedure is especially popular among gardeners. Thanks to this method, fresh greens can be tasted at the end of April. If the climate is Leningrad, then winter dill will ripen in May. The culture endures winter without problems. As soon as the soil begins to warm up, the seeds begin to germinate.
The right time for planting before winter is the end of September, October.
Landing rules:
- Before planting dill in the fall, it should not be soaked. The seeds must be dry;
- Take 2 grams per square meter. seeds They are planted quite often;
- The soil must be fertilized with humus;
- Sowing takes place to a depth of 3-5 cm. The distance between seeds is 3 cm;
- The seeds are sprinkled with loose soil and then mulched. Sawdust and hay are suitable as mulch. It is better to cover the bed with film. In the spring, as soon as the snow melts, the air temperature rises to +5 degrees, and the garden bed will have to be opened.
Soil and place
In the Moscow region, dill can be planted in open ground as early as April. It begins to develop when the soil temperature is at +3...+5 degrees Celsius. How to plant dill so that it sprouts well, is fragrant and lush? To do this you need to choose the right soil.
Dill loves neutral soil. It should not be planted in acidic or alkaline soil. Loose, breathable, fertilized soil is ideal. The bed for dill, as for other crops, is prepared in advance. The best time for this is autumn. The site is dug up, weed roots and grass are removed, and abundantly fertilized with compost, manure, and bird droppings. The use of complex fertilizers is allowed.
Note! It is recommended to plant dill next to cucumbers, cabbage, and tomatoes. These crops are not only good neighbors for dill, but also excellent predecessors. You should not plant the spice on carrots.
Dill loves timely watering, but not overwatering. Its cultivation should be in a place where there is no stagnation of water. The fragrant plant develops best in a bed that is illuminated by the sun. It is allowed to plant the crop in partial shade. If the plant ends up in a place where the sun's rays do not reach, it withers before it has time to grow. It is best to place the dill bed where there are no drafts.
Variety of dill
When choosing a variety, pay attention to the ripening time of the crop.
All varieties are divided into early, mid-ripening and late.
- Early varieties. From them you will not get a lot of green mass for sale, although there will be enough dill for cooking. The varieties are good for use in conservation, as they bloom and ripen quickly. Dill is sown in early spring and covered with film. In 1.5 months you will already have a harvest. The early varieties include Gribovsky, Umbrella, and Grenadier.
- Medium varieties, for example, Umbrella, Richelieu, Uzory - ripen 2 months after sowing the seeds. They give more greens - up to 10 branches. Suitable for preparing seasonings, and for freezing for future use, for sale and for use during the conservation period.
- Late ripening. The most productive are the late varieties - Alligator, Salyut, Buyan, Aurora, Kibray. They are the ones who produce lush, luxurious greens that can be used not only for preparing family meals, but also for sale. You will receive the harvest 2-2.5 months after sowing.
Late bush varieties. They do not develop umbrellas for a long time, new leaves quickly grow, which can be constantly cut off throughout the season without constantly sowing new seeds. These varieties are characterized by closely spaced stem internodes, so they look like small bushes, which is where their specific name comes from. Not all late varieties have time to ripen in the beds and produce seeds. But they have green, juicy, fragrant leaves that can be used all summer.
What to plant after the crop and why?
After dill, gardeners recommend planting tomatoes, eggplants and lettuce. It was noticed that zucchini and pumpkin grow better after a green predecessor. After harvesting the dill, late varieties of cucumbers can be planted in these beds. This will help prevent aphids from appearing. You can also plant peas, potatoes, cabbage or beans, as dill will reduce the likelihood of pest invasion.
What can't be sown and why?
After the dill has been harvested, it is not recommended to plant in its place:
- parsley;
- coriander;
- fennel;
- cilantro;
- caraway.
This is explained by the fact that the umbrella plant sucks all the nutrients from the soil. In addition, subsequent sowing of a similar crop will have difficulty growing due to the substances that were produced in the soil by the dill root system.
Every gardener can plant and grow dill; you just need to remember the basic recommendations for preparing seeds, caring for the crop and maintaining proper crop rotation for the plant. And then healthy aromatic greens will be on the table all year round.
How to harvest correctly
The harvest of dill greens, mature plants for preservation and seeds is being harvested. The plant is cut only when it is young. As soon as the umbrella appears, the greens are no longer suitable for cutting. The seedling is then left for seed, for making spices, or for use during preservation. When harvesting greens, adhere to the following rules:
- First, the rows of young shoots are thinned out.
- During development before reaching full maturity, you can remove a few leaves of dill for food, but leave enough for normal functioning.
- Before flowering begins, the entire plant is removed from the roots.
In bush varieties, in which the umbrella does not appear until 50 days, the period for collecting greens is quite long. First, the lower tier of the bush is cut off, leaving a rosette for regrowth. Then the side shoots are plucked out from the axils, and then the entire bush is collected. In some late varieties, the bush may not ripen before the formation of seeds. The green part is collected until late autumn. So, the dill is ripe. The seeds in the umbrellas have turned brown. It's time to collect them. After collection, they will need to be dried. Dill seeds remain viable for up to 3-4 years.
Features of sowing dill
For sowing, you will need to make furrows with a row spacing of 15-20 cm, a depth of 2 cm. Pre-irrigate the furrows with water. Sow the material with a distance in the row between the seeds of 1-2 cm, water. Dill seeds germinate at a temperature of 5 degrees. To speed up germination, cover the crops with film or agrospan. Expect sprouts to appear in 1-2 weeks.
How fast does it grow?
The ripening period depends on the variety and growing conditions of dill. On average, the plant is ready for consumption 25-30 days after the first shoots appear. If you need seeds, you will have to wait a little longer until the umbrellas ripen.
Possible problems
Dill will not grow if:
- the site has poor soil with high acidity;
- insufficiently lit area;
- bad seeds selected;
- seeds are processed incorrectly;
- frequently feed and fertilize the crop.
How to choose a place for planting and prepare a bed
You have already identified a bed with fertile black soil in a sunny place and good “neighbors” for dill; all that remains is to prepare it for planting pre-steamed seeds.
Ideally, start preparing the site correctly in the fall - carefully dig the soil 20-30 centimeters deep, enrich it with humus, chicken manure, and mineral fertilizers.
If the site has not been prepared since last year, no problem. Fertilizers applied in previous years may be sufficient for greenery if the soil is not acidic, not clayey, and receives sufficient water and light.
In the spring, 2-3 days before sowing, you need to loosen the soil and water it 1-2 days before.
Methods, secrets and agricultural techniques of growing
Seeds
Before planting dill, the seeds need to be treated to speed up the appearance of the first shoots. For this:
- The seeds are placed in water at a temperature of 50 degrees for several days.
- The water is replaced with new water once every 6 hours.
- After three days, the seeds are laid out on damp gauze, which must be periodically moistened, and placed in a warm place until sprouts appear.
You can find out whether it is necessary to soak dill seeds in preparation for sowing here.
The pre-prepared area is divided into rows with a distance of 20 cm between them, the seeds are placed in the grooves to a depth of 2 cm.
Important! Seeds on which sprouts have appeared should not be dried before planting.
In a separate article you can find out all the detailed information about seed germination.
Seedlings
- In cells with a volume of 50 grams, seeds are planted one at a time to a depth of 2 cm.
- After this, you need to water it generously and put the container in a warm place.
- After one and a half to two weeks, the first shoots will appear, after which the dill is sprouted for several more weeks to allow the roots to grow.
- After a month, the plant can be transplanted into open ground.
This must be done very carefully to avoid damaging the roots. It is recommended to replant in cloudy weather so as not to burn the young plant from the sun's rays. - You need to make beds with grooves at a distance of about 30 cm, place seedlings in them and sprinkle them with dry soil, pressing them on the sides, and then water them.
- If you plant the seeds in March and plant them in the ground on April 15-20, then at the end of this month you will be able to enjoy fresh greens.
You can find out all the subtleties and nuances of growing dill using the seedling method here.
In the greenhouse
By growing dill in a greenhouse, you can harvest it all year round. It is only necessary that the temperature is not lower than 16 degrees Celsius, and the lighting is provided for 12-15 hours. To obtain additional light in winter, special LED lamps are used. Before sowing, the soil is also fertilized, and the seeds are pre-treated in hot water.
Sowing seeds in an apartment
- To grow dill at home, you need to use containers with a drainage layer, into which highly fertile soil is poured, and the seeds are sown. They must first be placed in warm water for two days, changing it every six hours.
- Grooves 1 cm deep are made in the container, a little water is poured in, the seeds are placed, and then covered with dry soil.
- Cover the container with film and put it in a dark, warm place for 7 days.
- The plant needs light, so in winter, spring and autumn the crop needs to be illuminated with fluorescent lamps. Watering abundantly is not recommended.
Attention! To constantly receive fresh greens, you need to sow seeds in the cleared areas once every three weeks.
We invite you to watch a video about growing dill at home:
On hydroponics
Growing dill hydroponically is not difficult, since it is not fussy, and it is very easy to provide it with the necessary conditions. To do this, you need to place pots with sprouted sprouts in a system into which a nutrient solution will flow through tubes. In addition, it is necessary to install a compressor that will deliver oxygen to the roots of the crop. We must not forget about the timer, which is set to automatically start the pump once an hour for 20 minutes to supply the solution.
This method can be used to grow dill in an apartment or in a greenhouse, you just need to remember about lighting the crop.
Description, varieties and varieties of dill
A plant from the umbrella family in the wild can reach one and a half meters in height. Cultivated species are grown both in the garden and on the windowsill.
The culture is used not only as a seasoning. Juices, infusions and decoctions have a positive effect on the heart, liver and genitourinary system.
The varieties differ among themselves in the time of stem formation, the shape of the rosette, the color, and the splendor of the bush.
Rapid stem formation means that the plant produces many umbels in a short time.
For early ripening dill, the period from sowing to flowering in the Moscow region takes an average of 35 days. It is necessary to pick ripe greens in a timely manner.
The culture develops equally well in greenhouses and in open beds.
Immediately after ripening, the plant enters the flowering phase; it is excellent for growing for seeds. Next spring, the fallen seeds germinate well.
Popular varieties:
"Aurora". A small bush with dark green leaves. The ripening time for greens is 30 days. Forms inflorescences late. Grows well in shaded areas and is disease resistant. Used in salads and canning.
"Carousel". The bush of medium height has a strong aroma. It takes 40 days for the greens to ripen. After another ten, umbrellas begin to form. Ideal for canning.
"Dealer." Early ripe dill for greens. The ripening period is 35 days. The green leaves are large and juicy.
Mid-season varieties have a longer ripening period.
This means that more green mass grows, and the umbrella forms much later. The group is the highest yielding of all.
Popular varieties:
"Hercules". The best dill for greens. A powerful bush with high productivity. Leaves regrow after cutting. The variety blooms late.
"Richelieu". The bush has a bluish-green tint. The foliage emits a strong aroma. The variety is resistant to diseases and pests. "Frost". Bush dill, very spreading. They collect both greens and umbrellas. Retains flavor and texture well when frozen.
Late-ripening species are distinguished by a long period from germination to stem formation. The plant produces a large harvest of greenery.
Summer residents prefer late dill. Popular varieties:
"Kibray". Dill is bushy, the height of one plant is 40 cm. The foliage has a spicy aroma. The variety is resistant to diseases.
"Kutuzovsky". A plant with large leaves. Greens are cut within a month. The variety is valued for its special aroma and is recommended for drying and freezing.
"Russian giant". Great for greens. The foliage is large, raised. The green mass is very juicy. Umbrellas take a long time to form, which increases the fruiting period.