Onions are always available in any home; housewives use all of them to prepare most dishes. Bulbs not only add additional flavor to food, but also benefit the body. The vegetable contains a significant amount of vitamins and microelements, while its calorie content is low. Summer residents who have their own plot must plant onions on it. The harvested crop lasts for a long time. The agricultural technology of the crop is not too complicated, but still must be observed. First of all, this concerns the timing of planting.
Which onion to plant on the head in spring
For planting on the head, sets with a diameter of about 2 cm are most suitable. Smaller bulbs are best planted on greens. A good harvest will come from a set that weighs 2-3 g. It is better not to use bulbs that are too large, they will take longer to take root, and accordingly the harvest will ripen later.
In addition, in this case the risk of shooting increases. If you only have large sets at your disposal, plant them later. This will reduce the likelihood of an arrow appearing. Seed material of the same size is planted on one bed so that the plants develop evenly.
On a note! There are also varieties in which the head is formed in 1 season directly from the seeds, so the harvest can be obtained without an intermediate stage (onion sets). Suitable varieties for planting with seeds include Aleko, Bayram, Brunsvik, Vostorg, Globus, Carmen, Odintsovets and others.
Onions from seeds in one season - video
To grow onions from seeds in one season, you must first grow seedlings from nigella seeds. The best varieties for this are white onions - Exhibition, Stuttgarter Riesen, Holcedony, Odintsovets, red varieties - Red Baron, Carmen, Carmen MS.
When buying seeds, pay attention to the expiration date. If the year of planting coincides with the final shelf life, it is better not to take such seeds, since their germination rate is no more than 30%. Take seeds that have another 2 years left; their germination rate is 90%.
I have already written about how to grow Exhibition onions on my website, read it. Any onion from seeds can be grown in the same way. Having planted seeds for seedlings in the second half of February, by May the seedlings will grow with 2-3 strong feathers. This will be exactly the time when the seedlings are planted in open ground.
Watch the video on how to grow seedlings from nigella seeds.
How to choose the right onions for planting
For planting, 1-2 year old seedlings are used. It is necessary to pay attention to the quality of planting material:
- the bulbs should be dry and dense,
- Do not use material with hatched sprouts;
- onions with mechanical damage are not suitable for planting;
- There should be no traces of rot and mold on the sets, or white coating on the roots.
It is also necessary to choose a variety intended specifically for growing per head. The quality of the future harvest and its shelf life directly depend on the quality of planting material.
The best varieties for growing by head
For planting, it is necessary to choose zoned varieties. In the middle zone, the following varieties are most often grown for turnips:
- "Stuttgarten Riesen" . Mid-season productive variety. The heads are flattened, with an average weight of 200 g. The pulp is white, juicy, with a pungent aftertaste.
- "Centurion F1" . The variety produces stable yields, is well stored, and is resistant to the appearance of arrowheads. Ripening dates are very early. The heads are medium in size, slightly elongated.
- "Red Baron" . Red onion variety with early growing season. Resistant to bolting and can be stored for a long time. Yield indicators are average. The pulp has a semi-sharp taste.
- "Rostov local" . Early ripening variety. From 1 sq. meters, 2.5 kg of fruit is obtained. The bulb is flat-round in shape, with sharp pulp and golden scales.
- "Sturon" . A variety with medium ripening periods, forms elongated heads weighing up to 250 g. The fruits have a bitter taste and are used for preparing hot dishes.
Early-ripening varieties ripen on average in 3 months, mid-ripening varieties require about 4 months, the growing season of late-ripening onions lasts over 125 days. For the Moscow region and colder regions, varieties with early and medium ripening periods are suitable; in the south, any onion can be grown.
When to plant onions on a head in open ground in the spring of 2021
The timing of planting onions varies in regions. This is due to climatic conditions. If in the south gardeners develop active activity already in March-April, then in Siberia and the Urals the favorable time for this can only come at the end of May or at the beginning of June. It would also be a good idea to pay attention to the recommendations of the Lunar calendar.
In the regions
Before planting onion sets, you need to wait for consistently warm weather, when the threat of return frosts has passed:
- in the south of Russia (Stavropol region, Crimea, Kuban, Kalmykia) they begin planting in the second half of March);
- in the middle zone (Moscow region and the entire central part of Russia) planting is carried out from late April to mid-May;
- in the Leningrad region the climate is unpredictable; here it is better to plant onions in the second ten days of May;
- In Siberia and the Urals , snow can sometimes fall even in June; here it is recommended to postpone work until as late as possible; usually local gardeners plant seedlings in early June.
The dates must be adjusted taking into account the current weather. They can be moved both backwards and forwards.
According to the Lunar calendar
In order for the onion to germinate and take root faster, it should be planted on the growing Moon. For spring planting of seedlings in 2021, the Lunar calendar recommends the following dates:
- in March – 4, 5, 6, 13, 14, 22;
- in April – 1, 2, 10, 18, 19, 28, 29;
- in May – 5, 15, 16, 17, 25, 26;
- in June – 3, 12, 13, 28, 29, 30.
In addition to favorable days, there are also unfavorable days for planting onions. During these periods, it is better to do other things.
The following dates are not suitable for planting seedlings in the spring of 2021:
- in March – 8, 9, 10 , 23, 24, 25;
- in April – 7, 8, 9, 22, 23, 24;
- in May – 6, 7, 8, 21, 22, 23;
- in June – 4, 5, 6, 20, 21, 22.
A particularly strict ban on planting is imposed on the days of the New Moon and Full Moon. To determine the most ideal landing days, you must also pay attention to what zodiac sign the Moon is in. The most fertile signs include Taurus, Scorpio, Capricorn. Crops planted on such days not only give a good harvest, but are also well stored.
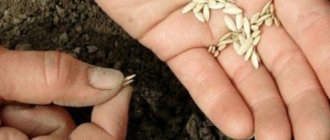
When to sow onions
It is recommended to plant onion seeds in a greenhouse from March 2-8, 21-23. You can sow onion seeds for seedlings or in open ground on the following dates:
- April: 13-14, 18-19, 26;
- May: 12, 15-17, 24-25;
- June: 11-13, 20-23;
- July: 17-23.
For sowing before winter in October, the favorable days are: 7-13, and in November: 6-9, 12-18.
All onion planting dates are based on favorable days according to the Lunar calendar. They are recommended, so you need to focus more on weather conditions.
Preparing onions before planting
Planting material in the form of sets is obtained in the fall. Gardeners face an important task - to properly preserve onions until spring planting. Store it in a well-ventilated and dry place at a temperature of 0° C. Do not use plastic bags for storage.
Immediately before planting, the sets are sorted by size, unsuitable bulbs are discarded, and then disinfected and antifungal treatment is carried out. If planting material was purchased, it must first be dried and warmed at room temperature for 2-3 weeks.
The same period will be needed to warm up your own planting material. This will allow the bulbs to start the germination process. Just before planting, the temperature is raised to 30-35° C and maintained under such conditions for 10 hours.
This technique will reduce the risk of certain diseases and prevent shooting. You can speed up the heating by soaking the onion in hot water at a temperature of 40-50° C for 10-15 minutes. After the hot bath, the bulbs are quickly cooled by placing them in cold water and then dried.
Additional processing methods:
- in a weak solution of potassium permanganate for 15-20 minutes - for the purpose of disinfection;
- in a saline solution (1 tablespoon per liter of water) for 3 hours – this method helps against onion flies (after soaking, rinse and dry);
- in an ash solution (250g of ash per 5 liters of water) for 5-7 minutes - the bath strengthens the immune system and protects against diseases;
- in a solution of “Fitosporin” according to the instructions - protection against rot and fungal infections;
- in a solution of a growth stimulator ("Gumisol", "Zircon", "Epin Extra") according to the instructions - accelerates germination, has a beneficial effect on the future harvest.
On a note! Before soaking, it is recommended to slightly trim the tops of the bulbs so that the liquid can more easily penetrate under the scales. You can also carefully trim the bottom, in which case the roots will begin to grow faster.
What to soak onions in before planting to protect against diseases and get a rich harvest - video
What are the different ways to grow onions?
You can grow onions using two methods: from seeds or from sets. Both of them are popular, but in the first case the work can last for 2 seasons, and in the second, by the end of 1 year you can harvest and use the crop for its intended purpose.
- Nigella (seeds) are sown in early spring or for winter. Over the next year, the crops germinate and onion sets are formed - small onions that need to be collected to be planted the next year.
- Onion sets can again be planted in winter or in winter - it all depends on what the crop is grown for.
So, with winter planting, the harvest can be obtained earlier, but with spring planting there are fewer risks, because severe frosts without proper insulation can destroy the future harvest. Onion sets can be planted in spring or winter
As you can see, cultivation is carried out in two seasons. You can reduce labor by purchasing not nigella for sowing, but ready-made onion sets, thus saving a whole year.
Experienced gardeners claim that you can grow onions from seeds in one year. Only this can only be done in southern regions favorable for growing, where there is an abundance of sun. In this case, nigella is sown in a greenhouse in March, and then in May-June it is transplanted to a permanent place in open ground. The method is quite effective, but due to the limited time, the final bow may be small in size.
Below are tips on how to grow onion from onion sets, how to prepare the soil and planting material, at what time to plant, how to care for the crop and harvest.
How to plant onions correctly in spring
When planting onions, it is necessary to take into account the rules of crop rotation, observe the depth and planting interval. Otherwise, the bulbs will grow small, the crop will be affected by diseases, and the shelf life of the vegetable will be reduced.
Selecting a location and preparing the bed
The area for planting onions should be flat or elevated, well lit. The vegetable is not planted in lowlands, on heavy, waterlogged soil. It is important to follow the rules of crop rotation; if they are not followed, the crop will be susceptible to diseases and pest attacks. The following are suitable onion predecessors:
- tomatoes;
- potato;
- pepper;
- cabbage;
- cucumbers
After these vegetables, enough nutrients remain in the soil, the soil is not greatly depleted. The listed plants do not have common diseases or pests with onions. Planting after peas, beans and zucchini is acceptable. If onions have already been grown in this area before, the next planting is allowed only after 3 years, and if the incidence rate is high - after 5 years.
The bed for vegetables is prepared in the fall. The soil is dug up onto the bayonet of a shovel, at the same time you can add, if necessary, compost or humus (3-4 kg per 1 sq. m), phosphorus-potassium fertilizers (30-40 g per 1 sq. m). Chalk or lime must be added to acidic soil.
On a note! Fresh manure is not applied before planting onions.
In spring, the bed is leveled and harrowed with a rake. If the site has heavy clay soil, it is recommended to build raised raised beds.
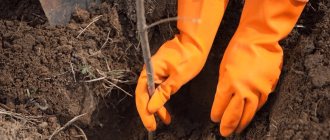
Landing
After the bed has been formed and leveled, grooves 4-5 cm deep are cut into it at intervals of 15-20 cm. If the soil has dried out by this time, the furrows must be watered with warm water. The recess can be lightly sprinkled with sand and wood ash. After this, they begin planting the bulbs.
They are placed bottom down, slightly pressed into the ground, then sprinkled with a 2 cm thick layer of earth. It is this planting depth that will ensure good turnip quality. In a row, the sets should be located at a distance of 6-10 cm. The larger the bulbs, the greater the interval between them should be.
Planting onion sets in spring
A set differs from a turnip in that a set always grows one head, while a turnip grows 3-8 onions in one nest at once. When planting turnip sets, take “oatmeal” or bulbs with a diameter of no more than 1.5 cm.
Prepare the soil for sowing in the fall, fertilize it with rotted manure, compost, and add wood ash to normalize the acidity of the soil. A good solution would be to sow green manure before winter; they will further fertilize the soil and normalize its acid-base balance. Therefore, the onion will grow excellent in such soil.
In the spring, immediately before planting the seedlings, the bed is loosened again. If you think that not enough organic fertilizers have been applied, then add more. Under no circumstances should you fertilize the beds with fresh manure; this will contribute to the development of fungal diseases on the onions.
The onions are planted by pressing them into the ground so that only their tails remain on the surface. First, make grooves at a distance of 10 cm from each other, and then plant an onion in them every 10 cm. If you have already gotten the hang of it, plant the planting material without making a groove, but immediately stick it into the ground at the same distance. Afterwards, the bulbs can be leveled with soil, although this is not necessary.
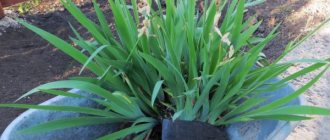
Caring for onions in open ground
Caring for planted seedlings involves watering, fertilizing, and protecting against diseases. Correct agricultural technology will only affect the quality of the crop for the better.
Watering
Young onions are watered 1-2 times a week with a moderate amount of water. After moistening, the soil between the rows must be loosened to ensure air access to the roots. As soon as the heads begin to form, the frequency of watering is reduced so that the bulbs fully ripen.
A month before harvest, watering is stopped. In severe drought, minor irrigation by sprinkling is allowed. In the first stages of growth, weeds pose a threat to seedlings. The weeds are carefully pulled out of the wet soil by hand shortly after watering.
Top dressing
If the soil was well fertilized before planting, there is no special need for fertilizing. If the soil is poor, you can apply fertilizer 1-2 times per season. The first feeding is carried out a month after planting. For it, it is better to use liquid organic fertilizers - a solution of bird droppings, mullein, horse manure. The organic matter is poured with water and allowed to ferment for 7-10 days.
Manure and mullein are diluted with 5 parts of water. The concentration of chicken manure should be 2 times weaker. Before use, the composition is diluted by half again with water. The second time the onions are fed during the formation of the heads, adding phosphorus-potassium mixtures, for example, potassium monophosphate. The solution is prepared according to the instructions and applied to the soil after watering so as not to burn the roots.
How to feed onions in spring for good development - video
Disease Prevention
Onions are often overcome by various diseases; to prevent this from happening, it is necessary to take preventive measures. The crop can become infected with downy mildew, Alternaria blight, rust, Fusarium blight, and various types of rot. Due to the short growing season, it is undesirable to treat onions with chemicals; all efforts should be directed toward protecting the crop from diseases.
For this it is necessary:
- observe crop rotation;
- provide the crop with good nutrition;
- place the bed in a sunny place;
- get rid of weeds in a timely manner;
- do not allow excess moisture in the soil;
- treat the seedlings before planting.
If signs of disease appear, it is recommended to add wood ash or potassium fertilizer - this will increase the immunity of the crop. It is better to pull out individual plants severely affected by the fungus and burn them. Treat the remaining onions with a solution of the preparation “HOM” (40 g per 10 liters of water). After 1-1.5 weeks, repeat the treatment. After this, you cannot cut the onion into a feather for 20 days.
To prevent an onion fly attack, as soon as the onion leaves reach a length of 10 cm, the bed is watered with a salt solution (1 cup per 10 liters of water). Then two more such treatments are carried out with an interval of 10 days. Preventive measures also include choosing a variety that is resistant to diseases and pest attacks.
Useful tips for gardeners
Planting a bow on a feather is somewhat different from when you need to get the heads. It is also necessary to take some measures to prevent bolting.
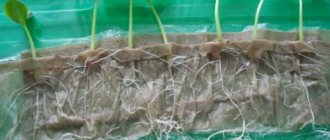
How to plant onions on greens
Planting onions on feathers involves the use of a different scheme and allows you to significantly save on the garden bed, because in this case you do not need to provide the onions with space to form heads. If there is a lot of planting material, it is recommended to plant using the bridge method. In this case, the bed is densely filled with bulbs and then covered with a small layer of soil (2-3 cm). For such planting, 11-13 kg of sets are consumed per square meter.
If you do not have a large number of bulbs, plant the sets using the belt method. The rows are placed at a distance of 15-20 cm from each other. In each of them, the sets are planted at intervals of 1-4 cm. With such a dense pattern, the crop will need to be thinned out in the future, leaving a gap of at least 3.5 cm between plants. Caring for onions when planting on a feather should be the same as when landing on a turnip.
How to put a bow on its head so it doesn't go into the arrow
To prevent the onion from going into the shoot, it is important to properly store the sets in the winter. It should be stored at a temperature no higher than 0° C. It is also important to correctly sort the onions by size. Small and medium sowings do not produce arrows. Onions whose heads are more than 30 mm in diameter will definitely shoot; they should be planted separately on early greens.
To prevent the appearance of shoots, it is important to adhere to planting dates. If the material was placed in cold soil, the bow will become knotted. Do not neglect the pre-planting treatment of seedlings. Warming up the bulbs will reduce the likelihood of bolting. If the arrow does appear, it is cut off at the base of the bulb. The procedure may need to be repeated.
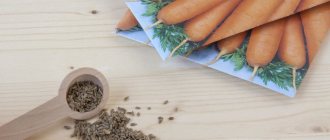
How to prepare planting material?
Also check out these articles
- Grape variety Moldova
- Sunflower varieties
- Feed yeast
- What to feed mulard ducks
Planting material must be grown or purchased in advance. In the first case, it will take a whole year, so it is easier to purchase it at local markets or in specialized stores. You just need to make sure that the crop was grown on local farms, otherwise planting onions on turnips may not give results at all, the planting material either will not take root in a different climate or simply will not sprout. Although there are exceptions.
A month before planting, the bulbs are sorted out and only the best are retained. Good planting material needs to be warmed up. To do this, it is placed near the battery or directly in the sun (window sill, balcony). The minimum warm-up period is 8 hours, the maximum is 4 weeks.
After heating, the bulbs need to be sorted by size. This will make it easier to plant and then sort the finished crop, because the more seeds there are, the larger the “turnip” will subsequently be.
It is worth sorting into three categories: large (diameter 2 cm), medium (diameter 1-2 cm), small (less than 1 cm). Those bulbs that are very dry, small, frail, and if left, are placed in a solution of wood ash or biofertilizers for 1-2 days before planting.
To speed up germination, cut off the neck of the bulbs (the dried place where the greens were) with scissors. This is done carefully, if you touch the “shoulders” or the germination of the seedling will deteriorate. It is the danger of touching the inner sprout, which is not visible behind the husk, that makes the procedure impractical, but some gardeners take risks to get early shoots.
Right before planting, you can soak all the bulbs for 15-20 minutes in a 1% solution of copper sulfate. And then, without drying it out, immediately plant it in the garden bed.