Hello, dear readers of my blog! April for farmers is like an emergency on a sea vessel. The main thing is not to miss the deadlines for sowing grain and planting vegetables. A wise folk proverb says: “If you sow in the dirt, you will be a prince!” Today we will plant potatoes!
Potato (lat. Solanum tuberosum) is a herbaceous tuberous plant from the nightshade family. Its homeland is South America, where this plant is still found in the wild. It was cultivated as much as 7 thousand years ago by Indian tribes living in the Western and Eastern Andes. They ate it and even worshiped it as an animate creature.
It was brought to Europe from Peru by the Spaniards in 1551. It appeared in Russia only towards the end of the 17th century. In 1995, it became the first vegetable grown in space. This versatile plant has saved the world from hunger more than once. A great variety of varieties of this vegetable have been developed.
And its chemical composition depends on weather conditions, soil type, variety, fertilizers, etc. On average, it contains 75% water and 25% dry matter, which includes:
- vitamins (A, B1, B2, B6, B9, C, E, K, PP);
- macroelements (potassium, phosphorus, magnesium, calcium);
- trace elements (iron, zinc, iodine, chromium, fluorine, manganese, copper, cobalt);
- organic acids, etc.
So this is an important food product and rightfully bears the name “second bread”. I offer the best ways to grow vegetables. Let me remind you that it’s still time to plant dill and cucumbers with new potatoes.
Types and varieties of potatoes
Preparatory work for planting begins with the optimal choice of crop variety. Breeders have bred about 1000 varieties of vegetables. They differ in appearance, flavor, specific application, timing of harvest, and use in specific regions. The main classification is based on the time elapsed from sowing the seed to harvesting.
Varieties are distinguished:
- early (and very early) – the cycle is 34-65 days;
- average ripening period (mid-early, mid-ripening, mid-late) – 65-95 days;
- late varieties - 95-120 days before harvest.
Early potato varieties are attractive because within two months after planting you can use fresh potatoes for food. The skin of this potato is thin and easy to peel. The tubers are poorly stored and the potatoes quickly fade. Middle and late varieties are harvested starting in mid-July. They keep well for use in winter. When choosing a variety, pay attention to the degree of boiling of the tubers, which is important for preparing various dishes. Consider the zoning of the variety. As a rule, varieties are bred for a specific area with characteristic soil and natural conditions. For example, the high-yielding early-ripening variety “Udacha” is recommended by the register of varieties and plants of Russia for cultivation in the Central, Volga-Vyatka, and Far Eastern regions.
What difficulties may arise when growing potatoes?
Potato plantings are one of the most unpretentious. But they are not protected from pests and diseases.
Protection from diseases
The most important thing is to be able to “diagnose” potato disease in time:
- Rhizoctoniosis. It is dangerous due to damage to the vascular system: the tubers begin to ripen in the axils of the leaves, on the green part of the plant. The first sign is weakening and redness of the tops.
- Stem rot. The tops quickly fade: a black spot appears on the bottom of the leaf, then it grows, transforming into necrotic with a light border.
- Phytosporosis. Various brown spots appear on the tops, outlined by light green borders. On the inside of the leaf there is a light coating in which spores of the causative fungus are hidden.
- Scab. An insidious disease that affects the underground part of the planting. Ulcers appear on the tubers, which over time transform into a cork layer, making the potato inedible.
- Brown spotting. The disease affects the lower parts of the bush - brown spots develop on the leaves. Then they become covered with a black coating. Spotting actively develops in hot, humid weather.
- Bronze leaves. The reason is potassium starvation. The greenery darkens, becomes covered with necrotic spots and a characteristic bronze coating.
- Macrosporiasis. It simultaneously affects both the tubers and the green part. There are brown spots on the leaves, and putrefactive inclusions with a black coating on the potatoes.
- Fomoz. On the stems of the plant there are pathological elongated spots that become discolored over time. The disease also affects tubers: they are covered with dry rot with a diameter of 2-5 cm. At the same time, voids with grayish mycelium (the body of the fungus) form in the potato.
- Potato cancer. The disease affects the entire bush - it grows unnaturally, becoming covered with formations reminiscent of cauliflower.
Any potassium fertilizer can be used to combat bronze leaves. Counteracting other diseases is the use of fungicides: Topaz, Maxima, Skora. Use the chemical strictly according to the instructions, observing the dosage, harvest schedule and other conditions.
Prevention of potato diseases is simple. These include disinfection of tubers, control of site moisture, and compliance with crop rotation.
Pest Control
In order not to devote the summer to fighting the Colorado potato beetle, be sure to add a handful of wood ash to the holes when planting. Calendula repels insects - sow sunny flowers in the spaces between the rows. Another protection is mixed plantings. The Colorado potato beetle does not like legumes - peas, beans. You can turn to baits, store-bought preventatives against the pest: “Aktara”, “Prestige”, “Confidor”.
Another potato enemy is wireworm (click beetle larva). The insect is afraid of wood ash and eggshells. An effective remedy is traps. Next to the affected potatoes, the pest’s favorite delicacies are buried in the ground - chopped potatoes, carrots, beets. From time to time the bait is renewed, and any insects caught are destroyed. The cardinal method of control is chemical preparations against wireworms and garden pests in general.
larva of the click beetle, a great enemy of potatoes
Colorado beetle
Preparatory work before planting potatoes
Before planting potatoes, the following preparatory work should be done:
- Choose a suitable site (in autumn).
- Till the soil for planting (autumn and spring).
- Germinate seed material.
Site selection
For potatoes, choose a bright area and plant it from north to south. When choosing a place for garden beds, consider the advice of experienced summer residents:
- You cannot plant a crop in one place for more than two years.
- When planning planting, keep in mind that the crop will grow well where beets, cabbage, cucumbers, green manure, and green manure were previously grown. The field should not be placed in the same place as crops such as tomatoes or peppers.
- Do not grow sunflowers or nightshades near the plant.
Beets will be a good neighbor - they absorb excess moisture well.
Preparing potatoes for planting
Seed material begins to be prepared in the fall. Medium-sized tubers weighing up to 100 g are selected from healthy bushes. It is worth keeping the material in the light until it turns green. Greened tubers are stored better; rodents will not be interested in them. Germination begins 4 weeks before planting. It is necessary to take the tubers out of the cellar into the light and lay them out on a litter in a warm place. In the box, spread the potatoes in one layer. At the beginning of March, start preparing the material in this order:
- Inspect the tubers, discard those that are sick or have rot.
- Remove the sprouts, 1-1.5 months before planting, expose the material to light for germination.
- Potatoes are ready for planting when thick sprouts 1-1.5 cm in length have formed.
- Large potatoes should be cut so that there are eyes on each part. You can make cuts throughout the tuber to encourage dormant sprouts to actively grow.
Treat potatoes with a disinfecting, nutritious, stimulating composition before sprouting.
Mulching potatoes
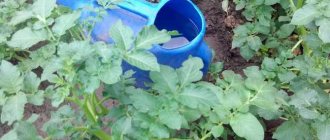
Mulch on a potato field works wonders - it inhibits the growth of weeds, maintains soil temperature constant, moistens the soil due to dew, prevents the formation of crust on the surface of the earth, serves as food for earthworms and fertilizer for potato bushes.
By mulching the rows of potatoes well, you will increase the yield, save time and effort that must be spent on weeding, watering and loosening.
There is never too much mulch, from a layer of 10 cm at the beginning of summer, by autumn there will be a layer of 3-5 centimeters with large bald spots, and by next spring in some places there will be a layer of pressed and rotted mulch only a couple of centimeters thick.
Above, I have already described a way to grow mulch directly between the rows. The second method is to mow the grass in the nearest meadow, then lay it in the rows and chop it with a shovel.
If possible, from the moment the potatoes sprout, during the season add a layer of mulch 10 cm thick around the bushes, and as the grass begins to rot, add a new mow on top.
After a couple of months, you will be surprised how the number of earthworms living under the mulch will increase dramatically, and along with the worms the quality of composting from the grass will improve.
I prefer to mow meadow grass for mulch with a simple scythe, the scythe size is 60 - 70 cm. I tried mowing with a gasoline trimmer, but the constant buzzing in my ear and flying blades of grass in my face quickly got boring. Besides, I didn’t have the nerves to change the line in the reel.
I’d rather beat off and sharpen the braid than pick up a trimmer again, and the productivity of the scythe is much higher.
The mulched row spacing does not need to be weeded in the future, but covering everything with grass once is much easier than constantly pulling it out.
Another plus in favor of mulching is that you do not need to make compost boxes and pits; the grass will rot in the right place, fertilizing the crops, and not the place under the compost heap.
Mulching the soil and sowing green manure is a systematic annual work, the results of which will be noticeable already in the first season.
Soil requirements
The plant prefers black soil, loamy soil, sandy loam (medium and light soils). If the soil is heavy, clayey, and oxygen supply to the soil is limited, the crop will be prone to diseases. The soil should be slightly acidic and fertile. Potatoes do not tolerate acidic, alkaline soils well. The acidity of the soil can be determined by following the advice of gardeners:
- Weeds thrive on slightly acidic soils and quickly respond to fertile soils.
- If it has a red tint, it means the soil is too acidic and needs to be improved before planting potatoes.
- The soil quickly compacts and begins to feel like clay—the acidity is increased.
They begin to increase soil fertility in the fall after harvesting. The soil should be dug up to a depth of 25-30 cm, turning over and removing weeds. Add per square meter of substance:
- 3 kg of humus,
- wood ash - 100 g,
- manure (or bird droppings),
- lime to reduce acidity,
- vegetable and food composts.
- complex mineral additives 25-30 g per square meter. meter.
Before planting, dig up the soil again, add ash and, if necessary, mineral fertilizers.
Selection of predecessors and soil preparation
Proper crop rotation will keep the soil in excellent condition. Thanks to the correct rotation of crops, the soil remains nutritious and loose. Failure to comply with crop rotation will lead to decreased yields and plant disease.
This is an important point in the technology of growing potatoes on an industrial scale.
Plowing fields for potatoes
Potatoes grow well in open ground after winter and spring crops, melons, legumes and green manure. Green manure is very useful for sowing fields. They not only nourish the soil, improve its structure, but are also able to cleanse it of pathogens of various diseases.
strictly contraindicated to plant potatoes after crops from its family: peppers, tomatoes, eggplants. They have identical diseases and pests that can survive in the soil. Carrots, beets and cabbage are not the best predecessors.
Potato planting technology includes soil preparation. In cases where the fields are heavily infested with weeds in the fall after harvesting the previous plant, the soil is treated with herbicides (Roundup, Chistart). The fields must be plowed. Plowland is plowed with tractors with plows to a depth of 30 cm. When the soil is light sandy, the depth may be less.
Autumn plowing is needed in order to:
- make the soil lighter, more breathable, improve the soil structure;
- saturate it with moisture during the winter;
- destroy pests living in the ground;
- get rid of perennial weeds and weed roots.
Along with plowing, organic and mineral fertilizers are added to the soil. It is necessary to add organic matter (compost, manure, green manure, peat) in the fall. During the winter, soil bacteria convert organic fertilizers into plant nutrients. By regularly adding organic matter to the soil, soil quality increases and acidity decreases.
Plowing of fields should be done in early or mid-autumn, when there is not yet heavy rainfall. Wet soil is difficult to plow and this leads to the formation of large clods.
To determine the amount of fertilizer needed and which elements need to be added more, a soil analysis is first done.
- For nutritious soils, it is enough to add from 20 to 40 tons of organic matter per 1 hectare,
- For poor soils - from 40 to 60 tons per 1 hectare.
During plowing, the ridges are cut.
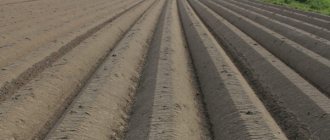
Distance between rows when planting
They begin to plant seed material in April-early May, when the soil is moist and warms up to 10 degrees. To have less green mass and larger potatoes, do not deepen the material into the soil by more than 10-15 cm, depending on the type of soil. The depth is different for different types of soil: The row spacing for early potatoes is approximately 70 cm to make hilling easy, between root crops is 35 cm.
When to plant potatoes in open ground: optimal timing and temperature
Important! Tubers can be planted in open ground when the risk of return frost has passed.
In many regions of Russia, the weather is unstable: one week it can be warm, and the next the temperature can drop to zero. And even minimal frosts will simply destroy the tops.
Interesting! Not only the air, but also the soil must be heated, since at soil temperatures below +8 degrees, potatoes are damaged by rhizoctonia.
It is best to plant tubers when the daytime air temperature is within +15..+20 degrees, and the soil has warmed up to +8..+10 degrees
Advice! When planting early, potatoes should be covered with foam stretched over arches, and the ridges should be made smaller so that the earth warms up faster.
You can also focus on natural phenomena:
- The leaves have blossomed on the birch tree.
- The bird cherry blossomed.
- The dandelion has bloomed (a ball has already appeared).
Interesting! Planting potatoes too late is also bad, as they will not have time to ripen before the end of the warm summer period.
By region
- In the South - in April.
- In the middle zone (Moscow region) - from May 10.
- In the North-West (in the Leningrad region), the Urals and Siberia - from May 20.
According to the lunar calendar 2021
You can also choose a favorable planting date according to the lunar calendar. Lunar sowing calendar for 2021
Favorable days for planting in 2021 are:
- March - 10-12, 21-25, 27-30;
- April - 6-9, 15-17, 20, 21, 24-26, 29, 30;
- May - 1-4, 8-10.
Important! Plants should not be planted during the new or full moon, otherwise they will be weak and stretched out.
Planting methods
Summer residents usually plant potatoes under a shovel, although recently they are increasingly using a walk-behind tractor. The method of planting depends on the specifics of the soil and the conditions of the region. Main methods:
- on the ridges,
- in the trenches,
- smooth.
On the ridges
The crop is planted on the ridges in areas with heavy soils and high humidity. The ridge is made from 12 cm to 20 cm high, up to 65 cm wide. The tubers are buried in the ridge by 6 - 10 cm, depending on the soil.
Trenches
In sandy areas and in warm climates, potatoes are planted in trenches. The work is carried out in the following sequence:
- In the fall, make a preliminary marking of the trenches: step back 40 cm from the edge, dig a ditch approximately 25 cm wide and 40 cm deep. Step back 60-70 cm to the next ditch. Lay the earth dug out when digging ditches into ridges (mounds).
- Fill the trenches with vegetable and food waste. Add fallen leaves on top without compacting them; pour a little over the mixture.
- In the spring, add manure to the settled waste (two buckets of manure per 10 linear meters of the ditch. Mix everything with a hoe, while pouring it between the rows of the trenches. You will get an embankment between the rows.
- Place the tubers in the ditches every 30-40 cm, depending on the size. Add 1 tbsp. a spoonful of wood ash for each tuber; sprinkle the material with soil from the mounds (10 cm).
Potatoes are laid out according to size: large ones every 40 cm, small ones - 30-35.
The smooth way
When planting on a smooth surface of the ground, the workpieces are laid out in holes (or furrows) and filled up. Adding wood ash is also recommended (throw in a handful).
Tips and tricks
Advice from experienced vegetable growers:
- Good lighting of the area.
- The wetter the soil, the shallower the depth the tubers are planted.
- The distance between planting holes is at least 25 cm.
- The row spacing ranges from 50 cm.
- Potatoes are planted in warm soil.
- It is better not to hill up the bushes, but to cover them with earth.
Features of caring for potatoes after germination
The technology for caring for potato bushes after germination includes the main components: protection from frost, watering, loosening and removal of weeds, hilling, fertilizing, control of vegetable pests and diseases. When performing agrotechnical activities, take into account some features of the process.
Frost protection
In May, the sprouts should be covered a little with soil so that they do not freeze from spring frosts. After freezing, new shoots will appear, but the harvest will be worse.
Loosening
- Before germination, loosen carefully; pierce the soil crust with a rake so as not to damage the emerging sprouts.
- Then loosen the soil constantly, after each watering, combining with the systematic removal of weeds.
Watering
- As a rule, when planting potatoes, the first shoots appear during the period when there is enough moisture. If the weather is dry, it is necessary to water the area, stimulating the germination of sprouts.
- From the beginning of budding until flowering, it is necessary to keep the soil moist. If there is a lack of moisture, water 2-3 liters per bush in the evening.
- How do you know whether you should water your potatoes after flowering or not? Only during periods of active drought is it necessary to water the potatoes so that the tubers do not wilt. Check the dryness of the soil. If it is dry to a depth of 6-8 cm, you will need to organize evening watering. In drought conditions, water 3-5 times during the growing season.
Hilling classic and fan
Rolling wet soil onto the roots of the bush (hilling up) is performed 2-3 times during the period of plant development. It is produced to increase the number of stolons (tubers) of the crop. Hilling helps improve the life of the bush:
- The moisture of the soil near the roots is maintained, and the temperature in the center of the bush rises.
- The flowering of the plant is stimulated.
- The development of Colorado potato beetle larvae is inhibited.
There are two methods of performing the action: classic and fan.
In the process of classic hilling, the soil from the row spacing is raked onto the rows, and the bush is covered with soil quite high. With a fan approach (unhilling), soil is poured into the center of the bush. The potato stems are not collected, but pushed apart. With this approach, lighting becomes more complete and the roots have easier access to nutrients. Perform the first hilling, careful and shallow, when the bush has grown to the length of your palm. The second, deeper one, occurs after 2-3 weeks, when the buds begin to form. To achieve the result, carry out the burning when the soil is softer and moist (after rain, watering). In hot weather, do not hill up; it will lead to loss of moisture.
Feeding
During the growing season, potatoes are fertilized, both foliar and root. The seed material is planted in fertile, fertilized soil, so they begin to feed the crop after germination. In total, it is recommended to fertilize the crop 3-4 times per season. After emergence, feed the mixture in the amount of half a liter per hole. Mix the ingredients in a bucket of water:
- urea - 15 g (or ammonium nitrate),
- manure - 500 g (1.5 tablespoon of bird droppings).
Feed the mixture in the amount of half a liter per hole.
At the time of budding (before flowering), during flowering. They stop feeding with nitrogen fertilizers, and plant growth stops. The components are dissolved in a bucket of water:
- double superphosphate - 15 g,
- potassium sulfate - 15 g,
- wood ash - half a glass.
Pour half a liter of the mixture onto the bush. Three weeks before harvesting, it is recommended to feed the crop with the following mixture per bucket of water:
- simple superphosphate - 30 g,
- slurry -1 cup
Feed 0.5 liters of solution per well. Observe the measure when fertilizing, adhere to precise calculations when preparing solutions, so as not to overfeed the plant.
Potato development stages
In order to make it easier to implement potato growing technology in practice, we will briefly talk about the main stages of potato development:
- From tuber germination to emergence of seedlings.
- From the appearance of the first leaves to the development of stems. As the stems and leaves grow, roots develop.
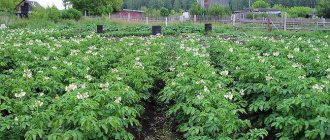
- From the appearance of buds to the beginning of flowering of plants.
- From the beginning of flowering and continues until the tops stop growing.
- The beginning of the tops dying is complete drying.
Usually on the 20-30th day (later in some varieties), after planting the tubers, sprouts appear on the soil surface. During this period, the need for moisture is minimal.
During this period, the formation of tubers ends (in early-ripening varieties, tuberization begins 15 days after emergence, in late-ripening varieties - after a month).
About two weeks after flowering, tubers rapidly grow and starch is deposited in them. After the growth of tops stops, tuber growth and starch deposition slow down. During the period of bud formation and flowering, there is an increased need for moisture.
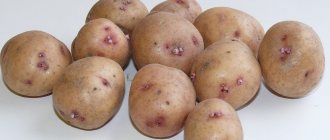
At this time, the tubers acquire a color characteristic of the variety, and the thickness of the peel increases. After a couple of weeks, when the tops died down and began to die, they began to dig for potatoes.
Sprouting potatoes
Sprouting potatoes before planting or vernalization is the process of preparing seed tubers for planting; we plant already sprouted tubers with sprouts and a developing root system in the ground.
This simple agrotechnical technique allows you to reduce the germination time of seed material and have time to grow crops in short summer conditions.
I choose seed material in the fall; from the most productive bushes I take large, even tubers the size of an adult’s clenched fist. Thanks to this selection, the variety retains its qualities and does not degenerate for many years. My potatoes are already in their second decade. Although I regularly, rather for pampering, grow new varieties from seeds.
If you take tubers the size of a chicken egg from all the bushes in a row for seeds, then you will very soon develop the “Ryaba Chicken” variety, and you will get a harvest the size of a quail egg.
Store selected tubers in the cellar separately from potatoes intended for food, each variety in its own compartment, so that diseases are not transmitted to each other.
In the spring, in order to help the tubers come out of hibernation and grow faster, they begin to warm up and germinate 3 weeks before planting. When planted, potatoes enter the ground with a developed root system and powerful eyes, which allows them to grow faster.
The easiest way to germinate potatoes is to spread them in 2-4 layers in boxes, place the boxes in a warm room with an air temperature of 18 - 22 degrees, after two weeks we lower the temperature to 10 - 15 degrees. If the air in the room is dry, spray the surface of the potatoes with water from a spray bottle every few days.
The second way is to put a wet substrate at the bottom of the box - sawdust, straw, hay, pine litter, then a layer of potatoes, then again alternate a layer of substrate and a layer of potatoes. The top layer of tubers should be sprinkled with the selected substrate to a depth of 4–5 cm.
Sawdust (peat, pine needles) should not dry out during germination; germination time is 2 weeks. The advantage of this method is that in addition to sprouts, the tubers form a developed root system. Look at the photo to see what kind of seed material I got from the pine litter.
The optimal size of sprouts for sprouted potatoes is 1.5 - 3 cm, the sprouts should be strong and green. Such tubers are carefully laid out in the holes with their sprouts facing up.
Some sources advise that potatoes can be sprouted in mesh bags. I categorically do not recommend doing this, because the mesh cells cut like a razor and tear off the eyes of the potatoes during transportation, even when moving the bags from place to place, many of the eyes break off; when you pull the tubers out of the bag for planting, their roots and eyes cling to the edges of the mesh.
The best container for sprouting potatoes is plastic fruit boxes. Tubers in boxes are easy to store, the boxes can be stacked on top of each other, it is convenient to carry and transport, and when planting, the potatoes are taken out of the box without damage.
I take the boxes themselves from fruit merchants, of whom there are plenty in Novosibirsk. The owners of the outlets usually throw away used containers, and have never refused my request to save as many boxes for me, without taking any money.
When it is not possible to warm the potatoes indoors, I warm them for a couple of weeks in the greenhouse, covering them with a thick layer of mulch. Depending on the weather, I keep the greenhouse open during the day and close it at night.
At its core, germination in a greenhouse is analogous to germination in a humid environment. Suitable for those who live in their own home and have a potato field and a greenhouse next door.
Dividing the tuber into parts before planting
If there is a shortage of seed material, for example when it is necessary to propagate a variety, the tubers are cut into two or three parts depending on the size of the tuber. When dividing into two parts, the tuber is cut lengthwise or crosswise, so that 2-3 large eyes remain on each part.
When you need to divide a tuber into three parts, cut off the upper part of the potato with a transverse cut, and cut the lower part lengthwise into two halves. Afterwards, the cut parts are powdered with sifted wood ash.
It is necessary to cut the tubers into pieces several hours before planting, so that the cut points have time to dry in the air. If you immediately plant freshly cut potatoes, the risk of disease and pests increases.
Precursors for potatoes
To maintain fertility on your site, it is necessary to observe crop rotation; the same crop must be returned to its original place after three years. During this time, other relatives should not grow on the site; for potatoes, these are nightshades. Potatoes are not planted before or after tomatoes.
Considering that most summer residents do not have large plots and do not have the opportunity to divide the garden into 4 parts, then follow the rule of dividing the plot into two parts and alternating potatoes with other vegetables and root vegetables.
For those who are far from botany and cannot distinguish cruciferous plants from nightshades by eye, there is simple advice on how to alternate garden crops and not get confused:
- The first year, plant what grows underground - potatoes, carrots, radishes, beets, radishes, etc.
- The second year in this place, sow what grows above the ground - cabbage, peas, greens, beans, beans, zucchini, pumpkin, etc.
The third case, when you still have to plant potatoes in the same place year after year, there is also a way out. This means sowing green manure immediately after harvesting in the fall, sowing green manure between the rows in the spring and mulching with organic matter in the summer.
The main rule of farming is that as much as you take from the ground, return as much, dig up a ton of potatoes per acre, put a ton of mulch in this place.
Immediately after harvesting, sow with mustard or winter rye - the root system of rye structures the soil well, and in the spring the green mass is embedded in the soil when digging. This way the land will be replenished with new minerals, replacing those taken by potatoes, and restore its fertility.
Protection from pests and diseases
During the life of a vegetable, gardeners have to deal with a variety of pests. Among them are the main ones:
- Colorado beetle,
- wireworm,
- May beetle larvae.
Undoubtedly, the most dangerous are the Colorado potato beetle and its larvae. How to deal with them? Gardeners fight the striped beetle in different ways:
- Collect insects by hand into a jar filled with kerosene or a high-concentration saline solution. The process is quite labor-intensive.
- Before planting, the tubers are treated with a special chemical preparation: “Prestige”, “Cruiser”, “Commander”.
- Sprayed with chemical compounds to control pests. For example, Aktara, Konfidor.
There is a problem with the use of these drugs: insects adapt to them very quickly. Therefore, it is necessary to use a different composition each new season. There are many known folk remedies. Among them are spraying with wood ash, infusions of onion peels, and tobacco. Wireworm is the larva of a click beetle. To get rid of it, gardeners make traps. During the growing season, you should carefully monitor the condition of the crop to prevent the development of fungal and bacterial diseases - late blight, various types of scab, rot. In the prevention and control of diseases, gardeners use chemical and folk remedies to spray potatoes.
Preparing the beds
Not every place on the plot is suitable for potatoes. Gardeners, planting it exclusively on “ownerless” beds that are not suitable for other crops, deprive themselves of a rich harvest.
Selecting a location
The potato plantation is located on a flat place (without hills, depressions, or slopes). Lowlands and ravines are not suitable for root crops - melt and then rainwater accumulate there. In a wetland, root crops rot and become susceptible to disease.
The best site is a small hill, open to the sun, not shaded by spreading trees and buildings. Potatoes are a light-loving crop and do not like waterlogging. However, he also “doesn’t like” the drought and hot summer.
Good and bad predecessors
Crop rotation is one of the main factors for a rich harvest. Planting potatoes in one field year after year is a big mistake. The fertility of the substrate is depleted, and pests get used to the location of the potatoes. Diseases characteristic of a culture are passed on “from generation to generation.”
The best potato predecessors:
- Green manure: oilseed radish, alfalfa, mustard, lupine, rapeseed.
- Cereals: oats, wheat.
- Root vegetables, onions, garlic.
- Cruciferous vegetables, including all varieties of cabbage.
- Pumpkin: zucchini, cucumbers, pumpkins.
- Corn.
- Legumes: peas, beans, beans.
Not the best predecessors:
- The potatoes themselves.
- Nightshades: tomatoes, eggplants, peppers, physalis.
The same cultures are unfortunate neighbors. They have common diseases and pests that can spread to both future and current plantings.
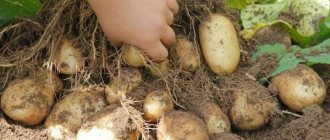
Harvesting
The harvesting time for potatoes varies depending on the type of crop. Basically, the process takes place from late August to mid-September. When using agrofibre, spunbond, agrotex, lutrasil, the time before harvest is reduced by 2-3 weeks. There are several ways to determine that potatoes should be harvested:
- Examine the appearance of the bush: the stems have turned yellow and dried out - it’s time to harvest.
- Dig up some bushes. Check how the top peel is cleaned. If it is difficult to peel, you can dig the potatoes. You should not keep potatoes in the ground - the weight of the tuber will decrease and they will be stored worse.
Mowing the above-ground parts of the tops and weeds accelerates the ripening of the peel. After mowing, the grass must be destroyed - it is a source of pests and diseases.
In summer cottages, harvesting occurs manually (with a shovel, pitchfork) and with the help of a walk-behind tractor. When harvesting potatoes, adhere to centuries-old rules:
- Harvest potatoes in dry weather.
- After digging up the tubers, look through them, discard the rotten and diseased ones.
- Select seed material.
- Spread the potatoes in an even layer, do not immediately take them to the cellar. Let it dry better.
- After 2-3 weeks, cull again. Separate early varieties from late ones.
- After this, take the harvest for storage in a dark, dry and cool place - in a cellar, basement.
Article Rating
Properly preparing planting material
Preparation of planting material begins in the fall, selection for seeds and calibration are carried out. Tubers weighing 30 g - 100 g are used for seed material. After harvesting in the fall, the tubers are selected and landscaping is carried out so that solanine accumulates in the potatoes.
This substance makes potatoes unsuitable for food (you can get poisoned), but it is involved in the germination process. In addition, during storage it will protect the seed material from being eaten by rodents and spoiled by pathogenic fungi.
For gardening, the tubers are left for 10–15 days in a sunny place outdoors or in storage under the influence of fluorescent lamps. In spring, the procedure is repeated when the temperature reaches +10°C – +15°C. Only this time the potatoes are left exposed to sunlight for three to four weeks. The goal is the appearance of shoots at least 2 cm long.
Next, the air-thermal heating procedure is carried out for a week. To do this, the tubers are placed in a storage facility with an average temperature of +25°C – +30°C, where the ventilation system operates. This stage can also be carried out outdoors in sunny, warm weather, if no precipitation is expected. But at night the tubers will have to be removed indoors. The goal is intensive growth and awakening of tubers.
The final stage is the treatment of tubers with fungicides and growth activators, carried out a week before planting to prevent diseases and stimulate growth.