Variety selection
Breeders have developed more than 70 varietal varieties of garlic. They differ in terms of ripening, endurance and requirements for growing conditions. All varieties are divided into two types - spring and winter.
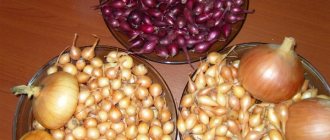
Spring garlic is planted in summer. It is less productive, but milder in taste, does not produce shoots and is well stored during the winter. The cloves in the onion differ in size and shape. Popular varieties: Gulliver, Victorio, Ershovsky, Elenovsky.
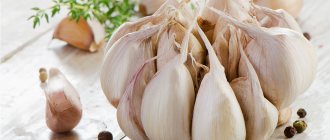
Winter garlic produces a good harvest, so it is often grown on an industrial scale. In the center of the head there is a rod, which is absent in spring varieties. The cloves are identical in shape and have a sharp taste. Famous varieties: Dobrynya, Alkor, Sofievsky, Lyubasha.
Features of the species
Each species has its own distinctive characteristics and growing conditions, based on which gardeners choose an option suitable for their area:
- Winter (arrowing). It is characterized by a large head, inside of which there is a hard rod. Around it there are large lobules with a thick shell. The shelf life is 3 – 4 months.
If you plant winter garlic in the spring and not in the fall, you will not be able to grow it and get a good harvest. All the power of the plant will be directed to increasing the green mass and shoots; a full-fledged bulb will not grow.
- Spring (non-shooting). The head consists of small teeth randomly placed in a spiral and lasts up to 10 months.
Related article:
It is important that the garlic does not rot
Landing dates
Spring garlic is planted in April or May, depending on the weather conditions of the region. Wait until the snow melts and the soil warms up to +5... +6 degrees. There should be no stagnant water, otherwise the cloves will rot. But there is no need to wait until the soil is completely dry. Cool weather and moderate soil moisture are ideal planting conditions.
Winter varieties are planted about a month before the onset of frost. In the north of Russia, work is carried out at the end of September - beginning of October, in the south - until the end of the first week of November. Before the arrival of winter, the cloves will have time to take root, and in the spring, when temperatures above zero, they will begin to actively develop the root system.
Answers to frequently asked questions
Which varieties of spring garlic to choose?
First of all, focus on your region. Now agronomists have developed varieties for almost every region of Russia.
Is it possible to plant winter garlic in the spring?
Why not? Of course, you shouldn’t wait for full harvests, but you will get quite normal heads.
How to update a variety?
To do this, you need to collect and plant the cloves. A single tooth will grow, with the help of which the variety will be renewed.
Where to plant spring garlic?
Choose a sunny, well-ventilated place with fertile soil.
How deep should the teeth be buried?
2-3 cm. No more is needed, otherwise they will not germinate well.
Do I need to water garlic after planting?
It is better to do this before the procedure. Dig a furrow, water it, let it soak in, and then plant the cloves.
Site selection and soil preparation
Garlic beds are laid out in a high place with good lighting. Lowlands are not suitable - stagnant moisture will cause rotting of autumn plantings and will not allow early sowing of spring ones.
The acidity should be neutral; the best option is sandy or loamy soil. If the soil on the site is acidic, add slaked lime, ash or chalk to it.
Be sure to observe crop rotation:
- onions are a bad predecessor - they leave garlic as a “legacy” of pest larvae and general diseases;
- carrots greatly deplete the soil, so garlic will not grow well after it;
- peppers, beets, potatoes and cabbage are also undesirable as predecessors;
- Areas where cucumbers, zucchini, pumpkin, legumes, grains and cauliflower previously grew are perfect.
Garlic inhibits fungal spores and repels harmful insects, so it can protect other garden crops. It will be an excellent neighbor for eggplants, potatoes, carrots, peppers, tomatoes, strawberries, and berry bushes. The exception is legumes - garlic planted closely will suppress them.
Before planting, the following preparatory work is carried out:
- The bed is dug up with a shovel or special pitchfork. For winter garlic, superphosphate, potassium salt and humus are added to the ground in amounts of 30 g, 20 g and 5 l, respectively. Then they wait until the soil calms down and settles, and only after that the cloves are planted.
- You can fertilize the soil for spring garlic both in autumn and spring. During the autumn preparation of the beds, a mixture of double superphosphate, compost and wood ash is used. In spring - ash and humic fertilizers.
- If you use organic fertilizers, use only rotted ones and be sure to mix them with soil. Fresh manure is contraindicated - it causes tops to grow rapidly to the detriment of root crops.
Preparation of planting material
Before preparing garlic for planting, you need to carefully inspect it. Choose large, dense bulbs as the size of the harvest depends entirely on the mother plant. The cloves should be healthy, without signs of disease, with tight-fitting skin. There should be the beginnings of roots at the bottom - this is the key to the garlic sprouting.
Soak the selected material in a pink solution of potassium permanganate, but no longer than half an hour. Potassium permanganate will destroy the beginnings of fungal infections and enrich the seedlings with potassium, which promotes the development of the plant.
Do not remove the skin from the cloves before planting! This is their protective layer, which acts as a barrier against pests and infections.
How to care for garlic planted in spring?
Garlic will quickly turn yellow from lack of watering.
Caring for garlic plantings is not difficult, but it must be done regularly:
- Irrigation is necessary (water temperature from 15 to 20 degrees), but its excess can injure the roots, watering is completed 2 weeks before harvesting;
- Potassium and phosphorus fertilizers are used as fertilizers. An excess of fertilizers has a negative effect on the plant, which can cause the leaves to turn yellow and reduce resistance to diseases;
- loosen the ground (after watering - necessarily) so that air circulation is not disturbed;
- get rid of weeds; if this is not done, full-fledged bulbs will not form;
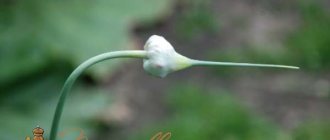
- excess arrows are removed, leaving only those from which seeds will be obtained;
- When caring for garlic, a summer resident must free it from weeds, monitor the moisture of the soil, feed it, and inspect it for infection with fungal or viral diseases in order to take timely action to eliminate them;
- plantings, if the need arises, protect against pests and diseases (one of the most common is fusarium).
Planting methods
Garlic can be planted in three ways: family cloves - cloves, seed bulbs or annual bulbs - sets.
With cloves
Form a bed about a meter wide and loosen it thoroughly. Make indentations every 15-20 cm in the row, then water them generously. Cover the bottom with ash or sand. The depth of the cloves is 5-6 cm. After finishing the work, sprinkle them with a centimeter layer of humus.
If you are planting a vegetable before winter, do not forget to mulch the bed with peat or other organic materials.
Watch a video on how to plant garlic cloves.
Bulbs
Bulbs are the seeds that form in the inflorescences of winter varieties of garlic. The largest of them are chosen as planting material. Growing a crop from bulbs rejuvenates and heals the plant, which is why gardeners periodically practice it.
Pre-winter sowing is carried out at the same time as planting the cloves. Furrows are made on the surface of the bed every 10-15 cm. Depth - up to 3 cm. The bottom is sprayed with potassium permanganate diluted in water, after sprinkling the ground with sand and ash. The seeds are laid out at a distance of 2-3 cm from each other, bottom down. The bottom is wider than the apex and is marked with a scar. When in doubt, place the grain on its side.
For the winter, mulch the bed with 2 cm thick peat or sifted compost. In spring, standard care will be required - watering, loosening, weeding. As soon as the tops turn yellow and the neck becomes thin, you can collect the sets. To do this, choose dry weather, and then the harvest is dried under the sun in the open air for three days. Until the next planting, it is stored at room temperature.
In the northern regions, bulblets are often planted in the spring due to the fact that they may not survive winter frosts. Until February, they are stored in a dry, warm place, and then transferred to a room with a temperature of 0 degrees. A refrigerator or basement is suitable for this. In mid-April or May, the seeds are processed and planted in open ground. By autumn the seedlings will ripen. It can be left to overwinter in a garden bed under a peat cover.
Sevcom
Single-toothed bulbs can be grown independently from bulbs or purchased at the market. For sowing, choose strong, dense and healthy specimens. If you want large bulbs, plant in the spring and then overwinter the beds. If you need a medium-sized crop, do the usual winter planting. Planting pattern: 20 cm between rows and 10 cm between seedlings.
Is it possible to plant garlic in the spring if you didn’t plant it in the fall?
If you were unable to plant it in winter, do not be upset. After all, you can plant in the spring and reap an excellent harvest by the end of the summer season. There are varieties that need to be sown at different times of the year. Spring varieties are suitable for spring planting .
The spring variety has several advantages.
- It tolerates long-term storage very well and can remain with you until the next harvest.
- The bulbs contain a large number of cloves, and the closer to the center, the smaller they are.
- There is no rod in the middle.
- In this case, the upper large teeth can be used for seedlings.
- Due to long-term storage, in the spring you will be able to select healthy cloves that have not been susceptible to disease. And this will be one of the keys to the next successful harvest.
- This variety is less pungent in taste, slightly sweeter, and is well suited for preparing various dishes.
Planting times depend on the climatic weather conditions of your region. After all, for garlic bulbs, the soil must thaw so that you can dig up the bed. But frosts should not fall lower than 8-10 degrees, because then everything will freeze.
The best time for planting is considered to be the second half of March or the beginning of April. By this time, the earth will have already frozen and warmed up to an average temperature of +5-7 degrees.
It is advisable to prepare the bed for planting in advance and apply fertilizer in the fall. This vegetable loves fertile soil with an average clay content. The place for the garden bed should be on the sunny side, so that there is no stagnation of water and excess humidity. Otherwise, the garlic may rot or be susceptible to fungal diseases.
Apply ash or other mineral fertilizers at the rate of 1-2 cups per 1 square meter of bed. This will accelerate the growth of the vegetable and increase resistance to diseases.
The cloves must be prepared before planting. Re-sort and select healthy teeth. You can also plant those that have had the husks removed from the top. During storage, they dried out, so they need to be soaked in water for 24 hours to swell. After that, place them on a damp cloth and wrap them. At optimal room temperature, they will germinate soon. Disinfect them in a weak solution of manganese and you can start sowing.
There will be a large harvest if the bulbs have time to form before the onset of hot days. If the temperature is too high, growth unfortunately slows down.
Garden bed care
Garlic is one of the unpretentious garden crops. All it needs is proper watering, loosening and fertilizing if necessary.
Garlic beds are watered once a week or two in normal weather, and during the rainy season, watering is reduced to a minimum. They are stopped two weeks before harvest. Periodically, the beds are loosened for better moisture saturation.
Feed garlic three times per season:
- after the first 2-3 leaves appear, the bed is watered with water and urea at the rate of one tablespoon per bucket of water;
- after a couple of weeks, water with another solution: half a spoon of urea and one spoon of superphosphate and potassium sulfate per bucket of water;
- when the bulbs are formed and the arrows appear, do the last feeding: two spoons of superphosphate and a spoon of potassium sulfate in a bucket of water.
Diseases and pests of garlic
To harvest a high harvest of garlic, you must follow all the rules of planting, crop rotation, care and prevention of plant diseases.
Fungal diseases of garlic include downy mildew, black mold, black neck rot, rust, green mold, black mold rot, and white rot.
Garlic bulbs can be affected by fungus even during storage. Affected fruits infect healthy ones. The main symptom of the disease is the appearance of damp dark spots and lethargy of the bulbs. A white coating is noticeable on the surface of the heads, which turns green over time. Further development of the disease leads to a hollow bulb. The disease of garlic heads is promoted by increased temperature and humidity in the storage room.
There are fungal diseases that can affect garlic not only during storage, but also in the garden beds.
Symptoms of the disease are:
- rapid yellowing and drying of leaves from top to bottom;
- the formation of a white coating at the base of the bush.
Gradually the plant dies.
Prevention of fungal diseases will include compliance with crop rotation, correct predecessor plants, and periodic renewal of planting material by collecting and planting aerial bulbs.
To combat an already existing disease, fungicides are used - chemical preparations intended for treating seeds and combating plant fungus. Fungicide concentrate is toxic to both humans and animals.
If preference is given to an environmentally friendly product and there is no desire to treat plants with chemicals, folk remedies are used.
You can treat the plants with an infusion of calendula and yarrow. To do this, pour 50 grams of chopped green plants into 1 liter of hot water. Insist for seven days. Before spraying, the infusion is diluted in water at the rate of 1 liter of infusion per 10 liters of water. The soil is cultivated before sowing and again during the period of abundant development of green mass. This treatment will be effective against white rot.
Pests of bulbous crops cause no less problems. Among the most common pests of garlic are onion fly, onion hoverfly, onion borer, onion thrips, onion secrecy, onion moths, onion stem nematode, root mites, four-legged garlic mite.
To protect the harvest, you need to take timely measures when the first signs of pests appear. It is recommended to treat plants with well-proven insecticides (chemical preparations designed to combat harmful insects), such as Actellik, Neoron, Dimethoate-400, Calypso and others. Each product comes with detailed instructions for use.
It is important to know when breeding bees in a summer cottage that the use of insecticides can be harmful to insects.
If you do not want to use chemicals, then you can use traditional methods of pest control. Among them, we can highlight the treatment of plants with shag infusion - add 250 grams of shag and 1 tablespoon of hot red pepper to 2 liters of hot water. Leave for 3 days. Then strain the tincture and dilute it in 10 liters of water, adding 30 grams of liquid soap. This treatment will save garlic from onion flies.