10.15.2019 Michur Ivanov Garden and vegetable garden Information on how and with what to treat the soil in a greenhouse in the fall from diseases and pests, how to carry out disinfection using traditional methods, how to organize the cover of greenhouse soil, will be useful for both beginners and those who want to renovate your agrotechnical knowledge.
Actions of biological products
Biological products are an excellent means for disinfecting greenhouse soil in the fall. How do the drugs work, what are their benefits?
- Diseases left by the previous harvest are eliminated.
- Larvae and eggs left by insects to overwinter in a warm shelter successfully die under the influence of biological products.
- They promote stimulation and make fertilizers act faster.
- Helps organic decomposition of nutrient mixtures.
- Binds and smooths out the effects of heavy metals and pesticides.
- Improves soil structure.
Fitosporin
One of the best universal remedies that can disinfect soil from such popular diseases as blackleg, powdery mildew, late blight, fusarium, fungi and mold. It is diluted according to the instructions and watered on the beds.
Phytocide
This is just a thunderstorm of all microbes. With its powerful action, it accelerates and stimulates the processing of organic matter and minerals, turning them into humus, which is so necessary for the fertility of the earth. It is enough for one hundred square meters in a volume of five liters to destroy all harmful microbial environments.
Azotophyte
This drug is designed to increase soil fertility. Helps seed germination and better adaptability and survival rate of seedlings in the early stages. Helps plants become more resistant to diseases, especially late blight.
One can also only talk about green manure plants on the positive side. They heal, disinfect the soil, their roots enrich the top layer of soil with micro and macroelements so necessary for plants, especially tomatoes. The most optimal green manure for greenhouse soil is white mustard.
There is another way you can improve the health of the soil in a greenhouse. This is her replacement. The method is quite labor-intensive, but allows you to almost completely renew and protect the soil. This is done as follows:
Remove a layer of 70-100 mm from the greenhouse. Place this layer in a place specially designated for it, since it must be treated with bleach and copper sulfate. It is left in this form until winter. This layer may be returned back to its place no earlier than in 2 years. But, ideally, she should not return there. It is better to apply it in a thin layer over the entire area after winter freezing.
What are the beds replenished with? To replenish, take a layer of earth prepared as follows:
- 2 parts soil or turf land,
- 2 parts sand
- 4 parts humus from a compost pit,
- 6 parts lowland peat.
This whole mixture should be mixed, add lime to it at the rate of 3 kilograms per square meter. Fill the beds with this composition, adding additional fertilizers needed for the crop.
Try to plant green manure in the greenhouse more often; you can manage to grow them twice a season. In early spring, before planting the seedlings, they calmly have time to grow. And in the fall, after harvesting, sow the land. Mustard grows in just a month. It needs to be cut and added to the soil before planting in the spring. And close it up in the fall, along with fertilizers.
After green manure, it is good to feed the soil with biological products such as: “Baikal EM 1”, “Vostok EM1”, these substances of ecological farming help the soil to process fertilizers and turn them into vermicompost.
In winter, especially snowy ones, you should throw snow into the greenhouse. In the spring, this snow will serve as watering the soil, and will also act as an additional soil healer against infections.
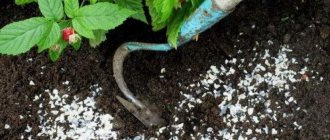
The main mineral fertilizers in the fall include simple superphosphate. It is added before digging the ground at the rate of twenty grams per bucket of water. Dilute and water the soil.
Nitrophoska is suitable for soil in greenhouses; it can be fed in both dry and liquid form.
Working in greenhouses in the fall allows you to prepare the soil for the next season. You will greet spring fully armed if you carry out the treatment correctly in the fall.
Soil treatment after diseases and pests
There are two approaches to ridding the soil in a greenhouse of pathogenic microflora and larvae of harmful insects - disinfection and replacement of the top layer of soil.
Treating the soil with chemicals is undesirable in a greenhouse, where harmful substances are less actively washed out by precipitation throughout the year, and the inability to use crop rotation often forces such treatments to be carried out for several years in a row. The disadvantage of the second method is its complexity.
Soil disinfection
Soil treatment with chemicals can only be carried out in autumn. If you do this shortly before planting seedlings, the roots of the tomatoes will absorb harmful substances from the soil, some of which will accumulate in the fruits.
If tomatoes are exposed to diseases, it is recommended to spray the soil with one of the following products:
- solution of copper sulfate (10%);
- Bordeaux mixture (10%);
- solution of iron sulfate (2.5%);
- drug "Fitosporin-M" (only if the soil temperature is above 10°C).
To combat the larvae of harmful insects, you need to treat the soil:
- drugs “Trichodermin”, “Fitoverm”, “Gaupsin”;
- 4% bleach (in case of spider mite infestation, the concentration of the solution should be increased to 10%).
Fumigation
In addition to directly washing the greenhouse, it is also necessary to fumigate it. For this, either cutting sulfur or sulfur blocks are used.
Before starting work, it is recommended to completely close the greenhouse and wet its main structures with water.
The fumigation process using cutting sulfur occurs as follows:
- First you need to prepare the material. It is recommended to use 1 kilogram of the substance per 10 cubic meters of room.
- The sulfur should be crushed well and mixed with charcoal until a homogeneous mass is formed.
- The mixture should be scattered on metal baking sheets, which must be placed in a deep basin, filling the latter half with water.
- At the end, the containers need to be placed around the room, setting fire to the sulfur, during which sulfur dioxide will be released into the air. It is toxic and dangerous to humans, therefore, according to the rules, it is necessary to use a gas mask, safety glasses and gloves.
The process of fumigation using sulfur bombs occurs according to the following algorithm of actions:
- Initially, you should prepare 60 grams of material.
- All checkers should be placed on baking sheets, which should be placed throughout the room.
- At the end it is necessary to set fire to the sulfur.
It is worth noting that many gardeners do not approve of the use of sulfur bombs. This is due to the fact that sulfuric anhydride has a bad effect on metal. That is why, if the frame is damaged, it is better to give preference to other methods.
Spraying
Fumigation is one of the most common ways to treat a greenhouse for the winter in order to disinfect it.
Despite this, there are many other methods that are no less effective.
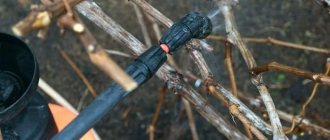
Many gardeners spray the greenhouse in the fall, using Bordeaux mixture or products designed to combat fungus and insects.
To do this, these substances must be correctly prepared in accordance with the instructions for use.
After this, using a regular spray bottle, you need to evenly cover all surfaces of the room with the resulting liquid.
Treatment with chemicals
Most often, the following chemicals are used to treat greenhouses in the fall:
- Copper sulfate. This substance helps against scab, phyllostictosis, clasteroporosis, coccomycosis, monilosis, curliness and many other problems.
- Bleaching powder. It should be applied primarily directly into the soil itself in the quantities indicated for this or that parasite.
- Potassium permanganate solution. After diluting this substance, it must be added to the ground along with water.
Chemical treatment is a process that must be carried out with all precautions.
This is due to the fact that the substances that are used are dangerous to living organisms, including humans.
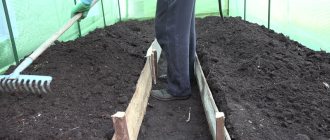
Soil replacement
It is recommended to remove a layer of soil of about 15-20 cm, this will remove most of the overwintering fungal spores, pest larvae and bacteria. In addition, the main layer of weed roots and seeds is located at this level.
Having removed the top layer of soil, in its place you need to put a mixture of peat, sand, rotted manure and compost. It is useful to add wood ash, mowed grass, and leaves to it. A new layer is dug up, mixed with the remaining soil, after which the soil in the greenhouse is mulched with straw.
Interesting!
If, after harvesting, you dig holes in the ground, fill them with dry leaves or hay and cover them with soil, you can speed up the warming of the soil in the spring. The leaves will begin to rot, heating up as a result of this process and increasing the temperature of nearby soil areas.
Proper carrying out of all autumn work in the greenhouse will allow you to obtain fertile soil free from pests and fungi by spring for growing tomatoes and other crops. Neglecting sanitary measures in the greenhouse is unacceptable, since in the case of many microorganisms and insect larvae, even frost is not an obstacle to successful wintering.
A set of measures to prepare a greenhouse for winter
The greenhouse allows you to get fresh vegetables and herbs to the table, from early spring until the first months of winter. But during the warm season it becomes dirty; harmful bacteria, insects, and dirt accumulate on the walls and behind the crossbars. There are plant remains in the beds, pathogens, pest beetles, harmful elements in the soil, and infections in the air. Such negative factors can damage the structure itself and the future harvest; in order to avoid sad consequences, it is necessary to carry out a set of measures to prepare the greenhouse for winter:
- clean, take out trash;
- wash;
- dry;
- disinfect;
- digging, tillage;
- insulate;
- strengthen the structure.
Preparing the greenhouse for winter, first of all, it is necessary to remove all unnecessary
Wellness and cleaning
Improvement and cleaning are carried out in the fall. If you are against chemicals, it is better to simply change the soil. Up to 25 cm of the top layer is removed and a mixture of humus, peat, and sand is added. The process is complicated, but the result will please you.
You can use both biological and thermal healing methods, but they are less effective. When choosing a thermal method, the main role is given to the effects of temperature. So, from February to March, snow is poured onto the beds. As a result, up to 50 percent of bacteria die. Steaming the soil at high temperatures also gives a good effect. Steamed and untreated soils should not touch.
How to prepare a greenhouse in the fall
First, we do some general cleaning, and then we clean up the house for the future harvest.
First of all, we remove all the tools, watering cans, hoes, supports supporting the plants, and more.
Completely remove all plant waste from the structure, as it can harbor harmful bacteria.
We wash the entire structure from the inside, including the covering, joints, lintels, and ceiling.
If the structure is made of metal structures, clean out rusty areas, prime and paint. If it is made of polycarbonate, wash the walls and ceiling with a solution of laundry soap or potassium permanganate.
Do all these simple steps carefully, and in the spring it is worth repeating the treatment of the walls and ceiling of the greenhouse again to be sure of the destruction of disease spores and infections.
Set of measures
Preparation of the greenhouse in the fall should take place at an air temperature of 10-15 ° C, in dry weather. Competent preventive maintenance of the structure and high-quality soil care in the greenhouse in the fall are carried out in several stages:
- cleaning;
- spring-cleaning;
- disinfection of surfaces;
- repair of the structure;
- cultivating the soil in a greenhouse in the fall: applying chemicals - fertilizers, drugs against pests and infections, fertilizing, improving the soil structure, digging or replacing the fertile layer;
- strengthening the structure;
- insulation, additional lighting, heating (if necessary).
The video shows a step-by-step process of how the autumn treatment of a polycarbonate greenhouse is carried out; the video recommends preparations for cleaning the structure.
The concept of a warm bed
So what is this concept? This is soil that is filled with the remains of vegetation, for example:
- branches;
- leaves;
- grass and other materials.
All these materials, when decomposed, are capable of releasing heat and also warm the roots of plants.
Thanks to the heat generated, plants develop better and tolerate temperature changes better. Decaying organic matter also helps form nutrients. Similar beds can be made in the fall or spring, but in the fall there is much more suitable organic matter on the site to fill. Do-it-yourself warm beds in spring can also be made using other organic materials available during this period. They should be placed from east to west, choose well-lit areas for them.
spring-cleaning
Preparing the greenhouse for winter in the fall begins with general cleaning. Equipment is taken out of it, trellises, supports, and garters are removed. Everything must be cleaned, rinsed thoroughly, disinfected, dried, and stored in a room with normal humidity.
Before removing the greenhouse for the winter, plant debris is removed from the beds. Tops and weeds can be placed in a compost heap, but it is better to burn them. Be sure to remove the top 50-70 mm layer of soil for the winter, this is where pathogenic infections, harmful substances and other infections have accumulated in large quantities. It is recommended to take the collected soil out of the greenhouse, scatter it over the area in a thin layer, or leave it in a heap so that it freezes thoroughly over the winter and becomes disinfected under the influence of low temperatures.
Cleaning the greenhouse for the winter:
- The inside of the room is washed with a soft cloth soaked in warm water with the addition of non-aggressive household chemicals. You should wash not only the walls, but also the roof.
- The gaps between the frame and the walls of the greenhouse must be cleaned; it is convenient to do this with a brush or toothbrush.
- Surfaces are washed with clean water and wiped almost dry.
- To prevent fungi or corrosion, the frame must be treated with a saturated solution of bleach: lime - 2 kg of lime + copper sulfate 0.100 kg + 1 bucket of water.
- After cleaning, the doors and transoms are opened for ventilation so that the greenhouse is completely dry.
An important step in preparing a greenhouse for winter is to clean all connections with a brush from dust, infections and debris.
Important: Preparing a polycarbonate greenhouse for winter prohibits the use of abrasives, hard sponges and brushes, and highly alkaline detergents during wet cleaning, so as not to damage the surface of the material and reduce its positive physical and chemical characteristics. More often, greenhouse structures made of polycarbonate are installed on sites.
Such structures are convenient, practical, budget-friendly, and installation of the product can be easily done with your own hands. Due to the demand for structures, we suggest watching a video with tips on how to prepare a polycarbonate greenhouse for winter; the video suggests the main stages of conservation of the building
More often, greenhouse structures made of polycarbonate are installed on plots. Such structures are convenient, practical, budget-friendly, and installation of the product can be easily done with your own hands. Due to the demand for structures, we suggest watching a video with tips on how to prepare a polycarbonate greenhouse for winter; the video suggests the main stages of preserving the building.
Be sure to check the tight fit of vents, windows, doors, handles, and the serviceability of fittings in order to avoid drafts and icing. If there are scratches on the metal frame, it is better to clean them and paint them over to prevent rust from appearing.
Disinfection after diseases and pests
If diseases or parasites appear on plantings in a greenhouse, it is necessary to disinfect the shelter to prevent a relapse in the next season. When choosing a method for processing a greenhouse, you need to take into account the materials from which the frame and transparent surfaces of the structure are made.
Metal carcass
Unlike wooden and polyvinyl chloride structures, the aluminum profile of the greenhouse can be subjected to heat treatment - doused with boiling water. The procedure is carried out after removing the film coating or polycarbonate panels from the frame.
To disinfect a metal structure, you can use 9% vinegar diluted with 20 parts of water. It is more effective to add it to boiling water. Metal parts coated with varnish can be treated with 1% Bordeaux mixture.
Cutting sulfur
To fumigate with sulfur cuttings, you will need to mix it in equal proportions with charcoal and grind it. The mixture is poured onto metal baking sheets and evenly distributed over the area. In total, you will need to take 1 kg of sulfur for every 10 m3 of greenhouse volume.
The principle of operation is similar to a sulfur bomb, so this method is also contraindicated in greenhouses with a metal frame. The ignited sulfur is left in a hermetically sealed greenhouse for 3-5 days, during which time not only the surface of the greenhouse, but also the soil in it will be disinfected. After this, the doors open. It is necessary to ventilate the structure for several weeks; all work in it must be stopped during this time.
Important! All work with sulfur compounds must be carried out using personal protective equipment.
PVC pipe frame
An effective means for treating PVC frames is a bleach solution:
- Dissolve 400 g of bleach in a bucket of water.
- Let sit for 4 hours, stirring occasionally.
- After the last stirring, leave for 15 minutes.
- Drain off the top transparent layer, being careful not to touch the “thickness”.
- The remaining mass needs to be processed into the frame.
On a note!
To disinfect the soil, you can use the drained top layer of liquid (a solution of low concentration).
To disinfect plastic frames, you can use a vinegar solution of the same concentration as for treating metal products, but its temperature should not exceed +60°C.
Bleach
The use of bleach is another effective way to get rid of pathogens and pests in a greenhouse. This treatment is effective against root-knot nematodes, black leg, white rot, clubroot. During autumn treatment, you can use a more concentrated solution of bleach than in spring.
The solution is prepared from 10 liters of water and 400 g of bleach powder. The resulting mixture should be poured generously onto all greenhouse beds. Over the winter, the substance will be completely neutralized.
Potassium permanganate
Potassium permanganate is a well-known potassium permanganate. This drug is sold in pharmacies and is a fairly strong disinfectant. To disinfect greenhouses after harvesting in the fall, potassium permanganate is diluted to a bright pink color, after which the walls and frame are treated with a brush or spray. In addition to disinfection, potassium permanganate also enriches the soil with microelements.
This is interesting: Grapes: leaf diseases, detailed description, treatment, photo
Wooden frame
Copper sulfate or Bordeaux mixture is best suited for processing wood structures. The solution is prepared in a concentration of 7-10% and wooden beams are impregnated with it. To enhance the effect, the frame should first be wiped with bleach. After disinfection, the wood should be allowed to dry and whitened with freshly slaked lime.
Since wood can dry out over time, and treating small cracks is difficult, the best way to disinfect a greenhouse is to fumigate it with sulfur. This method is especially convenient for greenhouses that cannot be disassembled.
Fumigation rules:
- Before the procedure, you need to carefully caulk all the cracks. For greater effect, moisten the internal surfaces of the greenhouse with water.
- Before starting fumigation, care should be taken to protect your hands (rubber gloves), eyes and respiratory organs (gas mask or respirator and goggles), since when the substance burns it releases compounds hazardous to human health.
- For fumigation, sulfur or a sulfur bomb is used. For every 10 m3, 1 kg of sulfur or 600 grams of sulfur bombs is required.
- The substance is crushed and mixed with coal.
- Metal braziers or baking sheets with the mixture are placed in basins with water (to reduce the potential fire hazard of the procedure) and placed evenly over the entire area of the shelter.
- After this, the sulfur is set on fire. The substance will smolder slowly, so it makes sense to open doors or windows in the greenhouse no earlier than after 5 days.
- After this period, the shelter should be thoroughly ventilated. In a polycarbonate greenhouse, after fumigation, you need to wash the surfaces with a soda solution.
Fumigation can also be carried out in a greenhouse with a PVC frame, but for metal structures, processing is allowed only if there is a special coating, as indicated by the manufacturer. Volatile substances released as a result of sulfur combustion cause metal corrosion. Fumigation with sulfur can be carried out in greenhouses made of polycarbonate, glass or film.
Recommendation!
Experienced gardeners claim that treating metal parts with grease before fumigation can protect the structure from damage.
Farmayod
Farmayod is a universal drug for any type of infection: fungal, bacterial, viral. The use of this product also helps fight harmful insects. The drug is produced in liquid form, packaged in bottles. To process structural elements and polycarbonate you will need a sprayer.
The required volume of water is poured into the sprayer, and the drug is poured there. Proportions are taken from the instructions. The product is thick, so to completely dissolve it you need to mix it well with water. Don’t forget about personal protective equipment (respirator, gloves, goggles). Pharmaiod can lead to negative consequences if it enters the body.
The solution is treated with:
- polycarbonate;
- designs;
- wooden fences for garden beds;
- soil.
For 4 days, treated with farmiod, the greenhouse is hermetically sealed and no one enters it. After quarantine, it is ready for the new planting season; you can enter it and carry out all the necessary seasonal work.
Whiteness
Over the summer, a coating of organic origin appears on the walls of the greenhouse; if it is not removed, it will become a favorable environment for the growth of bacteria. In neglected greenhouses, plants get sick, and the harvest is poorly stored.
In the spring, the interior surfaces of the greenhouse can be washed with white to destroy harmful microorganisms, as some vegetable growers advise. This is a well-known whitening agent; the active ingredient is sodium hypochloride.
Advice! Use white to disinfect gardening tools, ropes and laces for tying plants.
Whiteness is a good antiseptic, but it is still not worth using it to disinfect soil and wash polycarbonate. Substances containing chlorine have a bad effect on the condition of polycarbonate and worsen the composition of the soil. For example, excess chlorine in the soil has a negative effect on cucumbers: their growth slows down and the size of the leaves decreases.
Film, glass and polycarbonate
Glass, like polycarbonate panels, can be disinfected with a bleach solution. The polycarbonate is also washed with a purple solution of potassium permanganate. The film should be wiped with a solution of copper sulfate (4%) and left to dry without rinsing. After this, the coating is removed for storage.
Fitosporin
Phytosporin is the basis for preparing a solution intended to combat late blight mainly in tomato crops.
The prepared solution can be stored for up to 1 year under proper storage conditions and is available in three types:
- Liquid option.
- Powdered version.
- Paste option.
In addition to the basic recipe, you can make your own slightly different solution for treating soil and greenhouses, the calculation is based on 10 liters of water:
- Phytosporin stock solution – 4 tablespoons.
- Hydrogen peroxide – 3 tablespoons.
- Metronidazole – 10 tablets of the drug.
The prepared solution is suitable for use both in the beds and directly on the paths and throughout the entire greenhouse structure - the reuse interval (if necessary) is 10-13 days.
Copper sulfate
Copper sulfate is an effective broad-spectrum fungicide. To prepare a solution for treatment, you need to take 100 g of powder per 10 liters of water. Disinfection of a greenhouse in the fall with copper sulfate is carried out using a spray bottle, sprayer or sprinkler of any type.
Bleaching powder
To treat the surface of a greenhouse with a solution of bleach, you will need to dissolve 0.4 kg of the substance in 10 liters of water. After this, the mixture must be left for several hours to settle. Then carefully drain the solution from the sediment and use it to treat the internal space. The sediment can be used for whitewashing wooden structures. After treatment, the greenhouse must be closed for several days.
Bordeaux mixture
Bordeaux mixture is a mixture of solutions of copper sulfate and milk of lime, also known as a fungicide - used to kill bacteria and pests both in the soil and greenhouse, and directly on plants.
How to use Bordeaux mixture:
- Dilute a small volume of warm water with copper sulfate and then bring the volume to normal according to the instructions.
- Dilute slaked lime in water (according to the instructions) and mix both solutions.
- Apply the solution at the rate of 10 liters per 1 square meter.
Auxiliary structures
If a disease appears in the greenhouse, it is advisable to burn the materials for tying tomatoes and wooden supports. If this seems costly or the items are made of materials that are difficult to destroy in this way (for example, metal or plastic pegs), you need to soak them for half an hour in a solution of potassium permanganate or the drug “Fitosporin”. After soaking, the products should be rinsed, dried and stored in a dry place.
Sulfur checker
An effective method to disinfect a greenhouse in the fall, simple and reliable, but absolutely not applicable for structures with a metal frame. During the fumigation process, the saber releases sulfur dioxide, which, when interacting with water, turns into acid. The contact of such drops with metal elements leads to very severe corrosion, which cannot be stopped.
This is interesting: Kalanchoe blooming - care at home after purchase, watering, replanting, pruning
To disinfect a polycarbonate greenhouse in the fall, it is sealed with tape, and sulfur bombs, the amount of which is calculated from the formula 100 g of active substance per 1 m3 of volume, are placed evenly on iron stands and set on fire. After making sure that the reaction has begun and the saber has begun to emit smoke, the doors are closed. The room should remain in this state for 3 days, after which it should be ventilated.
Important! It is advisable to moisten the walls and frame with water before starting fumigation for greater efficiency.
Can it be installed in winter?
Winter installation is often justified by a reasonable price, as well as the start of sales and a wide range of greenhouses. In addition, winter crops can be planted in such a structure and get an ultra-early harvest. The benefit of installations in December - February also lies in the fact that the frozen soil has undergone natural purification from weed seeds and parasitic larvae, and the moist soil environment allows you to work on the beds without additional watering.
If you install a greenhouse in winter, the effect will be greater than in spring. The only drawback of such a structure can be considered the problematic choice of location, because under the snow cover it is not always possible to recognize the necessary plants growing on the site, as well as to assess the readiness of the soil. This is especially true for terrain with slopes that must be leveled in advance. Winter installation of greenhouses is more suitable for southern regions where there is a mild climate.
Important! It is better to plan the installation of polycarbonate greenhouses at temperatures above 0°C, since in frosty weather the material becomes very fragile.
Preparing the greenhouse for spring planting
- fertilizing soil in a greenhouse
- If the winter was harsh, with severe frosts, but you plan to use the greenhouse for planting in early spring, you need to start the process of its self-heating. To do this, after the snow melts, the ground is poured with plenty of hot water. And after a few days you can start planting!
- Biological products containing antibiotics and fungi also help fight pests. They are available in the form of liquids (Baktofit, Pseudobacterin, Planriz), powders (Golden Autumn, Fitosporin-M), tablets (Glyokladin).
Spring cleaning and repairs in the greenhouse
To replace in a greenhouse, a layer of soil 20-25 cm thick is completely removed My mustard sometimes blooms and goes into the winter, but in the spring it is withered like hay, but the oats are now green after winter, as if I had sowed him a month ago. But this doesn’t interfere either... the ground becomes loose
Disinfection of a greenhouse - what do we use?
Greenhouses with film coatingBut you can get the first greenery in early spring or plant seedlings of cold-resistant crops in a greenhouse not only with the help of hot water. The soil can be heated in the tried and tested old-fashioned way - using biofuel or adding organic matter. This method can be used by those summer residents who have the opportunity to purchase fresh manure in early spring. The volume of manure applied should be 1/4 of the volume of the entire greenhouse soil. For example, a standard plot with two greenhouses and four hotbeds will require about half of KAMAZ manure.But, since this does not happen so often, disinfection measures have to be taken.
Improving soil fertility
And not only because it is quite difficult to organize such “beds” and control plant nutrition, and the price of fertilizers is high, but also for the simple reason that vegetables grown in this way lose their taste and aroma. Therefore, amateur gardeners adhere to the traditional principles of organic farming, trying to use “chemistry” as little as possible, but maintain soil fertility with the help of natural materials. Here in my greenhouse I have exactly the same soil. I mulched, watered it with Baikal, it got better, but it remains just like stones. Stella, did you manage to cope with this problem? If the film has been on the frame for the winter, you need to carefully inspect it for integrity. We repair any damage found, if possible, or replace the damaged area.Horse manure produces the optimal amount of heat in cold climates. In addition, it warms up the fastest. Pig manure, as well as rabbit and sheep manure, are not suitable for heating greenhouses - it is too hot for greenhouse plants.
Svetlana, Russia
Svetlana, Russia
Svetlana, Russia
Svetlana, Russia
Svetlana, Russia
Svetlana, Russia
7dach.ru
They will help protect plants from diseases and pests, get a richer and (most importantly) environmentally friendly harvest. At the same time, they will populate the soil with beneficial microorganisms, healing it and improving its structure.
- Tilling the soil in a greenhouse in spring
- Preparing the soil for cucumbers in the spring in a greenhouse
- Soil in a greenhouse for cucumbers
- Tillage in a greenhouse
- Preparing the soil for planting tomatoes in a greenhouse
- Preparing soil in a greenhouse for planting tomatoes
- Preparing soil for tomatoes in a greenhouse
- Spring tillage in a greenhouse
- Tilling soil in a greenhouse with potassium permanganate
- How to disinfect soil in a greenhouse
- Soil for tomatoes in a greenhouse
- Eggplant varieties for greenhouses
How to clean the greenhouse after growing tomatoes
If the tomato beds have not been attacked by fungi or pests this season, you need to carry out scheduled cleaning and prepare the greenhouse for the next season. In this case, the following work is recommended
- cleaning of plant residues;
- restoration of soil quality;
- cleaning the greenhouse structure.
If pests or diseases are noted on tomato bushes in a greenhouse, thorough disinfection of the soil and structure is necessary.
Removal of plant residues
At the first stage of preparatory work, it is necessary to remove the tops of tomatoes or cucumbers that grew in the greenhouse, as well as weeds and other plant fragments.
- To do this, you first need to dig up the roots of the plants with a pitchfork or shovel, since they should be removed along with the roots.
- If the bushes of vegetable plants were tied to a horizontal trellis, then you need to go along the rows and use a sharp knife to cut off all the twine with which the plants were tied. Wire trellises should not contain any remaining twine or stem parts as they may become infected.
- Plants that have fallen to the ground must be collected and loaded into bags, along with their roots. In the same bags you need to put:
- rotten tomatoes or cucumbers that may have remained on the surface of the soil after the last harvest;
- weeds;
- mulch remains, since it may contain late blight spores.
- Clean all beds so that no plant debris remains on them. We clean the gaps between the plastic sides of the beds and the side polycarbonate walls of the greenhouse so that no plant debris remains there.
- All waste must be burned off-site or taken to a landfill.
The importance of removing plant residues is that they may contain larvae of harmful insects or pathogenic microflora.
Deep digging
If it is impossible to replace the soil in the greenhouse, the simplest thing would be:
- do a deep dig and reseed the soil through a fine and medium sieve, choosing plant debris, insects and their larvae.
Pests and pathogens accumulated in the soil layer in loose soil will become more accessible to the effects of disinfecting chemicals, low temperatures during freezing in winter, or when the soil is scalded with boiling water. After preparing the soil, you can apply organic fertilizers.
Structure processing
Before cleaning, the greenhouse should be disassembled (if the design allows this), since some areas of the frame cannot be properly processed when assembled. It is necessary to wash all the parts of the greenhouse - covering, frame, fasteners.
Elements of the structure made of plastic, polycarbonate, metal and glass, as well as film, should be washed with soapy water. For preventive disinfection, a strong soap solution (a bar of laundry soap in a bucket of water) will be sufficient. When cleaning, you need to take into account the requirements of the material:
- Polycarbonate surfaces should not be cleaned with hard brushes or burlap rags. For washing you need to use sponges and soft cloths.
- The film coating is never left for the winter, otherwise it will become unusable. The film should be rolled up, after washing and drying, and stored.
- After washing, the metal frame must be thoroughly wiped with a dry cloth and repainted.
- It is recommended to whitewash the wooden frame with slaked lime.
With the onset of frost, it is recommended to open all the windows and doors in the greenhouse. This will reduce the load from snow on the roof and prevent the formation of ice on the walls of the shelter, which is caused by temperature differences.
Fitosporin
One of the most popular and widespread preparations for biological treatment is phytosporin. It is used along with similar or similar phytocide, trichodermin, pentafage and others.
The valuable quality of phytosporin is that it:
- produces natural plant growth hormones;
- leaves the “soil formula” unchanged;
- qualitatively cleans greenhouse soil from parasites.
A week after the treatment procedure, beneficial bacteria are introduced if necessary.
How to treat the soil with phytosporin: the drug is prepared in accordance with the instructions on the package (everything that is needed is indicated there, including what concentration is needed for various plants, and how to calculate the amount of product per unit area, etc.).
Fitosporin is available in the form of powder, paste or ready-made solution. The latter is appropriate to use only for indoor plants. When processing greenhouse soils, the owner himself chooses the desired form of the drug. The difference between them is that the paste, unlike the powder, dissolves very well in water. Phytosporin powder needs to be soaked the day before.
Important! This substance must be dissolved! The so-called working solution is one part of powder and two parts of warm water. Without water, the beneficial bacteria contained in phytosporin will not “wake up”. Sprinkling powder on the beds and then watering them is useless.
When treating greenhouses, 5 g of phytosporin per bucket (10 l) of water is used. It is recommended to spray the surfaces of the greenhouse with this solution.
This is interesting: Garden blueberries - planting and care in open ground: how to grow them yourself on the site
Potassium permangantsovka
Potassium permanganate has received more and more negative reviews in recent years due to its pronounced antibacterial properties. After treatment with concentrated potassium permanganate, the chemical formula of the soil changes for the worse, and biological beneficial components die. If you treat the soil with a weak solution, then, as experienced greenhouse growers rightly note, it is of little use.
There are two main reasons why this chemical is used: laziness to bother and look for something new, or unwillingness to recognize any other methods - they say, our grandfathers etched the earth with potassium permanganate, and nothing, no one died.
In fact, of course, no one dies among people, but among beneficial microorganisms, only the most resistant survive from such a chemical attack.
But if you still use potassium permanganate, then it is added to the holes under the seedlings, quite liberally. The concentration of the solution is 2 g per ten-liter bucket of water.
But where potassium permanganate is really useful is in treating the surfaces of greenhouses. They need to be processed especially efficiently in cold summers, when the weather is rainy. Such weather conditions are very conducive to the development of various diseases.
It is also necessary to soak the disinfecting mat on the threshold of the greenhouse with a good solution of manganese. This disinfection barrier is necessary to neutralize possible external pathogens on the soles of shoes.
Types of underground greenhouses
Let's get acquainted with the main types of in-depth greenhouses.
Greenhouse in the ground without heating
This type of construction was and is actively used by the Indian population in the cold regions of South America and is called “Walipini”. This simplest structure, with minimal use of building materials, is a rectangular buried pit covered with plastic film or plastic sheets.
Also read about the features of a dome greenhouse.
The interior space is heated by the sun's rays, providing a stable, favorable microclimate for plants. The optimal length of “Walipini” is 6 m, the covering material is film, the ventilation process is carried out using PVC pipes.
Trench greenhouse
A trench greenhouse is a structure of considerable length and minimal width, buried to the level of soil freezing. This engineering feature allows the heat accumulated in the soil to be used over several cold months.
In the southern regions, in a trench greenhouse in winter the temperature does not drop below zero even without additional heating. In regions with colder climates, it is necessary to provide additional heat sources (wood stove, boilers with a water circuit). The entrance is provided at the end, which involves stationary steps down. The walls are insulated and forced ventilation is installed.
Important! If the groundwater level is high, building a trench-type greenhouse can be too costly.
Earth greenhouse thermos
The above type of structure comes in two types:
- Underground, in which the walls are completely in the ground at a depth of more than two meters. The degree of deepening depends on the occurrence of groundwater. In such greenhouses, a constant year-round temperature regime is maintained, which makes it possible to grow heat-loving “perennials” and bushes in regions with cold climates.
- Recessed. A simpler engineering option, in which the depth of the pit does not exceed 60 cm, the walls are from 50 to 110 cm high above the ground surface. True, with the simplicity of constructing a semi-underground structure, the heat-saving parameters “suffer”.
Soil for a greenhouse: the basics of soil preparation
In the spring, fresh manure is brought into the greenhouse. This is the main source of heat and supplier of nutrients for future plants. If you do not add plant residues, the manure will not heat up very much. Therefore, it should be mixed with straw, sawdust and leaves.
Growing vegetables in a polycarbonate greenhouse requires very careful selection of soil mixtures for a particular crop.
Humus aged 3-4 years (without hay and straw).
It must contain a sufficient amount of humus (the main component of soil organic matter responsible for fertility).
Active exploitation of beds leads to their depletion
- composts, leaf soil.
- For good soil, it is important that at least one of the fertilizer components serves as a soil loosener, and the other as a supplier of nutrients.
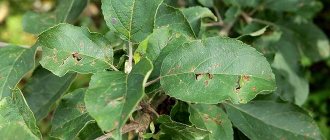
- Now you can prune those plants (trees, shrubs) that you are absolutely sure are diseased. Treat the pruning areas with copper sulfate or garden varnish.
- The smoldering time of the checker is 50-60 minutes, the time of the cleansing effect of the smoke is more than a day. Some recommend leaving the room closed for 3 days after treatment. After this, it is necessary to ventilate it for 24-48 hours until the specific odor completely disappears.
- So, the main component of many greenhouses is soil (of course, if you are not growing plants hydroponically). The best thing is to change it in the greenhouse every year. Moreover, you cannot use either soil from garden beds or waste soil from greenhouses. There is a high probability that they already contain pathogens. The best, although labor-intensive, option is to independently prepare a mixture of peat, humus, sand, fertilizers, and lime.
- fertilizing soil in a greenhouse
- To obtain the treatment agent, 400 grams of bleach are infused in 12 liters of water for 2-4 hours. Then the liquid is drained and the sediment is used for coating. If in the summer the greenhouse plants suffered any disease (for example, tomatoes suffered from brown spot), greenhouse structures and glass should additionally be sprayed with foundationazole or oxychome.
The small volume of soil in the beds causes a high load on the soil, and therefore it is very important that its composition can provide the grown plants with everything they need.
We suggest you read: Can you eat broccoli for pancreatitis?
A layer of freshly cut grass (before flowering, so that weeds do not sprout).
The requirements also include the optimal acidity of the substrate (Ph indicator), which must correspond to the crop being grown.
Selecting soil for closed ground is a rather difficult task.
Before preparing the soil in the greenhouse in the fall, it is necessary to carry out general cleaning, remove all remnants of plants and auxiliary materials (garter ropes and wooden pegs). The resulting garbage is a highly contaminated mass, so it is recommended to burn it rather than throw it into the compost heap.
Before disinfecting the soil in the greenhouse, it is necessary to disinfect the entire structure. Many of the pests hide in the cracks between the frame and glass or polycarbonate. It is these places that you should pay special attention to. The most effective preparations for disinfecting a greenhouse are a solution of potassium permanganate or copper sulfate.
The concentration of both substances is taken approximately, but not less than 1 tablespoon per bucket of water for vitriol and 1 teaspoon for potassium permanganate. Particular attention should be paid to green mold that has formed on the bottom of the window material; it is best to scrape it off completely. The resulting solutions must be used to treat the frame and glass of the greenhouse. A solution of lime chloride is used to treat wooden structures.
Types of greenhouses
In the modern agricultural market there are many greenhouse variations, differing in type of design, material, shape, purpose and operating features.
What kinds of shelters there are and how to choose them, we consider in the table:
| Types of greenhouses: | Characteristics (pros and cons): | Recommendations for selection and operation: |
| By form: | ||
| Single-pitch | Ideal for large areas (can be attached to any room), they are distinguished by their high efficiency and comfort. The disadvantage is the difficulty in covering the roof | Models with a glass or plastic top are preferable, since the film often sag, resulting in rainwater accumulating and breaking the sun's rays |
| Gable | The structure is able to withstand the weight of snow; the shape of its roof allows for a wide choice of covering material. This structure cannot be lengthened or expanded. | Choose models with a reliable foundation, the frame of which is treated with an anti-corrosion coating. Be sure to check its tightness |
| Arched | They have a smaller reflective surface, which allows more sunlight to enter. Design features allow crops to grow significantly higher than in other greenhouses. Caring for plants growing near walls is much more difficult. In winter, breaks and sagging of the roof are possible | Not suitable for growing seedlings with the further purpose of transplanting them into open ground (the design does not allow hardening of plants). Also, arched greenhouses should be avoided by residents of areas with an unstable climate. Due to insufficiently strong fastening of the frame to the foundation, strong winds can break the structure |
| teardrop-shaped | Thanks to the pointed top, snow does not accumulate on the surface of the structure. As a result, in the spring the soil warms up more intensely. The only drawback is the difficulty of installing the model | Ideal for the middle zone and northern regions with snowy winters. The roof can withstand up to 70 kg of snow per 1 m², and sunlight penetrates into every corner of the structure |
| By purpose: | ||
| Vegetables | Designed for year-round production of vegetable crops. The products obtained in this way are more environmentally friendly compared to specimens from open beds. The negative side is the careful selection of neighboring vegetables | The material for the floors must be reliable. Ventilation hatches are required. The possibility of shading certain types of vegetation is important. |
| Seedlings | Equipped with sliding racks, as well as special temperature, moisture and soil regulators | They are absolutely not suitable for the cultivation of forced green crops. It is better to use such buildings after selecting seedlings for growing green crops - lettuce, radishes, dill, celery |
| Floral (greenhouses) | There are film or polycarbonate. The first ones are built in the form of tunnels and are used for slow-growing and cold-sensitive flowers. Others are distinguished by their endurance and durability | It is better that the greenhouse is a lean-to building adjacent to the southern wall of the house |
| By type of operation: | ||
| Winter | They make it possible to harvest crops from familiar and exotic crops all year round. They are capital buildings with a strong foundation. Can be buried in the ground. Made from different materials | Variations with a strong metal frame, a reliable brick foundation and a glass shelter are preferred. |
| Summer | Operated from March until autumn frosts, heated using natural methods | Used for cultivating seedlings. Film models are preferred, since plants do not need overheating in the warm season |
When making greenhouses, polyethylene film, glass or polycarbonate are often used. Experts consider the latter option to be the best: its cellular structure promotes the formation of the microclimate necessary for plant growth and protects them well from spring frosts. It has been noticed that even the hundredth polycarbonate retains heat one and a half times more than glass and film. In addition, this material is distinguished by its strength and light transmission properties.
Important! It is better to place the greenhouse on the foundation in the warm season, when the soil is loose and soft.
Additional treatment and disinfection of the greenhouse in the fall
The photo shows an example of how to properly steam
To destroy the larvae and eggs of harmful insects and tenacious infections, it is recommended to carry out chemical treatment after steaming. One way to disinfect the soil in a greenhouse is to abundantly water the beds with a manganese solution. To enhance the effect, sprinkle the ground with bleach at a rate of 100 g/m2, dig it to the depth of a shovel, and loosen it so that the substance gets into the deep layers.
In the photo, preparing Bordeaux mixture with your own hands
After intensive disinfection, it is necessary to prepare the soil for the winter in the greenhouse; its structure should be fed and improved. It is recommended to sprinkle cleaned and disinfected beds with ash, river sand, scatter sawdust, peat, compost, if the soil is depleted, apply fertilizers, the choice of which depends on what crop will be sown in the greenhouse. Dig up, harrow.
Safe disinfection in the fall can be carried out using a solution of potassium permanganate. The proportions of the solution should be approximately the following - 1 teaspoon of potassium permanganate per bucket of water. Unlike spring, when all the parasites try to get out, in autumn they, on the contrary, begin to hide in different crevices.
We suggest you read: How to treat the inside of a greenhouse in the fall
Nuances of the procedure:
- In order not to give bacteria a chance to live in the greenhouse over the winter, pay special attention to frames, doors and all kinds of joints.
- If mold forms, it should be removed urgently, you can scrape it off with a knife, and under no circumstances throw it in the greenhouse; the best option would be to dispose of it in a bucket, and then wash the knife with a disinfectant solution.
- Everything that is taken out of the greenhouse should be burned.
- You will also need to remove all sorts of twigs and remnants of tops, which should also be burned in order to prevent diseased plants carrying pathogenic microbes from being overlooked.
- Placing leftovers in a compost bin should also not be allowed.
- If, nevertheless, the soil is heavily infected and has been attacked by several types of parasites, then it is best to change the soil in the greenhouse.
To replace the soil, it is necessary to remove a layer of soil of about 20 cm and fill it with new one, preferably with fertilizers for good feeding. Old soil can also be disinfected and then reused next year. But for this it is necessary to allocate an area in the garden for disinfection.
Basic processing methods:
- Chemical;
- Thermal;
- Phytopurification.
These basic methods will help get rid of parasitic microbes and clean the soil in the greenhouse. Of course, there are other ways. For example, electrode methods of soil sterilization have also proven themselves to be quite effective. They are rarely used, and only in industrial-scale greenhouses.
https://www.youtube.com/watch?v=mldUhdOFdtI
Good and effective remedies also include checkers with a chemical substance inside. Application is very simple. We close all the windows and doors. We place the checker in the center of the greenhouse, preferably on a flat and stable surface. Remove the head and light the wick. You need to leave the room before it fills with the substance.
This substance is based on sulfur. It saturates the ground, and after application the greenhouse cannot be opened for about 2 weeks. Do not forget that using sulfur in large quantities will be detrimental to the soil. Recommended use is once a year. To use the checker more effectively, you can moisten the walls inside the greenhouse.
In addition to chemicals, which often have side effects, adding biological products to the soil in the fall gives extremely positive results and helps to significantly increase fertility:
- fix nitrogen;
- bind heavy metals;
- help in breaking down pesticide residues;
- activate natural growth hormones;
- greatly enhance the effect of chemicals.
How to fertilize the soil in a greenhouse in the fall, per 100 m2 of area:
- phytocide - 300 ml;
- bitoxybacillin - 100-150 ml;
- lepidocide - 30 ml per bucket of water.
Phytocide is a powerful biofungicide with a wide spectrum of action. Used for treating seeds, plants, and disinfecting soil in greenhouses. The drug can be used in 2 ways:
- First, the land is treated with a fungicide; during the vegetable growing season, a phyticide is applied.
- In the fall, phytocide is added according to the instructions indicated on the manufacturer’s pack; if plant diseases appear during the season, then chemicals are added for treatment. With this option, much less chemicals are added, which has a beneficial effect on the environmental safety of the crop.
Bitoxibacillin, lepidocide are biological insecticides. Bitoxibacillin is used to destroy Coleoptera beetles, lepidocide fights Lepidoptera and their caterpillars: moths, butterflies.
The biological complex BTU is considered an effective new product; it is a universal drug that provides fungicidal protection. In the fall, it is recommended to apply it to the soil to protect the future harvest from bacterial diseases and fungi, and to restore the beneficial microflora of the soil. Treatment of BTU soil in the fall will increase the survival rate of seedlings and increase seed germination.
Treatment with biological products in the fall is safe for plants, effectively copes with diseases of closed ground, and contributes to a bountiful harvest.
In addition to whiteflies and spider mites, the greenhouse is often infested by aphids and ants; these pests always take root in tandem. The best way to get rid of them is to treat the greenhouse in the fall with sulfur bombs. Since it is impossible to disinfect a polycarbonate greenhouse in the fall on a metal frame by fumigation, spraying the soil and surfaces with Bordeaux mixture, which is a protective fungicide, bactericide and pesticide, will help.
Methods for disinfecting soil in a greenhouse
You can read more about disinfection in the article: disinfection of greenhouses and greenhouses.
Attention! After treatment with boiling water, the soil must be thoroughly dried.
Thermal way
All the measures described above are good, but completely useless if you do not simultaneously improve and clean the soil from pathogenic bacteria and pests. They constantly penetrate the greenhouse with shoes and equipment, seeds and seedlings, and other ways, after which they multiply and lead to diseases of greenhouse plants.
Therefore, soil replacement is done once every 2-3 years, or even once every 5-6 years, and during this time the land is periodically cultivated in special ways, fertilized, and other methods are used to preserve and increase its fertility.
Chemical method of disinfection
For this recipe you will need about 3-4 kg per cubic meter of the finished mixture.
Growing lettuce hydroponically
Marina, Tatyana and Natalya - thank you very much for your advice! We will now shed and cover. d.p. add sawdust and sand. and in the fall we’ll plant mustard. There's just one thing - won't it ripen? Is it hot in the greenhouse or will it dry out in the winter and everything will be fine? (I just had a “sad” experience with phacelia, when it filled almost the entire area, and they only fought by uprooting it, although it turned out to be tenacious and sprang up again... I hope the snow destroyed the phacelia and it will not bother us in the summer..:-))) )
Ways to disinfect a greenhouse
Where to start? And you need to start by clearing the greenhouse of plant residues and related materials used in growing crops: pieces of film, ropes, stakes. You should not put all this inside or near the greenhouse, because... pathogens and pests may remain on them. It is recommended to take everything out and burn it.
After the work has been done, a whole range of recommended activities follows:
- washing the walls of the greenhouse with disinfectant solutions;
- disinfection of the greenhouse and soil with sulfur or tobacco bombs,
- replacing soil or deep digging of soil,
- soil freezing,
- chemical treatment,
- spilling biological products or herbal infusions,
- steaming the soil,
- sowing green manure.
By carrying out autumn preparation using one or more of these methods, you will ensure favorable conditions for your future harvest. With the onset of spring, it will be possible to begin planting work, spending much less time on preparation.
Green manure we feed the beds with nitrogen
If you grow tomatoes or cucumbers, lime the soil once every 4 years. If you don’t know how, write in the comments and I’ll post recommendations for liming the soil.
Step 3. Sprinkle with lime.
Note that fresh and young plants are richest in nitrogen, and they decompose faster in the soil. Just don’t overdo it with the quantity, otherwise the green mass will not decompose, but will turn sour. But more mature green manure plants decompose more slowly, but enrich the soil with organic matter.
Just be sure to loosen the soil well so that it becomes breathable. You can safely dig at least every year, no matter how much the adherents of “living agriculture” recommend it.
Ways to solve problems
Are your plants growing slowly and their roots are not going deep into the soil? This means the soil is too heavy. Water accumulates in it, which “smothers” the crops, and pathogenic bacteria develop. It is necessary to introduce structure-forming agents - straw, sawdust, perlite, sand, and drainage. Then it will be easier for air to flow to the root system.
The soil may suffer from poisoning
Perhaps the reason for the weakness of crops lies in starvation. Or maybe due to increased acidity of the soil. Then you have to reduce it by adding chalk or dolomite flour to the soil. The alkaline reaction is removed by adding sawdust or peat. Among other things, fertilizers are applied in the form of ammonium nitrate and potassium sulfate.
The soil may suffer from poisoning. In this case, harmful substances are often supplied as herbicides. Dangerous components of mineral fertilizers, for example, chlorine or sulfur, can also concentrate. When manure is applied, ammonia can accumulate. In this case, soil washing or complete replacement is used. You can also switch to other feedings.
Systematic replacement of soil in a greenhouse increases the percentage of germination and yield several times
Another problem is excess salts. It is often noted when using purchased chernozem. Washing with a hose will help correct the situation. Soil fatigue may also occur. It occurs due to planting the same crop in the same place year after year. In the presented situation, it is better to replace the soil.
Improvement and cleaning are carried out in the fall
Test for proper preparation: how seedlings behave
Not only beginners, but also experienced gardeners often face the question: “So, prepare the soil for tomatoes yourself, or buy a ready-made soil mixture?” If you decide to purchase ready-made soil, then be sure to treat it with the biological solution “Fitolavin”, taking 2 ml per liter of water. You cannot be completely sure that the purchased land did not come into contact with anything during harvesting.
Free from weed seeds.
Ideally, be sure to leave at least 20% of the entire greenhouse area steamed - let the earth rest and be saturated with vitamins for at least one season. Be sure to keep a diary of soil use.
Vasha-Teplitsa.ru
Cleaning and washing the structure in the fall
Treatment of a greenhouse in the fall against pests and diseases begins with cleaning the room. You should take out equipment, trellises, remove tops, roots, dig up the soil, and remove plant debris. Using a hose with a sprayer, wash off dirt from surfaces. Wash the walls and ceiling with a warm soapy solution with a rag or sponge.
It is not recommended to use highly alkaline household preparations and abrasive pastes; they can damage the reflective characteristics of the covering material. Use a household or toothbrush with medium-hard bristles to clean the cracks, knots, and joints. Rinse the greenhouse with clean water, wipe with a dry cloth, open the doors and vents, and dry the room.
To avoid corrosion and fungi, the frame should be treated with a composition made from bleach. The disinfection solution is prepared according to the recipe: 2 kg lime per 10 liters of water 100 g copper sulfate. It is better to apply the composition with a washcloth or a soft brush. You can buy a ready-made mixture of components in the store, called Bordeaux mixture.
It is enough to wash the film or glass coating with soapy water, rinse, and dry. It is recommended to remove the film for the winter in order to extend its service life. Treating a polycarbonate greenhouse in the fall requires additional disinfection measures: the coating should be wiped with a manganese solution.
After cleaning, the joints are checked; if there are cracks, they should be sealed with sealant. Damaged pieces of covering material are being replaced. Doors and vents must fit tightly to the frame - a prerequisite that will help avoid icing of the structure in winter.
It is recommended to treat galvanized, unpainted metal elements with a 9% vinegar solution. It is better to wash wooden parts with signs of fungus with bleach, and after drying, lubricate them with a solution of copper sulfate. Whitewashing with a thick solution of slaked lime will help protect the wooden frame in the fall.
After cleaning and washing a wooden structure in the fall, it is recommended to fumigate it with sulfur bombs, 100 g per 1 m3 of volume. The processing is carried out in a sealed room, the checkers are placed on metal stands, pallets, evenly distributed over the entire area, set on fire, and the door is closed. The procedure lasts 3 days, after which the greenhouse is ventilated. If the metal frame is prohibited, the procedure of fumigation with sulfur bombs will lead to blackening of the metal, resulting in corrosion.
We offer a video that will tell you how to properly fumigate a greenhouse in the fall with a sulfur smoke bomb.
Disinfection of a polycarbonate greenhouse in the fall is done with a solution of copper sulfate. If there are no pests during the season, then 75 g of copper sulfate in a bucket of water is enough, moisten a rag and wipe the frame, walls, and ceiling.
A pressing question is: how to clean a polycarbonate greenhouse in the fall that is infested with spider mites and other pests. In cases of diseases and infections, surfaces are treated with a more saturated solution of copper sulfate, according to the recipe: 200 g of sulfate per 10 liters of water. Surfaces are washed 2 times.
Copper sulfate is the best recommendation than treating a polycarbonate greenhouse in the fall
Using a greenhouse during cold weather
A small amount of heat can be used in a greenhouse. Many vegetables can withstand low temperatures and even short-term freezing. Among them:
- cabbage;
- leek;
- Brussels sprouts;
- spinach;
- parsnip.
It takes a little time and money to prepare a greenhouse for winter.
Keeping it warm will help protect your perennials and save on your heating bills. The north side and any other solid walls should be insulated with mineral wool or another insulator. If possible, cover all unused vents, both inside and outside. Some types of vegetables can be sown before winter, so they will lie peacefully for several months in the ground, and spring sprouts will appear several weeks faster than those sown in spring. Frost-resistant varieties of onions, carrots and parsley, garlic and fennel are suitable for winter sowing. Seeds should be sown a little denser than in the case of spring sowing. The ground can be lightly covered with thin agrotextile, which will speed up the germination of plants, protecting them from frost.
Soil mixtures for greenhouses
Main types
Typically, greenhouses do not use whole soil taken from a field or meadow, but a special mixture of several components.
Each gardener has his own unique recipe, but we will describe several fairly universal options in this section.
- Peat soil is soil rich in humus, which is collected from swamps. When harvesting, layers of peat should be alternated with manure and lime. Lowland peat is added to the soil depending on its properties: light soils require the addition of 20-25 kg per square meter, heavier soils - up to 15 kg.
Mixing soil with peat
- Compost soil is food waste and products from household activities that have rotted over several years. Compost is quite easy to prepare: just store all the waste in a separate pile or box. The high organic content makes compost soil very favorable for growing vegetables and herbs.
Compost pile
- Leaf or tree soil is also made by adding plant material to the soil, however, their productive indicators are somewhat lower than those of peat or compost substrates. Such soil can be added in amounts up to 30% of the total soil volume.
Leaf ground
Growing vegetables in a polycarbonate greenhouse requires very careful selection of soil mixtures for a particular crop.
The small volume of soil in the beds causes a high load on the soil, and therefore it is very important that its composition can provide the grown plants with everything they need.
- The soil for tomatoes in a greenhouse should have a reaction close to neutral. Good results are obtained by adding 60% peat, 20% compost and 20% sand to the garden bed. Since tomato roots are sensitive to low temperatures, it is worth placing straw or sawdust on the bottom layer.
- Soil for cucumbers in a greenhouse is prepared slightly differently: mix 6 parts of peat with 2 parts of humus, and 2 parts of wood soil. A bedding made of sawdust will also not be superfluous.
Light soils are ideal for growing berries
- Berry crops are grown on light soils. For example, for strawberries the best ratio would be 6 parts turf and 2 parts sawdust. When growing in bags (Dutch technology), peat and compost are added to the substrate.
Ready or homemade soil
You must fill the ditch with humus about halfway with your own hands, after which you can either fill it with the soil thrown away during digging, or pour in new soil.
There are also websites of manufacturers of the variety you have chosen and simply informational websites where you can clarify the details.
Step 2. Next 3 buckets of sawdust and 200 g of urea.
You can sow green manure before tomatoes at the end of March, or in extreme cases - in the fall, after harvesting. Two weeks before planting the tomatoes, trim the grown green manure with a flat cutter and plant it to a depth of 2-3 cm. Do not remove any roots that remain - this is an excellent food for beneficial bacteria and worms.
So, if the greenhouse soil is without snow all winter, then by spring it completely dries out. This is even noticeable visually: the soil becomes dusty, as if lifeless. In fact, such soil is an excellent heat insulator, and the ground beneath it hardly freezes, and in the spring it does not need to be warmed up for a long time and tediously. Remember now what tomatoes are most afraid of? Yes, it’s cold soil, but the fact that it looks like sand is not scary - tomatoes grow well in the desert places of South America.
Tomatoes are fruit plants of the nightshade family. Their name comes from the Italian pommod Xoro - “golden apple”. And the Dutch were the first to develop the agricultural technology of this vegetable in their greenhouses, boasting that they had discovered the fourth state of water. The first is gaseous, the second is liquid, the third is ice, and the fourth is a Dutch tomato. And this “handsome guy” has considerable requirements for the conditions in which it is grown and on what.
Soil selection basics
Active exploitation of beds leads to their depletion
Selecting soil for indoor soil is a rather difficult task.
This is due to the fact that a small volume of soil mass leads to its rapid depletion:
- Firstly, at the end of the harvest, we remove all plant debris, which means that the organic matter necessary to restore fertility does not get into the soil.
- Secondly, the beds are exploited more actively, since the density of plantings in the greenhouse is much higher than in the open air.
- Also, do not forget about abundant fertilizing: after several years, residues of ballast substances included in fertilizers accumulate on the beds.
All this leads to the fact that many greenhouse owners prefer to completely replace the soil once a year.
However, we are faced with the following questions:
- Where to get tons of soil every year?
- Where should I export the waste?
- How to organize the replacement process?
In order not to solve such problems, it is worth initially taking care of preserving fertility and maintaining the physicochemical characteristics of greenhouse soil.
Storage of soil requires a separate space
Let's formulate the basic requirements for soil in a greenhouse:
- The soil should be fertile and loose.
- It must contain a sufficient amount of humus (the main component of soil organic matter responsible for fertility).
- The requirements also include the optimal acidity of the substrate (Ph indicator), which must correspond to the crop being grown.
Maintaining all these indicators at the proper level is not easy. This is why it is so important to prepare the beds with your own hands for the next planting season.
Preparing soil for a greenhouse most often includes enriching it with micronutrients. Today there is no unified scheme for such treatment, since the list of substances introduced depends on what crop we are growing and on what treatment the beds were subjected to in the current year.
Photo of beds covered with sawdust
The modern market offers us a wide range of mineral and organic fertilizers. However, as practice shows, in a home greenhouse you can get by exclusively with natural fertilizing.
It may contain the following substances:
- Seaweed meal (contains trace elements and lime).
- Meat or bone meal (phosphorus, nitrate, potassium).
- Lime flour.
- Wood waste (sawdust shavings, leaves)
- Down or feather (contains potassium nitrate)
Naturally, we should not forget about the “classic” fertility restorers - manure, chicken droppings and compost.
Soil preparation in a greenhouse most often involves layer-by-layer laying:
- Disinfected soil mixture with added organic matter.
- Humus aged 3-4 years (without hay and straw).
- A layer of freshly cut grass (before flowering, so that weeds do not sprout).
This instruction must be followed immediately after completion of disinfection activities, i.e. in the fall after harvest. This way we can restore the fertility of the beds, and in the spring we will plant seedlings on productive soil.
Treatment of the greenhouse with a disinfectant composition
There are many ways to disinfect. What method should you choose to ensure the greatest safety for plants, protect them from harmful microorganisms, without harming the quality of the product?
Checkers of sulfur
For one cubic meter of structure you need 50 g of the product if there were few parasites. Otherwise, the amount of sulfur must be increased to 150 g. This processing method is the most popular. However, those gardeners who use this method say that it does not protect against late blight, downy mildew and bacteriosis.
It is also not credible that during the combustion of sulfur, its dioxide is formed, which penetrates into the soil and ultimately ends up in the product.
Slaked lime in an amount of 3 kg is poured into ten liters of water, 500 g of copper sulfate is added and all surfaces of the greenhouse are disinfected.
Use of a biological product. I think this method is the best. For example, the product “Fitop-Flora-C” will help protect plants from fungi and prevent the influence of a negative environment on the future. To treat the greenhouse, dissolve 100 g of the product in 10 liters of water, but there should be no chlorine in the water. For processing 30 cu. meters of room, 10 liters of diluted drug is enough. Disinfection should be repeated after 14 days.
To increase soil fertility in a greenhouse
The same plants are grown in greenhouses, so the soil requires special care, unlike conventional beds. How can you improve and enrich the soil?
1. Replace the surface layer of soil
It is recommended to change the surface layer of soil annually, removing it by 10-20 cm. The removed soil is replaced with new one for the next planting. You can also make new soil yourself. To do this, you need to mix sand, turf, peat, and humus in a ratio of 1:1:5:3. To neutralize the acid reaction of peat, you need to add 3 kg of lime to 1 cubic meter of the mixture. This method is time-consuming and expensive.
2. Green manure
It has long been known that green manure is useful, so sow oats, rye or phacelia, as well as mustard, vetch, and watercress in the greenhouse. To save time, while the planted plants are bearing fruit, sow green manure between the rows, and in the fall, sow oats or rye.
3. Em-drugs
The use of these products will help provide protection from harmful microorganisms and diseases, and the harvest will be larger and cleaner. At the same time, em-preparations will enrich the soil with the necessary microorganisms, which will improve and make it healthier.
4. Biofuel
Biofuel beds can be used in open ground and in greenhouses.
So, this is an approximate list of work that needs to be done in the spring. Has everything been covered in this article? Share your experience. How are you preparing for spring?
Useful tips
Traditional methods of soil treatment in a greenhouse:
- Steaming the soil for the winter. They prefer to use potassium permanganate or nitrafen (3%). Treatment with these products should be carried out 3 weeks before applying fertilizers.
- Freezing of the soil. The method consists in the absence of any disinfection actions. It's all about the extreme freezing of the ground not covered with snow. Thanks to this, it is possible to get rid of both common diseases and annoying pests without making any effort.
- Tinctures based on mustard, tobacco, pine needles or ash. The advantages of these compositions are environmental friendliness and the possibility of repeated use without damage to greenhouse crops.
Self-construction
In order for the independent construction of a greenhouse to be successful, you need to think through everything in advance. At the initial stage, it is necessary to make drawings and select a location for the building. On the sketch you need to accurately indicate its parameters, as well as the location where the structure will be located.
When choosing a place to build a greenhouse with your own hands, you should take into account such factors.
- Sunlight. Plants in a greenhouse need the maximum amount of daylight. The most convenient location for this will be the location of the building from west to east.
- Wind protection. When constructing a greenhouse, you can provide protection from strong winds.
- Convenient approach to the building. Sufficient operating space should be prepared to allow access to the greenhouse with carts and buckets.
When starting construction, you should dig a pit - its depth should be at least 2 m. When choosing the size, take into account that the length of the structure can be arbitrary, and the width should not exceed more than 5 meters. If you choose other parameters, for example, build a structure 6 meters deep, then the heating of such a structure will be uneven, which will greatly increase heating costs.
The edges of the pit should be leveled for subsequent pouring of concrete. The frame of the future greenhouse structure is installed on the concrete foundation. When the foundation construction work is completed, they proceed to the construction of the base for the structure, and thermal insulation is fixed on top. A polycarbonate roof is installed on a metal base.
If the greenhouse is installed in the northern regions, then foil is used to insulate it, which is used to cover the walls in several layers. Such insulation is done only in the cold season.
If you make heated floors, you can install heating in the greenhouse. The optimal temperature for plants should be maintained in the greenhouse room from 25 to 35 degrees Celsius, while the humidity in the greenhouse should be taken into account. A prerequisite must be constant ventilation in the room. If all requirements are met, optimal conditions will be created for the operation of the greenhouse all year round.
When installing a roof, polycarbonate is more often used - with a sheet length of 12 meters, a flat surface is created, which eliminates the appearance of joints, as a result of which drafts will not appear in the room. To prevent corrosion, all fastening parts are pre-lubricated.
How to get rid of a mole cricket. Greenhouse disinfection
Disposing of fallen leaves and unwanted fruits is the first thing! The leaves must be removed from the trees, the fruits must be collected and all this must be put into compost, covered with film on top. This must be done so that pest spores do not spread to the plants on the site.
Place the checkers on the floor of the greenhouse, on a non-flammable stand, at a distance of at least 0.5 m from flammable objects. In the room being treated, close the vents and windows, plug the vents and cracks. Light the fuse, and after making sure that the checker is smoldering (a dark spot and translucent white smoke appeared on its surface at the point of contact with the burning fuse), leave the room, closing the door tightly.
First of all, do not put off cleaning the greenhouse until later. It is better to carry it out as soon as the greenhouse is free of the crops grown in it. The most convenient time for this is October or November, when work in the garden has already finished and it is still relatively warm in the greenhouse.
If you were unable to find fresh manure in early spring, you can try to do without it.
It is necessary to disinfect not only the soil, but also the greenhouse itself. To do this, all wooden structures are washed with copper sulfate, which destroys fungi, lichens and moss, and after a week they are coated with bleach.
Recently practiced by supporters of natural farming. The essence of this method is intensive crop rotation of fruit-bearing crops with green manure plants. This method is especially effective if the greenhouse has a heating system that can increase the growing season of plants in the fall from several weeks to 1.5-2 months. The advantages of planting green manure plants in the fall are obvious:
- Young plants provide more nitrogen that enters the ground while simultaneously “pulling” potassium salts to the surface with their root system;
- They do not need to be dug up, it is enough that in case of serious frosts they will die, forming a layer of humus on the surface, protecting the soil from being washed out in the fall and from sunburn in the spring;
We suggest you read: How to attach film to the metal frame of a greenhouse
Is it necessary to dig up the soil in the greenhouse in the fall after planting green manure? The land does not need reclamation; the dead root system not only fed it, but also became additional drainage.
Here's how to fertilize the soil in a greenhouse in the fall - mustard green manure plant is sown mainly before cucumbers
The following crops are widely used as green manure plants:
- Cereals – oats, rye, barley, wheat;
- Legumes – peas, lupine, phacelia, vetch;
- Cruciferous vegetables are also difficult - sunflower, radish, mustard.
Of all the listed plants, special attention should be paid to early-ripening and cold-resistant varieties: fodder peas, mustard, oats, vetch, rapeseed. They are the ones that are preferable to use as soil preparation for a greenhouse. The optimal growing season of 5-8 weeks is sufficient for the plants to gain maximum useful mass.
Soil replacement
Replacing soil in a greenhouse in the fall is one of the radical and most effective ways to increase productivity. Replace them if the infestation is too strong and is caused by several pests at once. In this case, it is necessary to select soil to a depth of 10-15 cm. This will result in a fairly large volume of contaminated soil. Where to put the land if there is not enough space on the site for disposal? You can not only disinfect it, but also use it for exchange after a year. To do this, the resulting soil is placed in a pile of arbitrary width, in layers 20 cm thick. Each layer is sprinkled with quicklime at the rate of 100 - 150 g. per sq. m.
Using peat as a basis for new soil in a greenhouse
The composition of the soil that must be laid to replace the withdrawn soil in a ratio of 6.5:1:1:
- Peat – sphagnum, without fertilizers, crumbly;
- The soil is fine-grained sandy loam or light loam with added humus;
- Compost - can be replaced with chicken manure at the rate of 5 kg per 1 cubic meter.
There are natural, biological additives that are highly recommended to be used in the soil, instead of inorganic fertilizers, at least in the first 2 years of use:
| Additive | What replaces | Quantity per cubic meter of peat (kg) |
| Bone flour | potassium nitrate and phosphates | 2 |
| Feathers or down (necessarily steamed) | potassium nitrate | 1 |
| Wood ash | Soil leaching | No more than 3 for acidic soils |
| Dolomitic lime | Soil leaching | No more than 4 for acidic soils |
| Seaweed | Microfertilizers, lime, algomin | 2 |
Replacing soil in a greenhouse – Garden
How to choose soil for a greenhouse
It has always been believed that the soil in a greenhouse plays the most important role in obtaining a good harvest. It contains all the necessary minerals that contribute to the normal growth of any plant.
What should be the soil for a greenhouse?
What kind of land is needed for a greenhouse? This question mainly worries only beginning gardeners. The choice of soil type is influenced by many factors:
- Type of crop grown.
- What time of year is it grown?
- Will the soil be heated in the greenhouse or not?
- What are the climatic conditions in the region, as they directly affect the composition of the soil, and so on.
Let's take a closer look:
- As a rule, the soil for a greenhouse contains: humus, compost, turf soil, sand, peat, limestone.
Note. As soon as you need to prepare soil for a greenhouse, they rely on the following parameters: 1 m3 of soil per 5 m2 of greenhouse structure with shelving, in ground greenhouses - 4 m2, for greenhouses with 4 frames - 4 m2.
How to prepare soil for a greenhouse
Soil preparation
For such actions there are special instructions with clearly established standards for components. For this you will need:
- Sod, humus no higher than 45%.
- Sand - 3%.
- Peat - up to 10%.
Advice. In order to make soil for cucumbers or tomatoes, all ingredients except sand are used in equal quantities.
It is worth considering that if topping is required, the tomatoes are topped with peat or the same soil as for cucumbers. Basic requirements that soil in a greenhouse must meet for normal productivity:
- Ensure normal heat exchange.
- Let air through.
- Be saturated with water during watering (see How to water tomatoes in a greenhouse correctly) and be able to pass it through yourself in the case of growing non-moisture-loving crops.
- Absorb all necessary substances and mineral elements in case of fertilization.
Recommendations:
- Making soil for a greenhouse with your own hands is not difficult.
- Initially, the conditions for normal growth of the crop that is planned to be grown in the structure are studied.
- Only on this basis is the soil prepared and then fertilized.
Procurement of all soil components for the greenhouse and soil preparation
Top layer for turf soil
One of the main components of soil is humus. What it is? Humus characteristics:
- Humus is completely rotted manure.
- It is used inside the structure as natural fuel (biofuel).
Manure preparation:
- There is manure that has already been used in the greenhouse.
- It is pulled out of the structure after harvesting and laid out in stacks.
- Then it is covered with peat and regularly watered with slurry.
Advice. In this process, the main thing is to move the piles to other places so that the manure does not dry out.
Thus, the manure turns into humus. Humus composition:
- Phosphoric acid.
- Calcium oxide.
- Nitrogen.
- Potassium oxide.
All these elements are beneficial for the plant. Properties of humus:
- It saturates the soil with minerals.
- Together with humus, a huge number of nutritional microorganisms enter the soil.
- Soil with humus has good air exchange and excellent water permeability.
Note. It is worth considering that humus cannot be used as soil. Subsequently, crop vegetation will begin.
Sod is no less important than humus. Why is it placed in the soil for growing “capricious” plants? Composition and functions of turf soil:
- It contains a large amount of remains of tree and grass roots.
- Thanks to this, the soil becomes saturated with nutrients.
- At the same time, its moisture absorption increases and the plants are in a favorable environment.
Note. You need to harvest turf for a greenhouse in fields and meadows. It is not worth taking soil near swampy areas, and where sedges and horsetails grow. The soil will be highly acidic.
Transplantation rules, how to prepare the soil
Sod is prepared almost similarly to humus:
- Initially, the top layer, which is penetrated by a numerous root system, is removed from the surface of the earth.
- Then it is placed in piles on the site mixed with manure. Be sure to sprinkle with lime.
Advice. The height of such a spatula should reach up to 1.5 m. All the time before use, the turf is watered with slurry and transferred. Peat will also need to be prepared.
He can be:
Note. Experienced gardeners prepare the mixture specifically from lowland sedge peat. Its ash content reaches 12%.
Recommendations:
- Peat humidity when used should not be more than 65%.
- Dry peat crumbs are never used, as they cannot be properly wetted with water.
- The acidity of the soil should be 6.5.
Advice. The soil should be free of insects, pests and soil pathogens.
Preparing land for greenhouses is characterized not only by mixing all the components:
- All ingredients are mixed immediately in the prescribed proportions.
- The soil is then placed in the greenhouse.
Advice. If the soil is placed in the structure in advance, then it is necessary to carry out a number of preparatory work before planting.
- They involve watering the soil a few days before planting.
- If the soil has not been moistened for a long time, it would be better to fertilize it with minerals two weeks before planting.
Note. Fertilization can be done after planting, when it becomes clear that they have begun to grow.
The video shows an example of preparing soil in a greenhouse.
Neutralization of soil in a greenhouse or its replacement
Steam treatment of the greenhouse and surrounding area
Soil disinfection in a greenhouse is carried out due to two factors:
- The soil has not been used for planting for quite some time.
- If you need to grow other crops on existing soil.
Note. You can replace the soil, but this process is lengthy and if you don’t want to make it yourself, then the price is quite high.
How to disinfect the soil in a greenhouse? This question worries almost everyone. Here you need to follow all the rules and regulations so that clean soil contributes to the normal growth of plants in it. Let's take a closer look:
- If you do not change the soil in the greenhouse, then every year it will become less and less mineral, and it will become saturated with insects that can corrode the root system from the inside.
- At the same time, the yield will be less and less.
- It is better to bring soil into the greenhouse not from the garden.
- It contains a large number of harmful microorganisms.
Advice. The soil is made independently or brought from remote areas where there is no constant cultivation of crops.
To disinfect the soil you will need:
- You can use copper sulfate. Initially, a solution is prepared. For this you will need a standard bucket of water (10 l) and 1 tbsp. copper sulfate. This solution is used to water the soil after harvesting in the greenhouse.
Note. Copper sulfate solution must be handled with extreme care, since it is copper, which is toxic and has a harmful effect on the human body.
- There is a special steam treatment of the soil. Under the influence of high temperature, many harmful particles die. To do this, the soil is poured with boiling water and covered with film. At the moment, this method of cleansing is considered the most economical and non-toxic.
- Formalin is also widely used. It is a toxic substance. It is used in its finished form. Grooves are made in the soil and it is poured into them. The grooves are buried, and the soil is not disturbed for 14 days. Then you need to ventilate the structure (at least 2 weeks). After this, the soil is dug well.
- Gardeners use sulfur bomb well. It is installed in the structure and set on fire for an hour. Within 10-14 days after this, the greenhouse is ventilated.
- Bleach can also rid a greenhouse of pests. It is sprinkled on the soil, as it comes in dry form.
Advice. It is not enough to disinfect the soil in the greenhouse. The entire structure needs to be disinfected.
To do this you will need:
- Wash windows and doors well.
- Dilute potassium permanganate and wipe all surfaces with its solution.
Recommendations:
- If there is no desire to disinfect the soil, then the soil in the greenhouse is replaced.
- To do this, the soil is completely pulled out.
- New soil is placed in its place.
Advice. Before placing new soil, the greenhouse structure is neutralized using special means.