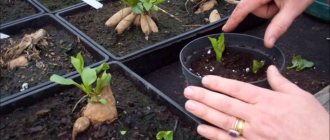
Tulips are bright and multifaceted symbols of spring. Summer residents and gardeners love to experiment with these flowers. Growing tulips from seeds at home, at first glance, is incredible, but you just have to try, and the young sprouts will conquer any doubts.
Tulips are rarely grown from seeds, but this method is also practiced
Is it possible to grow tulips from seeds?
Today these flowers are associated with Holland, but many centuries ago they were first grown in Asia. The name itself comes from the ancient Persian word, which translates as “turban”. Tulips were especially highly prized in the Ottoman Empire.
In the 16th century, flowers came to Europe. Since then, the world has been gripped by a real tulip fever. Breeders are constantly creating new hybrid varieties, surprising with the shape of the petals and colors.
The common planting material for everyone is bulbs. The seed method of propagation is questionable. It is quite possible to get beautifully flowering tulips from seeds. The only “but” is that the growing process will be long (5-10 seasons). But this will not stop passionate flower growers. Seeing how a precious bulb is formed from a small seed is a real miracle. You can also try your hand at selection and get original varieties of tulips.
Growing tulips from seeds is a very long process.
Attention! To achieve a positive result, you need to choose the right seeds, prepare suitable soil, provide greenhouse conditions and be patient.
Reproduction of cultivated species
There are 2 methods: vegetative (asexual) and seed. The choice of method depends on the goal. If you plan to breed a new variety with a change in decorative properties, then the seed method is chosen. When growing flowers while maintaining varietal characteristics, the vegetative method is used.
Vegetative propagation
This is the most convenient way to propagate tulips most often. Flowering occurs quickly, the decorative properties of the mother plants are stably preserved. During the active growing season, small nodules (babies) of different sizes grow around the mother bulb, and a replacement bulb is formed - the largest of the daughter bulbs. It contains leaves and flower buds for the next season.
To obtain high-quality planting material, it is necessary to promptly and correctly dig up the bulbs after flowering, process, sort and store them until autumn planting.
When to plant tulips with seeds
It is best to carry out the procedure in the fall (September-October). But if the tulip seeds (pictured below) were collected in the spring, the timing is slightly shifted, and planting can begin in the last days of October or the first half of November. In the first spring, a thin sprout will appear with only one leaf. In the second year, this leaf will become even larger, and the bulb bud will be almost completely formed.
It is better to collect tulip seeds in early autumn
How to grow tulip seeds at home
Some gardeners plant seeds directly into the ground. If in winter the air temperature is below - 5 °C, the plantings require additional shelter in the form of dense film or branches.
Many people prefer to grow tulips from seeds at home. This allows you to get stronger and more viable plants in the future. For this, greenhouses are used, and cultivation is also carried out indoors (in pots or containers).
Seed collection and soil preparation
The tulip should completely bloom. Then the stem is tied so that the arrow is in a strictly vertical position. Mature bolls begin to crack. This is the first signal that you can start collecting them. Ripe seeds usually darken and take on a red-orange hue. The box is carefully separated from the base with sharp scissors and transferred to a dry, dark room. It must dry completely.
Tulip seeds are collected when the capsule cracks
When the planting material is ready, you need to take care of the soil. Often they use ready-made soil, which is sold in any gardening store. You can prepare the soil mixture yourself by combining peat with organic matter and coarse sand. The substrate must be nutritious, loose, and well permeable to moisture and oxygen.
Landing rules
It is not difficult to obtain tulip seedlings from seeds.
The whole process includes several stages:
- Prepare containers (oblong boxes or pots) in advance and make small holes in the bottom.
- Drainage is placed at the bottom, and the prepared soil mixture is poured on top. It is leveled and depressions of about 3 cm are made. After this, the seeds are densely sown (each grain in its own cell) and sprinkled with sand.
- For the first month, the container is covered with regular cling film with holes for ventilation. The room temperature is maintained at least + 15 °C. As soon as the first sprouts hatch, the containers are transferred to a warm room with a comfortable room temperature. It is not recommended to place tulips near heating appliances and radiators. This will quickly evaporate the life-giving moisture.
Watering and fertilizing
Tulips do not like drought. Plantings must be regularly moistened using drip irrigation. This can be conveniently done at home using a small watering can, a small spray bottle or an ordinary syringe. This procedure is done approximately once every 6-7 days. It is best to use warm, settled water.
Attention! It is necessary to monitor the condition of the soil, preventing it from drying out or becoming waterlogged. In an overly humid environment, the seeds will rot and the bulb will not be able to form.
Seeds will die in waterlogged soil.
Organic and mineral fertilizers can be used as fertilizers. Humus or compost, chicken manure in granules that have been sterilized, wood ash, as well as complex mineral preparations are suitable for these purposes. It is very important for tulips to receive the necessary macro- and microelements (copper, magnesium, potassium, phosphorus, nitrogen, boron, molybdenum, iron, zinc, magnesium).
Preparing for planting in open ground
In the 3rd year, active vegetative division begins, and small baby onions appear. At the beginning of August they are divided and transferred to open ground. Holes are made in a pre-prepared area (each depth is from 10 to 12 cm). For small bulbs, maintain a distance of about 9 cm between the holes.
Clean river sand is poured into the depressions and watered with salt (1 glass per 10 liters). Before planting, it is useful to keep the bulbs in a weak solution of potassium permanganate for disinfection. In regions with cold winters, the bulbs will need to be additionally insulated with a layer of humus about 5-6 cm thick. If baby bulbs are planted in the spring, they will not bloom, but by autumn they will have time to strengthen and grow well.
Next, the plants are provided with the usual care: regularly watered, fertilized, carefully loosened the soil and periodically inspected for diseases and pests.
Types and varieties with photos
Wild nasturtium is a perennial plant. However, in central Russia, this flower is cultivated only as an annual, since it will not be able to survive the winter in open ground. Most of all, gardeners grow cultivated types of nasturtium.
Foreign or Canarian
The liana is native to South America. The shoots grow up to 3.5 m in length and quickly entwine vertical surfaces. Blooms from mid-summer until frost. Small yellow flowers with ruffled petals and green spurs. The leaves are also small, five or seven-parted. Seeds do not have time to ripen in middle latitudes.
Big
The shoots are highly branched, fragile, and grow up to 2.5 m in length. There are upright varieties that grow up to 70 cm in height.
Blooms from June until frost. Propagates well by self-sowing. Seeds remain viable for 4 years. The leaves are large, asymmetrical, reaching 80 mm in diameter. On one side they are green, on the other they are bluish. This species includes many varieties:
- King Theodore - bright red flowers.
- Peach Melba - cream flowers with a red spot in the center.
- Salmon Baby - semi-double flowers of a pale orange hue.
- Ladybug - orange flowers with burgundy spots.
Cultural
Combines hybrids of large and shield-bearing nasturtiums. The shoots are densely leafy. Leaves are purple or green. Varieties differ in shape and height:
- compact – up to 50 cm;
- creeping - up to 4 meters;
- dwarf - up to 15–20 cm.
Varieties:
- Gleming Mahagani is a bush up to 40 cm high with double red flowers.
- Golden Globe is a spherical bush up to 25 cm in height and 40 cm in width. The leaves are round and greenish. The double flowers are large yellow-golden in color.
- Moonlight - shoots grow up to 2 m in length. The flowers are yellowish.
Small
Thin, branched shoots grow up to 35 cm. The leaves are small, round, and the petioles are thin and long. The flowers are small, yellow with dark spots, up to 3 cm in diameter. The upper petals are velvety with pointed edges. The spurs are curved in a cylindrical shape. Blooms from June to October. Varieties:
- Cherry rose - 30 cm in height, double flowers of red color.
- Black corduroy - 30 cm in height, simple burgundy flowers. They reach 6 cm in diameter. It is also called “Black Lady”.
Shield-bearing
This is a creeping subshrub with fragile 4-meter stems of dark green color. The leaves are thyroid-like in color and the same as the stems. The flowers are dark red. Blooms from June until frost. The seeds have time to ripen. The most popular variety of this species is considered to be Lucifer - an upright bush 25 cm high with green stems and large green leaves with a dark red tint. The flowers are simple orange-red and reach 6 cm in diameter.
Decorative types of nasturtium also include azure, ciliated, multi-leaved, beautiful, and tricolor. But they are rarely grown in Russia.
How to store tulip seeds in winter
Breathable paper bags that can be folded into plastic containers are best suited for this. For tulip seeds, provide the same conditions as for any other flowers: in a cool, dark room with a normal level of humidity. If there is dampness, mold will form on the seeds. Foil cannot be used as packaging, as this will cause the seeds to lose their viability.
The bulbs are stored in cardboard containers at room temperature, out of direct sunlight. For planting material that should remain in storage until spring, the optimal temperature is + 15 °C.
Landing
The most favorable time to sow seeds for seedlings is mid-October. Before planting, seeds should be carefully inspected. They should be solid and with a transparent layer around the edges. It is better to immediately set aside grains with holes or suspected rotting to avoid contamination of the remaining seeds.
The seeds need to be sprinkled in a fairly dense layer on the sand and covered with 1–2 cm of soil and then sand again on top.
The germination rate of the seeds of this flower is not very high, so it is better to plant them in larger quantities. Leave it like this until spring. It should be taken into account that if it is very frosty outside, then the bed must be insulated. This can be done by placing a film on it and covering it with branches on top. Pre-clean the branches from leaves. You can also cover it with a layer of rotted humus 5–7 cm thick. If you grow tulips in a greenhouse, then you don’t have to dig them up for the first 2–3 years.
Useful tips
Growing tulips from seeds is a rather complicated process. Not every gardener decides to do this. Those who have practiced this method of cultivation know many secrets of growing tulips from seeds.
Proper care will allow you to get strong shoots
A few recommendations:
- Correct temperature conditions and regular watering will allow you to get healthy and strong shoots.
- Do not plant tulip bulbs near potatoes or cabbage.
- Bulbs affected by disease or pests must be dug up and burned in a timely manner.
- It is permissible to plant tulips before the coldest weather, but in the spring they will bloom much later than expected.
- Young plants need to be protected from sunlight. If this is not done, the green mass will grow to the detriment of the formation of buds.
- Every year it is recommended to plant tulips in a new place. This will protect them from diseases.
- After flowering, the bulbs must be dug up and carefully sorted. All questionable specimens are immediately disposed of.
- At home, you can regulate the flowering of tulips. To admire beautiful flowers in winter, you need to water and feed them twice a week. After budding, the pots are moved as far as possible from the radiators.
- Tulips can also be grown in hydrogel or water.


