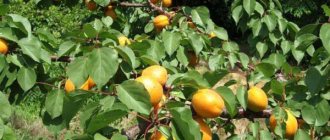
What does grafting give to a tree and a gardener?
There are several reasons why you have to graft an apple tree. At the same time, they are relevant in terms of efficiency both for the tree itself and for the gardener. What new opportunities does vaccination provide?
- Increases yield due to crown renewal. At the same time, the massive and well-developed root system of the tree is preserved.
- It becomes possible to obtain several varieties of apples from one tree. This significantly saves space on the site.
- If it is necessary to improve the frost resistance of an apple variety, you can also vaccinate. Then the tree will ensure the normal existence of the branch with fruits without any problems.
- In case of damage due to mechanical damage, part of the tree can be saved by grafting a branch. In addition, you will get a beautiful dwarf fruit tree.
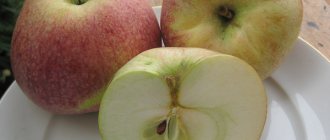
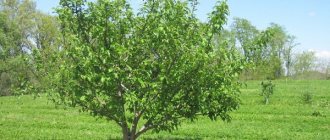
The result of grafting an apple tree to a pear tree
Note! If you take into account a lot of positive factors, then grafting apple trees seems not just a whim, but a necessity. In most cases, this technique helps eliminate a lot of shortcomings.
Features by rootstock
For an adult apple tree
There are enough reasons to graft onto an adult apple tree. And you have them. Maybe you decided to make a garden from one tree.
In order not to complicate the life of the tree and not to weaken frost resistance:
- Select scions and rootstocks that apple ripening
- Select varieties from one apple tree that are close in ripening (autumn and winter, summer and autumn);
- Do not place more than 4-5 varieties on an apple tree;
- Graft onto the main skeletal branches ;
- Make these vaccinations on an adult apple tree for two to three years ;
- Place vigorous on the north side ;
- Experts recommend a cupped crown shape ;
- There are different methods, you choose depending on your plans: here “bud to butt” almost all summer;
- If you want to grow something short, cut it down to a stump and graft several cuttings onto the bark .
Important:
- Do not graft apple trees older than 25 years;
- Plant the following on one branch: 1-3 cuttings, if its diameter is up to 3 cm;
- 4-5 cuttings - with a diameter of more than 3 cm.
Go wild
What is a wildflower (or wildflower, or thorny seedling)? This is a tree (sapling) of a wild apple tree in the forest, an outgrowth of a local apple tree. They:
- More resistant to diseases (especially fungal) and droughts;
- They have increased frost resistance;
- Improves fruiting.
But they also have disadvantages :
- Good compatibility and survival rate on apple trees of the so-called old varieties (Antonovka, Anis);
- Such compatibility has not yet been found in new varieties, and often the incompatibility of vaccinations makes itself felt after some 2-3 years.
More on Tele4n.Net:
Catalog of apple tree varieties in alphabetical order
Where to get:
- Grow from seed;
- Dig near a wild apple tree or an old orchard;
- Use a year or two after planting on your site.
Vaccination for wild animals.
You can vaccinate varietal apple trees against wild ones both in spring and summer . It could be:
- Budding (main);
- Copulation;
- For the bark;
- Into the cleft;
- In the side cut.
Adviсe:
- Prepare the cuttings before grafting (5-6 buds);
- Graft several varieties onto one apple tree;
- On young game, graft at a distance of 40-50 cm from the trunk;
- Graft 4-5 cuttings onto thick branches.
To the pear
Among gardeners and specialists you can hear absolutely opposite opinions both on the grafting process itself and on apple tree grafting in particular.
It is believed that an apple tree is grafted onto an apple tree . And if someone experiments, it is not for nothing that they are called a Michurinist. But a lot works out.
And among gardeners (probably, this is typical not only for fishermen and hunters) you will definitely hear about grafting apple trees onto quince, pear, hawthorn, rowan, plum, Japanese quince, and shadberry .
Why does a gardener take up a grafting knife and pruning shears? If you want to conduct an experiment, creative success to you! But the majority wants to have good apples through grafting:
- And more;
- And for a long time;
- And so that they don’t get sick;
- And to withstand frosts;
- AND …
Therefore, you need to know what to graft on :
- Practice grafting of similar varieties and species . As a gardener friend of mine used to say: “Bone by stone, seed by seed”;
- Of all the named varieties for grafting apple trees onto them, we are not talking about all varieties, but only certain ones.
Here, for rowan, plum-leaved apple tree (Chinese) can be grafted .
And the pear is interesting. The survival rate of a pear on an apple tree is an indisputable fact. And it looks beautiful. Here are just some examples:
- The Lada pear grows into a cleft on the Melba apple tree, and to the root on Antonovkai;
- Cathedral pear on the stump of an apple tree Knight for the bark on the stump.
Important! But pear is very rarely used as a rootstock for apple trees. And again, what circumstances force you to think about this.
And a few words about grafting an apple tree onto a plum tree . Perhaps, in conversations, the plum-leaved apple tree (also known as the Chinese apple tree), which has good frost resistance, was mistaken for a plum. Therefore, it is impossible to confirm the possibility of this option in practice. And even advise you to find material on this topic somewhere.
And we again returned to the question of purpose.
Timing of apple tree grafting
There are many recommendations on how to plant an apple tree in the summer. But it turns out that you can do this all year round. But first it is worth assessing the condition of the tree itself, weather conditions and climatic zone. Only after this can you determine the best time for the procedure.
Features of vaccination in different regions
How to plant an apple tree in summer: a step-by-step guide
Russia has a huge extent and many climatic zones. Moreover, each has its own characteristics and timing regarding the implementation of the vaccination procedure:
| Regions of Russia | Spring grafting | Summer | Autumn | Winter |
| Siberia, Urals and Karelia | When the ground thawed to a depth of 30 cm | First week of August | Not advisable | If weather conditions permit, this is the ideal time for the procedure. |
| Middle lane | From April 15 to May 3 | From July 25 to August 5 | 2 first weeks of September | Not advisable |
| Southern regions | Mid-early March | From the second half of July to mid-August | From the second ten days of September to mid-October | Not advisable |
Important! In any region, special attention should still be paid to weather conditions. It is this factor that has a special influence on the speed and efficiency of “healing” of the grafted branch.
Deadlines
When to vaccinate:
- The time of vaccination depends on the state of growth and the maturity of the axillary buds ;
- Signs of wood maturity and readiness: The bark can be easily separated from the wood.
- the apical bud on young branches has already formed.
- the length of internodes in the upper part of the shoot is less than in the lower part.
Important! For each apple tree in your garden, these are different dates:
- Rootstocks;
- Varieties (summer, autumn, winter);
- Conditions. But the essence is the same - do this during the period of active sap flow.
Still, grafting an apple tree in June is not the best option, be patient a little longer.
You can learn everything about grafting apple trees in July and August from these articles.
And this article will help you choose the optimal summer month for vaccination.
Methods of grafting fruit trees
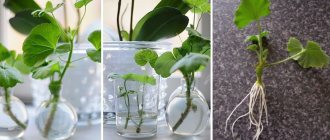
How to propagate an apple tree without grafting: cuttings in summer
There are several ways to graft fruit trees. Each has its own advantages and features. Especially popular among gardeners:
- Budding.
- Vaccination for the bark.
- Into the cleft
- In the cut.
- Vaccination with a pipe.
- Bud and cuttings.
- Bridge grafting.
Additional Information ! Each method has its own effectiveness at certain times of the year. This helps you choose a method not only in accordance with personal preferences, but also regional indicators.
By eye (budding)
Fruit trees are usually budding in the summer, although in the northern and southern regions the preferred time of year is still spring. This option can be used by gardeners of any “skill level”. Thanks to its simple technology, this method is almost always guaranteed to be 100% effective.
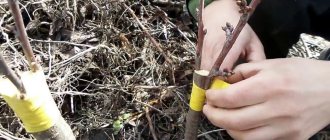
Vaccination for bark
This method is often used when it is necessary to graft several young branches of different varieties onto the stem of an old apple tree. In this way, you can save the old tree from complete death.
Important ! In the process of sawing off the trunk of an old apple tree, you need to leave a few skeletal branches. They are the ones who will form normal juice circulation.
The features of bark grafting are as follows:
- It is necessary to make the correct cut of the trunk so that a few branches remain for the normal functioning of the root system.
- Several cuts need to be made along the bark vertically. The depth should be such that the wood is touched.
- Use the back of the knife to slightly separate the bark from the wood where the cuts are made.
- Make an oblique cut 4 cm long on the cutting.
- Insert the scion into the prepared “holes” in the bark.
- To ensure that the cutting branch is well fixed under the bark, it is worth wrapping the trunk with twine. There is no need to tighten the rope too much.
Grafting an apple tree by the bark
Into the cleft
The ideal method of vaccination, which is carried out in spring and summer. It is during these periods that rapid movement of juice is observed. This version of the procedure is especially popular among experienced gardeners.
Note ! The scion branch must be older than 3 years.
Vaccination is carried out as follows:
- A shallow split is made on the rootstock.
- The handle is sharpened from the edge that will be fixed in the cleft.
- The scion is installed vertically in the cleft.
- The last step is fixation of the graft.
In the cut
The incision grafting method is also called copulation. You need to cut 2 branches of the same diameter so that they can fit together. Then the assembly area should be tightly wrapped with electrical tape. Thanks to this, you can get a small fruit-bearing branch, albeit with a small harvest.
Incision grafting
Bud and cuttings
Summer grafting of an apple tree with green cuttings is quite rare, since the work is close to jewelry. In addition, you need to select the right kidney and prepare it for implantation. Grafting apple trees with fresh cuttings in the summer is carried out by implanting a “living” cutting under the bark or into a tree cut. Additionally, you need to carry out preliminary cuttings.
Bridge grafting
A mechanically damaged tree can be saved by bridge grafting. Thanks to this method, it is possible to stop the secretion of juice in damaged areas of the bark.
Dudkoy
Pipe grafting is a subtype of more complex budding. In this case, 2 knives with sharp blades fastened together are used as the main tool for work. The very principle of preparing the stem and cuttings is completely identical to budding.
Grafting with a pipe
How to properly graft an apple tree with a fresh branch
For grafting apple trees in the summer, fresh branches of the current year are used. For the procedure to be successful, you need to prepare tools and materials, as well as choose the appropriate method.
Required materials and tools
For vaccination you need to prepare a number of tools. Among them:
- Hacksaw. For cutting branches onto rootstock.
- Secateurs. For preparing cuttings.
- Scalpel or sharp garden knife. They are given the desired shape to the ends of the shoots.
- Electrical tape, garden tape, or plumber's tape. Used for strapping.
- Film.
- Garden var.
Before grafting an apple tree in July, you need to make sure that the tool is well sharpened and that the hacksaw is in good working order and does not have broken or bent teeth. A low-quality tool makes the cuts uneven, which reduces the tightness of the sections of the rootstock and scion, reducing the likelihood of tissue fusion.
This is interesting! Some gardeners use a drill to make a hole for the rootstock on the scion.
Procedure Guide
There are different ways to get vaccinated. Each of them has its own subtleties and technology.
Into the cleft
Many gardeners consider splitting technology to be the easiest method of grafting. In this case, simply make cuts on the scion and rootstock that coincide with each other.
Step-by-step instructions for cleft grafting:
- Select a tree 3-6 years old, which will become the rootstock. The split is grafted into a standard or skeletal branch. The selected area is cut off by at least a third, removing excess shoots.
- A split 3-6 cm deep is made in the center of the scion. It should be slightly deeper than the length of the wedge on the rootstock.
- The lower end of the rootstock is sharpened on both sides with a flat wedge 3-5 cm long.
- A scion wedge is inserted into the split of the rootstock so that the bark and layers of elements coincide on at least one side. If the diameter of the rootstock is large, several scions can be inserted into it.
- The split area on the scion is tightly wrapped with garden tape. In this case, the electrical tape should transfer from the scion to the rootstock.
- All cuts on the scion are covered with garden varnish.
For the bark
Bark grafting is another simple way to carry out the procedure.
There are instructions to help beginning gardeners:
- The scion (this can be a trunk or a thick skeletal branch) is cut at least in half. From the cut site, a longitudinal cut of at least 3 cm in length is made down the bark. The bark is pryed with a fingernail and lifted.
- A flat wedge is made at the bottom of the scion. Its length will be slightly less than the cut on the rootstock bark. Some gardeners cut the wood at the bottom so that on one side there is a protruding thin piece of bark.
- The scion wedge is inserted under the bark, covering it with cut flaps.
- The junction is tightly tied with electrical tape. The saw cuts are covered with garden varnish.
Budding
When budding, a bud with part of the bark is used. This method is difficult to implement, but gives good results. Many gardeners prefer to use it.
Step-by-step instructions for budding:
- The grafting bud is cut off from the central part of the shoot along with a flat section of bark and wood 1.5-2 cm long. The leaves are removed from it along with the petiole.
- A T-shaped cut is made on the rootstock bark. The chances of survival will increase if you select a site with a kidney for these purposes.
- The bark flaps on the rootstock are pushed apart. The scion bud is inserted into the resulting pocket.
- The bark flaps are retracted. The junction is wrapped with electrical tape so that only the kidney remains open.
Budding for beginners - simple and accessible information about tree grafting
By the bridge
This method is suitable for trees with damaged bark.
It is usually not used for healthy plants:
- On the scion, at the site of damage to the bark, 2 annular cuts are made. The area of bark between them is removed.
- The exposed area is wiped with a clean cloth. Longitudinal sections are made on the top and bottom of the bark; the top and bottom should be located opposite each other. The number of cuts should be equal to the number of grafted cuttings.
- The cuttings are sharpened with a flat wedge from the upper and lower ends.
- The lower end of the scions is inserted into the lower cuts on the bark of the rootstock. When all the cuttings are inserted, the junction at the bottom is tightly wrapped with electrical tape.
- The cuttings are bent into a bridge and the upper wedge is inserted into the upper cuts in the bark on the rootstock. They make a winding.
- The bare area on the rootstock is covered with garden pitch.
Copulation
Copulation is the latest popular grafting method, which is used if the diameters of the scion and rootstock are the same.
The technology is simple:
- The rootstock and scion in the lower part are cut at an acute angle.
- The cuts must completely coincide and fit tightly to each other.
- They make a winding. To increase the strength of the structure, you can insert a stick into the winding.
- The top cut of the scion is covered with garden varnish.
Common mistakes to avoid
Beginner gardeners often make mistakes that reduce the chances of successful grafting:
- Grafting to the edge of a branch or tree. In this case, the scion receives few nutrients and develops slowly. Correctly graft an apple tree to the base.
- Lack of enhanced care after vaccination. The tree to which the apple tree has been grafted needs intensive care, frequent watering and fertilizing.
- The winding is too strong. It pinches the tissue, disrupting sap flow, and the cutting receives few nutrients. The winding should be tight, but not pressing.
- Using polyethylene for winding. It creates a greenhouse effect, which leads to tissue decay.
How to understand that a tree is ready for grafting
Diseases of fruit trees, diseases of garden fruit trees
Budding of fruit trees in summer is short in terms of duration. But it is important to decide whether the tree is ready for grafting. There are several signs:
- Young shoots have already stopped growing.
- The axillary buds are fully mature.
- A significant distance should form between the buds on the cuttings.
- The degree of adhesion of the bark should be average.
Additional Information ! You should pay attention to the variety of apple tree - the early ones are grafted first, and then the late ones.
Preparation of material for budding
If you have not yet propagated trees using eyes, you must first learn to distinguish between growth and flower buds (the latter are not suitable for these purposes). There are most growth buds on the tops of annual shoots, but between them there are also flowering buds, albeit in small quantities. There are still many growth buds on the shoots, which are located on the outside of the crown.
A careful examination will help you understand where the growth bud is and where the flower bud is: the former have a more elongated and flattened shape, while the latter have a rounded shape. Also, growth buds are smaller.
After examining the shoots, those with more growth buds are taken for cuttings. The requirements for escapes are as follows:
- the bark is smooth, there are no visible defects;
- woody shoot;
- leaves without signs of disease;
- length not less than 30 cm;
- The diameter of the branch at the cutting site is about 5 mm.
The best time for cutting cuttings is before 10 am, preferably on the day of grafting. If you plan to graft immediately, then you don’t have to immerse the workpieces in water. The leaves and tops are cut off from the cuttings with sharp scissors, wrapped in a moistened rag and in this form carried or transported to the work site.
The best weather for budding is cloudy, but without rain. You can't work on a hot day.
Required tools and materials
Summer budding of an apple tree is carried out using certain tools and materials:
- Secateurs, a sharp knife and a saw for creating cuts and chips.
- Garden varnish, which is used to lubricate the cut.
- Electrical tape or twine to secure the grafting site.
Additionally, you need to prepare work gloves, a measuring tape and chalk. These tools are useful for marking the trunk and preparing cuttings.
Additional Information ! The best option would be a special budding knife. In this case, the tools must be as sharp as possible.
Set of tools and materials for budding
Timing and schemes for apple tree budding
The budding procedure allows the eyes to take root well on apple trees if it is carried out several weeks before the average temperature is no higher than 15 degrees. Then it will not be so hot and the grafting for the tree will be less painful. If the procedure is carried out in the summer, then the best time for it is from early morning until 10 o’clock. The evening procedure is performed after 16:00. In cloudy weather, vaccinations can be done during the day.
Trees that have completed their fruiting period earlier are grafted first. Typically, budding is done on the north side of the trunk, 5-8 centimeters above the root collar. A graft of this type is performed closer to autumn.
Scheme of summer grafting of an apple tree with green cuttings
Summer budding of an apple tree
Most often, budding of apple trees is carried out in the summer. Plants tolerate it less painfully, and the cut sites grow well together. The bark begins to come away from the trunk well around the end of July and until mid-August. In regions with a warm climate, the optimal time for budding is the first ten days of August. During the period of sap flow of the apple tree, selection is carried out by grafting a bud, and after this period - with a butt.
Compared to grafting apple trees in other seasons, summer budding has a number of advantages:
- no need to prepare and store cuttings in advance;
- in the summer it becomes clear how the rootstocks survived the winter, whether they have taken root well and are ready for budding;
- you won’t have to lose a whole year if spring grafting doesn’t bring positive results;
- the summer budding procedure is better, the scions grow well with the rootstock and do not require further labor-intensive care;
- all rootstock cuttings are used, which is especially important if they are in short supply;
- summer grafting does not leave unsightly growths on the tree and the place of budding is almost invisible.
Before budding, you need to prepare the material and select a suitable cutting. It is important to be able to distinguish growth buds from flower buds. This can be done if you follow simple recommendations.
- Sprout buds are usually located at the top and bottom of the branch. In the middle of the shoots there are both flower and growth buds.
- Pay attention to the location of the branches in the crown of the tree. Most of the growth buds are located on the sides.
- The appearance of the kidneys also differs. The growth buds are long and flattened, while the flower buds are round and larger in size.
Cuttings are taken from branches without defects, on which growth buds predominate and there are healthy leaves. The length of the branch should be from 30 cm, the diameter at the cut point should be 5-6 mm.
Some gardeners do selection with two buds in case one donor does not take root. Budding is performed as follows:
- a small thin layer of wood is cut from the scion, which becomes thicker in the bud area;
- The length of the shield is 25 mm or slightly more. The width is the same along the entire length;
- a T-shaped cut is made on the rootstock;
- insert the eye into the cut, lowering it to the bottom of the slot, and press it as much as possible against the woody layer of the rootstock;
- The grafting area is tied. The rootstock bud is closed or left in the air.
There are several methods for budding apple trees, varying in complexity and method of implementation. Each of them has its own characteristics, which you need to familiarize yourself with before carrying out work.
Summer budding of an apple tree
Budding in winter
Budding of apple trees in winter is carried out from January to mid-March. Like any selection, the procedure requires preparation. In the fall, before frost sets in, you need to dig up the required number of high-quality rootstocks, at least two years old, with a developed root system. The result of budding and the subsequent harvest will depend on their quality. The above-ground part of the rootstock is shortened to 25-40 cm. If a suitable tree is not found, you can use root cuttings at least 20 cm long and 1-2 cm thick.
The blanks are tied into bundles and the upper end is marked at the root segments so as not to make a mistake during budding. A few weeks before grafting, the rootstocks are transferred to a covered room where the temperature is not lower than 17 degrees. There they are covered with damp moss, sawdust or sand.
The scions are sorted, rejecting those that are frostbitten and of poor quality. The roots of suitable cuttings are washed well and the scions are placed in water for a day. They are brought into a warm room a couple of days before grafting and also kept moist. You can use a weak mineralized solution. To do this, dilute a teaspoon of nitrogen-phosphorus mineral fertilizer in a bucket of water. Before budding, the sorted cuttings are placed on a work surface and covered with a damp cloth.
The grafting procedure is performed in a heated room, at above-zero temperatures outside. The grafted pieces are planted in the spring.
Scions and rootstocks cannot be stored under snow, because... The weather in winter can change. The alternation of thaws and sudden cold snaps can destroy the buds and wood or cause the roots of the rootstock to freeze.
Scheme of spring budding of an apple tree
Spring budding
Spring budding can guarantee a positive vaccination result, because During this period, the sap flow in the tree is quite strong, their immunity is increased, and the healing period passes without complications.
It is impossible to vaccinate in early spring, when the frost has not yet subsided. The optimal period for the procedures is mid-April, when the temperature outside is positive and the weather is calm. The right time of day is morning or evening.
Many gardeners prefer to focus their work on the lunar calendar. In this regard, the best time to work with plants is the waxing moon.
In almost all methods of spring grafting, cuttings are used as rootstocks. They are harvested in early autumn, when the air temperature is not lower than 10 degrees. Before making a cut, you need to treat the branch from external contaminants. Do not touch the cut site with your hands, but wrap the cutting with a damp cloth.
The scions are stored in a cool, dry place until budding. To do this, you can use the bottom shelf of the refrigerator, cellar or basement. The cuttings are placed vertically so that the cut points are directed towards the bottom. To maintain a suitable level of humidity for the scions, they can be placed in a box with sand or sawdust.
How to budding an apple and pear tree: step-by-step description
There are several methods for planting an apple tree in the summer. But many gardeners use the budding method. Instructions on how to vaccinate an apple tree yourself in the summer are as follows:
- It is necessary to prepare a longitudinal cut of the rootstock branch (the tree to which the cutting will be grafted).
- On the cut, make a cut in the shape of the letter “T”, the depth of which should be no more than 1-1.5 cm.
- From the scion (the branch that will be grafted), the outermost bud is cut off, which is almost ready to bloom. It is also worth removing all the bark around the cut.
- Then the finished scions are vertically inserted into the cut so as to cover the areas exposed to the bark. Thanks to this, the peephole will be protected from harmful microorganisms.
Features of budding
Even a novice gardener who has not previously tried this method of tree restoration can understand the apple tree budding algorithm.
Summer budding of an apple tree - step-by-step instructions
There are many ways to graft fruit trees. But not all apple trees are suitable for summer grafting.
In warm months, trees can only be grafted using the budding method (there are two types of budding: T-cut and butt-budding). The choice of budding method depends on how well the bark is separated from the wood.
Grafting an apple tree into a T-shaped incision
This method is suitable for grafting plants whose bark comes off easily. The knife for budding must be sharp, with a special “bone” to create a T-shaped cut.
Budding an apple tree into a T-shaped cut is the most common method of summer grafting
- Stand next to the rootstock, tilt it and make a cross-cut through it all the way to the wood. It should be done at a slight angle to the vertical axis of the rootstock in order to facilitate the insertion of the shield in the future. Depending on the thickness of the branch or tree trunk, the length of the cross-section should be from 2 to 3.5 cm.
- Take out the budding knife and use the rounded part of the blade to make a longitudinal cut perpendicular to the transverse one. As a result, you should end up with the letter “T”. To prevent the knife from slipping, place the index finger of your right hand just below the blade. It should move along the rootstock as a stop. Place the knife blade perpendicular to the tree bark. The length of the longitudinal cut should be 1-3 cm. The easier the bark is separated, the shorter the cut can be.
- When the knife blade reaches the intersection of the longitudinal and transverse cuts, do not remove it, but turn it alternately to the right and left, lifting the corners of the bark.
- Take the scion cutting in your left hand with the tip facing you and select a bud suitable for grafting.
- Cross-cut the bark on the cutting at the top of the future shield, retreating 1-1.5 cm from the top of the bud.
- Make a second transverse cut 1.5 cm below the base of the bud, cutting through the bark and a small layer of wood.
- Place the knife blade at a distance of 1.5-2 cm from the base of the bud, with a sliding movement toward you and to the right, slightly deepen the blade and carefully slide it under the bark, grabbing a thin layer of wood.
- As soon as the blade reaches the base of the bud, you need to lift the butt of the knife, thereby deepening the blade.
- Cut the vascular-fibrous bundle feeding the kidney and lower the blade of the knife again.
- Cut off the top of the shield so that the bud is located in the middle.
- Take the resulting shield by the petiole with your left hand and insert it into the T-shaped cut in the rootstock bark, slightly bending the rootstock in the direction opposite to the cut.
- The shield should be inserted so that the kidney is in the middle of the longitudinal section.
- Run the index fingers of both hands along the longitudinal cut so that the bark fits more tightly to the shield.
- Wrap the grafting site with plastic wrap immediately after the procedure. The strapping is carried out from the lower end of the longitudinal incision to the upper edge of the transverse incision. The grafting site is “bandaged” tightly, without gaps, but the bud and petiole are left open. When tying, make sure that the shield does not move.
- If some parts of the grafting cut remain uncovered, they are lubricated with garden varnish.
Apple tree grafting
This method is suitable for branches and trees whose bark is difficult to separate.
Budding into the butt requires perfect alignment of the cambial layers of the scion and rootstock
- On the rootstock at the grafting site, cut from top to bottom a strip of bark with a thin layer of wood 2.5-3 cm long, 0.4-0.7 cm wide.
- Then cut off about 2/3 of this strip, and move the remaining piece of bark slightly to the side.
- Place the knife at an angle of 30 degrees at the place where the strip of bark is attached to the trunk and make a cut 4-5 mm deep. As a result, you should get a wedge-shaped cut, where you will subsequently insert the lower end of the shield with the kidney.
- Cut the shield from the cutting using the method described in the section “Grafting an apple tree into a T-shaped cut.”
- Insert the shield under the remaining piece of bark where the cut was made and align it with the rootstock so that their cambial layers touch each other on all sides.
- Immediately tie the grafting site with cling film or other material so that the shield remains in place and the cambial layers continue to touch. Cover open cuts with garden varnish.
Safety precautions
To avoid injury during work, you should follow the safety instructions:
- A knife or other cutting tool should be held so as not to injure your fingers or hands.
- It is advisable to wear glasses while making a cut or sharpening a branch. This way you can prevent sawdust from getting into your eyes.
- Hands can be further protected by wearing work gloves.
Other safety recommendations may relate solely to the individual characteristics of the procedure.
The benefits of vaccinations
Zoned cherries, apple trees, pears, and plums are grafted onto frost-resistant wildflowers in nurseries. Sometimes grafting is done to speed up the ripening of fruits: if late autumn varieties are grafted onto early ripening varieties, a harvest can be obtained by the beginning of autumn. I know people who have grafted shoots from tall varieties onto dwarf trees.
My neighbor in the garden has a unique apple tree: more than 10 varieties are grafted onto it. I won’t dare to do such an experiment. I started budding to preserve my favorite variety of apples. They are tasty, juicy, and store well.
Caring for apple and pear trees after budding
After budding, you need to properly care for the trees. The procedure consists of the following step-by-step steps:
- During the first 14 days, you need to check the condition of the scion every day. If the graft does not take root, you should separate the cutting and cover the cut of the branch with garden varnish.
- It is necessary to periodically loosen the “tourniquet” that secures the branch. 2-3 months after budding, it can be completely removed.
- The shoots that appear on the branch below the graft must be cut off with pruners or a knife. This will ensure proper nutrition for the vaccine.
- If branches appear on the grafted cuttings, the excess ones need to be cut off. In this case, the strongest escape is determined.
Proper care of the scion and tree is a guarantee that the graft will take root and will soon produce a good harvest.
The result of proper care
Note ! It is imperative to monitor the tree as a whole - timely watering in hot weather, treating foliage and bark from pests.
Care after vaccination
It is important to look after the tree after grafting.
Below are the basic rules of care:
- All young growth that forms on the scion and next to the graft is removed. It draws most of the nutrients, reducing the chances of survival.
- It is important to keep birds away from the graft, as they can break it.
- 3-4 weeks after the procedure, the winding is removed.
- 3 weeks after grafting, the tree is fed.
- The grafted apple tree is watered as the soil dries.
Possible mistakes of novice gardeners
The grafting method is an affordable and popular option for obtaining a varied and rich harvest. But during the procedure, you can make many mistakes, which are especially common for novice gardeners:
- An incorrectly selected scion that will not take root on the rootstock.
- Incorrect preparation of the branch for grafting.
- Sometimes it is difficult for novice gardeners to determine whether a tree is ready for the procedure.
If your hand is not full in terms of preparing cuttings, then the risk of justifiable damage to the tree immediately arises. Therefore, “young” gardeners in terms of experience should carefully study the information about this stage of work.
What is budding
What is budding of fruit trees? This is one of the ways to graft a young seedling onto the trunk of another variety (rootstock). A bud or cutting of a cultivated variety is used as a donor. Located on the rootstock, it resembles an eye. This is where the name of the procedure came from.
Budding is a method of grafting apple trees, which can change not only the appearance of the tree, but also improve its fruiting. Budding is also beneficial for the following reasons:
- You can rejuvenate an old plant and increase its vegetative performance. This is especially good in cases where there are rare varieties of apple trees on the site, but the tree no longer produces fruit so successfully;
- crown formation. If the tree is of a tall variety, it can be made shorter to make it more convenient to harvest from its top;
- growing several varieties with different tastes on one tree. This is convenient when there is little space on the site and it is impossible to plant several different varieties;
- Harvesting can be carried out in several stages, from the beginning of the fruiting period of early varieties to the end of the growing season of late varieties;
- rescuing damaged plants, such as rodents or insect pests;
- increasing frost resistance of some varieties.
Budding apple trees is similar to a surgical operation. The more accurately and correctly the procedure is performed, the better the final result and the longer the life of the “patient.” After selection, you can expect a harvest within 3-4 years. In addition, vaccination can be performed at any time of the year.
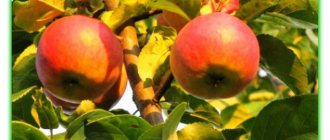
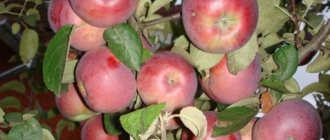
The result of apple tree budding
Useful tips
Any old tree can be revived by grafting. At the same time, it will produce a good harvest of fruit of a new format, preserving the old variety range. To achieve good results, it is worth knowing a few secrets and nuances that relate to grafting apple trees:
- You need to select the “right” season for the procedure. For each variety and region, the time is selected individually.
- To make a good butt of the handle, it is advisable to make all cuts, cuts and chips under a ruler.
- There is no need to try to graft a tree that is not ready for this procedure. This can completely destroy the plant.
The result of a correctly administered vaccination
The art of grafting new apple tree branches onto old trees takes many years to develop. Therefore, new gardeners should not worry if something doesn’t work out the first time.
Tips on the topic
Some tips will help simplify the vaccination procedure:
- The electrical tape is wrapped around the junction of the fabrics with the sticky layer facing outward so that when removing the winding it does not damage the fabric. Instead of electrical tape and garden tape, you can use a regular rag.
- In cold weather, the varnish hardens, and when it gets on clothes, it leaves greasy stains that are difficult to wash off. Whitewash, which can be used as a substitute for garden varnish, does not have such disadvantages.
- To make identical sections, use a grafting gun. It makes the procedure easier.
How to properly care for a grafted apple tree
Regardless of which budding method you used, after 2-3 weeks you will need to remove the wrapping. As soon as you do this, you will immediately understand whether your vaccination gave a result, or something went wrong. If the petiole dries out and falls off, then the result is good. If this is not observed, the bud has turned black, then be patient, and next spring try to take into account possible shortcomings.
Places where the integrity of the bark has been damaged are lubricated with garden varnish. If the buds have taken root, but the temperature is expected to drop soon, it is recommended to cover the graft, you can bury the entire seedling, such protection will only benefit it.
So, you could see for yourself that there is nothing complicated about summer grafting of apple trees. With proper care and compliance with vaccination rules, in 100% of cases the graft takes root well. Budding expands the possibilities of the garden, even if its area is small. Agree, an apple tree looks funny, with fruits of different varieties ripening on its branches. And if we add to this the fact that the winter hardiness of apple trees will increase significantly, then it becomes clear why such an “operation” is so popular. Be sure to take our recommendations into account and feel free to take action.
The main conditions for successful vaccination
ATTENTION! Do not confuse the top and bottom of the grafted part by placing it “upside down”.
There is no need to despair at the first failures; skill comes with experience. Grafting is, in fact, a surgical operation in which cleanliness and speed, the sharpness of the instrument and the tightness of the bandage, and weather conditions are important.
Purity
Wipe the dirty instrument with a clean cotton cloth.
For this purpose, you can use a bandage by wrapping it around your left wrist (for a right-handed person). We first wipe the cuttings and rootstock in the cut area from dirt and dust. The surface of the cuts should not be touched with hands.
All cuts must be perfectly clean.
We do not use scion with fresh cuts that accidentally fell to the ground before the operation.
Speed
Half a minute is the period in which it is advisable to have time to make cuts and combine the rootstock with the scion.
The exposed cambium oxidizes and dries out; If the operation lasts longer than a minute, then the chances of survival are reduced.
Tool
You will need a scalpel or a knife - well sharpened, razor-sharp. Each cut should be as smooth and precise as possible.
It is convenient to use a special knife.
A pruning shear is also useful for cutting cuttings.
Harness
Having combined the scion with the rootstock, we apply a temporary tight bandage . It will ensure strong fixation, active growth of callus (connective tissue), supply of moisture and nutrition to the scion.
For tying use:
- strips of polyethylene film wide 1 -1.5 cm,
Wrap the grafting site with a strip of plastic film.
- stretch film,
- PVC electrical tape (not black fabric tape) 0.15 mm and 15 mm ,
- plumbing FUM tape 12 mm (not the thinnest).
Garden stores also sell special grafting tapes (self-destructive).
The grafting tape stretches as the diameter of the trunk increases and gradually breaks down under the influence of sunlight.
Tight binding prevents the scion from drying out. Sometimes it is advised to additionally protect the grafted cuttings - cover it with a cap made of a moistened plastic bag, then shade it with newspaper, a burdock leaf, etc. For summer grafting, experienced gardeners usually do not recommend coating with garden pitch: in the heat it melts and flows into the wounds, interfering with healing.
Weather
Vaccinations work better in cloudy weather, but it should not be rainy. On sunny days, operations are performed in the early morning or evening.
Preliminary abundant watering of the young rootstock (a week or at least a day before grafting) will increase sap flow and contribute to successful fusion.
What is required for budding and how to prepare the scion
Tools
To carry out budding you will need the following tools:
- Budding knife;
- Strapping film (polyethylene tape, in extreme cases - electrical tape, which you will need to remove yourself);
Ideally, a special (photodegradable) film (sold under the name “Shaft”) is used for grafting and budding, which itself is destroyed under the influence of ultraviolet rays (i.e., subsequently it will not even need to be removed).
Rootstock and scion
The rootstock is the seedling that you will graft onto. As a rule, a 1-2 year old wildflower (a tree grown from a seed or seed) is used as a rootstock for budding.
Moreover, in the conditions of the same central zone (Moscow region) and other cold regions, the most winter-hardy varieties for rootstock .
A scion is a varietal cutting, and in this case, a shield with an eye (bud), which you will graft onto the rootstock.
Where can I get the scion?
Ask your neighbors for some, or buy them at a garden fair, or better yet, at a nursery, or order them online.
Scion preparation: cuttings and eyes (buds) with shield
To graft by budding, you must first prepare cuttings for the scion, namely:
Note! It is advisable to prepare future scion cuttings on the day of grafting .
However, it is allowed to store the cuttings in damp material (they need to be wrapped in a damp cloth and put in a bag) in the refrigerator, but not more than for a week .
- Cut an annual cutting (= current year's shoot) about 40 cm long.
As a rule, cuttings are taken from the upper part of the crown on the south or west side.
- Carefully pluck (remove) all the leaves from it.
Some gardeners try to leave the stalk (petiole) of the leaf, however, this is more relevant for T-shaped budding, while most often budding is done with the butt of a knife (but if you want, you can leave the petiole, but in the future you should not wrap it, and leave the peephole open).
- Next, you need to trim 2-3 lower and upper buds (shorten the cutting from below and above) , i.e. Only the middle part of the shoot is used for grafting.
Now you must directly prepare the scion, namely, correctly cut off the bud (eye) with the shield:
- Take the cutting in your left hand and place your finger under the bud (eye).
- We make one short cut under and above the bud, and then turn the knife over and start cutting from the bottom up, cutting off the bud with the scute (a thin layer of wood).
- After the cut, the top of the shield should be between your knife and your thumb.
Why is budding necessary?
Summer budding of an apple tree is ideal if you did not have time to vaccinate in the spring. The reasons for this can be different - cold, lack of light, excess rainfall, and so on.
Budding allows you to improve the quality of the crop and obtain hybrid plants. Also, grafting can be done if the tree has suffered from insects and harmful microorganisms, which has led to the drying out of many branches on the apple tree.
When is budding carried out in the summer: at what time?
Vaccination using the budding method is carried out in the second half of summer - from the 3rd decade of July to the 2nd decade of August (relevant for the Middle Zone).
- Why in summer, in August?
This is a period of active sap flow in the shoots, when the bark is easily separated from the wood; it is by this time that the buds on this year’s growths (one-year-old shoots) ripen.
Accordingly, grafting by budding begins with stone fruit crops - from the end of July, and then - from August - they move on to pome crops (apple trees and pears), because In stone fruit crops (cherries, cherries, plums), sap flow begins and ends earlier than in pome crops.
- Is it possible to vaccinate with an eye earlier?
If budding is carried out too early (in early July), the buds may germinate in the fall, which means they most likely will not survive the winter.
However! You can try spring budding. You just need to wait for the sap to start flowing . In this case, cuttings prepared in the fall of last year are used. The bud will bloom and sprout this same spring.
And yet, this method is almost never used, except for budding stone fruit crops (cherries, petioles, plums).
- Why can't it be later?
The eyes may simply not have time to get accustomed to the rootstock.
For normal fusion after budding, an average of 30 days should pass with a temperature above +16-18 degrees. Accordingly, in warm southern regions, budding can be done in the fall (September-October).