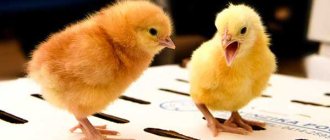
Breeding chickens requires the creation of certain conditions. Depending on their age. During the first weeks after hatching, the birds must be kept in a special box. There is nothing difficult about making a brooder for chickens with your own hands. A properly designed nursery can, in its characteristics, replace a mother hen. Thanks to them, the farmer will be able to monitor the development of young animals. And save all the livestock.
Main characteristics
What is a brooder
A brooder for raising chickens at home is similar to a heated box. It can take up part of the room. The chicks will stay in it for several weeks. Until they grow up and get stronger.
Chickens typically spend two months here before being moved to a cage or communal coop.
The box can be used for several generations. Each time transferring the grown-up offspring to another home. Painting the wooden elements will help prolong the life of the structure.
Equipment and functions
Chick boxes are equipped with:
- drinking bowl;
- feeder;
- equipment for maintaining humidity;
- a heating device (in some cases it can also be a lighting device);
- lighting;
- ventilation holes;
- bedding for comfortable movement of chicks.
The key function of a brooder for chickens is to provide optimal temperature conditions for heating. In this way, conditions are created that are as close to natural as possible. When the chicks are close to the hen.
When the hen is not keeping the chicks warm, a special box does this successfully. If you make a brooder with your own hands, you can maintain the number of growing chickens.
Requirements
Since chickens live in a brooder after hatching, special requirements are placed on the device.
The floor here is dry, otherwise the bird will get sick. And also rough, otherwise the chickens may break their legs.
The brooder must be cleared of droppings in a timely manner so as not to contribute to the spread of diseases.
Since chickens are susceptible to temperature changes, it is necessary to think about how to organize heating.
The temperature is sufficient, but not high, so as not to overheat the bird. We will talk about this parameter separately below.
A litter box must be placed under the floor.
To avoid injury, the size of the mesh floor sections must be selected in accordance with the age of the bird. For very small ones, the cell size is 10 by 10 mm. As they grow older, a grid of 15 by 15 mm, 25 by 25 mm is used.
Ventilation is required, but without drafts.
Requirements
A brooder actually helps replace a hen for chickens, being a small box in which they are kept in the first weeks of their life if they are bred in artificially created conditions. When making it yourself, attention should be paid to the following parameters:
- Dimensions . Depends on the number of chickens, since per 1 sq. m should not come more than 25 individuals. Taking into account the fact that they will be kept in a brooder until they are 2 or 3 months of age, at least 0.1 square meters should be allocated for one individual. m area. A standard “house” can often contain 50 one-day-old chicks. Its acceptable dimensions are:
- length – 100 cm;
- width – 50 cm.
height – 50 cm;
Thus, the dimensions of a standard box for housing 50 chicks are 100x50x50 cm. If you plan to keep broilers or more than 60 chickens, you can increase the width and length to 60 cm and 1 m, respectively, with a height of 50 cm.
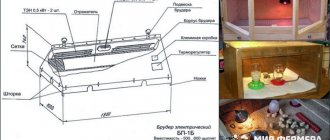
Taking into account these parameters, a home master can assemble a brooder using the following scheme:
If necessary, you can make several similar buildings and stack them on top of each other to get a battery where you can breed a large number of chickens.
Key nuances and parameters that a home craftsman should take into account when making a brooder are given in the following video:
Density of chicks
A special requirement is placed on the number of individuals. If the chicks are crowded, brood losses can be expected. The surviving chicks will grow up weak. There will also be a natural competition for food.
You can get rid of this by strictly observing the size of the number of birds placed there.
The size of the brooder must be selected according to the number of chickens. It is optimal to calculate the constructed structure for 30, 50 and 100 individuals.
There is a universal formula for calculating stocking density: 1 square meter of area is required for 25 chickens.
It is easy to calculate that for 50 chickens you will need 2 square meters.
Brooders for broilers differ slightly in size. And some poultry farmers do not even recommend increasing the size for chickens of this species. After all, the goal of growing is rapid weight gain. A large space promotes additional physical activity.
Brooder for ducklings
Duck breeding should take place in comfortable conditions for the chicks.
There is a misconception that ducks love dirt and moisture. But this leads to illness in the chicks, weight loss and poor quality of feathers and down. Therefore, they need to be kept clean. If there is paper on the floor, then it needs to be changed at least once every 2 days. The feeder is cleaned regularly, and the drinking bowl is washed with hot water and disinfected every day.
Ducklings need space in the brooder. About 40 newborn ducklings or either 10 chicks, which are up to 3 weeks old, or 3 adults, feel comfortable per 1 m2. The optimal design area is 300 cm2, and for musk ducks it is 500 cm2, and the height is 40 cm. Then the birds will not need to bend their heads while in the brooder.
Tip: it is better to use a metal mesh with cells 2.5x1.2 cm.
In the brooder, it is important to maintain a temperature of approximately 32° C – for small ducklings, and for those who are 1 week old – 16° C. Do not allow the temperature to drop to 11° C, otherwise the chicks’ productivity decreases by 20%.
Types of finished structures
Before you build housing for chicks, you can familiarize yourself with the offers of leading companies. There are ready-made brooders available for purchase. Only designs must fully satisfy the needs of the owners.
They can be made from foam or metal. But most finished models are made of wood. Cost varies. Depends on the material and number of chickens to keep. The price ranges from 4 to 35 thousand rubles.
Convenient houses for chicks with a built-in thermostat. After all, heating the brooder for chickens is the first thing people pay attention to. It is important to choose a box designed for the intended population. Chicks will not survive in a small box.
Brooder for broilers
There are several features of the mounted structure that are worth considering:
- Make the floor non-slip so that the broilers' legs do not move apart.
- The food container can be a regular egg tray. Thanks to this design of the feeder, each broiler can easily get to food.
- Choose feeders and drinkers that will not injure the broilers and will not tip over due to their excessive activity (they like to walk on the edges).
- The assembled product is painted to increase its service life.
- It is advisable to treat the finished brooder with a soapy disinfectant solution.
Alternative exit
Now let's figure out how to make a chicken box with your own hands. Even a beginner who does not know what a brooder is can cope with this task. And raising chickens for the first time.
Drawings for a chicken brooder will help you avoid assembly errors. On them you need to indicate the required dimensions of the parts to create the box.
Households have many DIY structures for raising chickens. At the same time, they are engaged in construction in all regions. Even in Moscow, where purchasing a finished product is not difficult.
This is not surprising, because a do-it-yourself chicken brooder takes into account all the features and nuances of their breeding. Which is not always present in ready-made designs.
The second advantage is budget savings. You can build a house for chicks from scrap or cheap materials.
Concept and main functions
The brooder protects small chickens from temperature fluctuations, wind, humid air, drafts, and lack of light. All these factors lead to stress, as well as the development of diseases in immature chicks. The manufacturing technology of the structure is simple. It can be constructed in one day.
A brooder is a container designed to hold small chicks in the first 2 months of their life. The word “brooder” comes from the English “brood” - to bear.
The design includes:
- containers for food and water;
- devices that provide comfortable levels of temperature and humidity for chicks;
- ventilation system;
- lighting equipment;
- flooring that facilitates the comfortable movement of small birds.
We build it ourselves: option No. 1
Stocking up on materials
Almost anything that is used in home construction is suitable as building materials for a brooder.
But it is best to choose a newer one. For example, so that the tree is not rotten or damp. Or infested with insects or mold.
Chicken breeders with experience in arranging a structure for broilers with their own hands are advised to prepare the following materials in advance:
- wooden boards (several pieces of the required size);
- plywood;
- mesh;
- screws;
- brackets for fastening the mesh;
- bars for closing the door.
Preparing the tools
To make a manger, you will need a regular tool. You should stock up on:
- jigsaw or saw;
- screwdriver;
- hammer;
- tape measure;
- nails or furniture stapler;
- tape measure;
- pliers;
- pencil.
If you have everything you need, you can make a homemade brooder in a couple of days.
Installation instructions: first steps
Let's take a closer look at how to make a chicken brooder with your own hands.
Before starting manufacturing, you need to have the necessary materials on hand - two sheets of plywood, a mesh of the required size, hinges, and more.
The manufacture of a brooder begins with assembling the frame and attaching plywood to it. Using beams, two squares are formed - they will become the side walls of the future box.
The frame can be assembled using self-tapping screws. They attach well to wood.
The formation of the box is carried out by fastening the side walls with long slats. The box is lined with plywood on both sides.
A jumper is installed in the middle on which the doors will be attached.
A mesh is attached to the open part of the brooder, which will later become the floor. It can be nailed down with nails. Or shoot him with a furniture stapler.
Final actions
Since the box must be cleaned, it is raised on legs. And underneath there are boxes for litter.
You can easily make legs by nailing four bars of the required size to the bottom of the box. It is worth considering that a litter box will be installed under the floor in the future. Therefore, the height of the legs is made at least 5 cm so that the drawer can slide out freely.
At the last stage, hinges for doors are attached to the front side of the product - on top or on the sides. It depends on the owner’s desire in which direction the doors will open.
After making the doors, you should take care of the lock. A primitive lock is a nail driven in halfway and bent at an angle of 90 degrees. It will rotate and hold the door. For a more powerful shutter, you can make a latch, hang a padlock or any other device.
DIY brooder video
Important! Don't forget about the ventilation holes. So what if the brooder doors cover the entire front wall? Then holes must be made for air access in the roof or the upper part of the side walls.
After assembling the structure, little remains to be done. The socket is screwed from the inside to the roof into which the lamp is installed. A thermometer is mounted on the side wall. A special automatic device is attached to the outside of the product. The heating parameters are automatically set to automatically turn off the lamp when the required temperature inside the house is reached.
A feeder with mixed feed and a drinking bowl with fresh water are installed on the mesh bottom. A little potassium permanganate is added to the water. I use it as a disinfectant for 2-3 days and as a preventive measure for poultry health.
Then all that remains is to monitor the thermometer, clean, add food, and pour water.
Option No. 2: with thermostat
Choice of material: cardboard
There are other options for nurseries. For example, make them with a thermostat - a dimmer. This design has features in the selection of material and assembly.
A device with a thermostat is made of various materials. It is important to take into account operating features that not everyone is aware of.
You can build a product from cardboard boxes. But the only thing that can attract is the cheapness of the material. The costs for such a box are minimal. However, the material may ignite when heated. Therefore, breeders advise abandoning this idea immediately.
Plastic
There is an option to build a brooder for chickens from plastic. But this material also has disadvantages.
Plastic can melt when heated, releasing toxic substances. This is fraught with poisoning of the livestock, with further suffocation.
And not all plastic holds temperature well. The chickens will freeze. Therefore, you shouldn’t make a manger out of it either.
Metal
Durable material. But the brooder made from it can oxidize. In addition, the metal cools quickly. Therefore, the design will not be warm enough. And we will have to invent additional heating methods.
Tree
The best option to do it yourself is to use wood.
This material is easy to work with. Each owner can make a house for chickens with his own hands.
It should be taken into account that wood is a natural material. And it does not cause trouble when used correctly.
The main thing is to prescribe it with antiseptics and fire-resistant agents. Fortunately, the market provides a lot of options for caring for wooden surfaces.
There is only one condition - you can launch chickens only after the tree has completely dried. And the removal of harmful odors.
You don't need a lot of money to make a heated brooder from wood. In addition, the material has excellent thermal insulation. And retains the heat given off by appliances.
Preparation
As in the first installation option, you first need to prepare a drawing of a brooder for chickens with your own hands.
On it you need to draw a general view of the structure. Parts and their quantity. As well as exact dimensions, taking into account all joints and overlays. Otherwise, an annoying oversight may result - gaps will appear in the product.
Once the dimensions of the chicken brooder have been determined, you can begin cutting the material and preparing structural elements.
Tools
You can easily make a brooder for chickens using ordinary available tools that are available on every farm:
- hand saw or jigsaw;
- nails or screws;
- screwdriver;
- loop;
- grids;
- pliers;
- roulette;
- hammer;
- furniture stapler;
- pencil for marking parts.
Assembly instructions: beginning
You need to start assembly with the frame. The manufactured side walls are attached to each other with long slats. And they are knocked together to form the outline of a rectangle. Then the back wall and lid are closed if the design does not include a mesh.
In another case, a mesh is attached to the bottom of the resulting box. Metal or plastic. The main thing is that it does not bend. It is necessary to take into account the weight gain of the brood. After all, light chickens will become larger and heavier in a couple of weeks.
The mesh is nailed down. Or it is targeted with a furniture stapler.
Continuation
Legs are attached to the brooder support. These are either four independent legs. Or two slats running from below on both sides.
When making a box, when calculating the height of the legs, it is taken into account that the box with litter should move freely under them. After all, it needs to be emptied from time to time. To make the process comfortable and fast, the brooder design must take this into account.
Conclusion
At the last stage, doors are made in the brooder. The design is ordinary, uncomplicated.
The doors are made of wood, mesh on the frame, and transparent plastic. They are mounted on hinges, the shutter is a latch or a lock.
The main secret is the presence of a dimmer. That is, the temperature regulator. It consists of a rod on which an infrared lamp is attached. Its power is 250 W.
The dimmer is installed in a ready-made brooder. The structure can be moved closer or further away, thereby adjusting the heat level.
There are devices with manual power control. For large areas, you can choose a design with two lamps.
Quail brooder
Quails need special conditions. For quails it is important that:
- The lighting for the first 7 days was around the clock. They react sensitively to light and grow faster if there is enough lighting. From the second week, the lighting is turned off for 3 hours, then for 12 hours.
- The temperature in the quail brooder on the first day of life was about 37°C. Then the temperature is reduced by 1°C every 3 days, bringing it to 22°C.
Expert advice
Viktor Nikolaevich Travnikov
For about 20 years he has been breeding laying hens, broilers, geese, ducks and other poultry. Our expert who is always happy to help readers.
Ask a Question
Infrared lamps can serve not only as a source of heating, but also as additional illumination. Quails develop better under red light.
- The room was well ventilated and there was no smell of hydrogen sulfide or dust.
- Humidity was about 60-70% in the first week and 50-60% in the following weeks.
- There was remote supply of food and drink. Quails are shy chicks, so constantly replacing food in a saucer or drinking bowl leads to stress for them. Solution: you can take the hose out of the drinker and the bottle out of the saucer. At the right time, add food and water without interfering with the chicks’ space.
- There was enough space in the brooder. Experienced quail breeders advise making a brooder with dimensions of 700x500x400 mm.
To prevent the quail from getting sick, the brooder must be kept clean. You should not put cardboard on the bottom, as it is fire hazardous, fragile and does not withstand treatment with an antiseptic. For this case, plywood or boards from 20 to 30 mm are suitable. They must be treated with safe disinfectants. The removable litter screen needs to be cleaned regularly.
Tip: a mesh with cell sizes depending on the age of the chicks is placed on the bottom. For example, for quails up to 5 days - a 5x5 mm mesh, up to 2 weeks - a 10x10 mm mesh, up to a month - a 25x15 mm mesh. In the first days, you can put two layers of fine mesh so that the chicks’ legs do not fall through.
Preparing and equipping the brooder
How to treat before planting chickens
It’s better to play it safe and disinfect the box immediately after making it.
Parasites and bacteria invisible to the human eye can provoke the death of fragile chicks. Therefore, treat the surface with disinfectants.
The preparations Virotsid and Alaminol are suitable for treatment. They will help avoid infection.
It is necessary to treat the box before each planting of a new brood.
Heating
This is the most important function of the brooder. Therefore, the breeder needs to take into account all temperature factors: whether the lamp is overheating. How good a place was chosen to place the chicken house. Are there any drafts?
Much of the success depends on the lighting fixtures chosen to keep the birds warm. It is important that there is enough heat to cover the entire area. So that even in a remote corner the chicken does not experience the cold.
For more information on how to organize everything correctly, read the article “Lamps and other devices for heating chickens.”
Temperature
The basis for successfully raising offspring is proper nutrition. What is described in the article “What to feed chickens at home from the first days of life.”
The conditions for keeping chickens are no less important. The more comfortable they are, the less problems the brood will bring to the owner.
Since in the first weeks of life, chickens are especially susceptible to temperature parameters, close attention should be paid to this issue.
The temperature should be stable, without changes. Because the thermoregulation regime in chickens is imperfect. And in the absence of feathers, they need stable warmth.
What temperature readings are recommended, and how to maintain them, read the article “Rules for keeping chickens in a brooder: temperature and other parameters.”
Recommendations for making a feeder and drinker
A ready-made “box” for keeping chicks is not the whole structure. It is necessary to make a drinking bowl and feeder for the comfortable keeping of birds. Experienced livestock breeders recommend making a bunker-type feeder. If you give preference to this type, you will disturb the birds less - the food is added from the outside. You can place the required amount of food at one time and not worry that the chicks will remain hungry.
Step 1. Cut a hole in the front wall of the structure to accommodate the feeder (its size is determined by the number of birds you house).
Step 2 . The feeders are fixed with metal plates. When they are moved, the feeder can be easily removed and installed back.
As for drinkers and plates, it is best to avoid vacuum options. They carry infection, need constant cleaning, and unintelligent chickens can get inside and drown. Use nipple drinkers with special drip catchers (preventing dampness in the building) - they are the safest.
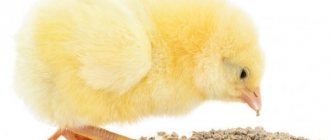
Feeding a chicken from a special feeder
How to warm a cage
For young birds, it is necessary to maintain the temperature in the first days of life at 30-32 °C (air humidity 55-70%), then it is gradually reduced to 20-22 °C.
Various options are used for heating:
- infrared lamps, they emit a luminous flux in which 80-85% of the radiation is warm light. As you move away from the heat source, the temperature decreases inversely to the square of the distance. That is, when removed by a factor of 2, the heat flux is dissipated by a factor of 4. Such heaters dry out the air, so to increase the humidity you need to place a cloth, part of which is in water;
- incandescent lamps 15-50 W. Their radiation consists of only 30-40% of warm infrared flux, but in practice they are easier to use inside a cell. A homemade chicken brooder with such heaters is easy to adjust. By reducing the supply voltage, the intensity of the heat flow is reduced;
- ceramic resistors with high heat dissipation are installed under the floor. The floor heating temperature is only 33...36 °C. Warm air will rise upward. This heating method is the most beneficial for chicks;
- Film heaters of the “warm floor” system are easy to use. The heat flow is dissipated over a fairly large area. The heater itself can be placed below, under the floor, or above - on the ceiling. The heating temperature is 40…45 °C;
- heating pad. It is packaged in a plastic bag and placed on the floor. Set the minimum heating mode, which gives a temperature of 32...36 °C, which is quite enough for any chicks: quails, ducklings, goslings and turkey poults.
The simplest method presented is to install incandescent lamps. They are located under the ceiling of the broiler brooder.
If you install several switches and minion sockets, then low-power light sources of 15-25 W are used. For an area of 50-60*30-35 cm, you will need to install all 4...6 lamps. When you turn on all of them at the same time, you can create a heat flux equal to 100-150 W.
A comfortable temperature inside the sleeping compartment can be maintained at negative temperatures outside.
It's quite easy to use a heating pad. Low cost and sufficient area make this heating source quite attractive.
Important! When using a heating pad, you will have to install light sources. LEDs will provide the desired spectrum of illumination at low energy costs.
Box parameters
Beginning livestock breeders use packaging boxes with a volume of 10-20 liters as a brooder for keeping chickens.
the floor is covered with fabric, and incandescent lamps are installed on top. Saucers and small cups are installed for feeding and drinking. But such small boxes can replace a cage only during the first 5-8 days. Therefore, take this advice: you need to take care in advance about making a brooder for chickens, where they will be kept until they are two months old.
The structure will be serviced by women, and possibly children. Therefore, it must be made comfortable for a small person. You should take advantage of the recommendations offered by ergonomics.
Size justification
It is convenient for a person to maintain the cage if it is located at a height of 80-110 cm from the floor. You can also equip the device with legs. The depth to which the hand can freely reach is 50-70 cm (this size determines the width of the case).
The livestock breeder can, without taking long steps, cover a space of 120-140 cm. Too much height is not needed, the space is heated artificially, so usually the height of the body is 50-60 cm.
So, based on reasoning and ergonomic feasibility, the dimensions of a chick brooder are as follows:
- length – 120-140 cm;
- width (depth) – 50-70 cm;
- height – 50-60 cm.
In such a cage you can accommodate up to 25-35 broilers. Its density will comply with accepted standards. As the young grow, the number of chicks decreases. They will have to be kept in a second or even third brooder. Therefore, it is recommended to build not one, but two or three devices.
If necessary, you can adjust the number of chickens in each of them. It will be possible to process the internal space by temporarily moving a certain number to other cells.
Three walls are made blank. This approach will prevent the occurrence of drafts. Doors are installed on the front wall. The design should allow them to be opened from top to bottom, and not in different directions. Then the chicks will not jump out when they are opened. The width of the doors should not be less than 30 cm. By opening two doors located next to each other, you can get to the back wall from the inside and wash it if it gets dirty.
Based on the above, you can develop a drawing of a brooder for chickens. Many craftsmen do not draw it according to all GOST rules. A drawn sketch will be enough.

