All gardeners and gardeners are constantly looking for methods to increase productivity. The use of organic fertilizers is an expensive method, and not so accessible. Mineral complexes are much cheaper and give good results, but over time the soil becomes worse in quality. The plants on it grow worse every year.
Compost can be a good solution to the problem. It will fertilize the soil and at the same time save money on garbage disposal and watering, as well as the purchase of special fertilizers. All waste from the kitchen just needs to be sent to the compost bin. You can also send garden waste there. You just need to know how to make compost correctly.
Harvesting methods
Composting can only be done in two ways:
- in a heap;
- in a box (composter).
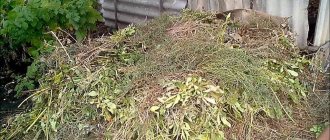
The first method is the simplest and cheapest. Air and moisture pass through the wire frame of the pile perfectly. It takes no more than 9 months for compost to mature using this method.
A closed compost bin can be purchased at any specialty store. It looks more attractive and protects the contents well from all kinds of pests . There is a drum inside the box that turns the compost in the box. Also, such containers have a special hose for water supply.
Features of grass compost, its advantages and disadvantages
The quality of compost depends on:
- From the components placed in the pit (or container).
- Season and weather conditions.
- Access to water and air.
With all the advantages, one major drawback must be taken into account.
During the process of transformation from one substance to another, an unpleasant odor is released. Therefore, it is better to carry out storage away from home and places of rest, not only your own, but also those of your neighbors. For the same reason, a suitable compost container design is chosen. Of course, you can do without it, for example, by simply putting raw materials in a pile. This is the most unfortunate way. Firstly, it is not aesthetically pleasing, secondly, when watering, useful substances are washed out and flow into the ground, thirdly, it is inconvenient to mix the mass, it spreads.
Initial stage of preparation
The most effective process of humus occurs in a compost pit and container, since they maintain a constant temperature and humidity. The larger the pit , the sooner the compost fertilizer will ripen. The optimal pit sizes are:
- diameter - 2 meters;
- depth - 1 meter.
The pit can also be made into an elongated rectangular shape, dividing it with a partition. In this case, it will be convenient to fold mature compost.
The compost heap can even be located directly on the surface of the earth. Organics that are composted decompose with the participation of bacteria, which require good air ventilation, water and nitrogen. That is why the compost heap must be well ventilated, kept in constant humidity and not become waterlogged . Moreover, it should not be too huge. It is better to make its base about a meter, and its height no more than one and a half meters.
First of all, you need to dig a hole as deep as a shovel. A drainage layer of branches of berry bushes or small trees is laid at the bottom. This is necessary so that the liquid formed during decay can easily flow down. A layer of soil and various organic waste are placed on top, and each layer is watered and compacted well.
If there is already mature compost on the site, then it is better to lay it as the first layer. This will be ideal - it will provide the necessary bacteria for the new compost. In order for the pile to have the correct shape, you need to enclose it with a pre-made wooden frame or large metal mesh. This will protect the substrate from birds.
Preparation of compost according to Annenkov
Boris Sergeevich Annenkov is the author of a unique system, which he called “Agricultural technology of natural farming.” In his opinion, it is the natural mechanisms of soil restoration that are the best assistant to a gardener or gardener, so he is against the use of any modern fertilizers .
Moreover, he does not consider it necessary to use even fresh manure or droppings, because in the wild the land does not receive such fertilizer everywhere, but this does not interfere with the rapid development of vegetation.
In this system, compost is just one element, and high yields are the result of many actions.
Therefore, we will tell you not only about preparing compost according to Annenkov, but also about its correct use. The natural farming system covers all seasons, as it does in natural conditions.
Here is the sequence of actions throughout the year :
- In early spring, the soil is loosened with a Fokin flat cutter to trim the plant roots remaining in the soil and prevent their development. The depth of exposure is 5–7 cm.
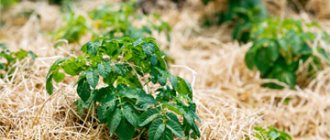
- Seeds or seedlings are planted in soil loosened with a flat cutter, without digging any holes for them (if necessary, you can push the soil of a suitable size with a piece of wood). Then they cover it lightly with soil and mulch the entire area of the bed with completely rotted compost. Layer thickness 1–3 cm.
- Add new portions of compost to the beds at intervals of 2–5 weeks; if the plants need hilling, then first mulch them, then immediately hill them up.
- If weeds have appeared somewhere, they are pulled out and placed in a compost heap (this can be a homemade composter or just a heap on the ground). The dimensions of the heaps are chosen arbitrarily, but there is no point in making them larger than 2x2 m (length and width) due to difficulties with maintenance.
- After harvesting, green manure is planted to restore the soil.
- After green manure has finished growing, they are mowed down and placed in a compost heap.
- Before winter, the soil is loosened with a Fokin flat cutter to cut off the roots of green manure, turning them into food for worms and humus-forming bacteria, and the soil on top is mulched with stale or heavily stale compost.
This mulching attracts more worms and also forces them to crawl to the surface, due to which the worms loosen the fertile layer to the full depth, improving the soil structure and increasing the access of plant roots to water and air.
Note that the contents of the cesspool also go to the compost heap , if it is not connected to sources of chemical pollution, such as a washing machine, bathtub or sink.
Plus all the natural vegetable waste from the kitchen, and if there is manure or droppings, add that too. Periodically sprinkle the material with soil.
Heaps are made in different places; if one heap has already reached the optimal size, then the next one is laid.
Thus, the humus in them matures at different times of the year, which means there will be no interruptions when adding it to the soil .
A distinctive feature of the Annenkov system is the production of humus from grass without introducing bacteria or worms into the compost, because these participants in the process enter the compost heap from the ground.
This increases the rotting time, but due to the laying of several heaps at different times of the year, it does not in any way affect the availability of humus. And the refusal to dig or plow relieves the inhabitants of the soil from serious stress, which often leads to their death.
Compost composition
Compost is obtained from organic residues, manure, vegetation, and kitchen waste, which decompose under the influence of microorganisms. In addition to organic matter, good compost requires constant moisture, air and bacteria.
The humidity should be approximately the same as a wrung out washcloth . Proper moisture levels are incredibly important and should be maintained between 45-70%. In this case, the temperature should be about 27−35 degrees Celsius.
Dry material will not be able to decompose, but too wet material will cake and its components will not be able to interact. In hot and dry summers, the pile needs to be watered, and in rainy weather, the compost needs to be stirred regularly. Under no circumstances should the compost be allowed to overheat. If the temperature reaches 60 degrees, then all beneficial microorganisms will simply die.
For effective decomposition there must be a sufficient amount of oxygen in the mass. To ensure good air flow, you need to mix the entire contents of the compost heap once every two weeks. The more often this is done, the faster the substrate will mature.
The essential participants in the decomposition of organic matter in a composting bed are:
- worms;
- insects;
- bacteria.
They generate heat and activate decomposition processes.
Compost material must be shredded. This will allow you to wait for the result faster. Large pieces will take longer to decompose.
All compost components can be divided into groups:
- Green mass. This includes: grass, garden stems, weeds, food waste, manure and bird droppings. These are all nitrogenous substances that help the mixture maintain carbon-nitrogen balance and ripen efficiently.
- Brown mass. This includes: straw, tree leaves, cardboard, wood shavings, branches and tree bark. These carbonaceous components contain a huge amount of fiber. It is food for bacteria, and they, in turn, loosen the mixture and contribute to its rapid decomposition. In addition, these components saturate the compost with useful macro- and microelements.
Types of preparation of humus from mowed grass
Aerobic – compost heap or compost pit:
- It is necessary to turn the compost components from time to time.
- Grass clippings that are in compost should not be allowed to dry out.
Anaerobic – compost barrel, composter that limits air access:
- This type of compost retains nutrients better.
- Compost matures faster (it can be used as fertilizer within a month, and full maturation occurs after three months).
Layer scheme
When forming compost with your own hands, you need to alternate green layers with brown ones. This will improve air flow and speed up the decomposition process, which will help achieve the desired fertilizer texture.
The decomposition of nitrogen and carbon occurs differently. The nitrogen components generate heat, and decomposition occurs very quickly, while bacteria multiply rapidly and absorb oxygen. Materials containing carbon are friable, have a lot of oxygen, and when rotting they consume nitrogen. The necessary balance can be achieved by taking equal parts of nitrogenous and carbonaceous material.
Characteristics of herbal compost
High-quality humus must meet the following characteristics:
- Color. The color of proper humus is dark brown. Humus, sold for planting and fertilizing plants in markets and flower shops, is usually black in color. Such humus is devoid of many useful microelements and is obtained as a result of conventional combustion under the influence of excessively high temperatures and high humidity.
- Smell. Properly prepared compost smells very pleasant. The smell of fresh humus is reminiscent of forest, mushrooms and dry leaves. If a gardener smells rot and mold when opening the compost bin, the process has been disrupted. In this case, it is necessary to remove the lid of the box and allow the humus to dry thoroughly, then dig it up, providing fresh air access to the parts of the compost that are deficient in it. If this does not help, there is no need to do anything else; the fertilizer will have to be thrown away, as it can become dangerous for the plants.
- Compound. Proper humus is crumbly and friable. The degree of readiness of humus is determined by the ability to make a solid ball out of it. In addition, a sign of increased readiness of the fertilizer may be the presence of a large number of worms in the humus.
To make good fertilizer consistently, you need considerable experience and several years of practice. If there are optimal conditions, grass, weeds and other plant elements will become humus only by the next summer season.
What not to use
In order to obtain high-quality humus, in no case should you use waste and materials that are unsuitable for this.
- Leaves or branches of diseased plants should not be sent to the compost bin. Even with decomposition, the infection will not die.
- There is no need to use large pieces of wood, as well as cuttings of evergreen trees and shrubs, since they will rot for a very long time and will delay the maturation of the substrate.
- It is also not recommended to use fallen leaves from the current year, as they take a long time to rot.
- Perennial weeds with seeds are also not sent to compost.
- The use of waste treated with poisons and pesticides is prohibited, as they can destroy beneficial bacteria and microorganisms.
- You should not put glass, plastic and synthetic fabric, as well as fat, bones and other hard-to-decompose waste into the pit.
- Under no circumstances should human or animal feces be used, as they may contain worms.
- Among the plants, it is not recommended to add potato and tomato tops, lily of the valley, and castor beans to the compost. This waste contains poisons that kill microorganisms. Decomposition will be very slow and ineffective.
Step-by-step instructions for forming compost from start to finish
Step 1. Choose a place for compost away from living quarters and recreation areas. The distance to the water source must be at least 30 m. If the pit is built on a slope, it must be lower than the water source. This is necessary to ensure that plant decomposition products do not get into drinking water.
Step 2. Build a compost pit:
- Most often, the height is 1 m, ½ m below ground level, the upper part rises by the same amount.
- Width 1 m.
- Length 1.5 – 2 m.
These sizes are optimal. If one pit is not enough, you need to build several.
Tip #2: Pay attention! When constructing a pit, only the walls are fixed, the bottom remains earthen. This is necessary to aerate the compost.
Step 3 . Make a lid. For this, boards, plywood, chipboard, and fiberboard are used. The pit is covered from heavy rains and drought.
Step 4 . Place 25–30 cm of mown grass and other organic waste on the bottom in a layer of 25–30 cm.
- Sprinkle EO preparations, water and compact the grass.
- Do the same work with each next layer.
- After laying, cover the pit with a lid or plastic wrap.
Step 5 . The mass needs to be watered 2 times a week. Once every 2 weeks – stir and add the EM-preparation again. If the substances are not used, compost will be formed no earlier than after 6 months.
Step 6 . After 3–4 weeks, the mature compost is removed from the pit and used as mulch or organic fertilizer.
Step 7 . When the pit is empty the process begins again.
Rules for laying layers
Plant waste should be placed that are not too thick (about 20 cm). A thick layer will slow down rotting. The layers should alternate.
- Green manure plants are rich in protein and decompose very quickly. They are placed between coarser waste.
- Straw and hay are invaluable for the composition, as they facilitate the flow of air and provide porosity to the structure. But before laying, the material must be thoroughly crushed and mixed with nitrogenous materials, kitchen waste or other organic matter. This layer should be quite thin.
- Wood shavings contain very little nitrogen and decompose slowly, so they must be mixed with green matter.
- Food waste is a very valuable mass that quickly decomposes. To prevent waste from rotting, it must be mixed with coarse materials, such as wood shavings.
- Manure and bird droppings contain a huge amount of nitrogen and have a beneficial effect on compost. It is recommended to sprinkle soil on top of the manure layer.
- Paper decomposes well thanks to cellulose. Before laying it, you need to wet it and tear it into small pieces. It should be combined with rough material.
How is compost different from humus?
When talking about organic fertilizers, many gardeners perceive the words “humus” and “compost” as synonyms. Others, on the contrary, consider these to be separate varieties.
Going deeper into the details, the following points should be highlighted:
- humus is rotted manure that acquires an earthy, loose mass; it may contain impurities of straw and grass;
- Compost is already a combination of 2 or more components, stacked in layers.
How compost differs from humus
If you call compost humus, there will not be a big mistake here - in both cases, organic matter is over-rotted.
Acceleration of maturation
You can use special preparations called biodestructors. They do not contain chemicals, but they contain a huge number of bacteria, which significantly accelerate the decomposition processes.
You can use a homemade herbal solution. To do this, you need to take five parts of well-chopped grass, 2 parts of manure and 20 parts of water. The composition should be infused for two to three days.
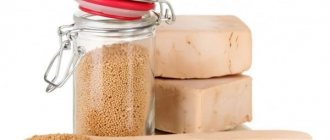
Yeast is a very effective means of speeding up the decomposition process. For 1 tablespoon of dry yeast you need to take 200 grams of sugar and 1 liter of water. A hole is made in the compost and the solution is poured into it.
Liquid green fertilizer - preparation method
If there is no desire to arrange a hole or heap for composting, freshly cut greens are placed in a large plastic barrel by a third and filled with water. The mixture should begin to ferment, after which it is used as fertilizer.
You can prepare an infusion of herbs for feeding plants 2 weeks in advance. Lawn species or weeds that need to be chopped for better fermentation are suitable.
During the fermentation process, nitrogen is lost, so the barrel is tightly closed for the first days, then opened after a week, leaving a small gap for air to enter.
Grass and yeast
To make the herbal infusion for feeding plants ripen faster and be more nutritious, yeast is added to it.
This is done to enrich it with microelements - boron, magnesium, sulfur, calcium and potassium.
There are two ways:
- Dissolve 1 kg of yeast in 10 liters of water with two tablespoons of sugar. After it starts to ferment, dilute it again: 0.5 liters per bucket. Add the resulting liquid to the herbal infusion.
- When adding greens to a barrel, yeast is added at the same time - approximately 200 g per 200 liters of mixture.
When using a ready-made green infusion, additional mineral fertilizers are added to the soil, especially potash, since yeast fungi actively absorb it.
Possible problems
There may well be some problems with compost:
- The appearance of ants. This situation indicates that the compost is too dry and the material decomposes very slowly. The situation can be saved by watering and shoveling.
- Fetid odor and mucus. This suggests that the compost contains a lot of soft materials. This can be corrected by adding straw when mixing the compost. Dry branches, cardboard or leaves will also work.
- No visible changes. This indicates that the pile is too dry. Watering and adding freshly cut grass will help correct the situation.
- Unpleasant smell. This can happen when the heap has an unbalanced composition.
How to prepare compost in bags
Recently, resourceful gardeners have successfully used mobile containers to prepare compost. This method is good because you do not need to specially build a waste box, but use bags. The method of laying raw materials is the same as in the pit:
- A 20-25 cm layer of grass is sprinkled with additives and EO preparations.
- Watered.
- They are compacting.
- Place in a shaded, well-ventilated place.
For compost, it is better to use bags that allow air to penetrate, such as string bags or sugar bags.
It is better to make small holes in plastic bags. The advantage of this method is that the bags take up less space and can be placed in several places. The disadvantage of this method is that the material of the bag is destroyed by ultraviolet radiation and low temperatures, so the finished compost cannot be transported in packaging; it must be reloaded in order to be delivered to the garden or garden.
DIY compost manufacturing options
- To prepare quick compost, all components should be crushed before filling the composter. It is better to use a mower or garden pruner.
- To quickly prepare compost, it is useful to add an EM preparation.
- It is useful to alternate a layer of hay or straw with a layer of manure from domestic animals.
- To make compost quickly, you need to raise the temperature inside the composter. To increase it, you need to cover the compost heap with a durable film or roofing felt. Then within a day the temperature in the center will rise sharply.
- Frequent turning of organic matter every 2 days will reduce its maturation period to 2 weeks.
There is nothing complicated about how to prepare compost. To make your own compost, you need to fill the composter with organic matter. Properly prepared and matured compost is brown in color and smells like forest soil. There is no unpleasant smell. Insufficiently mature compost contains weed seeds that can germinate.
How to make compost at your dacha using herbs and food waste.
To prepare high-quality compost, you need to put herbs and kitchen waste in a bag, adding a little soil. Microorganisms begin their work, and the raw materials rot. If the raw material is dry, then you need to water it and then tie the bag. Here's how to make grass compost. This is one of the basic options for making compost.
Compost with manure and superphosphate.
About 25 kg of superphosphate is added per ton of manure. The ingredients are placed in layers. This compost contains more nitrogen than other composts and is beneficial for potatoes and berry bushes. Apply 100 kg per 1 square meter to potato beds. m. Berry bushes are 2 times larger.
Chicken compost
An option on how to make compost with your own hands with the addition of chicken manure for champignons. To prepare a composter, dig a shallow trench. Straw is laid in the first layer to a height of 30 cm. Next they pile up horse manure, which is covered with dry chicken droppings. The mass is compacted and watered, achieving a humidity above 70%. The operation is repeated to form 6 layers. A roller is built along the edges of the mash to prevent the nutrient solution from leaking out.
During the first 5 days, the mixture is watered in the morning and evening. On the 6th day, the mixture is mixed and alabaster is scattered on its surface in an even layer. Use a pitchfork to move the compost a meter to the side. When transferring it to its original place, alabaster is again added to the mixture and those parts that were on the surface are placed inside, and the bottom layer is left outside. The mixture should have smooth edges and a smooth surface. Over the next 5 days, water the mixture twice a day. On day 12, the mass is mixed again, but alabaster is not added. The third and fourth mixing is carried out on days 17 and 22. During the latter mixing, the compost is not moistened. Then wait another 3 days and the compost will be ready for sowing the mycelium.
How to prepare compost at your dacha using peat.
To prepare compost in spring, summer and autumn, you need to mix 1 part manure and about 2 parts peat. They are laid in layers, starting with a peat layer. The height of the mass should reach about one and a half meters, and the width should be 2 times longer. Peat is placed on top and at the base of the compost in a layer of 0.3 m.
Compost in bags
To prepare compost in bags, you will have to spread the soil in a layer of about 30 cm and then add organic matter. They overheat faster in bags. When frost occurs, the bag can be taken to the barn. If the contents in the bag smell like earth after rain, then everything is fine. If it smells like ammonia, then too much nitrogen-containing raw material has been added. The situation can be corrected by adding products containing carbon.
How to make compost in bins correctly
When the box is put together correctly (about 1 meter high and wide), there is no need to stir up organic raw materials. The container is covered with a durable film or roofing felt. After a day, the temperature in the box will rise and the decomposition of organic matter will begin. There are huge benefits to making compost at the dacha with your own hands. Preparing compost is beneficial to the gardener for two reasons. He gets rid of garbage and fertilizes the garden with healthy organic matter instead of chemicals.
Factors influencing the decomposition of organic matter during compost production
To prepare proper compost, you need access to oxygen, a sufficiently high temperature and humidity.
- Oxygen. To saturate the compost heap with oxygen, the vegetable grower has to turn the heap weekly so that the lower layers are on top and the upper ones go down. It is also useful to shuffle the contents of the heap from right to left and back again.
- Humidity. The compost mixture should remain moist. A moisture content of 60-70% is sufficient to decompose tree bark, sawdust, straw, hay and grass from the lawn or plants into compost. If the humidity is lower, the compost will mature more slowly. And at humidity below 45-50%, decomposition slows down sharply. Dry organic matter will stop decomposing, but highly moistened organic matter will only cake.
- Temperature. Temperature greatly influences the formation of compost. Cool weather in winter slows down decomposition, and in summer, when air temperatures rise, microbiological activity accelerates in the center of the compost heap.
At the initial stage of compost maturation, at a sufficiently high temperature, organic matter loses moisture, so the compost heap must be constantly moistened and ventilated. The temperature in the center of organic matter can rise to 70 degrees. At such a high temperature, weed seeds and harmful microorganisms die. However, such a temperature can only appear when a lot of organic matter is accumulated. Then the temperature drops to 40 degrees, which promotes a more complete breakdown of substances. At the end of the decomposition of the components, the temperature in the center of the compost heap and the air are compared.
Quick compost: pros and cons
Rapid composting has undeniable advantages:
- you can quickly obtain highly valuable fertilizer to enrich the soil, improve its structure and properties;
- Compared to the traditional method of preparing compost, labor costs are reduced: shoveling of the composted mass is not required;
- space is saved because, as a rule, compost pits or piles occupy a fairly large area, from 4 to 12 square meters for a long period, up to 3 years;
- if in compost piles some of the nutrients go into the underlying layers of soil, then in the bags they are completely preserved;
- such “composters” are mobile, they can be easily moved to vacant areas;
- quick compost allows you to avoid autumn fires, in which nutrients literally turn into smoke.
But our world is two polar. And even if there are pluses, there will definitely be minuses, like two sides of the same coin. Quick compost is no exception. Its disadvantages include the fact that it must be a quick, one-time planting of a heterogeneous plant mixture. If you add one component, for example, fallen leaves, or just tops, then the fermentation process will slow down greatly. In this case, it will not be possible to obtain good, complete fertilizer.
What containers are suitable
When deciding how to make compost from grass and weed clippings, as well as other raw materials, they look for a suitable place for this.
Some people start digging holes, which is not worth doing for a number of reasons:
- excess water will accumulate;
- in such conditions it is impossible to properly mix the pile;
- poor air access, which will prevent proper rotting.
The best option is homemade boxes 1 m high. They are missing one wall - for convenient access to the pile. It is advisable to make the floor lattice so that air can be sucked in from below. Then composting will be fast and high quality. If you plan to simply fence the area with 3 walls, then sawdust or straw is first laid on the ground.
Recipes
You can purposefully select the composition of the compost, enhancing the nutritional properties of humus. Experienced summer residents offer a time-tested recipe.
From chicken droppings
- 10 kg of straw is soaked for 2 days;
- the same amount of litter is divided into 3 parts and placed in a container, layered with straw and moistened with urea;
- after a week, they are shoveled, sprinkled with alabaster and fermented for another 7 days.
Before use, dilute with water 1:2. After application under the plants, it is recommended to sprinkle with soil.
Chicken manure compost
From slurry
Liquid compost made from manure, without adding any impurities, is most valued in agriculture. To ripen, the slurry is placed in a container (for example, a barrel) and mixed thoroughly every 3 days, keeping it for 2 weeks. Increasing the temperature will help speed up the fermentation process.
Important! To avoid burning the plants, the compost is diluted with water in a ratio of 1:3 before use.
Conveyor production of aerobic compost
Gardeners and gardeners are inquisitive and inventive people. They came up with a combination of traditional and rapid composting. From the traditional one they took the periodic replenishment of the composter, from the fast one - the loose simultaneous loading of a large mass of various raw materials.
So, the organization of the conveyor. In a remote, hidden area of the garden, on a certain hill made of stones or bricks, a pair of two-hundred-liter barrels is installed. These are the future composters.
At the bottom of the barrel, at the bottom, there is a door, a couple of centimeters wide than a shovel, 20-25 centimeters high. To make it convenient to remove the finished compost.
Shredded or chopped with an ax plant materials are placed in the barrel using the above method. You can add food waste. All this is shed with Baikal Em-1 solution or any analogue. Closes firmly. To provide the necessary moisture, the mass can be periodically watered from a watering can, or opened in the rain.
During the fermentation process, the organic mass settles, and after some time a new portion of various organics can be added, flavored with an accelerator.
A couple of months after laying the first batch of compost you can rake out the door. And use it to fertilize beds, greenhouses, and replant potted plants. As a rule, a couple of composter barrels will ensure the processing of all plant residues of a standard 6-acre plot and kitchen waste of an average family during the season. But most importantly, cleaning the site will take place gradually, in several stages. Therefore, it will not be so labor-intensive and burdensome. The yard and area will always be clean, and a rich “treat” will be prepared for the plants.
8.PLAY IN WARM BEDS
For warm beds, tall wooden boxes are built. In them, under a thick layer of soil, the remains of vegetation are placed mixed with rotted manure and special preparations containing effective microorganisms. The cut grass should be placed at the very bottom of the homemade device so that it cannot germinate and interfere with the planted plants. During the process of rotting, the contents of such a bed release a large amount of heat and create ideal conditions for the successful development of garden crops. The result is rapid ripening of the crop, protection of seedlings from sudden temperature changes, the ability to reuse the planting site, and no need to apply organic fertilizers because the nutrients will already be present in the soil in sufficient quantities.
If in your suburban area you have mastered such a miracle of garden design as warm (high) beds, mowed grass may be useful to you in this case too.
The peculiarity of such beds is the creation of closed high boxes in which plant residues (clippings of branches and tree bark, plant roots, foliage, mown grass) mixed with half-rotted manure and/or EM preparations are placed in layers under the soil layer.
If you have grass that was mowed at the end of the season, that is, already faded or with seeds, it is logical to send it to the very bottom of such a bed, where it will not have a chance to germinate and interfere with cultivated plants.
Overheating, all the “insides” of such a bed emit a lot of heat and create comfortable conditions for the development of plants, especially for heat-loving crops or in case of early planting. As a result, you get the fastest ripening of the crop, protection of plants from temperature changes, convenient processing of plantings, long-term use of the space, and no need to add organic matter, which is always available.
