Daylilies are perennial plants, as are irises grown from bulbs. They have very beautiful flowers, interesting colors. In their shape, they are somewhat reminiscent of lilies, a video of planting and caring for which can be found here.
Daylilies have one peculiarity: having opened early in the morning, their flower fades towards evening . Ongoing breeding work has made it possible to obtain new hybrid varieties, the flowering of which lasts up to two days. There are even daylilies that bloom at night. Despite this, new flowers bloom every day, creating the illusion of continuous bloom over time, unlike a seed-grown anemone.
But daylilies are not only a decoration of the garden and indispensable inhabitants of the front garden in front of the house. They are used to make decoctions used to lower blood pressure, stimulate the heart muscle and cleanse the liver. So the plant brings no less benefits than the fruits of actinidia, about planting and caring for which you can read here.
Daylily roots, which contain protein, are used as a delicacy, and unopened buds can be eaten by lightly roasting. Flower petals, which have a distinctive taste and contain a large amount of carotene, are perfect for summer salads.
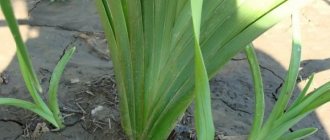
Daylilies in a flower garden
Daylilies are a type of plant that harmoniously combines beauty, unpretentiousness and high resistance to environmental conditions. They are simply a godsend for any garden plot. They are not afraid of either the hot sun or the shadow of arches with climbing plants.
Daylilies in a flower garden in the photo
They will grow well in both fertile soil and sandy soil, both in rain and during drought. No wonder daylilies are considered flowers for lazy gardeners.
A wide range of flowering times, in which the first daylilies begin to bloom in May and the last in August, allows you to have flowering plants in your flower garden throughout the summer.
How to plant daylilies in spring
Before the main manipulations, the varietal characteristics of the crop are studied. There are species and hybrid daylilies that differ not only in appearance, but also in agricultural technology.
Important! Planting daylilies in open ground in spring can be postponed for a month if weather conditions are unsatisfactory. The root system of the flower is sprinkled with sand and wrapped in a damp cloth. The leaf blades are cut in half to reduce the need for moisture.
After the snow melts, before planting daylilies, the seedling and the site are prepared and the location of the bush is determined.
Site selection
The homeland of daylilies is the Far East, where they successfully grow in shady forests. Central Russia has a temperate climate, which does not provide the crop with enough heat, which affects the flowering of the plant. The optimal temperature for the life of most varieties is + 18 °C.
In the garden plot, the place for daylilies should be well lit, inaccessible to the winds. The plant develops well if it is exposed to sunlight for at least 5-6 hours. Varieties of light shades are more light-loving; daylilies with dark buds require shading during the midday hours so as not to burn out prematurely.
The culture is perennial; without replanting, the bushes live up to 10 years. In the seventh year of the daylily’s life, the abundance of flowering decreases, so it is recommended to replant the plant periodically.
Important! When creating a landscape design, it is necessary to take into account the proximity of other crops: the close proximity of trees and shrubs has a negative effect on the growth and flowering of daylilies.
Soil preparation
Before planting daylilies in the spring, prepare the soil in advance. The ideal soil for it should be neutral or slightly acidic. To enrich it, it is recommended to add compost or fertilizers. The variety of assortment in the store allows you to choose the best option.
The earth is dug up to a depth of at least 30-35 cm. Sand or peat is added to the heavy clay soil. This will avoid moisture stagnation. Sandy soil is enriched with humus and clay is added.
Important! The proximity of groundwater is a reason to place the daylily on a ridge 10-15 cm high.
Scheme for planting daylilies in open ground
Preparing a seedling for transfer to the soil involves removing dead and rotten parts and checking the root system. Weakened plants, damaged by pests or external factors, are less likely to have time to take root before the onset of autumn frosts.
A daylily seedling is disinfected with a fungicidal agent or potassium permanganate. If stored improperly, the root system dries out. In this case, the plant is moved to a solution of Kornevin or Humate for several hours. After the procedure, the dried, unrecovered parts of the daylily bush are cut off.
Planting holes are placed at a distance of 0.5-1 m from each other, dug in such a way that the root system fits completely. Peat, ash and mineral fertilizers are poured into the prepared hole and spilled with water.
A hill is formed in the center of the hole, the root collar of the daylily is placed on it, and it is sealed to a depth of 2.5-3 cm. The roots should be freely placed in the hole. After this, the daylily is covered with earth, the soil around it is compacted and watered. Over the next few days, it is necessary to regularly moisten the seedling. It is recommended to sprinkle mulch on top of the daylily.
Plant varieties
There are two types of wild daylilies . Yellow daylily grows up to one meter and has large yellow flowers, blooming in mid-June. Lemon daylily blooms at night and blooms in early August.
Among the hybrid varieties, more than sixty thousand varieties are already known , which differ in height, flowering time, color and shape (for example, terry, spider).
Spiders are flowers that have a so-called arachnid shape.
Daylilies of dark colors should not be planted in areas that are too sunny.
Flower spider
Reproduction and cultivation
Daylilies are propagated both by seeds and using the vegetative method.
Seeds
Reproduction of daylilies by seeds, in contrast to planting and caring for Repanda juniper, is carried out only for breeding work.
The seeds of these plants can quickly lose their viability, so it is better to plant freshly collected seeds in the fall. You just need to sow them in the prepared soil, deepening them two centimeters. If this did not work out for some reason, you can sow in the spring by pre-stratifying the seeds.
Dividing the bush
For division, take young plants (no older than six years). It is best to do this in the spring. The bushes are carefully separated with a knife.
Daylily roots are distinguished by their fragility. Therefore, it is very important not to damage them.
When and how to plant daylilies from seeds. Sowing daylily seeds
After keeping daylily seeds in the refrigerator for 3-4 weeks, you can plant them in the garden before winter, where they will undergo natural stratification.
You can sow daylily seeds in the spring. Before sowing, they are stored in the refrigerator all winter, placed in paper bags with dry sand. Seed storage temperature is +2C...+4C).
You can grow daylily seedlings from seeds in a greenhouse or at home through seedlings. This is desirable to preserve all young plants and provide good conditions for their development, especially if valuable seeds are obtained from good crossings.
If there are conditions at home or in a greenhouse for additional illumination of seedlings, daylily seeds kept in the refrigerator for 3-4 weeks can be sown in containers with soil as early as October. When there are no such favorable conditions for the development of seedlings, then daylily seeds should be sown closer to March, when the frequency and duration of sunny days increases.
Before sowing, daylily seeds are soaked in water with the addition of hydrogen peroxide (15 ml of a 3% solution) or the addition of one teaspoon of alcohol per 1 liter of fresh water. Soak daylily seeds (in separate containers according to variety) for a week. In this case, the layer of water above the seeds should not exceed 1.5 cm.
To improve seed germination, you can add a few drops of epin to the water.
When white roots appear on daylily seeds, they are planted in containers with steamed garden soil or filled with ready-made “Living Earth” soil. Sowing is carried out to a depth of 0.5 cm.
Containers with crops are covered with a transparent film so that the soil does not dry out. Water the crops through a tray. Regularly ventilate the plantings, removing condensation from the film. Prevent diseases by carefully spraying with a weak solution of foundationazole.
Some gardeners carry out real stratification of daylily seeds and achieve 90% germination. This is especially important if only a few seeds are produced from crossing good daylily varieties. To do this, after soaking the seeds, they are washed in clean water and wrapped in a damp cloth on a cotton pad, and then alternately placed in heat and cold for a period of 7 days. Monitor the moisture content of the fabric and the process of seed hatching until they all hatch. Seeds prepared in this way germinate well after sowing.
Planting technology
After the daylily bushes are divided, you need to properly plant these plants. To do this, holes are made in well-dug and loosened soil. They must exceed the size of the root system. In the middle of the hole you need to make a hill, place a daylily bush on it, and distribute its roots evenly downwards. Then the bush is covered with earth and compacted. After planting, moderate watering should be carried out.
You need to be careful not to cover the root collar of the plant by more than three centimeters. Deepening can lead to rotting and death of these flowers.
Plant care
Caring for daylilies is quite simple. It is necessary to remove wilted flowers in a timely manner, as with delphiniums, the planting and care of which we described in the material. After flowering has completely finished, you need to remove all flower stalks, and in preparation for winter, prune the above-ground part of the plant.
Properly planted and cared for plants in the photo
Before the onset of frost, all crops and new daylily plantings should be covered with pine needles. With the onset of warm weather, insulation should be removed in order to prevent rotting. After the soil has warmed up enough (in May), it can be returned to control weeds.
You should not use geotextiles or film to insulate daylilies.
Wintering
With proper preparation in the autumn, daylilies easily endure winter . In the spring, they only need to be opened, cleaned and fertilized.
Fertilizers
As soon as the snow melts, you need to fertilize the daylily with complex mineral fertilizer . This can be done either by watering or by scattering it among the plants.
Do not allow fertilizer to come into contact with the plant. This may cause him chemical burns.
The next feeding is done at the moment when plant growth is activated (April - May). You can use urea and calcium nitrate. When flowering begins, daylilies are fed with infusions of mullein, chicken droppings or fermented herbs. In August, nitroammophoska or superphosphate with wood ash should be added.
Don't neglect the last feeding. After all, it is at this time that the formation of daylily buds begins, which will bloom next year. Therefore, fertilizers applied correctly during this period will increase not only the number of flowers, but also their size.
Fertilizer
To ensure normal growth and development of daylilies, it is recommended to regularly fertilize the soil. Today you can easily buy fertilizer intended for daylilies in specialized stores. It contains all the necessary nutrients for the normal development of the plant. Proper soil fertilization allows you to get large and beautiful buds on each daylily bush.
Daylilies are fertilized in several stages. In the spring, after the snow melts, it is recommended to use a complex of mineral fertilizers. Particular attention should be paid to the growth period, which occurs in May. It is necessary to increase the amount of nitrogen in the complex fertilizer. Chicken droppings or mullein infusion will be an ideal option for fertilizing the plant in the summer. It is also necessary to properly prepare the plant for next year by intensively fertilizing the soil.