Pushkinia: planting and care in open ground, types and varieties with photos
The Puschkinia plant is a representative of the genus of the hyacinth subfamily, the Asparagus family, but in some sources this flower is included in the Lily family. This flower was named in honor of Musin-Pushkin, who was a Russian mineralogist and chemist, as well as a member of the Royal Society of London, and it was he who first collected data from representatives of the plant world on Ararat. Pushkinia is also sometimes called dwarf hyacinth, because these plants are very similar in appearance, as they are close relatives. This genus includes only 2 species and several varieties. In nature, they can be found in Asia Minor and Asia Minor, as well as in the Caucasus, while Pushkinia prefers to grow in mountain meadows, among shrubs and on wet rocky slopes.
Features of Pushkinia
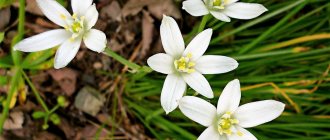
Pushkinia is one of the most spectacular spring primroses. The height of the bush varies from 15 to 20 centimeters. This herbaceous plant is an ephemeroid; its ovoid bulbs are covered with thin outer brown scales. At the base of the stem there are 2 or 3 dark green leaf plates of a belt-like linear shape. The racemose inflorescences consist of bell-shaped flowers of white or light blue color, which have an unobtrusive, unpleasant aroma. Flowering in some cases begins a few days after the appearance of the leaf blades. The fruit is a juicy capsule containing pale brown round seeds.
Despite the fact that this plant can hardly be called large, it is very decorative. Pushkinia looks good in rock gardens, as well as in small home gardens, planted together with other primroses or perennial plants.
Planting Pushkinia in open ground
What time to sow
If you decide to grow such a primrose from seeds, then you should be patient. The fact is that when propagated by seed, Pushkinia begins to bloom only in the fourth year of life. Even the first seedlings appear approximately 30 days after sowing. But the vegetative method of propagation is also ineffective. The seeds are sown in open soil immediately after collection, and this time usually occurs in June. Also, sowing can be done from the second half of September to the twentieth of October, but in this case, freshly collected seeds will need to be placed on the refrigerator shelf before sowing, and care should be taken that they do not dry out.
Seeding features
If the seeds are sown in winter, then they will be able to undergo full natural stratification, and this has a very good effect on the growth, development and health of the plant. But before you start sowing, you need to prepare the area. To do this, you need to make sure that there is good drainage; if the soil is too dense, add sand, peat or leaf humus to loosen it. For sowing, you can choose a well-lit or slightly shaded area. The seeds must be buried into the soil at least 5 centimeters, then in the winter the surface of the site should be covered with a layer of mulch (peat).
This is interesting: Description and characteristics of Argut spirea, planting, cultivation and care
Growing Pushkinia from seeds
Pushkinia seeds photo
It is not difficult to grow this primrose from seeds; besides, Pushkinia produces abundant self-seeding, but the period from sowing to the first flowering is 3 years.
- Seeds should be sown immediately in open ground before winter, so they will go through the process of natural stratification and successfully germinate next spring.
- Collect the seeds after they ripen, this time is in June when the soil is very dry, so sowing should be delayed until autumn.
- Sow from the second ten days of September to the twentieth of October. Until then, store the seeds in the vegetable section of the refrigerator.
The seeding depth is about 5 cm, and mulch the top of the planting with a layer of peat about 10 cm thick.
As mentioned earlier, cannon is capable of reproducing by self-sowing, but it is better to control this process so that the growth does not become spontaneous.
Caring for Pushkinia in the garden
You need to care for Pushkinia in the same way as other flowers growing in the garden. So, it needs to be systematically watered, loosen the soil surface, remove weeds, feed it on time, and promptly remove the inflorescences that have begun to fade. To significantly reduce the number of watering, weeding and loosening, it is necessary to cover the surface of the area with a layer of mulch (peat). In order for these flowers to develop normally and have a very impressive appearance, they need to be cared for correctly and systematically, for example, if the weed is not removed in time, it will quickly “crush” the fragile small Pushkinia.
Fertilizing is done in early spring. To do this, use a complete mineral fertilizer (for example, nitrophoska), which is evenly distributed over the surface of the area, taking from 50 to 60 grams of the substance per 1 square meter (about a couple of handfuls). In this case, fertilizing must be done even if there is snow. After the soil thaws in April and seedlings appear, it will be necessary to loosen the rows.
If the spring turns out to be dry, then Pushkinia will need to be watered, and it should be taken into account that it especially needs watering during the period of intensive growth of leaf plates. In summer, it is imperative to carry out timely weeding and loosening of row spacing. If the bush turns yellow earlier than expected or is affected by a disease, it must be dug up and destroyed.
Growing Pushkinia is quite simple, and it is sure to give you a lot of pleasure when it blooms in the spring.
Reproduction of Pushkinia
When growing Pushkinia, we must remember that it needs systematic replanting. The fact is that an adult onion grows about 5-7 children of different ages over the course of 4–5 years. These plants become very crowded, which significantly reduces their decorative value. During transplantation, the children must be separated from the mother's bulb. In this way, vegetative propagation of Pushkinia occurs. How to propagate it using the generative (seed) method is described above. The nest of bulbs must be dug out and the babies separated from the parent bulb. Then they are put away for storage, and with the onset of autumn they are planted in a permanent place, while a distance of at least 10 centimeters must be maintained between the bulbs. Experts recommend dividing the bulbs once every 5 or 6 years.
It should be remembered that it is necessary to dig up the bulbs on time. Bulbs dug up ahead of schedule are very poorly stored. If they are removed from the soil later than expected, then most of the babies will remain in the ground, since at this time they very easily break off from the mother’s bulb. The time when you should start digging up a bush is determined by the condition of its leaves. As soon as they dry out, you should start replanting and dividing. The bulbs must be removed from the soil and placed in the shade to dry, and then the remaining soil and old roots must be removed from them. Separated babies should be sorted by size. Large bulbs can be planted in open soil in a permanent place or used for forcing indoors. Small bulbs need to be planted in a training bed for growing. All sorted bulbs should be placed in slightly moistened sawdust or peat and stored in a well-ventilated, cool room. There they should be stored until planting.
This is interesting: The best grape varieties for making wine
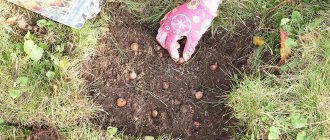
Pushkinia is planted in open ground in the autumn. The planting depth depends on the size of the bulb and can vary from 5 to 7 centimeters, while a distance of at least 10 centimeters must be maintained between the holes.
This flower can reproduce quite well by self-sowing. This method of propagating Pushkinia is an excellent alternative to seed; the main thing is to remember to control this process.
Pests and diseases
This plant can suffer from those diseases that affect small-bulb and bulbous plants. For example, if brown spots appear on the ground parts of the bush, this means that it is affected by gray mold, the causative agent of which is the botrytis fungus. This is a rather dangerous disease, because this fungus is omnivorous, and it can quickly infect other plants. For preventive purposes, experts recommend that when watering a bush, try to ensure that the liquid does not fall on the surface of the foliage, do not overfeed Pushkinia with nitrogen, and also dig up and destroy the affected specimens as soon as possible. At the initial stage of development of the disease, such means as Champion, Bordeaux mixture, Topaz or Kuproxat are used to destroy it. If the specimen is very severely affected, then Skor, Previkur or Fundazol are used to treat it.
Also quite dangerous is damage to the plant by bulb rot, and the causative agent of such diseases is a variety of fungi. In infected bushes, the base of the leaf blades becomes yellow, then the disease penetrates into the bulb itself, causing brownish-red spots to form on its surface. This leads to the death of the bulb. This infection can persist in the soil for a long time. In order to save the plant, it must be promptly treated with a product containing copper. Before planting the bulb, it is necessary to carefully examine it; if it raises even the slightest doubt, then it is better to destroy it.
Pushkinia is also susceptible to a disease such as Achellenchoides. Because of it, the scales of the bulbs become brown, and ring rot appears. Also, near the bottom, pale brown necrotic spots form on the surface of the bulb. The affected bush has a delay in development and loss of decorative appearance. All diseased bulbs must be burned, and before healthy ones are planted, they are immersed for some time in slightly hot (about 43 degrees) water.
The plant's bulbs can damage mice; in order to drive them away, baits with poison are placed around the area. Also dangerous for such a flower are root meadow mites, which penetrate inside the bulbs, gnawing their bottom. They eat the internal scales, which leads to rotting or drying of the bulbs. For preventive purposes, the bulbs should be treated with insecticidal preparations before planting. If there is a serious danger of infection, then Pushkinia is treated with the same drugs on the site.
Diseases and pests
Pushkinia is prone to diseases of small-bulbous plants:
Botrytis or gray mold
A dangerous fungal disease that spreads quickly. Brown spots can be seen on the ground parts of the plant. For preventive purposes, you should not “flood” the plant, and when watering, make sure that water does not get on the leaves; and do not “overfeed” the flower with nitrogen. If the disease is detected in the initial stages, treat with one of the fungicidal preparations: Bordeaux mixture, Kuproxat, Topaz, Champion. If the plants are severely affected, it is better to treat them with Fundazol, Skor or Previkur.
Bulb rotting
The culprit is the same fungal infection, which persists in the soil for a long time. First, the leaf blades of the infected plant turn yellow, the disease spreads to the bulb - it becomes covered with red-brown spots. If no action is taken, the bulb will die. Treat the plants with a copper-containing preparation. Before planting, it is necessary to carefully inspect the bulbs, and if stains or damage are found, do not plant such specimens.
Achelenchoides
When affected by the disease, the scales on the bulbs turn brown, and ring rot is observed. Necrotic brownish spots appear on the surface of the bottom of the bulb. The growing bush will lose its decorative appearance and will lag behind in growth. It is necessary to destroy the affected bulbs. In order to prevent the disease, it is necessary to keep the bulbs in warm water (temperature 43 °C) for 10-15 minutes before planting.
Pests
Among the dangerous pests are meadow mites, which gnaw through the bottom and move inside the bulb. This leads to it drying out or rotting. It is necessary to treat the bulbs with an insecticidal preparation before planting. In case of pest damage, you will have to get rid of the bulbs; treat the plantings with an insecticide.
Juicy bulbs are a tasty morsel for rodents. Traps or special poisons will help protect against mice.
Pushkinia after flowering
In the autumn, after sowing seeds or planting bulbs in open soil, Pushkinia experiences a dormant period. At this time, the plant should be prepared for wintering; for this, the area is covered with humus (layer thickness from 20 to 30 mm) or peat (layer thickness from 50 to 70 mm). In spring or summer, there is no need to remove mulch from the site, because it protects plants from the rapid growth of weeds and from drying out.
This is interesting: The best varieties of peaches with photos and descriptions
When and how to plant Pushkinia in the fall
Pushkinia bulbs photo
Let's talk about the timing and method of planting. Pushkinia bulbs are planted in open ground before winter and they will bloom next spring.
Bulbs are planted in the fall, throughout September and the first two decades of October.
It is important that the bulbs have time to grow roots and successfully overwinter, so do not delay planting. Depending on the size of the bulb, the planting depth is 5-7 cm. In order for the plants to develop comfortably, a gap of 10 cm should be maintained between them. After planting, mulch the area with humus with a layer of 3-5 cm. Experienced gardeners recommend dividing and replanting every 5-6 years
Experienced gardeners recommend dividing and replanting every 5-6 years.
Forcing Pushkinia
Pushkinia is perfect for forcing indoors, and its beautiful flowers can be seen already in winter. Several bulbs are selected for forcing. They are planted in November in a pot having a diameter of 13 to 15 centimeters and a height of about 7 centimeters. A soil mixture is poured into it, which includes leaf humus, river sand and turf soil, taken in a ratio of 1: 1: 2. The container is placed in a dark basement for 8–10 weeks, where the air temperature should be no more than 10 degrees and the humidity should be about 85–90 percent. Then it is taken out into a well-lit room, in which it should be no warmer than 15 degrees, and the flower will need to be watered. After 14–20 days, flowering begins. It is recommended not to throw away a faded bulb, because if you care for it properly, it will delight you with its spectacular flowers again and again.
Harm and contraindications
As such, there are no contraindications to planting Pushkinia. However, for allergy sufferers who often react to inflorescences, Pushkinia will be harmful. Therefore, before planting this plant, pay attention to how you react to it.
In order to conduct the test, you can purchase a Pushkinia flower in a pot and place it in your room. It is better to do this during the period when the flower begins to bloom. If the reaction does not appear within two days, everything is in order and you can keep this plant at home or even grow it in your garden.
Types and varieties of Pushkinia with photos and names
There are 2 types of Pushkinia cultivated: proletaria and hyacinth.
Puschkinia hyacinthoides
Under natural conditions, this species can be found on the mountain slopes of Eastern Transcaucasia and Northern Iran. This very beautiful small plant has fleshy linear leaf plates that reach 15 centimeters in length and are a centimeter wide. The diameter of the bulbs is about 20 mm. The powerful flower stalks reach 15 centimeters in height. They contain dense oval-shaped inflorescences, consisting of 12–30 drooping light blue (almost white) flowers, reaching 15 mm in diameter; a deep blue stripe runs along the back of the petals. The first adult bulb can grow up to four peduncles. Flowering duration is 1.5–3 weeks.
Puschkinia scilloides
In nature, you can find such Pushkinia in Turkey, Lebanon, Iran and the Caucasus, while it prefers to grow in meadows and on the edges of shrubs. The compact bush has 2 dark green basal narrow-linear leaf plates, reaching 12–15 centimeters in length; they grow simultaneously with peduncles, the height of which is about 20 centimeters. The peduncles are decorated with fragrant light blue bell-shaped flowers, the diameter of which varies from 15 to 20 mm; a blue stripe runs down the center of each part of the perianth. The length of the few-flowered racemose inflorescence reaches 12 centimeters. Flowering begins in May and lasts 20 days.
This type of Pushkinia has a fairly popular variety called Pushkinia lebanotica (Pushkinia Lebanese). Unlike the main species, it has larger flowers, the crown lobes of which are two-toothed. This variety must be planted and grown in the same way as the main species.
