The crop is often bred from cuttings or ready-made seedlings from a store or dug up in the forest. Using seed material significantly lengthens the process of obtaining an adult plant, but this is the simplest and most cost-saving way to obtain several specimens at once, for example, to create a hedge. It is important to know how to properly grow pine from seeds at home, since the seed material does not always take root. Improper planting or insufficient care of young seedlings will lead to their death.
How do conifers reproduce?
As for the “sexual orientation” of conifers, there are among them both dioecious plants and monoecious ones, in which both female and male “flowers” are formed on the same plant.
The male “flowers” (microstrobiles) of most conifers are small and sometimes collected in “inflorescences”. The female ones are almost always collected in “inflorescences”. Conifers are pollinated by the wind and that is why they have very light pollen that is carried over long distances.
Most often, fertilization occurs between specimens of the same species. Hybrids as a result of pollination of different forms occur very rarely. Fertilization is impossible between representatives of different families, between different genera in the same family it is possible, but not found in nature, between different species of the same genus it occurs, but very rarely due to the natural isolation of populations.
The seeds are collected either in fruit cones or hidden in fruits that look like berries or nuts. The size and shape of conifer seeds of different families, genera and species vary significantly, but most often they resemble nuts. The seed coat is always leathery or woody. The seeds of some species have wings, which allows them to be spread by the wind, others have succulent covers and are carried by animals, mainly birds. This is how conifers reproduce in natural conditions.
To propagate conifers in garden culture, it is extremely important to use methods that allow you to completely reproduce the characteristics of the maternal forms. The problem is that only natural, “wild” species are capable of identical reproduction by seeds, and their varietal forms during seed propagation give significant “splits”. During vegetative propagation of conifers, the characteristic features of the species are preserved, although the typical shape of the crown is not always repeated.
We will try to help you choose the simplest and most effective methods of propagating conifers and suggest the path that is most rational for the conditions of your garden.
First, read up on how to propagate coniferous plants by seeds.
Pine cones and seeds
All pine trees produce seeds in female cones that are ovoid or cone-shaped. The cones are formed by rather dense scutes - scales, arranged in rows, one above the other. The scales are initially tightly closed, and during the ripening period they open and expose the seeds. At the same time, the pine cones fall entirely to the ground, where it is convenient to collect them to obtain seed material.
It is important to know that complete ripening of seeds in the cones of some pine species takes two years. Many pine trees have seeds with a wing and a rather dense outer shell. In some it is so dense that the pine fruit resembles a nut.
One cone contains several dozen seeds. For planting, you should free the seeds from the scales of the cone and select mature specimens of the correct shape and approximately the same size. To facilitate the release of seeds from the cone, it should be wrapped in a paper bag and placed in a well-ventilated, dry place. The bag should be shaken periodically; as the seeds dry, they will easily come out of their cells. Do not dry the buds at elevated temperatures, as this will impair germination. Pine seeds have a fairly long dormant period, so their germination rate increases after stratification. In order to plant pine seeds in spring or autumn, immediately after collection, they need to be soaked in water at room temperature for three days. Then mix with clean river or continental sand in a ratio of one part seeds to three parts sand. For at least two months, boxes with pine seeds must be kept at temperatures from 0 to +5 degrees. To do this, they can be placed in a cellar or buried in a trench and covered with a layer of snow. In spring, the seeds are ready for planting in open or protected ground.
What do pine seeds look like?
The coniferous crop does not bloom; it immediately forms male and female strobili. During the formation of young shoots, two spherical brown formations are noted at their ends. This is the first stage of the cone; during the summer the cone grows, changes color to green, and by autumn it becomes the size of a pea. Next spring, the growth of the cone continues, it is quite intense, by the end of the seasonal growing season the cone grows up to 8 cm. In the 2nd year of growth, the cone matures completely by winter. What does a pine fruit look like:
- round shape, length – 10 cm, volume – 4 cm;
- the surface is lumpy, large scales are tightly pressed;
- color – dark brown.
In the third spring after formation, when the weather has fully recovered, the cones begin to dry and open, pine seeds lie on the scales, 2 pieces each. External characteristics:
- ovoid shape, elongated, length – 3 mm;
- surface unprotected (bare);
- equipped with a wing 3 times larger;
- color - light brown or black, wing beige.
Pine propagation by seeds is possible after the material has matured. If the cone has fallen to the ground, the scales are pressed tightly and there are no signs of opening, it is not fully ripe and the seed will not sprout.
How long does it take for pine seeds to ripen?
The ripening time of pine seeds depends on the type of crop. Strobili with the embryo are formed in early May. The planting material matures along with the growth of the cone. In some species, the material ripens by the end of August and remains in the cone for the winter. In the spring, at the beginning of the growing season, when the snow has completely melted and the soil is moist enough for germination, the cones open or fall off and the seeds scatter.
This is interesting: The homeland of the indoor cactus - the origin of the plant
Other species need 18 months before the material is ready to grow a coniferous tree. If pollination took place in the spring, only by the next autumn the seeds ripen, remain in the cone for the winter, and scatter in the spring. In any case, the guideline is the opening of the scales.
Processing of seed material
Working with cones
You need to collect the cones correctly so that the quality of the seeds does not suffer. What nuances will you have to keep in mind:
- Collection time is late autumn or early spring. Some are collected in winter, but then it is difficult to distinguish a healthy cone from a damaged or infected one.
- Green cones are not suitable for collecting seeds. We need brownish-red ones.
- They should be dense to the touch, fairly hardened, not soft.
- Inspect them for damage, mold, insects, larvae, and new growths.
- Pay attention to the scales, which should fit tightly to each other. If they are slightly open, there is a risk that the seeds have already flown out of the sinuses and you will bring home an empty cone.
- If the pine cone easily comes off the branch, throw it away: it is most likely rotten or infested with insects. Healthy ones should sit firmly in their nest and be removed only through the application of certain efforts.
- Do not collect from the ground: half are empty, half are infected with fungi and pests.
The number of seeds in pine cones is not constant. One can contain from 10 to 20 pieces. If you take into account the percentage of germination, usually it will be enough to collect 3-4 cones.
How to get seeds from cones without damaging them? To do this you need:
- Loosely (so as not to touch each other) lay the cones on a dry surface in a dry and warm place.
- In a couple of days they will begin to reveal their scales. If this does not happen, you need to increase the heat. For example, place them above the battery.
- After the scales open, the seeds are removed. To do this, just grab the base of the cone and knock it on the table.
Working with seeds
Next, the most painstaking and responsible front of work begins - directly with the seeds. They fall out of the cones along with translucent wings. To remove them after a day, you just need to rub the extracted material in your palms - and the dried film will quickly fall off on its own.
If the collection was made in the fall, the seeds should be placed in a cool place, otherwise they will become moldy, dry and rot. It's easier if it was done in the spring. Then they are collected in a bag and put away for 2 weeks in the basement or on the balcony. This kind of express stratification will harden them, make them more resistant to low temperatures and increase germination.
After this, they are kept at room temperature for about a day - for adaptation. Next comes a very important and responsible part of seed processing:
- A working solution of the drug “Sporobacterin” is being prepared - a means for the treatment and prevention of infectious diseases, created on the basis of highly active spore-forming bacteria (1.5 g per 1 liter of clean, settled or bottled water).
- The seeds are dipped into this solution and kept in it for about 2 hours.
- Those that have surfaced are not suitable for sowing.
- Filter the planting material from the solution (there is no need to pour it out - it will later be useful for watering the seedlings).
After this, the pine seeds are ready for planting. But what to do if it is not possible to buy Sporobacterin? There are simpler alternatives. Although, as some argue, less effective (however, this still needs to be proven). For example, a weak solution of potassium permanganate or a solution prepared based on any rooting agent. As a last resort, if you have absolutely nothing on hand, just soak them in warm water for 2-3 days.
When should you sow conifer seeds?
The choice of the optimal sowing time depends on the following points:
- Seedlings of coniferous crops grow slowly at first, for this reason it will be better if the seedlings appear as early as possible, no later than February. Such timing allows the seedlings to grow well in the first year and become stronger before the onset of cold weather; they can be left for wintering in the open ground in the fall.
- Quite often, the first sprouts of coniferous plants appear after 1-1.5 months have passed. In addition, the seeds sown germinate within 2 months.
To obtain seedlings of coniferous plants in a convenient time, it is necessary to sow the seeds in March, and then remove them for stratification for 9-10 months in the cold. With this method, seedlings appear for the first time in the spring of next year. Under natural conditions, this is how everything happens: the seeds that spill out of the cones in the fall remain in the ground for a whole year and only then germinate. Before sowing, it is more convenient to keep the seeds in the refrigerator on the bottom shelf.
Transplanting a seedling into open ground
You can grow a coniferous tree only from a 4-year-old seedling. The seedling is transferred to the place of subsequent growth in March, when the soil has warmed up to +12 0 C, and the crop obtained from the cone is at rest. Sequence of work:
- The soil is moistened, and the plant is removed from the soil using a shovel.
- If you dug up several pieces, they are carefully separated so as not to damage the root.
- Make a planting hole along the height of the root to the neck, 25 cm wide.
- Place drainage at the bottom; fine gravel will do.
- Place the plant in the center and cover it with soil.
After 3 years the pine tree is replanted. If the trees are located in one line, leave 1 m between them.
Optimal conditions for growing pine from seeds at home
Seedlings can only be grown if the temperature is observed; it should not be higher than +230 C and only in natural light. Special lamps are not used to grow young pine trees. The greenhouse is ventilated, as is the room where the containers are located.
It is possible to grow seedlings only if the air is not too dry. In winter, central heating reduces humidity to a minimum. It is recommended that, along with spraying, place the containers in a pan of water or place a wide cup of water nearby. When the weather is above zero, the containers are taken out to the area in partial shade. The film cover is removed from the greenhouse.
Preparing the soil for sowing seeds for seedlings
First of all, it should be noted that pine trees are quite unpretentious plants, but growing them in heavy soils is extremely difficult. The ideal soil for them is considered to be one that is well saturated with oxygen, that is, it can be sandy soils or sandy loam. By placing a seed in heavy and poorly loosened soil, you have every chance of not waiting for the sprout to appear.
In the absence of air access, rot forms at the end of the hatched root, which quickly covers the entire embryo. The same thing happens when there is excess moisture in the soil. If planted in sand, then the optimal ratio of its particles to water will be such a state when moisture does not ooze from the lump raised in the fingers, but the individual fractions remain linked by it. The ideal environment where it is recommended to place Scots pine seeds, both for germination and those that have already hatched, is peat compost. And not just any one, but one obtained from the top layer, which is looser.
The fact is that peat is formed from sphagnum bog moss, which turns under the influence of dampness and in the process of decomposition by bacteria into a kind of compost. This planting substrate, in addition to excellent oxygen saturation, is very rich in various microelements, initially replacing fertilizers for seeds. Moreover, top peat retains to some extent the antiseptic properties of sphagnum moss and protects pine embryos from rot and fungus.
To some extent, black soil, which it is advisable to dry first, is suitable for planting hatched seeds. Before planting, such soil is watered with a weak solution of potassium permanganate to destroy the fungus.
Preparation and scarification of coniferous seeds
Scarification is rarely carried out before growing pine trees from seeds, since they have a soft coating, although woody. It is based on the destruction of the dense feeding cover of the seed, which interferes with its germination. In the natural environment, microorganisms in the soil cope with this task. As for conifers, scarification is necessary mainly for northern hard-seeded varieties (yews, junipers).
Scarification of conifer seeds in sulfuric acid
The seeds should be cleaned of feeding wings and debris remaining after peeling, dried and soaked in sulfuric acid for half an hour. After etching, the material must be washed and you can proceed either to sowing or to the next stage - stratification.
There is a less “harsh” way to scarify conifers, but also less effective - this is mechanical stripping of the seed cover. To do this, the material must be shaken in a container whose walls are lined with coarse sandpaper. Since it is impossible to store the seeds of coniferous plants after such manipulations, they are carried out before sowing.
Seed selection
Not all pine seeds are suitable for sowing. Among them there may be unripe and damaged specimens. The spilled seeds have “wings”, with the help of which they are carried by the wind through the forest. To select high-quality seed, seeds are soaked in warm water. Before soaking, the “wings” must be removed. The seeds suitable for sowing will settle to the bottom, and the rest will float on the surface. They need to be thrown away.
To grow a pine tree from a seed, you need to put in a lot of effort. Seeds must be prepared before sowing for germination to be successful.
Preparing pine seeds
To germinate pine seeds, you must first prepare them. There are two methods of preparation: stratification and direct preparation before sowing. For stratification, selected pine seeds are mixed with sand (three parts sand and one part seeds) and placed in a cold place (0-5 degrees) for 2 months. This is how the seeds are naturally hardened for better germination. Many gardeners skip this step and germinate seeds without stratification.
Selected seeds are soaked for two days in water, and another day in any solution of a growth stimulant. After this, they begin sowing.
Before sowing in the ground, you can pre-germinate the seeds. To do this, selected pine seeds are laid out between layers of damp gauze and placed in a warm place. It is important that the gauze remains moist during this period, so it is constantly moistened with a spray bottle. After about a week, the seeds germinate.
Soil preparation
To sow pine seeds, you can use a special soil mixture for coniferous plants, purchasing it at a specialized store. For self-preparation, you need to mix peat, sand, turf and dry pine needles to obtain a loose substrate. The soil must first be spilled with boiling water or a solution of potassium permanganate for disinfection. Also, for this purpose, the soil can be placed in the microwave for 20 minutes, which will kill all harmful bacteria. After this, you can start sowing.
Mixtures for planting seeds
For sowing, it is necessary to prepare a moisture-rich, breathable, light mixture without large inclusions. It is not advisable to sift the mixture; such soil will quickly turn sour when wet. If there is no special soil for conifers, then mix 1 hour of coarse sand, 2 hours of leaf sand and add 1 part of turf soil to this mixture. To make it easier to replant the seedlings later, it is advisable to add a little peat and small sawdust to the mixture. It is very easy to remove seedlings from mixtures with the addition of sawdust and peat, and the roots will not be damaged; a minimal number of seedlings may die.
This is interesting: What is lentil and what does it look like: how it grows, types and varieties with descriptions and photos
Acidity of the mixture for sowing seeds
When choosing soil for sowing coniferous plants, it is necessary to take into account, in addition to the mechanical composition, acidity. This parameter reflects the level of hydrogen ion content in the soil, acidity equal to 7.0 is considered neutral, values higher indicate an alkaline environment, and lower values indicate an acidic environment.
Preparing the soil for sowing seeds for seedlings
First of all, it should be noted that pine trees are quite unpretentious plants, but growing them in heavy soils is extremely difficult. The ideal soil for them is considered to be one that is well saturated with oxygen, that is, it can be sandy soils or sandy loam. By placing a seed in heavy and poorly loosened soil, you have every chance of not waiting for the sprout to appear.
In the absence of air access, rot forms at the end of the hatched root, which quickly covers the entire embryo. The same thing happens when there is excess moisture in the soil. If planted in sand, then the optimal ratio of its particles to water will be such a state when moisture does not ooze from the lump raised in the fingers, but the individual fractions remain linked by it. The ideal environment where it is recommended to place Scots pine seeds, both for germination and those that have already hatched, is peat compost. And not just any one, but one obtained from the top layer, which is looser.
The fact is that peat is formed from sphagnum bog moss, which turns under the influence of dampness and in the process of decomposition by bacteria into a kind of compost. This planting substrate, in addition to excellent oxygen saturation, is very rich in various microelements, initially replacing fertilizers for seeds. Moreover, top peat retains to some extent the antiseptic properties of sphagnum moss and protects pine embryos from rot and fungus.
To some extent, black soil, which it is advisable to dry first, is suitable for planting hatched seeds. Before planting, such soil is watered with a weak solution of potassium permanganate to destroy the fungus.
Germinating seeds before planting
Before growing conifer seeds for seedlings, be sure to carry out stratification (spreading with layers of peat mixture, sawdust or sphagnum moss, followed by treatment at high or low temperatures). It is necessary due to the slow development of the embryo. For germination they need quite a lot of time (1-2 years), as well as compliance with the following conditions:
- constant high humidity - at least 80%,
- uniform temperature regime of 21-25 degrees.
Stratification of conifer seeds at home
For seeds of southern, heat-loving varieties, stratification with heat is suitable, and for northern ones - with cold. For those adapted to the temperate climate of central Russia and ripening by mid-summer - combined.
Stratification of conifer seeds for seedlings
The procedure for stratifying conifers at home:
- The initial stage consists of mixing the seeds with wet sawdust or peat mixture in a ratio of 1:3, after which they are placed in closed boxes until germination.
- Containers with seed should be placed in a dark room where a temperature suitable for the selected type of stratification is maintained.
- This process is lengthy, so it is important to periodically inspect the seeds, shake them, and if there is excessive moisture, replace the substrate to avoid rotting. Overdrying, which stops the maturation of the embryos of the material, should not be allowed.
- Stratified seeds can be sown in pots or in open ground - the method depends on the type of conifers.
Snowing of conifer seeds
This method is considered simpler, but not the most effective. It is used before growing spruce from seeds, as well as for germinating pine, thuja and fir, but mainly for those varieties that do not require long warm or cold periods of embryo ripening.
Making snow and growing spruce seeds in peat tablets
For snowing, seeds are sown in containers that are placed under the snow for the winter. In the spring, heat-loving species are transferred to greenhouses for germination, and frost-resistant species are dug into the ground.
Where can I get planting material?
There are several options to consider:
- buy online, from hand or in a specialized store, but no one can guarantee good germination of the seed;
- purchasing breeding varieties from the nursery that are intended specifically for decorative purposes is an excellent option if you want to grow a real decoration on your plot;
- collect it yourself - in the forest (if you are satisfied with Scots pine, without any varietal characteristics), in parks, on a neighbor’s plot, in your own garden, etc.
The last option is the most labor-intensive, but most often meets all expectations, since a colossal amount of work is done with the seed material.
Landing rules
Pine seeds are planted in a container with soil during germination at home or directly into open ground. The choice of planting method depends on climatic conditions and how quickly young shoots need to be obtained. Whatever sowing method is chosen, a number of conditions necessary for proper seed growth must be strictly observed. These include:
- maintaining optimal soil moisture;
- formation of drainage;
- sufficient amount of ultraviolet radiation;
- temperature from 22 to 40°;
- balanced composition of the earth.
Soil for conifers can be purchased at any flower shop or prepared independently. To do this, peat, sand and turf are mixed and dry pine needles and finely chopped pine bark are added to them, which are necessary to give the soil a loose structure. Expanded clay or slate broken into small pieces is used as drainage, and the thickness of the drainage layer should be at least 2–3 cm.
Open ground also needs to be prepared before planting seeds. To do this, make a groove in the ground 25 cm wide and 30 cm deep and pour a pre-prepared earth mixture into it.
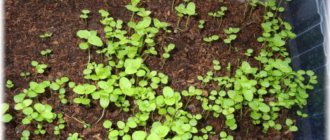
The seeds need to be sown to a depth of 2.5–3 cm, maintaining an interval of 15 cm. The top of the planting is mulched or sprinkled with a thin layer of sand and wait for seedlings to appear. During germination, it is necessary to carefully monitor the soil moisture and prevent it from drying out. To do this, the planting is moistened with a sprayer every day for 2 weeks and the presence of pets is not allowed on it. The first shoots appear 15–21 days after sowing.
The emerging sprouts are covered with a transparent film that protects the plants from attacks by birds, and it is removed only after the shoots have dropped the remaining seeds. In this planting, young pines can grow for up to 3 years, after which they are planted at a distance of 90–100 cm from each other. The tree can be transplanted to a permanent location no earlier than after 5 years. Both during the first and second transplantation, coniferous litter and soil taken from a pine forest must be added to the soil. This substrate contains mycorrhiza, which promotes good survival of the pine in a new place.
To germinate seeds in a container, containers should be medium-sized, at least 15 cm deep, and each seed needs its own container. This is due to the weak root system of pine sprouts, which is severely injured when picking. To avoid large losses when planting, it is better to immediately prepare an individual pot for each sprout. Before sowing, containers must be disinfected using a solution of potassium permanganate. Sand with expanded clay is calcined in the oven at a temperature of 220° for 20 minutes, and the fertile soil is spilled with boiling water or a weak solution of potassium permanganate.
The best time to sow seeds is the beginning of March. It is during this period that seeds that have undergone 3 months of stratification are most ready for germination.
The first shoots when germinating seeds at home usually appear on the 25th day, but in some varieties they have to wait up to 2 months. Seeds that have not been subjected to stratification and left to germinate in damp gauze are carefully removed from the fabric and slightly buried, trying not to damage the fragile root. Then the planting is moistened with a spray bottle and the containers are placed in a sunny place.
This is interesting: How to treat a pear from rust: treatments to get rid of stains on the leaves
In the future, watering is carried out daily, preventing the substrate from drying out and using a sprayer or tray with water. If the seeds were planted in containers that were too large, holding 500 g of soil at a rate of 250, then small holes are made in the side walls of the containers. They are necessary to normalize air exchange inside the pot and evaporate excess moisture.
The sprouts are fed until mid-summer using mineral compounds.
How and when to plant in open ground?
Young pines grown at home in pots can be transplanted into open ground at the age of 2–3 years. By this time, the root system of the plants has become stronger and can tolerate replanting quite calmly, and they themselves reach a height of 25–30 cm, have a lignified trunk and several strong branches.
- Young pines should be planted in a sunny place protected from side winds at a distance of 1.5 m from each other. If you neglect this rule and plant trees at a closer distance, they will shade each other. At the same time, the pines growing in the middle of planting will begin to stretch and lose their fluffiness.
- A drainage layer is poured into the dug holes, fertilizers are applied and a nutrient soil mixture is laid. Transplantation should be carried out by transshipment, without exposing the root system and moving it to a new location along with a lump of earth. This allows you to preserve the peri-root microflora, which protects the plant from pests and various diseases. The holes need to be dug to such a depth that the pine roots are in a straightened state.
- When filling in the soil, you need to lightly compact it, being careful not to damage the root system. It is recommended to tie each seedling to a support, which will prevent side winds from breaking or bending the young tree and will allow it to form a smooth, beautiful trunk.
- It is better to choose calm and not too hot weather for transplanting pine trees into open ground, and place the trees in such a way that they are slightly shaded on the western side.
Growing in a pot
Pine seedlings can be transplanted to a permanent location after 2-3 years, when the root system is sufficiently developed. To do this, they are transplanted together with a lump of earth into spacious pots. In this form, the grown seedling can be placed on open verandas, at entrances to premises, shops, in recreation areas, and on personal plots. An evergreen tree will decorate any interior. Successfully growing pine at home will be a source of pride for a patient gardener.
How to properly care
Growing pine from seeds at home is not too difficult, provided that it is properly cared for.
Be sure to remove weeds from young growth, apply fertilizer and water. In the first year, water frequently and a lot.
Fertilizing is carried out once a month, with organic mixtures. Fertilize with a root stimulator once every six months.
Sprinkle the trunks with tree shavings and cover them with pine needles - thereby insulating the roots and preventing the growth of weeds.
Make a picket fence or fence around the young plant to prevent animals from harming it.
Don't prune as this will slow down growth. Of course, if there are dry branches, then pruning will be necessary.
Plot near a pond: nuances of choice
Which fast-growing shrubs are suitable for green fences?
Juniper stricta - description, cultivation, planting and care. Secrets of garden maintenance and application in landscape design (130 photos and videos)
Seedling care
Pine is an unpretentious tree. Basic care comes down to:
- hydration;
- weeding;
- loosening the soil;
- replanting into a deeper container as needed;
- protection from diseases and pests.
The culture requires care for the first 2-3 years. After transplanting into open ground, the pine develops a powerful root system that goes deep, so there is no need to even water. The exception is abundant watering in preparation for cold weather and in the spring, if there was little snow during the winter. When growing pine trees in open ground in the fall, young trees need to be insulated. When using airtight material, it is important to leave air vents so that the plant can breathe and the buds do not die from lack of air and fungal diseases. It is recommended to cover it with spruce branches, removing it only in the spring after the snow has melted.
Young seedlings need to be watered moderately with settled water every 1.5-2 weeks. When an earthen crust forms, loosen it. You cannot flood the seedlings; pine seedlings are susceptible to blackleg. The plant responds well to spraying from a spray bottle, especially when grown on a windowsill. In summer, it is advisable to take young pines outside or onto an open balcony.
You cannot flood the seedlings; pine seedlings are susceptible to blackleg.
To protect against diseases, treatment with fungicides is required. You can use Fitosporin solution, the number of sprays per year is 2-3 times. Young pine seedlings, especially those grown from seeds, should be shaded from direct sunlight. In this case, containers with culture should be placed in well-lit places.
If necessary, it is necessary to replant the bush into a larger pot, but not more than once a year. It is recommended to use the transshipment method, in which the root system remains in an earthen coma. When it is exposed, the plant weakens and may become sick and die. Some varieties require crown formation. It is permissible to carry out the procedure for the first time only after 2 years. After improper pruning, the pine tree may begin to hurt.
Regardless of the variety - be it the tall Bunge pine or the dwarf Winter Gold - when grown from seeds, the plant can only vaguely resemble the mother tree. Seed material during storage reduces germination, so it is advisable to use fresh grains collected in the fall from unopened two-year-old cones.
Stratification - is it really necessary for pine seeds?
Some tree species require sharp cooling when growing seedlings from seeds, or, in other words, they need stratification. These include linden, ash, rowan and even pear. This method of activating the development processes of planting material is also applied to Scots pine seeds.
Dried pine seeds
In addition, you can try to apply to a small batch of seeds the method of soaking in ice-cold melt water, which, like stratification, according to some gardeners, activates accelerated growth and saturates the planting material with energy. In general, germinating well-dried seeds in warm water is sufficient to obtain uniform, friendly shoots. If you consider stratification for Scots pine seeds as a necessary stage of preparation, you can use the following advice from arborists.
When the cones are fully opened, the seeds are soaked in gauze for 3 days. To hatch them, you need to keep the planting material in a humid environment for about 10 days, so a shorter period will simply reduce the dormant period. Next, the seeds are mixed with coarse sand (preferably river sand, with rounded fractions), in a ratio of 1:3, for which you will need small wooden boxes. Stratification requires storing seeds in a cool place, at a temperature of 0 to 6 degrees, for which a dry cellar or a half-meter-deep ditch, subsequently covered with snow, is suitable.
External features of culture
The evergreen beauty is a shrub with graceful short shoots. They are almost always directed upward, regardless of the variety. Some are creeping and extend several meters from the main trunk. The length of the needles is approximately 4 cm. The needles of low-growing pine trees in the country are collected in miniature bunches. They are hard and prickly to the touch. The needles are colored dark green. Some varieties are golden or grayish-green in color.
During the flowering period, the shrub puts on a “mantle” of light brown paniculate bouquets. This beauty is observed in May. The cones ripen only the following year at the end of autumn. At first they are colored gray-green, and then acquire a brown tint. The minimum size of cone-shaped fruits is approximately 5 cm.
The trunk of a mountain pine has a unique feature. Its bark changes color. The young tree has a smooth brown-gray trunk. Over time, dark scales form on its upper part. Therefore, the lower area of the trunk appears much lighter than the upper part.
In 1 year, the plant grows approximately 6 cm. It perfectly tolerates heat and winter cold.
Depending on how long the pine tree has been growing, varieties are selected that are ideal for the area.
Stratification - is it really necessary for pine seeds?
Some tree species require sharp cooling when growing seedlings from seeds, or, in other words, they need stratification. These include linden, ash, rowan and even pear. This method of activating the development processes of planting material is also applied to Scots pine seeds.
Dried pine seeds
In addition, you can try to apply to a small batch of seeds the method of soaking in ice-cold melt water, which, like stratification, according to some gardeners, activates accelerated growth and saturates the planting material with energy. In general, germinating well-dried seeds in warm water is sufficient to obtain uniform, friendly shoots. If you consider stratification for Scots pine seeds as a necessary stage of preparation, you can use the following advice from arborists.
When the cones are fully opened, the seeds are soaked in gauze for 3 days. To hatch them, you need to keep the planting material in a humid environment for about 10 days, so a shorter period will simply reduce the dormant period. Next, the seeds are mixed with coarse sand (preferably river sand, with rounded fractions), in a ratio of 1:3, for which you will need small wooden boxes. Stratification requires storing seeds in a cool place, at a temperature of 0 to 6 degrees, for which a dry cellar or a half-meter-deep ditch, subsequently covered with snow, is suitable.
Preparing the landing site
As soon as the young plant is well rooted and strengthened in the seedling container, it can be transplanted to the site, having previously selected the most suitable place for this.
It is important to take into account several criteria at once:
- moderate substrate moisture (mountain pine does not tolerate wetlands);
- sufficient illumination of the area;
- the presence of optimally suitable soil composition.
Regarding the last point, it is better to organize the seat using a sand-clay mixture. The size of the hole will depend on the size of the plant’s rhizome (usually the seat should be 2 times the volume of the container), so on average it is worth adding at least 15–30 cm to the initial parameters.
We advise you to learn how to transplant an adult apple tree to a new location.
A drainage layer of expanded clay or broken brick is placed at the bottom of the pit, on top of which a nutritious soil mixture of 3 parts turf soil, 1 part peat and the same amount of river sand is poured. On depleted soils, it is useful to add 20–30 g of complex fertilizer and mix everything thoroughly.
The replanting process is no different from similar actions when propagating other trees: using a transshipment method, a pine tree with an earthen lump is moved from a closed container to a hole prepared for it, and the remaining space is filled with the remaining earth. At the end of the planting activities, all that remains is to compact the substrate in the near-trunk area and water the pine tree abundantly.
Video: planting mountain pine
Species and varietal diversity of pine trees
The pine genus is one of the oldest representatives of coniferous trees. Its age is estimated at thousands of years and dates back to the period of dinosaurs.
The genus of pines (pinus) are offspring of the pine family (pinaceae), which includes about one hundred species and varieties. Fifty of them grow wild in the climate of the middle zone. For convenience, the species diversity of pines is usually divided by size.
To tall ones that reach ten meters in height or more. These include:
Crimean or Pallas
Dense-flowered or Grave:
- ponderosa or Oregon pines.
Medium-sized - the size of which ranges from three to nine meters (mountain and cedar dwarf trees). They are also represented by medium-sized varietal groups of tall representatives:
- Scots pine (Vatereri), which grows up to six meters and has the form of a bush, or Fastigiata, a slow-growing tree with branches pointing upward
- European cedar - Columnaris, which grow slowly and have vertical, upward-pointing branches
- black or Austrian - Selects with wide conical crowns and slow growth rates
Low-growing or dwarf, which do not exceed three meters in height. Such varieties are inherent in almost all species, but are especially common in mountain pine and are represented by:
- Gnome - with a neat small rounded crown
- Mini-Pug - in the form of a wide symmetrical bush
- Lauriom - comes in various forms
This is far from all representatives of the pine genus, and such a variety of species and varieties allows you to choose conifers to suit your taste, taking into account the availability of space and the climate of the area.