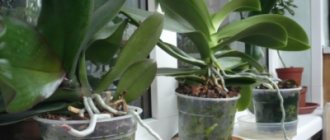
Pelargonium is a flower known to all lovers of indoor plants. It is also called “grandmother’s”, because. he grew up in almost every home. Nowadays, pelargonium is grown in containers or pots outside the window in the summer, and moved indoors for the winter.
This perennial grows tall over time, exposing the lower part, and looks unpresentable. Therefore, it needs to be updated regularly. The plant propagates by seeds and cuttings. At home, it is better to use the second method, because... varietal qualities will be preserved. In addition, cuttings are suitable for all types of pelargoniums.
It is not difficult to propagate the plant in this way, and even novice gardeners can do it.
When can you take pelargonium cuttings?
Pelargoniums can be cut all year round, but still the best time for their vegetative propagation is March - April and August - September. Rooted at the end of summer and successfully overwintered, cuttings will gain strength by the beginning of the season and will delight with lush flowering.
Cuttings are taken from the strongest plants. However, cuttings will also benefit the acquired pelargonium seedlings, which have already been planted in a permanent place. It will become more magnificent, and its “babies” will bloom in a few months. But in this case it is necessary to cut off the apical shoots.
How to care for cuttings after transplanting into a permanent pot
After transplanting the cuttings into a permanent pot, the young plant is cared for in the same way as adults. Geraniums require regular watering to prevent the soil from drying out, loosening the soil in the pot and fertilizing. Fertilizing pelargonium should begin no earlier than 2–3 weeks after transplantation, when the plant recovers from stress and adapts to new conditions. Initially, nitrogen fertilizers are applied to promote leaf growth. If the geranium blooms, it will require phosphorus-potassium supplements.
A sign of proper maintenance and successful rooting is the flowering of an individual. Different varieties of geranium will release buds at different times after transplantation. For example, Zonal geranium will delight the owner with lush flowering within a couple of months after transplantation, and Royal and Ivy-leaved ones only the next year.
If the manipulations are carried out correctly, the geranium will quickly take root and in due time will delight you with a thick crown and intense flowering.
How to plant royal geranium
- Check the soil in the container. If it's dry, moisten it.
- Using a brush, apply a thin layer of growth stimulator to the tip of the cutting.
- Mark one or more holes in the pot using a stick.
- Deepen the cuttings into them obliquely above the lower rosette of former leaves by 1-1.5 cm. Compact the soil around the plant to displace unnecessary air bubbles that have a bad effect on the formation of roots.
Transfer
Pelargoniums are grown in pots no larger than 0.75 liters. Too large a container capacity provokes the plant to build up its root system and green mass. This reduces flowering rates. For the same reason, geraniums are not fed with nitrogen fertilizers. The selected pot must have holes at the bottom. It is filled 15% with expanded clay drainage.
For the growth of geraniums, a soil mixture consisting of:
- 2 parts of turf land;
- 1 part peat;
- 1 part sand.
The prepared soil is watered with a weak solution of potassium permanganate for disinfection and structuring, and then the prepared pot is filled with it two-thirds. Then the rooted cuttings are transferred to a pot. It is advisable to do this by transshipment, so as not to disturb the root system again. The remaining space is filled with soil, shaking the container occasionally to avoid the formation of voids. Then the flower is watered with lukewarm, pre-settled water.
Rules for planting sprouts in the ground
A thin drainage layer is poured onto the bottom of the prepared pots and filled with fertile soil. To prevent diseases, it is treated with a solution of potassium permanganate. Then the soil is abundantly moistened and young seedlings are planted. Each sprout is covered with a glass jar or cut plastic bottle to create greenhouse conditions.
In the future, in order to properly propagate indoor geraniums, the plantings must be cared for. To do this, pots with seedlings are placed in a warm and bright place. In the evening, they are provided with additional lighting using fluorescent lamps. The air temperature for pelargonium should be in the range of 22-27° C. Water the plant, focusing on the condition of the top layer of soil.
As soon as it dries, the plant can be watered with warm and settled water. Flowers tolerate spraying with warm water well, but can do without this procedure.
During active growth, the plant is fed twice a month with potassium fertilizer. If you correctly follow all the rules of propagation, then by mid-summer the young plantings will bloom.
Possible problems
The appearance of signs of infectious diseases
To prevent this phenomenon, it is recommended to disinfect the soil and pot in which cuttings will be planted or seeds will be sown (fungicide treatment, heat treatment). You can also disinfect seeds by placing them in a weak solution of potassium permanganate for a while.
Rotting of cuttings
This phenomenon is possible with excessive watering and irrigation.
Seeds don't sprout
This is possible if the seed was of poor quality or had been lying around for a long time. It is important to check the expiration date of seeds purchased in the store.
The plant does not bloom
After rooting the cuttings, geraniums should throw out the first flowers in the first summer. The plant will bloom in full force after wintering. If the flowers were never released, then most likely the problem, oddly enough, is in the pot.
An excessively large pot will encourage the geranium to actively develop its root system and grow foliage rather than buds. Therefore, it is necessary to transplant the flower into a smaller pot. And this fact must be taken into account when choosing a pot for planting a young plant.
Rooting geraniums in perlite. How to root pelargonium (geranium)
There are people who can root anything, they may not even know about all sorts of hormones and rooting agents, but simply take a cutting, stick it into the soil or water, and after a while they get a rooted plant. Some people succeed, others don't. A couple of useful tips on how to root pelargonium with the smallest losses.
Unfortunately, for most indoor plant lovers, the situation with rooting is the opposite. We “rush” with domestic cuttings, “love them to death”, use various growth hormones, greenhouses, lamp lighting and do not always get 100% results.
How can one learn to root geraniums so that at least not all, but most of the cuttings do not die? This requires experience, experience and more experience.
To buy experience you need to try. If you don't experience it, nothing will happen. The catch is that we flower growers each have their own microclimate in their house, apartment, or balcony. If certain growing conditions are suitable for one, they are not at all suitable for another.
Some people easily root geraniums in water. For others, it rots, and they only use rooting in the ground. In most cases, pelargonium does not need to be placed in a greenhouse, since it does not like such conditions, but some gardeners put it under a bag and not only does it not die (despite the fact that this is very strange, since the dark leg does not under no circumstances does it sleep especially with geraniums), but it also takes root.
In this article I would like to share my experience of rooting pelargoniums.
For myself, I concluded that geranium takes root best in the spring. In the spring, any cutting inserted into the peat takes root. Despite the fact that this does not mean that it is necessary to root pelargos only in the spring. Try it! In the summer they also take root, although there are already losses, especially if the summer is hot. In the summer, my roots quite often die from the dark stem, despite the fact that they are not so waterlogged.
- So, spring (late February-May) is best for rooting geranium cuttings, but rooting is possible at any time.
- Then the soil! I actually don’t root geraniums in water, but rather in the ground. The soil is peat with perlite. There is no need to skimp on perlite. If there is peat with perlite in a 1:1 ratio, this is very good. Many gardeners use peat pills to root geraniums. True, they don’t always exist and now there are quite a lot of fakes. If you use a real peat pill, then the rooting result will also be good.
- Moisture. At any time when watering an adult geranium or cuttings, do not forget about the dark stem (DS). It’s better not to top up geranium than to overfill! Otherwise, you will notice the danger at the end, when it is too late to do anything. The dark leg is the enemy of geraniums. She sneaks up unnoticed. The stem begins to rot from the root, you don’t see it until a certain moment, and while you see it, this rubbish spreads with rapid force. All that remains is to throw away the plant or cut it into cuttings, which are not always viable. Unfortunately, it is best to root in a glass. If the cutting is small, then do not plant it in 200g, 100g will do. Place drainage at the bottom of the cup and soil on top. Wet the soil lightly, but so that the water does not stand in it and it is easily wet.
- The cuttings need to be dried before sticking into the ground. In general, it is better to take cuttings from a mother plant that has not been watered for a couple of days. It can be dried for a couple of hours, it all depends on the variety. In my practice, I was dried for 6 hours and everything was fine.
- All that remains is to stick the dried pelargonium cuttings into the ground and wait. It can take 2 seven days to take root. Maybe a month. In the spring, one geranium took root in one seven days, and the second cutting, taken from the same bush, took three days to take root.
- No greenhouses, sprays or greenhouses are necessary! Geraniums don't like this.
- Examination. During rooting in a transparent cup, it is possible to notice whether the process is progressing or not. From time to time, an accidentally inserted cutting not in the center, but closer to the wall of the glass, prematurely allows one to find the developing geranium roots. Based on this, it is possible to intend to root the cuttings by sticking them not in the center, but closer to the edge. This is especially important for those who are impatient and curious.
Victoria DidenkoSource
Similar articles
- Petunias on the balcony? It's real!
Pelargonium cuttings video
With the appearance of roots, which can be seen through a transparent glass, fertilizers begin to be applied. Foliar feeding is carried out once a week. You can use special fertilizers for indoor and garden plants. During the growing season, fertilizing is carried out from the end of April to the beginning of September every 14 days.
To transplant young pelargoniums, you can use the following substrate: manure humus, leaf compost, peat in equal quantities and half of river sand. As the plants grow, they are transplanted into larger containers. The pot should not be very large.
Geraniums should be watered abundantly, but do not over-moisten the soil. In winter, water once every 2-3 days, and in summer once a day. When watering, make sure that the soil is not wet.
Young pelargoniums should be pinched. The growing point is removed above the 4-5 leaf. With this method, the plant blooms profusely and becomes fluffy. Periodically, you should loosen the top layer of soil in the soil and remove damaged and yellowed leaves.
How to propagate?
Cuttings
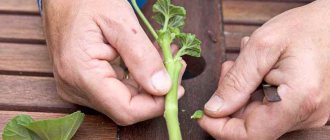
Cuttings are an artificial method of vegetative propagation of plants, in which parts separated from the mother plant - cuttings - are used. A cutting is a specially separated part of a plant (shoot).
Tops obtained by trimming faded pelargonium are used as cuttings. An important condition: the cutting must have 2 - 3 internodes, its total length - from 8 to 20 cm.
It is not recommended that the selected shoot contain more than 5–6 leaves, as they will take away some of the nutrients and moisture, which will negatively affect the rooting process. It is better to completely remove the lower leaves from the cuttings, and cut the upper ones in half.
Reference! A node is where leaves grow, and an internode is the distance between nodes.
The shoot is cut from the mother plant with a sharp knife just below the node and at a slight angle. The cut can be treated with charcoal. Be sure to dry the cuttings slightly before rooting, that is, leave them indoors or outdoors for 2 to 8 hours (but not in direct sunlight).
Royal pelargonium must be rooted directly into the ground. If the cutting is immersed in a container of water, then with a 100% guarantee it will rot and, accordingly, die.
Before planting the cutting in the ground, you can treat its lower tip (it is cut at an angle) with any root formation stimulator (Kornevin, Heteroauxin, Epin-Extra, etc.).
We invite you to watch a video on how to propagate royal pelargonium from cuttings:
Rooting cuttings
The cutting is buried 2 - 2.5 cm into the moistened substrate, which is pressed tightly around the plant to avoid the presence of air bubbles that negatively affect the process of root formation.
Pelargonium does not like excess moisture, so it is not advisable to install a “greenhouse”: just place the container in a warm (+20C – +25C), moderately lit place, but without direct sunlight on the future plant. Shelter (a plastic bag or glass jar) can be used only as a last resort: if the leaves have turned yellow or withered.
The shoots should be watered systematically, but moderately. Spraying should not be done. After approximately 1 - 2 months, the cuttings will take root. A sign of this is the appearance of young leaves and the relative growth of the shoot.
After planting the plant in a permanent pot, you need to pinch: the first pinch is above the 3rd pair of leaves, and new shoots are also pinched. Pinching is done in order to stimulate branching of the plant in order to form a bush of the required shape.
From the video you will learn how to properly root cuttings of royal pelargonium:
Dividing the bush
Royal pelargonium is propagated by dividing the bush during plant transplantation.
- After removing the plant from the old pot, you must carefully examine its root system; all rotten or dried elements must be removed.
- Next, you should separate a part of the pelargonium with a sufficient number of shoots and viable roots, place it in a pot in the center, previously prepared for planting (drainage, substrate), fill the resulting voids with soil and press it around the plant with your hands.
- After planting, the plant should be watered quite abundantly, and then moderately, otherwise the root system or stems may rot.
Seeds
When propagated by seeds, the characteristics of the parent plant may not be preserved.
- Royal pelargonium seeds can be collected with your own hands, or can be purchased at any specialty store. But in any case, they are processed: they are soaked in a weak solution of potassium permanganate for 4 hours, and then ground between sheets of sandpaper, since their shell is very hard.
- Loose soil (peat and sand) with humus is poured into a shallow container; seeds are placed on its moistened surface, which are sprinkled with a thin layer of substrate.
- The container is placed in a “greenhouse” (a bag or larger container with a tight-fitting lid). The first shoots will appear in 2 - 3 weeks.
- The soil surface should be systematically irrigated and the seedlings should be ventilated to prevent them from rotting.
When is the best time to do this?
You can experiment at any time of the year. But experienced gardeners believe that geranium takes root faster in the spring.
Summer heat has a negative effect on seedlings , and with high humidity there is a possibility of developing “black leg”.
It is almost impossible to save the affected plant from the “black leg”. The disease develops quickly, the trunk rots from the very root and pruning does not help. When watering, it is better to pour water into the pan to avoid waterlogging of the soil.
If you propagate geranium in the fall, it will have to create greenhouse conditions:
place seedlings under lamps for at least 17 hours a day;
- the air should be heated to 23 degrees Celsius;
- In autumn, rooting takes longer, amounting to 35-40 days.
So, for geranium cuttings to take root well, the best period is considered to be from the end of February to May, but your own experience may refute this statement. Rooting is influenced by many factors and each gardener has his own conditions. And yet, in the spring, geranium is always accepted.
Main difficulties in reproduction
If the plant is kept in a too hot room at 26°C or more, or, conversely, in a cold room where the temperature is below 16 degrees, it will be difficult to get roots.
If there is often a draft in the room and the temperature changes, it is better to cover the container with film, which will remain until the root system appears. It needs to be removed daily for ventilation.
The same requirements apply to seed propagation. If you do not follow the rules and do not maintain the necessary conditions, the seeds are unlikely to hatch.
It is important to observe the light regime when the seedlings are already on the windowsill. To ensure that all seedlings receive the same amount of light, the container must be turned regularly.
As a result, you need to choose the right cutting; it must be cut from a young shoot. The old branch will not be able to give a positive result when propagated.
Aftercare
It is recommended to grow ampelous geranium seedlings transplanted into individual pots in a bright place, but without direct sunlight on the foliage. The ideal option is north, north-west, north-east windows. The young plant is watered moderately and little by little.
Fertilizing is done with complex mineral fertilizers purchased in flower shops, from spring to autumn 2 - 3 times a month. The elements necessary for it are potassium, phosphorus, magnesium. It is not recommended to add organic fertilizers to containers with geraniums.
Propagation by cuttings and seeds are the two most popular methods of propagating ampelous geraniums, which also do not require special financial investments. The main conditions for success in this are the desire of the grower himself, the creation of comfortable conditions and proper care of the young plant.
Wrong cutting selected
Geranium may not take root in water due to the fact that the cuttings were chosen incorrectly. To prepare viable shoots, follow these recommendations:
- For planting, select cuttings from the apical part of a young flower, from the side shoots.
- Do not water the mother plant before cutting.
- Use a sanitized knife.
- Cut a 5-8 cm piece of stem as close to the bud as possible.
- Remove the lower leaves, peduncles and buds from the shoot.
Pelargonium cuttings
How to plant?
Attention! Cuttings that have given roots will take root better in the soil at 23-25 degrees Celsius and when the ground has warmed up to plus 15-18.
What is required for planting:
- prepare the soil (avoid stagnation of water, add rotted compost and peat);
- make planting holes (deep - designed for a branched root system, with drainage at the bottom);
- plant seedlings , compacting the soil around the plant;
- water abundantly (such watering is allowed only during planting);
- mulch the soil from drying out (spread organic mulch: bark, wood chips, dry peat, compost).
For those planning to grow geraniums, the following articles may be useful:
- What do geranium seeds look like in the photo and how to collect them at home?
- Peculiarities of propagation of geranium leaves.
Reproduction: ampelous geranium, or pelargonium
In order for the window sill to bloom for three seasons, you need to carefully care for the plant and propagate it correctly. If you want to propagate geraniums of various types (pelargonium, as it is also called), you need to know a few simple rules:
- You can grow a seedling using seeds or cuttings. Ivy-leaved geranium prefers propagation by cuttings according to the same principle as ampelous geranium;
- the plant loves saturated soil, slightly clayey, consisting of several components;
- You can plant the sprouts in the garden. But it is worth planting cuttings in the ground, taking into account certain care conditions.
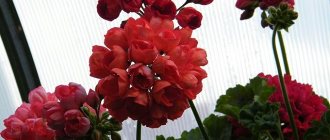
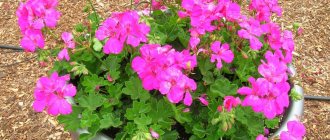
Unique flower with bright buds
In order for sprouts to take root, it is advisable to have a certain amount of knowledge and be able to work with the soil. It is necessary to think through every step of action. Any gardener can choose his own method regarding how to propagate pelargonium.
Methods for propagating geraniums
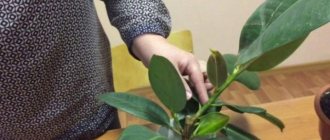
Preparing the cuttings
In order for the rooting of geranium cuttings to be successful, it is necessary to carry out appropriate preparation. It is performed in several stages.
To begin with, cut cuttings should be placed on newspaper and left in a dark, dry room for a couple of hours. During this time, the sections will dry out slightly and a thin film will form on them. Thanks to it, the plant will not be affected by bacteria living in the soil. But to be on the safe side, the cut area should be further processed. It is best to use special substances, but you can get by with coal powder or ordinary wood ash. It would be useful to carry out the same procedure with a cut on the mother plant.
Right before planting, dip the tip of the cutting in special growth stimulants, sold in all flower shops. Thanks to them, the root system develops faster, which means the plant will quickly take root in a new place.
Rooting in the ground
Experienced gardeners plant petioles directly into the ground. You can try it too. First, place a layer of pebbles in plastic cups for drainage. Then pour the substrate on top. Deepen the cuttings 4-5 cm into it. Compact the soil and water generously. To help young plants adapt faster, place the glasses in the shade for several days. Before planting, do not forget to sprinkle each cutting tree with a root growth activator.
After 3-4 days, move the glasses to a bright place. The best temperature for rooting will be from +16 to +18 °C. It is better to water through a tray so that moisture does not fall on the leaves and stem - this way you will avoid the appearance of a black leg. After 3-4 weeks, root formation will begin.
If the cutting develops well, do not cover it with a jar or film. Otherwise, be sure to do it. In transparent glasses, the emerging roots will be clearly visible.
Step-by-step instructions and photos of plants
The cuttings are prepared for planting. The next stage is choosing a rooting method. There are several ways to plant geranium cuttings.
In the package
Cellophane prevents moisture evaporation.
- To perform this method, you need to pour soil into the bag.
- Before planting, be sure to moisten the soil mixture.
- Afterwards, tie the bag with a rope.
- Holes must be made in its upper part. Cuttings are planted through them.
In a pot
- To grow geraniums from cuttings at home, you need to take small pots or any other containers.
Their bottom should have drainage holes. Important! You can plant them in one large container, but keep in mind that the roots may get tangled. This will complicate further transplantation. - Drainage is installed. Pebbles, broken bricks, polystyrene foam, etc. can be used as drainage. Loose soil is poured on top of it. A mixture of turf, garden soil, humus and river sand is suitable. The soil should only take up half a glass.
- The soil should be thoroughly watered with boiling water.
- After the earth has cooled, the cuttings are planted in the ground to a depth of at least 2 cm. The earth must be compacted on the sides.
- Gradually you need to add soil, also compacting it.
Do not completely cover the pots with soil. Once the cuttings have rooted, soil can be added. There is no need to create greenhouse conditions, since there is a high probability of rotting of the sheets when they get wet. Condensation forms in the greenhouse, which collects on young plants. For the same reason, watering should be done very carefully so as not to wet the leaves.
Pots with cuttings must be placed in a lighted place and should not be exposed to direct sunlight. The room temperature should be in the range from 15 to 25 degrees. Rooting occurs slowly. As soon as new leaves begin to form, the plant is rooted.
When is the best time to do this?
Definitely in the warm season. Cuttings at home during this period have enormous advantages.
- The rooting period is reduced.
- There is no need for additional lighting.
- There is no need for pruning in the spring.
Reproduction in water
Propagation by cuttings in water is the easiest way. Let's figure out the best way to root geranium in water quickly and without loss.
- You need to take a dark glass glass.
- You need to pour water into it.
- Add crushed coal to it. Thus, the plant will not be susceptible to various diseases.
After this, all that remains is to wait for the roots to appear. As soon as they grow to a length of two and a half centimeters, they should be carefully removed from the water and planted in a permanent place in the ground.
Why doesn’t it take root in water and what to do?
This method of propagation is not suitable for all representatives of geranium. Some may simply not have time to take root and rot. In this case, you just need to choose a different method of reproduction at home.
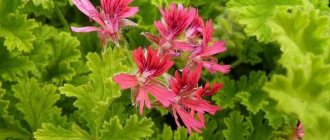
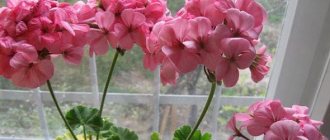
Introduction to geranium
Pelargonium belongs to the Geranium family. She fell in love with the comforts of home. The plant pleases the eye with the abundance of shades of its inflorescences. Probably everyone recognizes geranium by the shape of its heart-shaped leaves. Europeans had the opportunity to admire pelargonium back in the 17th century. The plant was brought from Africa. Local breeders fell in love with geranium and developed many interesting varieties. Over the years, this beautiful and hardy indoor plant has found a place in various parts of the world.
The perennial is distinguished by an erect stem, long petioles, and branched roots. It also has long peduncles, and the flowers are collected in racemes. Each flower has 5 petals. Their shades are very different: from white to pink, lilac, red.
Today, both professionals and amateurs resort to propagating geraniums by cuttings at home. Pelargonium has some advantages:
- It is considered not only an indoor plant, but also a garden plant.
- Even the most experienced florist will satisfy his request among the many varieties.
- It does not require much time or serious effort to maintain, care and propagate this flower.
That’s why it won’t hurt you to learn how to propagate geraniums at home using cuttings or leaves.
Activities for caring for seedlings
Remember that geranium does not like the use of fresh organic fertilizers. It cannot be fed with manure and humus. Such actions will lead to the cessation of flowering. Indoor pelargonium requires the use of nutrient mixtures, which include all the essential minerals in equal doses. Active flowering requires potassium substances.
The stable growth of a newly propagated plant depends on trace elements: iron, zinc, copper, calcium, magnesium, manganese, boron. In summer, heat is stressful for a flower, so refrain from excessive fertilization. The optimal frequency of feeding should be 2 times a month. Note that geranium is not very demanding on air humidity. Any atmospheric conditions are suitable for its establishment, development and flowering. But the abundance of light is simply necessary for pelargonium.
Way to solve the problem
Geranium cuttings from pruning to planting
If all the recommendations are followed, but the geranium does not root in water on time, the problem can be solved. To do this, follow the instructions:
- Remove the cutting from the water.
- Update the slice.
- Dry the shoot overnight.
- In the morning, plant the plant in slightly moistened soil.
How to properly obtain cuttings from large-flowered geraniums?
Material for cuttings of royal pelargonium is obtained with the arrival of spring and until mid-summer. Cuttings are harvested either during the formation of the bush or during the first pruning. In the first case, it is allowed to leave shoots for propagation throughout the year, and in the second - only from spring and the first half of summer.
Cut the cuttings slightly below the level of the internodes. The cut is made at an angle of 45 degrees. Take a sharp tool. To prevent infection of the plant, it is recommended to pre-treat the blade. Shoots should not be broken off. This will damage the pelargonium. The length of the cutting depends on the variety of geranium. If the mother plant belongs to a dwarf variety, shoots approximately five centimeters long are separated. Ten-centimeter ones are taken from large specimens. All existing flowers and leaves are completely torn off from the cuttings. Some types of royal pelargonium, grown for several years, have quite long shoots. To collect planting material from such plants, the cuttings are simply cut to the required size, that is, each is cut into pieces of 5-10 centimeters.
How to speed up the rooting of geranium cuttings. Cutting time
All procedures involving mechanical damage to the plant are carried out taking into account the annual cycle and biological characteristics of the species. Otherwise, the survival rate of pelargonium deteriorates, varietal characteristics are lost, and immunity to diseases decreases.
Cuttings taken from old pelargonium take root much worse. With age, the ability for root formation decreases due to a decrease in water-retaining properties and slow metabolic reactions. Therefore, it is better not to delay the timing of cuttings.
Pelargonium cuttings are taken in autumn and spring. Although some nurseries cut geraniums for commercial purposes all year round, including in winter, it is optimal to do this in August-September or March-April.
Cuttings taken in the spring have a better chance of successful rooting. These include a consistently high temperature, the absence of drafts, and the right amount of sunlight required for auxin synthesis. The disadvantage of the spring procedure is that the planting material is cut with already formed flower buds. This reduces the decorative value of the mother bush.
Autumn pelargonium enters a dormant stage and the rate of metabolic reactions is reduced. Therefore, propagation of geraniums by cuttings in the fall at home is a little more difficult and slower if the shoots are cut from a bush older than 6 years. Planting material from young pelargonium develops quickly and blooms next year.
Important!
Cuttings and rooting are performed in the same way for all types of pelargonium. Rooting of royal pelargonium is carried out only in the soil due to its tendency to rot due to moisture accumulation. Other species root in soil or water.