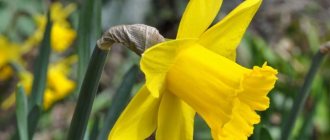
The perennial calla flower, which many consider to be a houseplant, thrives in open ground and decorates many garden areas. Unfortunately, this plant is not resistant to cold weather and cannot overwinter in the ground. Therefore, flower growers dig up these flowers for the winter. But in order to see flowering next year, you need to know how to store callas in winter at home. We'll talk about this today.
Selection of planting material
A high-quality, healthy tuber is the key to the normal development of the plant. Therefore, the choice of planting material must be approached very responsibly. The tuber should not be soft or show signs of disease or mechanical damage.
The size of the tubers plays an equally important role. The larger they are, the faster flowering will begin, and the more inflorescences there will be. The number of inflorescences in a plant with a large tuber can exceed 20 pieces.
Before planting in the soil, the tubers are washed in a weak solution of potassium permanganate, then rinsed with clean water and dried.
Useful tips for storing and digging calla lilies
- When purchasing calla lilies, make sure that they are already adapted to our conditions. Thanks to this, you will be sure that you will not have problems with rotting, drying out and spring fall of planting material. As for imported material, it takes several years to adapt it.
- When digging up and cleaning its tubers, you should not put in a lot of effort, as this can damage the immature sitting nodules. In winter, these nodules mature and are fenced off from the so-called mother plant by a special partition. It is after this that they can be easily separated. At the same time, if the tubers are damaged during this procedure, lubricate them with brilliant green.
- After digging, calla lilies should be stored in a cool, dark room. They will fit perfectly in basins and drawers. But keep in mind that the leaves need to be cut off two weeks after digging, when they wilt a little and the nutrients go to the root.
- We should not forget that calla lilies need to be dug up in September. The thing is that light frosts do not damage the root system of the plant.
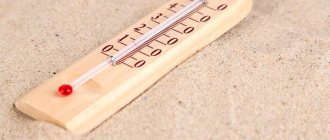
- The optimal temperature for storing tubers is 5-12°C. If the air temperature is higher, the plant will lose its moisture.
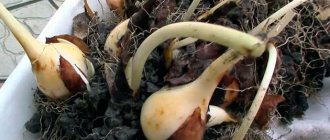
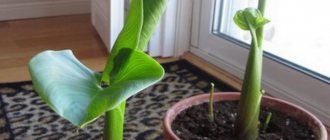
- We should not forget that if you grow calla lilies in pots, then with the arrival of autumn, watering should be stopped. Thanks to this, the leaves will begin to dry, and you can quickly prepare the plant tubers for rest.
If you haven't been able to properly preserve your calla lilies, don't despair. Plant the sprouted plants in pots with nutritious soil. When the seedlings appear, treat them with ferrovite (to increase the efficiency of photosynthesis when there is insufficient light in early spring) according to the instructions on the package. In May, plant the plants in open ground, and they will not bloom as profusely, but will still bloom.
Preparation
In order for the wintering of plants to be successful, they should be dug out of the soil at a certain time. Harvesting tubers too early will lead to the fact that the plant, whose growing season has not yet ended, will not be able to survive wintering normally. And if you wait until severe frosts to dig it up, the flower may die from the cold.
In the climate of the middle zone, calla lily tubers are collected with the onset of the first night frosts (the first days of October). And in more southern areas this can be done a month later: in early November.
With the arrival of the first frost, plants need to be pruned. Dry leaves are cut so that they are visible 5-7 cm above the ground.
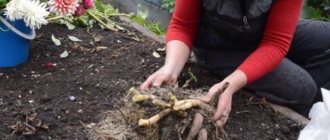
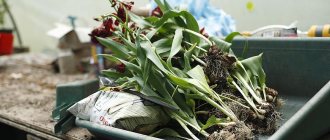
You should dig up the rhizomes very carefully, using a garden fork, so as not to harm the plants. The flower is dug up at a safe distance from the roots, after which it is pryed up with a pitchfork along with a lump of earth.
Root tubers need to be cleared of soil residues. To do this, they are placed in a container with water, after which they are gently washed under a small running stream.
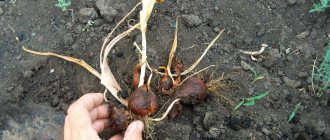
When the tubers are cleaned, they are carefully inspected. Planting material that has damage, rotten areas and signs of disease is discarded.
Small damaged areas can be removed with a sharp knife, and then treated with brilliant green or crushed coal.
Drying the tubers
The next stage of preparation is drying the tubers. This should be done in places with good ventilation, away from sunlight. In such places it is necessary to maintain a constant temperature within +20°C - +25°C.
Drying of planting material should continue for at least 2 - 3 weeks , after which calla lilies can be stored all winter.
Remnants of dry leaves must be completely removed from the tubers. This is done a few days after the start of storage. After which, after about a week, the roots are removed. By this time, the roots will separate easily. This must be done so that the flower does not begin to grow prematurely without spending enough time in “cool dormancy.”
During this period, small tubers (babies) have not yet formed a special film that allows them to “live independently.” Therefore, it is impossible to separate them from the mother tubers. This should be done in winter, when they are already stronger. Then it will be a full-fledged planting material.
If the babies were separated from the tubers ahead of time and were damaged, they can be treated with brilliant green (coal dust) and dried. Calla lily bulbs should be stored in winter until the last days of March.
Is it necessary to dig up garden calla lilies for the winter?
These flowers, despite their southern origin, are not too capricious even when grown in more northern climates. But it is recommended to dig up the tubers for the winter - a small disadvantage, not to mention severe frosts, can easily destroy the plant. Plus, for tuberous calla lilies to bloom, a mandatory period of “cool dormancy” is required; this also applies to many indoor varieties.
In the southern regions, some gardeners leave rhizomes and tubers to overwinter in the ground, covering it well with mulch. But this technique usually does not bring anything positive. It's like playing roulette. In recent years, winters have been unpredictable even in the south. It is safer, and more effective, to remove calla tubers for the winter. Moreover, this agricultural technique allows you to examine the bulbs after digging and identify the onset of diseases in time. The harvesting of plants from the garden itself takes place in several stages.
Under what conditions should it be stored?
Conditions for storing calla lilies in winter are as follows:
- constant temperature within +5°C - +10°C;
- ensuring ventilation in places where planting material is stored;
- low level of humidity to prevent mold from forming;
- storing rhizomes at some distance from each other, sprinkled with sand, wood shavings or covered with moss and peat;
- regular inspection of planting material for timely identification of diseased tubers.
The container in which the rhizomes are located can be placed on an insulated balcony, in a cellar, basement, cool pantry, or refrigerator.
Let's wake up the callas with the arrival of spring
In order to complete wintering, the best time for the middle zone will be the beginning of April, for the southern regions - the beginning of March. Calla lilies root tubers are taken out, carefully examined, and treated with a solution of manganese or any fungicide against fungal diseases. If you didn’t separate the “babies” from the calla lilies in winter, you can separate them now.
“Children” are not cut off from the mother plant, but broken off. The separation area must be disinfected, treated with brilliant green, and sprinkled with ash.
In order for these beautiful plants to safely endure the period of winter dormancy, you need to properly dig them up, dry them and ensure they are stored in a dry and cool place.
In the basement
Storing calla lilies at home is best done in drawers, in a basement or cellar. Good ventilation and constant temperature are a must. The optimal storage temperature for calla lilies is +5°C - +10°C.
If the room is warmer, the tubers may begin to germinate prematurely, so maintaining the correct temperature is very important. The air should also not be too humid. The development of fungus in this case will destroy the tubers. Therefore, calla lilies can only be preserved in a dry room in winter.
How to store it correctly
Selected material for planting in winter must be periodically inspected. This will prevent any rot that has formed from being missed and, if necessary, remove damaged areas in a timely manner. Bulbs should be stored in cardboard boxes in a cool, dry place. They are dormant from October to April. Of course, these dates vary depending on the region. Indeed, in the northern regions, plants need to be dug up already in August, and planted when constant warmth has established. Gardeners believe that the best place for growing flowers is the Middle Zone, Southern regions.
You may be interested in:
How to preserve tulip bulbs after flowering until next spring Many people love tulips. Gardeners grow these beautiful flowers in a variety of colors. In July, it’s time to dig...Read more...
Wintering a plant in a pot
Calla lilies have successfully become plants found in many homes. They must also be periodically at rest. It is artificially necessary to stimulate the cessation of the vegetative period of the plant. To do this, the pot should simply be placed in a dark, cool place. Watering the flower is also reduced. Many people doubt whether it is necessary to dig calla lilies out of the pot for the winter and store them according to the established technology. Experts say this procedure is not necessary. The tubers will overwinter well in a pot or container.
Choosing a storage location
Proper storage will ensure continued good flowering of the plant. For storage, you can place containers with tubers in your apartment, basement, refrigerator or loggia. Each place has certain features that are important to consider.
Contents in the basement
This place is the most common for wintering planting material. This storage technique requires certain rules to be followed.
- It is important to observe the temperature regime. Boxes with bulbs should be kept in the basement at a temperature not lower than +5 and not higher than +10 degrees.
- Excessive temperature conditions can cause premature germination of tubers.
- The storage period should last until the end of March. Afterwards, the bulbs need to be transplanted into soil and pots.
Note!
The basement is not the best place to store tubers, since the humidity in it constantly increases. The flower requires a room with dry air.
Winter accommodation on the loggia
A loggia is one of the most common places where it is very convenient to store flower bulbs. This is a great way to grow flowers in pots at home. This technique requires the following conditions to be met:
- by the onset of autumn it is necessary to reduce watering, gradually preparing the plant for hibernation;
- when the leaves die, the flower pot needs to be moved to a balcony (necessarily glazed) or loggia. There they are stored until spring.
Location until spring in the apartment
You can store prepared tubers in an apartment for those who do not have the opportunity to place the plant in the basement or on the balcony. Flat storage is a risky storage method. It requires certain conditions:
- The container with tubers should be in the coldest place in the apartment. For example, on window sills, away from the radiator, near the balcony doors;
- It is important to ensure temperature conditions (not higher than +20 degrees). Even at this temperature, the tubers can withstand the winter, however, closer to spring they will dry out and wrinkle. This can negatively affect the flowering process in summer.
You may be interested in:
When to dig up and how to store dahlias Dahlias can be grown in your garden for many years. It’s just important to dig up seedlings in time in the autumn...Read more...
In a refrigerator
If you need to overwinter a small number of tubers, then a refrigerator is suitable for this at home. This is the second method of storing flowers after the basement. It requires compliance with two important conditions:
- the tubers must be wrapped in paper and placed in a separate compartment of the refrigerator, in which vegetables are usually stored;
- the temperature should be between +5-7 degrees.
In the apartment
When there are no other options, you can store calla tubers in a city apartment in winter. To do this, boxes with planting material are placed in the coolest places. A vestibule, a pantry, a place near the balcony door, etc. are best suited.
To prevent the tubers from drying out and shriveling, they should be kept as far as possible from hot radiators and other heat sources. Even if planting material that has been exposed to temperatures above +20°C can maintain viability, flowering will not be as abundant as we would like. If the warm place is also damp, the flowers will quickly begin to sprout.
Leading stages of preparation for wintering
In order for the tubers to be well preserved during the cold weather, they should be dug up correctly and carefully. There are several basic steps that will allow you to grow amazing flowers in the coming season without any problems. To learn information about how to store calla tubers, you need to follow the steps:
In the last days of September, immediately after the plant withers, the tuber roots are removed from the soil. During the procedure, you will need to leave part of the plant above the ground untouched.- Next, the drying period begins - for 14 days, the calla tubers, inseparably from the stems, are placed in cardboard boxes and left in a well-ventilated and dry room.
- When the leaves of the plant begin to easily detach from the dried stem, drying can be stopped.
- The tubers are removed from the top and kept in a cardboard box for another 7-8 days.
- Then the callas are stored until the petioles become easily separated from the tubers. After cleaning and examining each planting specimen, you can begin to place the callas for long-term storage.
Flowers in pots
How to store calla bulbs, if they are indoor plants, worries many housewives. After all, these flowers also require a period of rest.
When flowering is finished, containers with callas are placed in a dark place with a low temperature so that their growing season ends faster. In this case, watering the plants should be reduced to a minimum.
You can store tubers of indoor calla lilies in winter directly in pots. Or you can dig up the bulbs, carry out the treatment as indicated above, and keep them in the general conditions for this plant.
When to dig calla lilies from open ground in the fall
For successful wintering, tubers must be dug up on time. If you dig up a vegetative plant too early, it will not be able to successfully overwinter, and delaying the deadline until the onset of frost can simply destroy the flower.
Depending on the variety
There are 8 types of calla lilies in nature. They are divided into two main subspecies – rhizomatous and tuberous. Calla lilies Elliot and Remani are called tuberous. These species shed their leaves during the dormant period. The rhizomatous species include Ethiopian calla, which does not shed its leaves during the period of “hibernation” and does not have a pronounced dormant period.
Tuberous callas, which are more susceptible to low temperatures, are dug up first. But rhizomatous plants can tolerate a slight disadvantage. But you shouldn’t delay digging them up either.
Depending on the region of growth
The timing depends on the growing region and how early in the fall the cold weather arrives. Typically, excavation is carried out in the southern regions from the beginning of October, and in the central zone, including the Moscow region, from the second half of September. And in more northern regions, preparations begin at the beginning of the month.
Premature growth
When one of the tubers begins to germinate ahead of schedule, it is planted in the soil and grown in a pot as an indoor flower. And with the arrival of spring warmth, it is transplanted into open ground. After which the calla lily will again become a garden plant.
To ensure that calla lilies bloom as early and luxuriant as possible, the tubers of this plant should be dug up every autumn at a certain time and stored in proper conditions. And those who decide to leave them in the soil may be left without this beauty in the new season.
Storing callas in winter is not at all difficult, you just need to follow the tips given in this article.
Spring planting of tubers
After winter comes the favorite time of gardeners - spring, the time of planting seedlings and seedlings. Calla lilies are no exception. Planting begins after the threat of severe frost has passed. In the central zone, callas are usually planted in early May, in the southern regions - from mid-April.
Before planting, a preventive inspection is carried out after storage. The tubers should be healthy, dense, and elastic. All diseased, severely rotten, dried out tubers are discarded. If the damage is minor, the sore spot is cut out to healthy tissue, and the cut site is crushed with charcoal.
Before planting, it is advisable to disinfect the planting material. Use a pink solution of potassium permanganate, where the bulbs are placed for 30 minutes. You can use special preparations that are usually used to treat planting potatoes. These are the already proven Prestige and Maxim .
The bed is first dug up and granular complex mineral fertilizers are applied, 25-30 grams per 1 square meter. The depth of the planting hole is 5-10 centimeters. The distance between plants is from 30 to 50 centimeters, depending on the growth vigor of the variety. There should be enough space around for calla lilies to grow. It is advisable to plant in shaded areas; they should be protected from direct, scorching rays of the sun.
Directly when planting, the tuber is placed in a hole, covered with soil and watered well. If there are no sprouts, there is no need to worry prematurely and try to dig up the tubers - the first sprouts of calla lilies appear only after 2-4 weeks.
First, their root system begins to grow, and then the above-ground part begins to actively grow. Some gardeners first plant the tubers in pots. In March and early April, callas are placed in pots with a substrate, and then in May they are transplanted with a lump of earth into open ground.